Loading ...
Loading ...
Loading ...
The reversing of doors or replacement of light bulbs is
not covered by warranty. Assistance, if required can be
arranged by calling our service centre on 13 13 49.
Normal service call and labour charges apply.
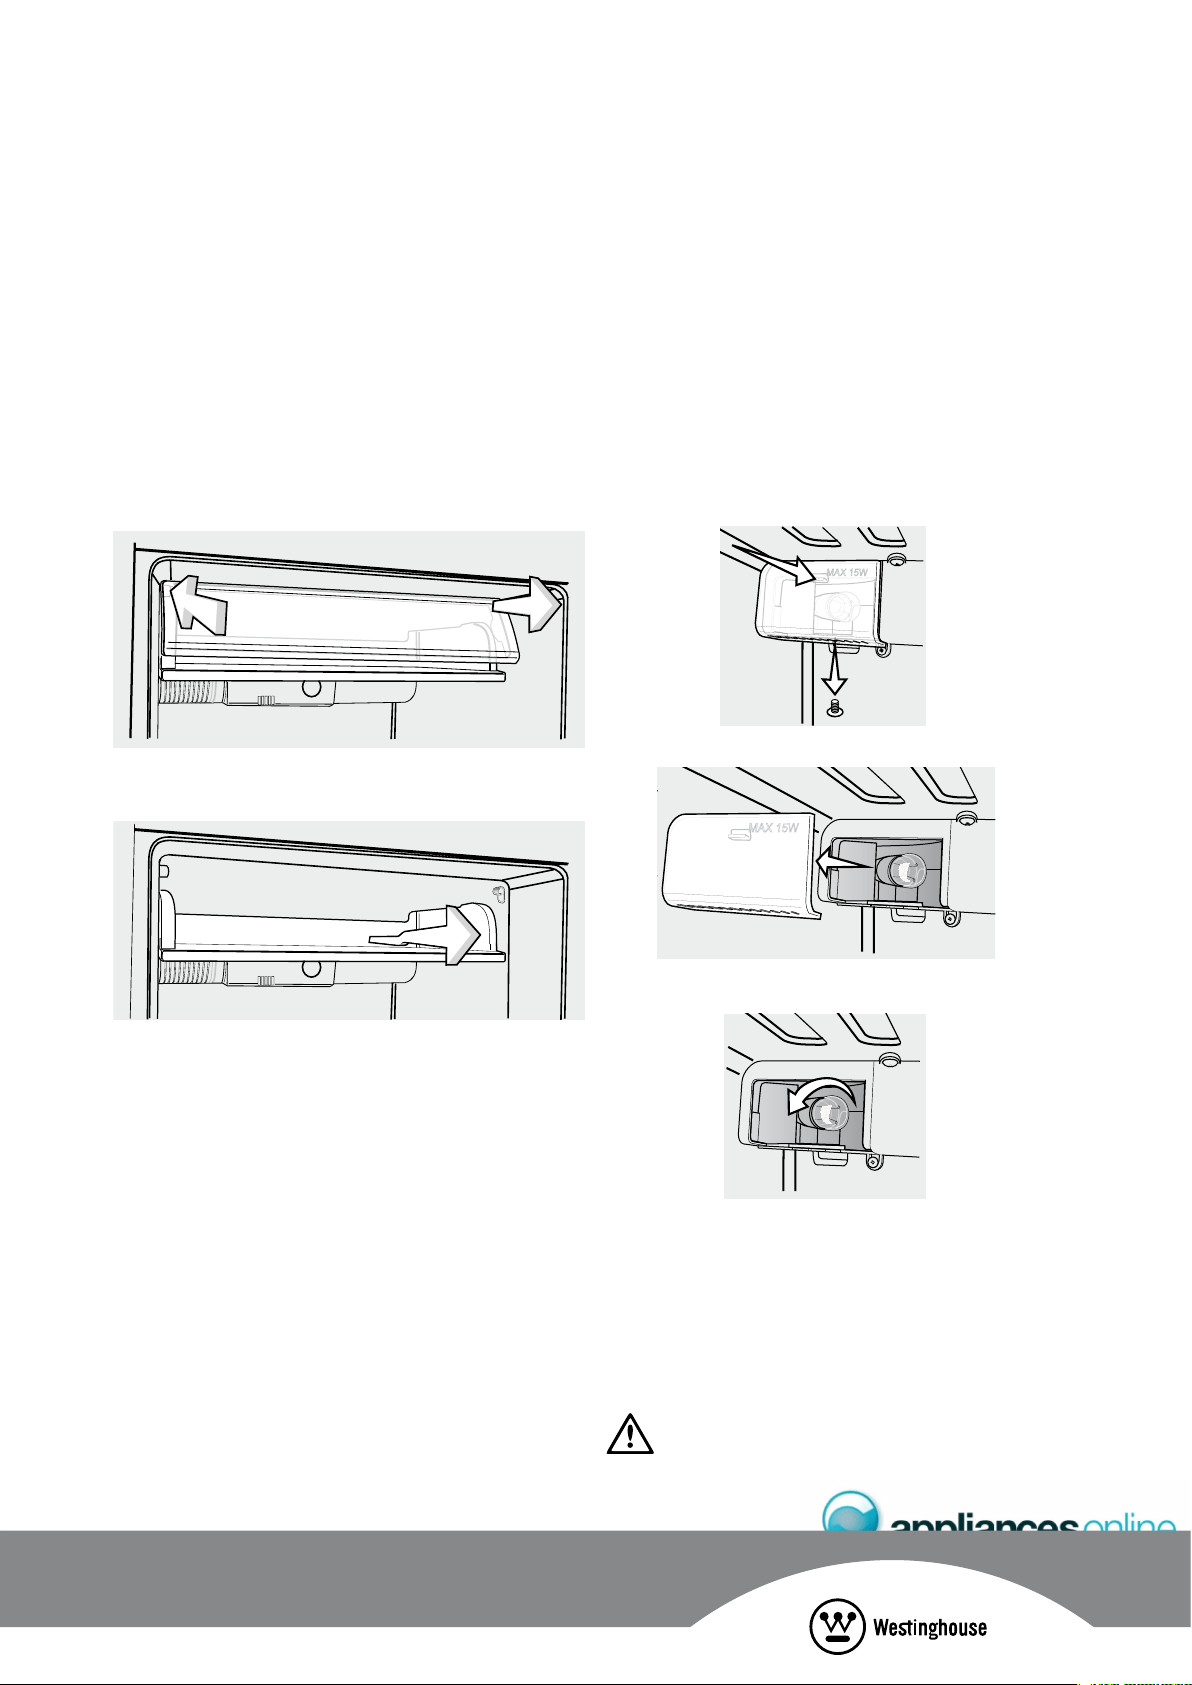
1. Switch off the power at the power point and remove the
cord by pulling the plug.
2. Remove the screw from the centre of the control panel.
3. Apply pressure with your finger tip to the top centre of
the light lens. This will release a catch on the back face
of the lens that holds it to the light housing.
4. Remove the lens.
5. Unscrew the light bulb in an anti-clockwise direction.
6. Screw the new light bulb into place using a cloth. Do
not allow your fingers to touch the new bulb as the
oils from your skin can cause hot spots on the globe,
shortening its life.
7. Clip the light lens on and replace the screw.
8. Wait 5 minutes to ensure pressures in the refrigeration
system are equalised, before turning the refrigerator on
at the power point.
WARNING
Never insert your finger into the light bulb socket.
In order to access the light housing, the chiller door and
chiller drawer need to be removed.
There is a node on each side at the top of the chiller door.
These ‘nodes’ allow the door to swivel open and shut and
also secure the door to ‘C ’ shaped clips on each side of
the refrigerator liner. The clip on the left liner wall faces the
back of the refrigerator, while the clip on the right liner wall
faces the front. To remove the door, push back against the
left top corner of the door, while pulling the top right corner
of the door forward.
Remove the chiller door.
To replace the chiller door, slot the node on the top left
hand corner of the chiller door, left into the clip on the
cabinet lining. Push the node on the top right corner of the
chiller door, back into the clip on the cabinet lining.
Loading ...
Loading ...
Loading ...