Loading ...
Loading ...
Loading ...
In this example, the operation is reversed from right side
hinging to left side hinging.
• Turn off the appliance
• Unplug the power cable
• Remove all food from the appliance
• Remove shelves and baskets
• Do not lay the appliance down at on its back as this will
impair its operation.
• When tilting the appliance to access the underside,
support it so that it will not fall to the floor.
NOTE: All parts removed must be retained to reinstall
the door. Ensure washers are reassembled in original order.
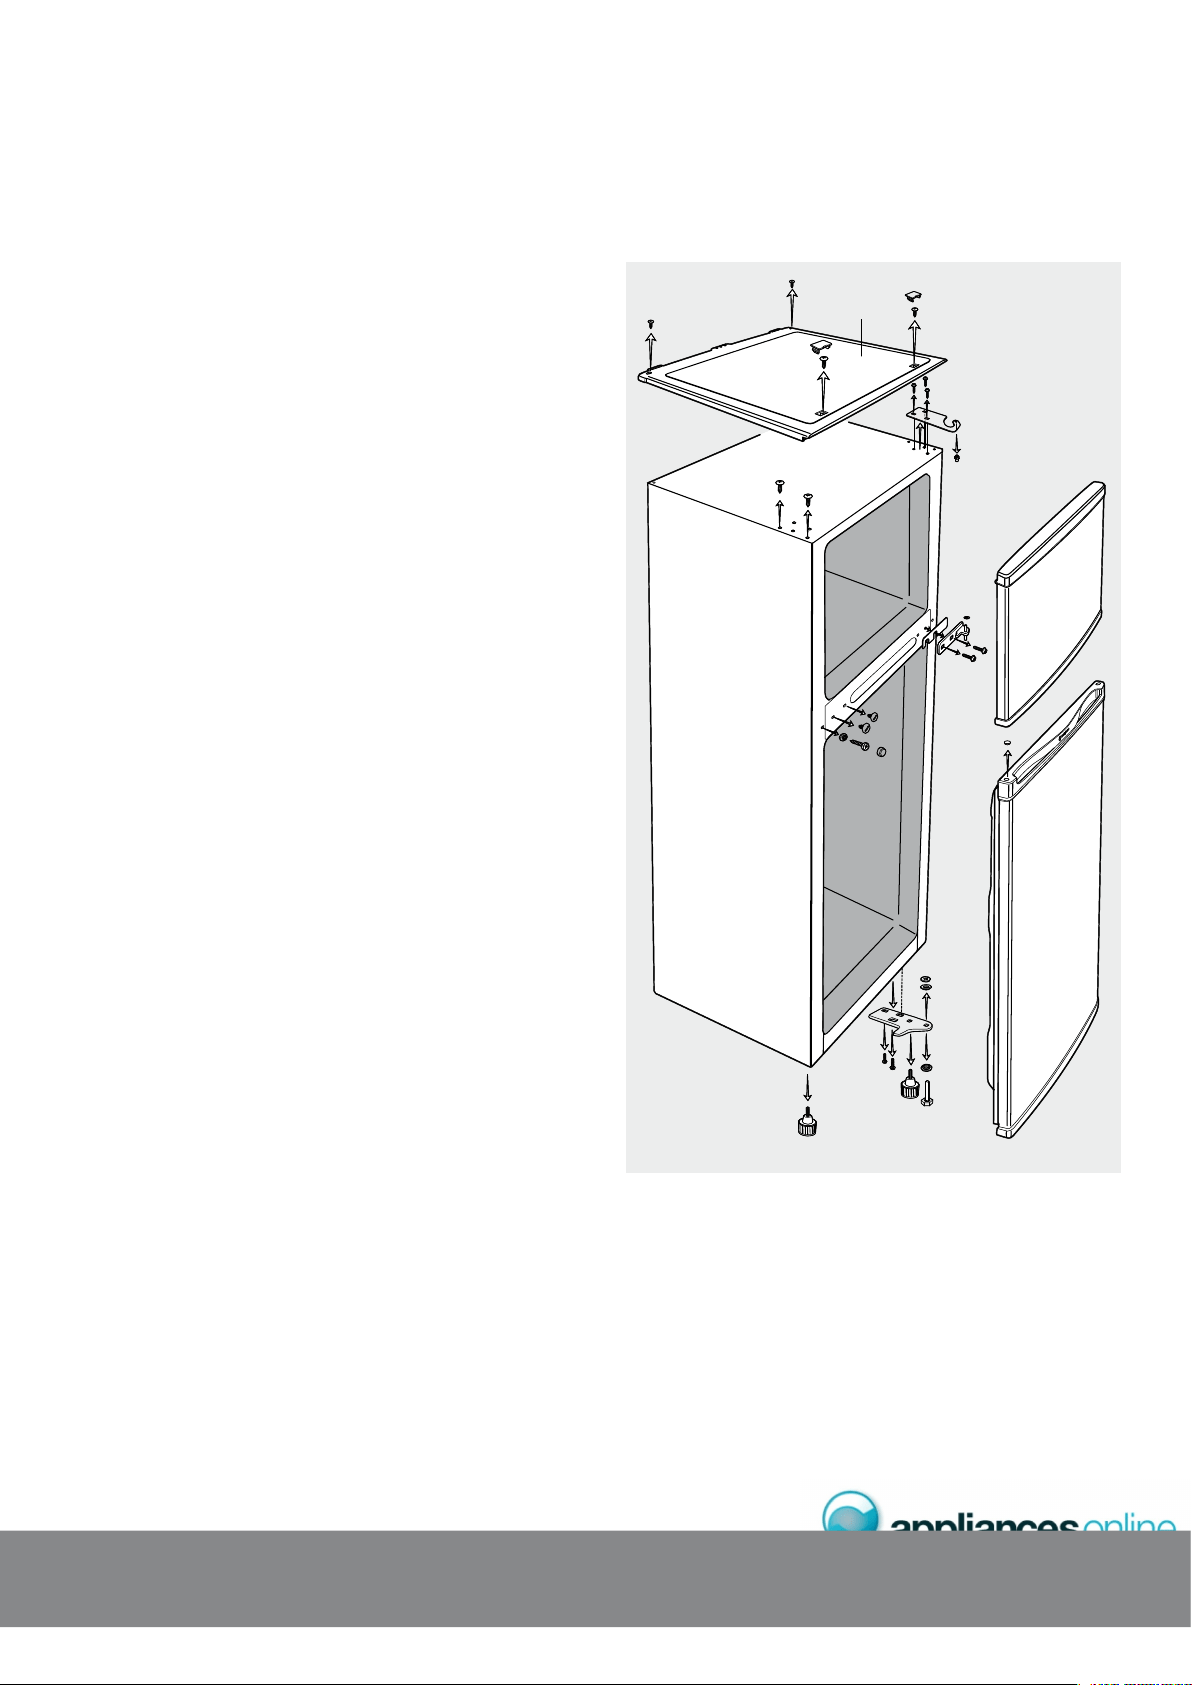
• In the front of the panel (1) on top of the freezer
compartment there are 2 rectangular plugs (2). Use a flat
bladed screwdriver as a lever to gently remove them.
• Use a Phillips head screwdriver to remove the screws (3)
that the plugs were concealing.
• There are 2 round holes in the back of the top panel (1).
Remove the screws (4) from these holes.
• The top panel (1) can now be removed.
• Hold the freezer door in the closed position while
removing the 3 screws (5) that secure the top hinge (6).
• The freezer door can now be lifted off along with the
top hinge.
• Remove the top hinge pin (7) from the hole in the top of
the freezer door.
• Now unscrew the hinge pin (7) from the hinge (6). Turn
the hinge over and screw the pin (7) in from the other
side of the hinge (6).
• On the left top of the appliance are 2 screws (8)
which need to be removed and re-inserted into the
corresponding holes on the right top of the appliance.
• While supporting the refrigerator compartment door,
remove the 2 screws (9) securing the centre hinge (10) to
the cabinet.
• Remove the hinge (10), the plastic washer on the top pin
and the plastic gasket behind the hinge and carefully put
the door aside.
1
2
2
3
3
5
6
7
8
10
11
16
15
14
17
18
9
12
13
4
4
Right sided hinging assembly
Loading ...
Loading ...
Loading ...