Go online for a comprehensive walkthrough
of your new product!
This guide has everything you need to get ready for first use,
including setting up, using and maintaining your machine,
but online you’ll find additional resources like tips and
troubleshooting, videos, product registration, parts, and more.
Use the BISSELL Connect App or go to support.BISSELL.com.
ICONpet
™
HIGH-POWERED ROBOTIC VACUUM
2291 SERIES
2 BISSELL.com
IMPORTANT SAFETY INSTRUCTIONS
WARNING
TO REDUCE THE RISK OF FIRE, ELECTRIC
SHOCK OR INJURY:
»Do not use outdoors or on wet surfaces.
»Do not allow to be used as a toy. Close attention is necessary
when used by or near children.
»Do not use for any purpose other than described in this user
guide. Use only manufacturer’s recommended attachments.
»Do not charge or use with damaged Docking Station, charger,
cord, or plug. If appliance is not working as it should, has been
dropped, damaged, left outdoors, or dropped into water, have
it repaired by a qualified technician.
»Do not pull or carry charger by the cord or plug, close a door
on cord or plug, or pull cord or plug around sharp edges or
corners. Keep plug, Docking Station and charger away from
heated surfaces.
»Do not unplug charger by pulling on cord. To unplug, grasp the
charger, not the cord.
»Do not handle charger, contact points, Docking Station, or robot
vacuum cleaner with wet hands.
»Do not put any object into openings. Do not use with any
opening blocked; keep openings free of dust, lint, hair, and
anything that may reduce air flow.
»Keep hair, loose clothing, fingers, and all parts of body away
from openings and moving parts.
»Do not use to pick up flammable or combustible materials
(lighter fluid, gasoline, kerosene, etc.) or use in areas where
they may be present.
»Do not use in an enclosed space filled with vapors given off by
oil-based paint, paint thinner, some moth-proofing substances,
flammable dust, or other explosive or toxic vapors.
» Do not use to pick up toxic material (chlorine bleach, ammonia, drain
cleaner, etc.).
»Do not pick up anything that is burning or smoking, such as
cigarettes, matches or hot ashes.
»Do not use without Filter in place.
»Keep appliance on a level surface.
»Do not carry the robot vacuum cleaner while it is running.
»Remove the cords from other corded products out of the area
to be cleaned.
»Do not operate the vacuum in a room where an infant or child
is sleeping.
»Do not operate the vacuum in an area where there are lit
candles or fragile objects on the floor.
»Do not operate the vacuum in a room that has lit candles and/
or fragile objects on furniture that the vacuum may accidentally
hit or bump.
»Do not allow children to sit on the vacuum.
»Prevent unintentional starting. Ensure the Power Switch is in
the OFF position before connecting to battery pack, picking up
or carrying the appliance. Carrying the vacuum with your finger
on the Power Switch or energizing appliance while carrying it
invites accidents.
»Turn OFF the appliance before making any adjustments,
changing accessories or storing appliance. Such preventive
safety measures reduce the risk of starting the appliance
accidentally.
Do not subject battery pack to mechanical shock.
»Recharge only with the charger specified by the manufacturer.
A charger that is suitable for one type of battery pack may
create a risk of fire when used with another battery pack.
»Use appliances only with specifically designated battery
packs. Use of any other battery packs may create a risk of
injury and fire.
»When battery pack is not in use, keep it away from other metal
objects, like paper clips, coins, keys, nails, screws, or other small
metal objects, that can make a connection from one terminal
to another. Shorting the battery terminals together may cause
burns or a fire.
»Under abusive conditions, liquid may be ejected from the
battery; avoid contact. If contact accidentally occurs, flush with
water. If liquid contacts eyes, additionally seek medical help.
Liquid ejected from the battery may cause irritation or burns.
»Do not use a battery pack or appliance that is damaged
or modified. Damaged or modified batteries may exhibit
unpredictable behavior resulting in fire, explosion or risk
of injury.
»Do not expose a battery pack or appliance to fire or excessive
temperature. Exposure to fire or temperature above 266°F /
130°C may cause explosion.
»Have servicing performed by a qualified repair person using
only identical replacement parts. This will ensure that the safety
of the product is maintained.
»For use only with battery pack 2753 or 1618614.
»For use only with charger model ZD36W225160US.
»Do not modify or attempt to repair the appliance or the
battery pack.
»Do not charge the unit outdoors.
»Do not position Docking Station near stairs or cliff edges.
»Follow all charging instructions. Keep the temperature range
between 40-104°F / 4-40°C when charging battery, storing unit
or during use. Charging improperly or at temperatures outside
of the specified range may damage the battery and increase
the risk of fire.
»This product contains a wireless device. Refer to website for
regulatory information.
»Plastic film can be dangerous. To avoid danger of suffocation,
keep away from children.
»Do not plug in your vacuum cleaner UNTIL you are familiar with
all instructions and operating procedures.
»Dispose of used batteries promptly and properly.
»Do not dismantle, open or shred battery pack.
»Do not short-circuit battery pack. Do not store haphazardly in
a box or drawer where they may be short-circuited by other
metal objects.
»Do not remove battery pack from its original packaging until
required for use.
»Observe the plus (+) and minus (–) marks on the battery pack
and equipment and ensure correct use.
»Seek medical advice immediately if battery pack or parts of the
battery pack has been swallowed.
»Wipe the battery terminals with a clean dry cloth if they
become dirty.
»Do not leave battery pack on prolonged charge when not in use.
»After extended periods of storage, it may be necessary to
charge and discharge the battery pack several times to obtain
maximum performance.
»Remove the battery pack from the equipment when not in use.
»Battery pack usage by children should be supervised.
»Keep battery pack clean and dry.
»Battery pack needs to be charged before use. Refer to the
manufacturer’s instructions for proper charging instructions.
»Do not use any battery pack which is not designed for use with
the vacuum.
»Turn OFF the appliance and disconnect charger from electrical
outlet before making any adjustments, troubleshooting,
changing accessories or storing appliance. Such preventive
safety measures reduce the risk of starting the appliance
accidentally.
»This product contains a Class 1 laser sensor. This class is eye-safe
under all operating conditions.
»Do not pick up hard objects such as glass, nails, screws,
coins, etc.
SAVE THESE INSTRUCTIONS THIS MODEL IS FOR HOUSEHOLD USE ONLY.
READ ALL INSTRUCTIONS BEFORE USING YOUR APPLIANCE.
When using an electrical appliance, basic precautions should be observed, including the following:
The software included in this product contains open source software. The open source licenses associated with this product may be obtained by visiting www.BISSELL.com/opensource. With
regards to GNU Lesser General Public License Version 2.1, you may obtain the complete corresponding source code for a period of three years after the last shipment of this product by visiting www.
BISSELL.com/opensource/2291 which leads to the download page for such source code. This offer is valid to anyone in receipt of this information.
FCC/IC NOTICE: This equipment has been tested and found to comply
with the limits for a Class B digital device, pursuant to part 15 of the
FCC Rules. These limits are designed to provide reasonable protection
against harmful interference in a residential installation. This
equipment generates, uses and can radiate radiofrequency energy
and, if not installed and used in accordance with the instructions,
may cause harmful interference to radio communications. However,
there is no guarantee that interference will not occur in a particular
installation. If this equipment does cause harmful interference to
radio or television reception, which can be determined by turning the
equipment OFF and ON, the user is encouraged to try to correct the
interference by one or more of the following measures: (1) Reorient
or relocate the receiving antenna.
(2) Increase the separation between the equipment and receiver.
(3) Connect the equipment into an outlet on a circuit different from
that to which the receiver is connected. (4) Consult the dealer or an
experienced radio/TV technician for help.
Changes or modifications not expressly approved by the party
responsible for compliance could void the user’s authority to operate
the equipment. This transmitter must not be co-located or operated
in conjunction with any other antenna or transmitter.
This device complies with Part 15 of FCC Rules and Industry Canada
license-exempt RSS standard(s). Operation is subject to the following
two conditions: (1) this device may not cause interference, and (2)
this device must accept any interference, including interference that
may cause undesired operation of the device.
Le présent appareil est conforme aux la partie 15 des règles de la FCC
etCNR d’Industrie Canada applicables aux appareils radio exempts de
licence. L’exploitation est autorisée aux deux conditions suivantes :
(1) l’appareil ne doit pas produire de brouillage, et (2) l’utilisateur de
l’appareil doit accepter tout brouillage radioélectrique subi, même
si le brouillage est susceptible d’en compromettre le fonctionnement.
The device has been evaluated to meet general RF exposure require-
ment. This equipment complies with FCC/IC radiation exposure
limits set forth for an uncontrolled environment and meets the
FCC radiofrequency (RF) Exposure Guidelines and RSS-102 of the
IC radiofrequency (RF) Exposure rules. This equipment should be
installed and operated keeping the radiator at least 20cm or more
from a person’s body. This device supports 20 MHz and 40 MHz band-
width modes. The device has been evaluated to meet general RF
exposure requirement. The device can be used in portable exposure
condition without restriction.
Cet équipement est comforme aux limites d’expostino aux rayone-
ments énoncées pour un environnement non contrôlé et respecte
les règles les radioélectriques (RF) de la FCC lignes directrices
d’exposition et d’exposiotn aux fréquences radioélectriques (RF)
CNR-102 de l’IC. Cet équipement doit être installé et utilisé en gardant
une distance de 20 cm ou plus entre le dispositif rayonnant et le
corps. L’appareil a ete evalue pour repondre aux exigences generales
d’exposition RF. le dispositif de a ete evalues a repondre general rf
exposition exigence.
BISSELL.com 3
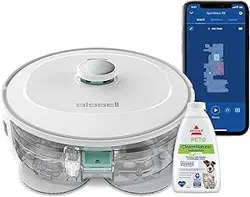
We’re so happy you chose the high-powered ICONpet
™
Robotic
Vacuum. We put this guide together to help you set up, use and
maintain your robot. We’ve also included some tips we think will come
in handy when you first start using your robot, so let’s get started!
For a comprehensive walkthrough of your robot, use the
BISSELL Connect App or go to support.BISSELL.com.
What’s in the Box? ....................................................4
Product View ..............................................................4
Connecting Your Robot to
the BISSELL Connect App ....................................5
Docking and Charging Your Robot ...................6
Things to Know Before Your
Robot’s First Clean ...................................................7
Manual Cleaning ........................................................7
Automatic Cleaning..................................................8
Activating Low Power Mode ................................8
Emptying the Dirt Bin..............................................9
Maintaining the Filter and Separator Cone ....9
Maintaining the Brush Roll ..................................10
Replacing the Battery ............................................ 11
Troubleshooting ........................................................ 11
Warranty ...................................................................... 11
4 BISSELL.com
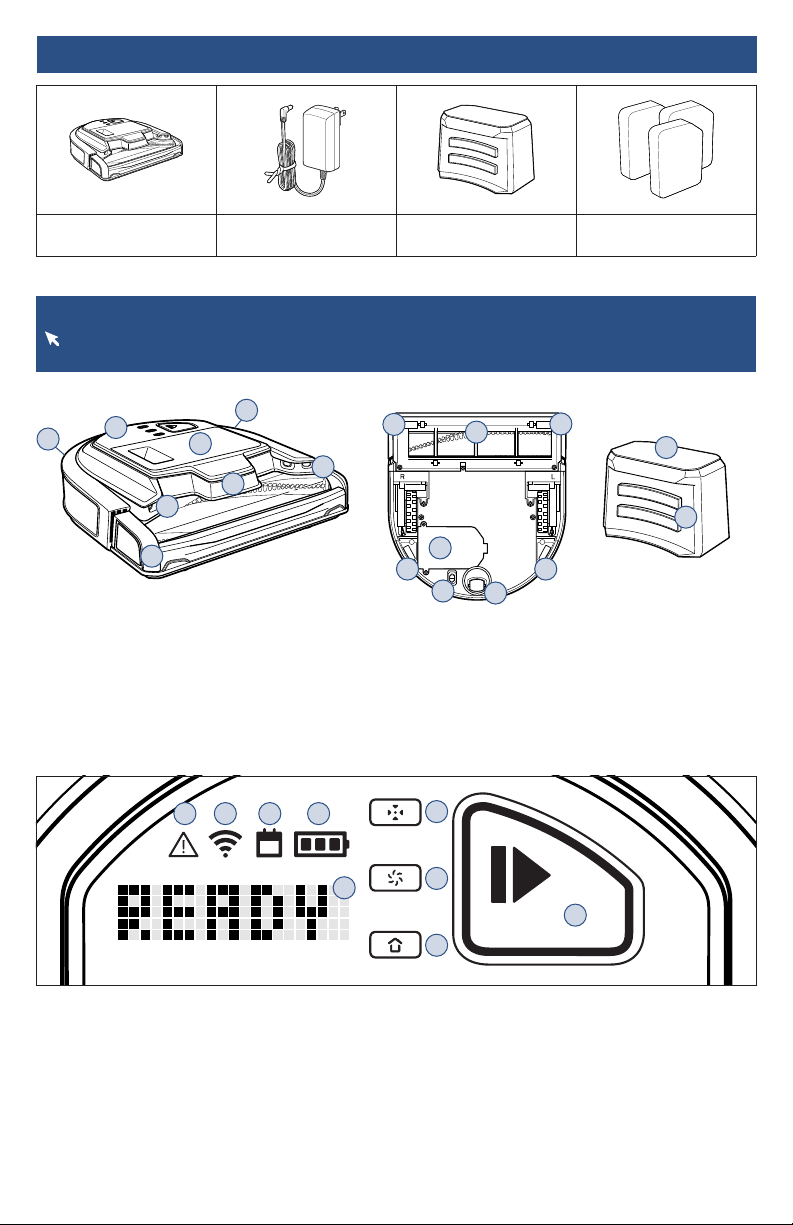
Product View
For more information about your robot, download the BISSELL Connect App, see instructions
on page 5 or visit support.BISSELL.com for additional support videos and information.
Product View
1. Robot Interface
2. Dirt Bin
3. DIGITALVISION™ Sensors
4. Infrared Sensors
5. Bumper
6. Docking Station
7. Charging Contacts
8. Cliff Sensors
9. Sole Plate, Brush Roll
10. Battery Compartment
11. Power Switch
12. Caster Wheel
Robot Interface View
1. Notification Light
2. WiFi Status Light
3. Schedule Status Light
4. Battery Status Light
5. Text Display
6. Spot Mode Button
7. Power Level Button
8. Dock Mode Button
9. START/PAUSE Button
1
2
5
3
3
4
4
4
9
8
8
8 8
10
11
12
6
7
BISSELL® ICONpet
™
Robotic Vacuum
Power Adapter Docking Station Filter Pack
Select Models
What’s in the Box?
1 2 3 4
5
6
7
8
9
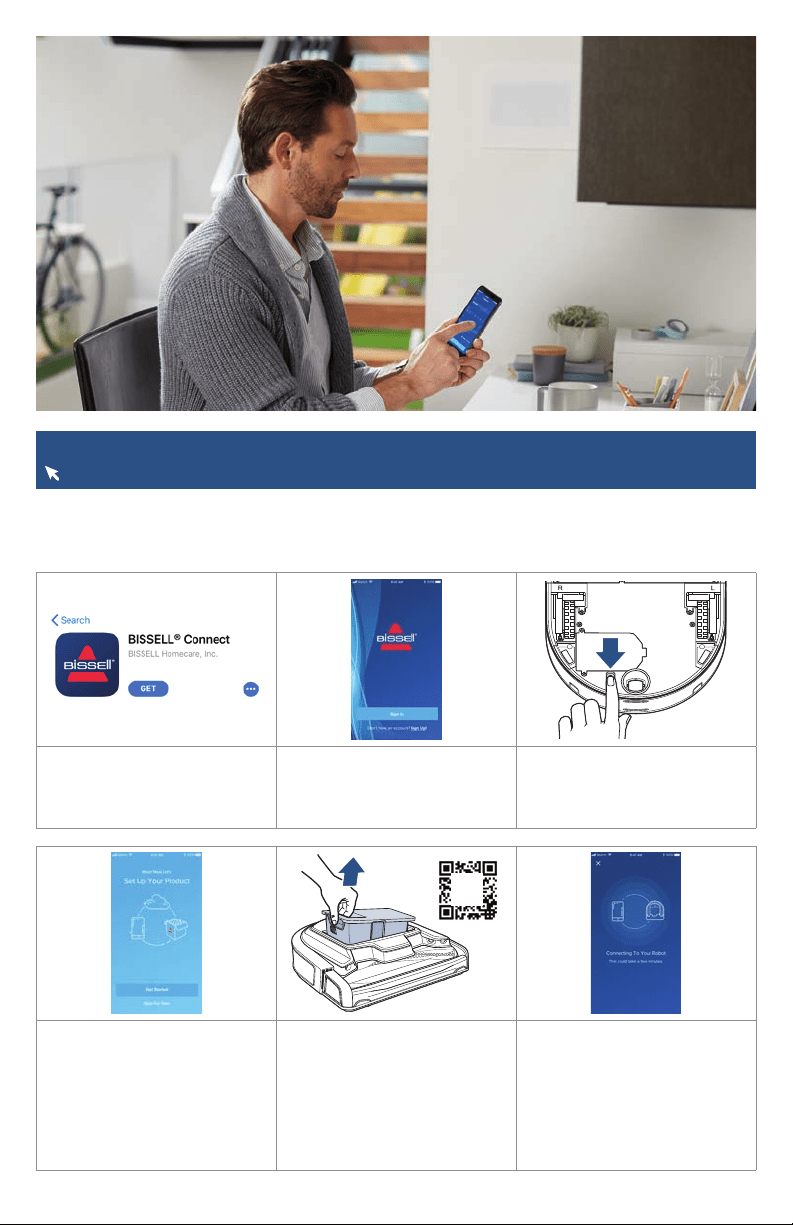
BISSELL.com 5
1. In the App or Google
Play Store search “BISSELL
Connect” and download.
2. Once downloaded, open the
app to sign in or create a new
login.
3. Make sure you’re near your
WiFi router before turning the
robot ON (I).
4. From the app, select “Set
Up Your Product” and then
select “Get Started”.
Note: Be sure the robot is
charged or is on the dock
before attempting to pair.
5. The QR code needed for
setup can be found under the
Dirt Bin. The WiFi Status Light
should start flashing blue when
the Dirt Bin is removed.
Note: Keep the bin removed
until you have named your
robot in the app.
6. Once you have located and
scanned the QR code, follow
the instructions in the app to
pair.
Connecting Your Robot to the BISSELL Connect App
For more help, visit support.BISSELL.com.
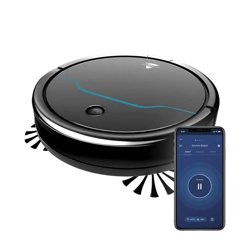
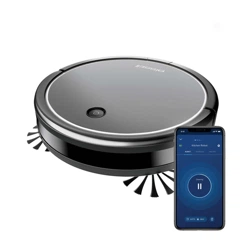
Downloading the BISSELL Connect App means you can change your robot’s cleaning mode, start,
pause, or stop your robot, schedule cleanings, view notifications, track your cleaning history and
troubleshoot all from the palm of your hand.
Find
Me
Scan
Code
6 BISSELL.com
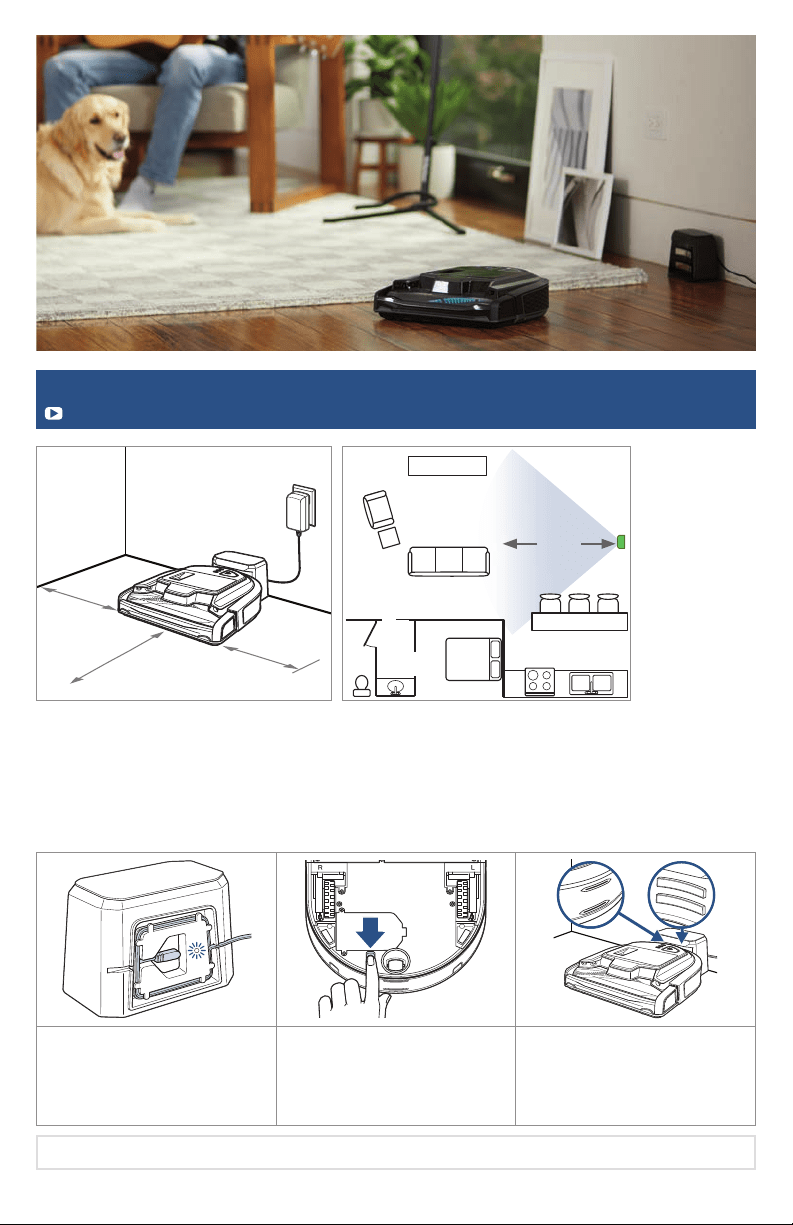
Docking and Charging Your Robot
More of a video person? Open up the BISSELL Connect App for how-to videos.
1. Plug the Power Adapter into
the wall and the back of the
dock. The light will illuminate
when the dock is ON.
2. Turn the Power Switch on
the bottom of the robot ON (I).
3. Place the robot on the dock.
The Battery Status Light will
flash to indicate charging.
Charge for 4 hours for
maximum cleaning time.
• To help the robot find its home, we recommend at least 40 inches (1 meter) of space between the
dock and any walls or obstacles around it. For reference, see diagram.
• Choose a spot with a good WiFi signal in your home.
• Set up the dock in a central part of your home to help improve docking success.
• For best docking performance, dock should be on hard floor surface.
• Robot may spend up to 20 minutes searching for dock when the battery is low.
40 in
1 m
40 in
1 m
40 in
1 m
Note: Store robotic vacuum safely indoors where it is unlikely to be damaged.
15 ft
4.5 m

BISSELL.com 7
Things to Know Before Your Robot’s First Clean
Head to support.BISSELL.com for additional tips on getting started with your robot.
Prepare the House
• Pick up loose toys, cords, clothing, or other foreign objects that may interfere with your robot.
• Secure or move fragile items as your robot may push lighter objects across the floor.
During the Clean
• Monitor your robot for the first few cleans as it may have difficulty passing under objects at a
certain height.
• The robot will clean under areas that were unreachable with your traditional vacuum, so the Dirt
Bin and Filter may need to be cleaned more frequently. Make sure to monitor both to ensure your
robot is performing correctly.
Keep in Mind
• Not recommended for use on plush, dense carpet.
• You may need to use a lower power level if your robot keeps reporting an error on high pile carpet.
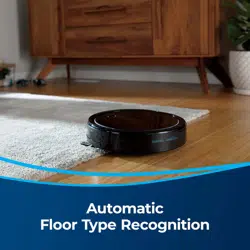
• You may notice the sound of vacuum motor change. This is normal as the robot self-adjusts to
different floor types to maintain consistent performance.
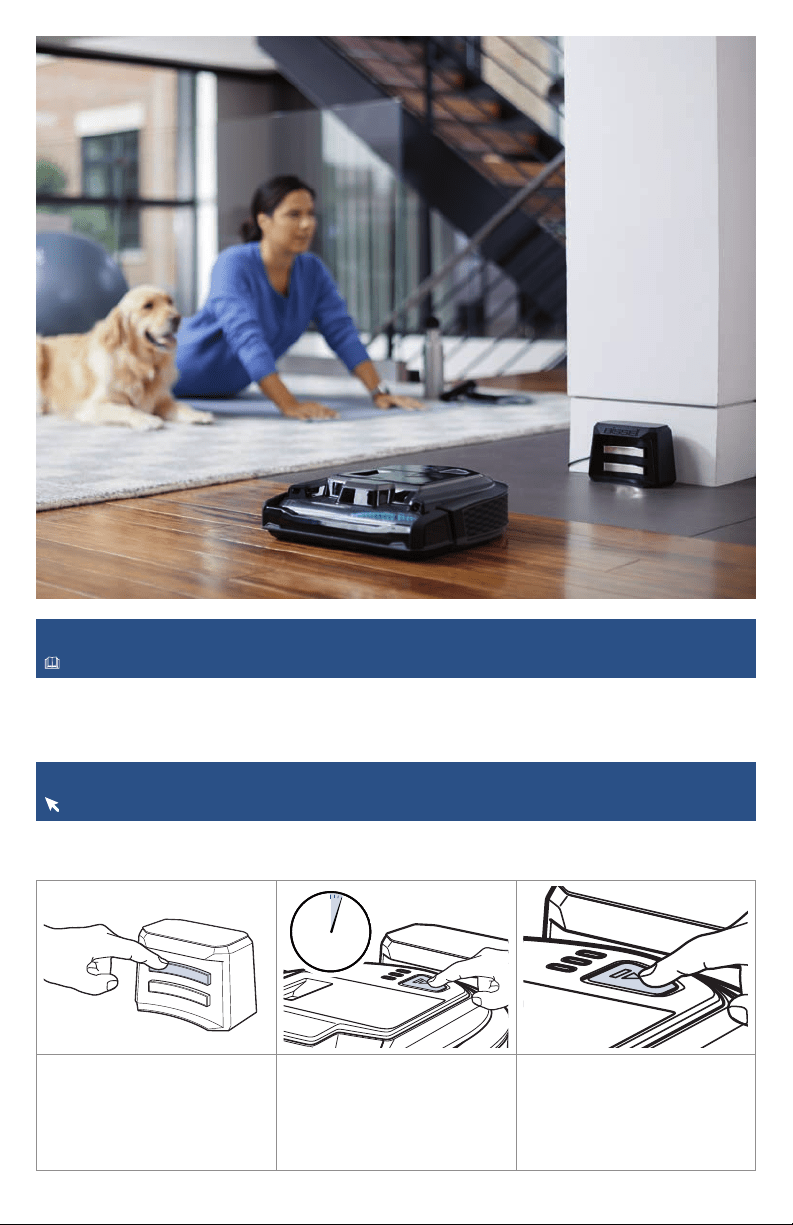
Manual Cleaning
Looking for more guidance? Go to support.BISSELL.com for tips and support while cleaning.
1. Use the Power Level Button
to select the desired cleaning
power and approximate run time:
2. Press the START/PAUSE
Button to start cleaning. You
can press it again to pause
cleaning.
3. The robot will finish the
cleaning session and attempt
to return to the Docking
Station.
LOW MID HIGH
90 mins 60 mins 30 mins
Large Area Cleaning
Spot Cleaning
1. Place the robot 12 in (30
cm) away from the area you
want cleaned. Ensure the area
is clear of obstacles.
2. Press the Spot Mode Button
to put the robot into Spot
Mode.
3. Press the START/PAUSE
Button to start cleaning. The
robot will run for a few minutes
and then stop with a message
of “DONE” when finished.
12 in12 in
30 cm30 cm
8 BISSELL.com
Automatic Cleaning
For more information about your robot, download the BISSELL Connect App.
You can designate a day and time for your robot to run automatically using the BISSELL Connect App.
Once the robot is connected to the app, go to the Schedule tab and follow the on-screen prompts.
Activating Low Power Mode
For more help, visit support.BISSELL.com.
1. Push top charging contact
10 times.
2. Place robot on dock. Hold
START/PAUSE Button for 3
seconds. The Digital Display will
turn OFF, indicating that the
robot is in low power mode.
3. To wake up from low power
mode, press the START/PAUSE
Button.
To take dock out of low power
mode, unplug it from the wall
and plug it back in.
Note: While in Low Power Mode, the robot will not run scheduled cleanings or be accessible through
the BISSELL Connect App.
x10x10
3s
BISSELL.com 9
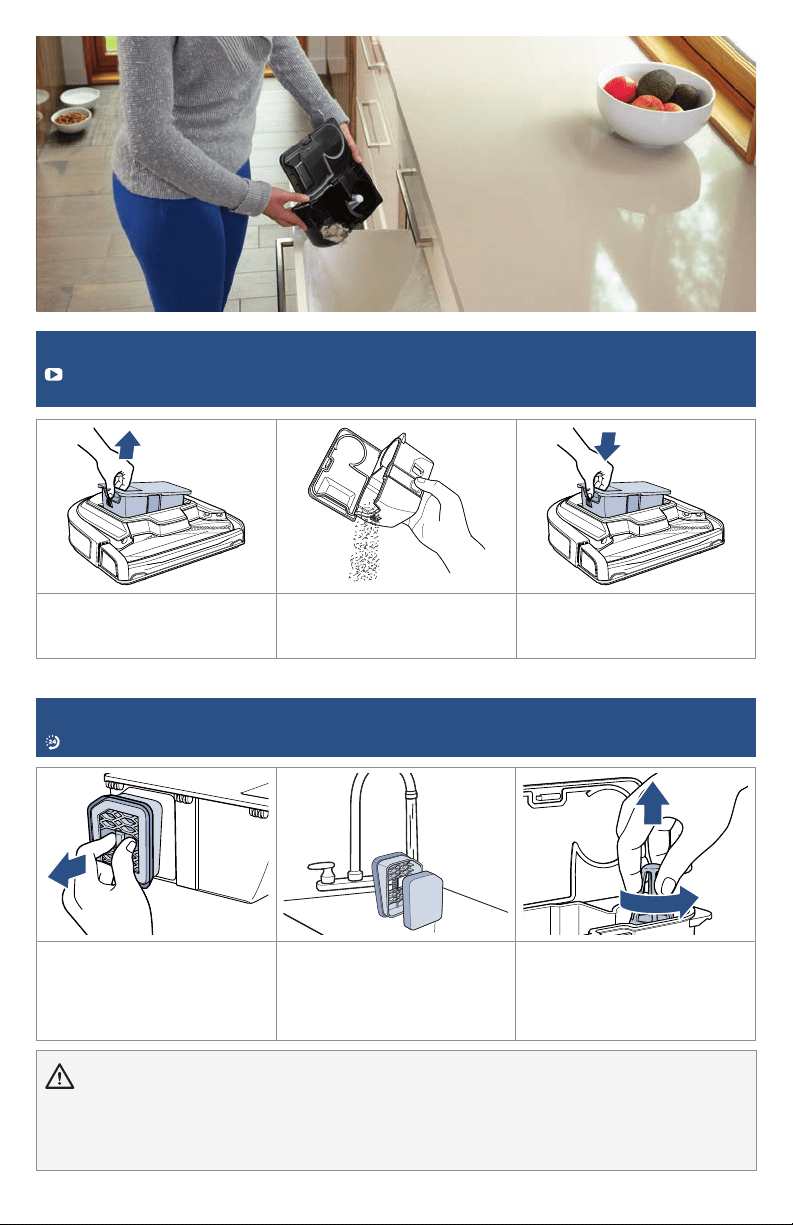
Emptying the Dirt Bin
For helpful how-to videos on cleaning your Dirt Bin and Brush Roll, download the BISSELL
Connect App.
1. Remove the Dirt Bin from
the robot by pulling up on the
handle as shown.
2. Press button to release Dirt
Bin lid and empty into trash.
Close the lid until it clicks shut.
3. Put Dirt Bin back in the
Robot.
WARNING
» Do NOT immerse robot in water. For instructions on how to clean this machine beyond emptying the Dirt Bin, go to
support.BISSELL.com.
» To reduce the risk of electrical shock, turn Robotic Vacuum Cleaner Power Switch OFF and disconnect plug before performing
maintenance or troubleshooting checks.
Maintaining the Filter and Separator Cone
For more help with maintaining your robot, open up the BISSELL Connect App.
1. Remove the Dirt Bin. Pinch
and pull filter assembly out
from the back of Dirt Bin.
Clean filter if dirty. Replace if
damaged.
2. Separate washable
filter from assembly. Wash
filter and filter assembly.
Let dry completely before
reassembling.
3. Open Dirt Bin, clean debris
surrounding Separator Cone. If
necessary, carefully twist cone
and pull up to remove.
10 BISSELL.com
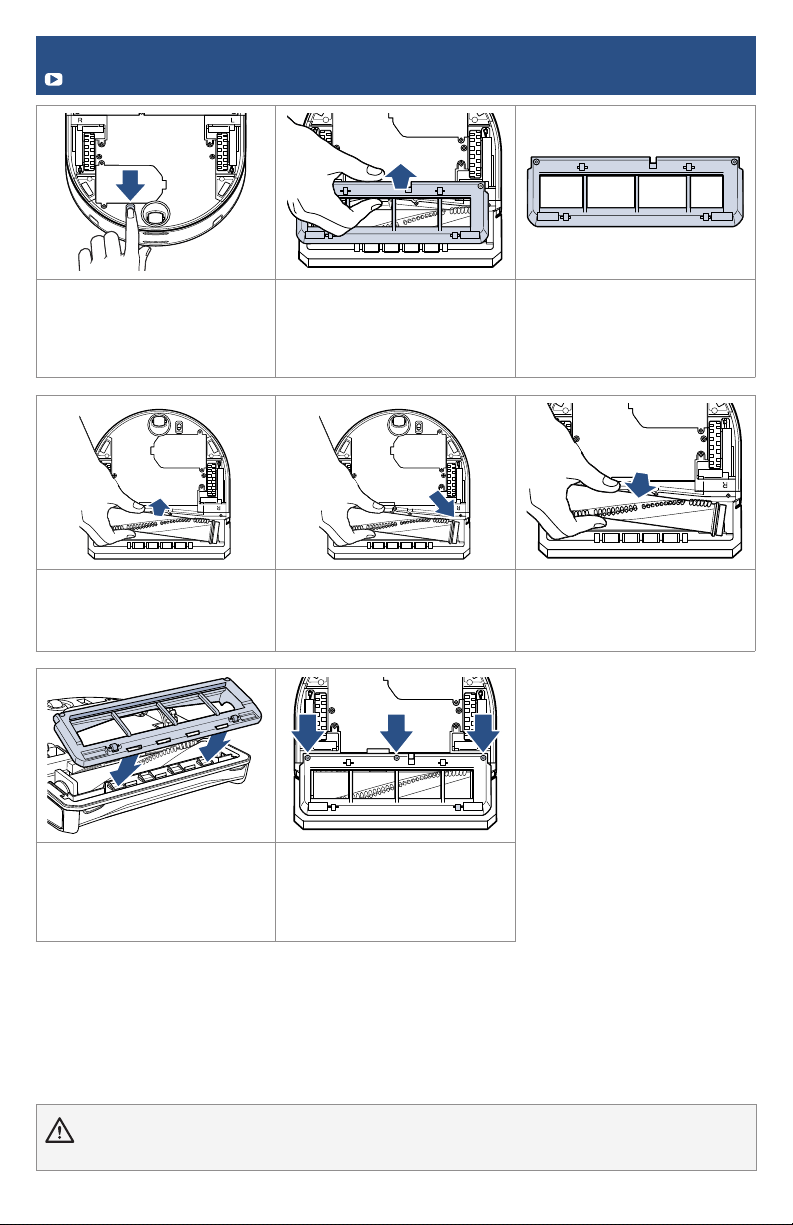
WARNING To reduce the risk of fire, turn Robotic Vacuum Power Switch OFF before performing maintenance or
troubleshooting checks.
Maintaining the Brush Roll
Check out the BISSELL Connect App for tips and videos on Brush Roll Maintenance.
1. Turn power OFF, remove the
robot from the dock and put it
upside down on a soft surface.
2. Use a Phillips-head
screwdriver to remove the
3 screws on the sole plate.
Rotate the sole plate and lift
it out.
3. Look for damage on the
sole plate rollers and flexible
wiper. Make sure they’re all
rotating freely. Replace if
necessary.
4. Pull up on the plastic
endcap to remove the brush.
Clean it and make sure the
plastic end rotates freely.
5. Check right side drive gear
to remove any hair build up.
6. Replace Brush Roll.
7. Holding the sole plate at
a slight angle in front of the
robot, align the slots in sole
plate with the tabs, then rotate
the sole plate into place.
8. Replace the screws and
don’t overtighten. Compress
the bumper several times to
ensure smooth operation.
BISSELL.com 11
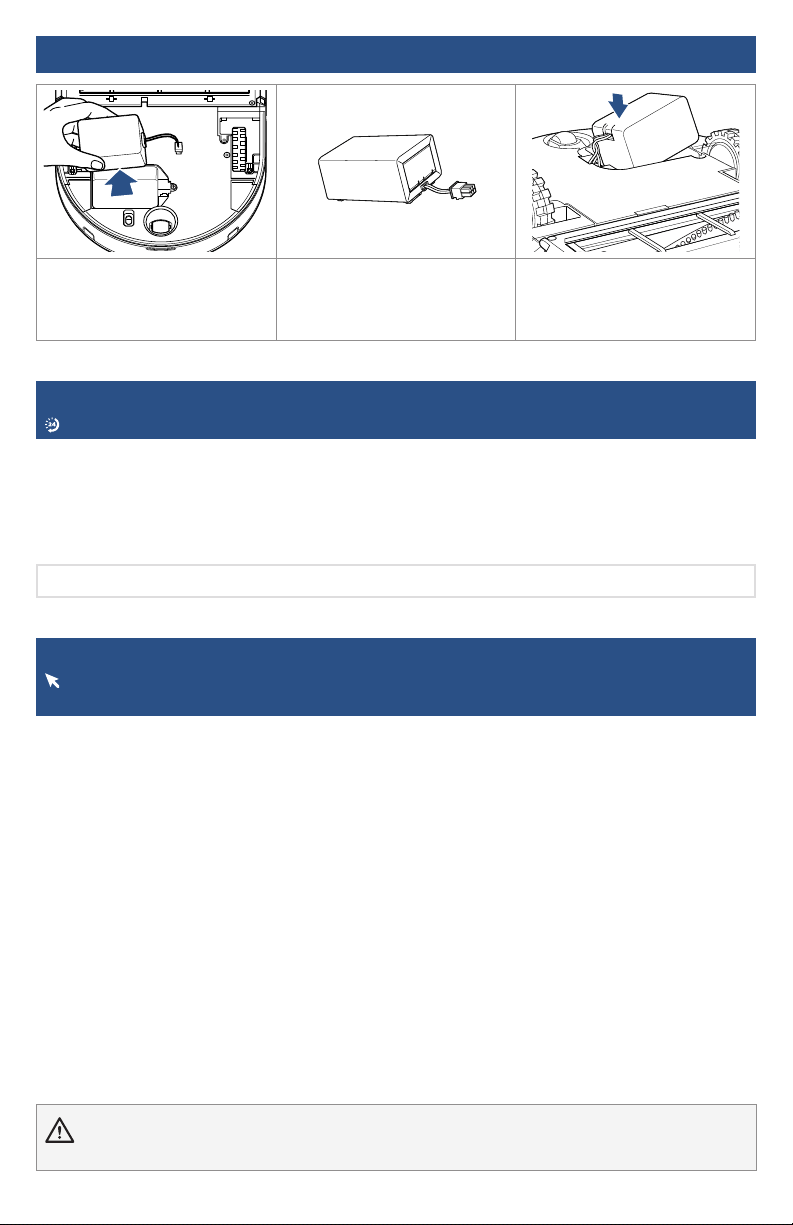
Replacing the Battery
WARNING To reduce the risk of fire, turn Robotic Vacuum Power Switch OFF before performing maintenance or
troubleshooting checks.
Troubleshooting
For a comprehensive walkthrough and support for your robot visit support.BISSELL.com.
Using the BISSELL Connect App with your robot is the best way to diagnose and fix errors with
detailed instructions and videos.
For performance issues, some errors can be corrected by turning the Power Switch OFF, waiting a
few seconds, and turning back ON. If that doesn’t work, try emptying your Dirt Bin, checking the
filter or checking the Brush Roll and Chamber to improve cleaning performance.
1. Gently press the battery
connector tab with a finger
and pull the battery connector
away from the robot.
2. Dispose of battery properly. 3. When replacing the battery,
make sure you can see the
wires and connector from the
top to prevent damage.
Warranty
2-Year limited warranty, may vary by state. Visit support.BISSELL.com or call 1-844-383-2630
for complete warranty information.
Note: Any other servicing should be performed by an authorized representative.
But wait, there’s more!
Join us online for a comprehensive walkthrough of your new product,
including troubleshooting, product registration, parts, and more.
Go to support.BISSELL.com or the BISSELL Connect App.
VIDEOS
INFOREGISTER PARTS SUPPORT
©2020 BISSELL Inc. All rights reserved.
Printed in China. Part Number 1618195 01/20
We’re Waggin’ Our Tails!
BISSELL® proudly supports BISSELL Pet Foundation® and its mission to help
save homeless pets. When you buy a BISSELL product, you help save pets,
too. We’re proud to design products that help make pet messes, odors and
pet homelessness disappear. Visit BISSELLsavespets.com to learn more.