Loading ...
Loading ...
Loading ...
23
Getting started
used on the handset and base station
have different shapes or different
lettering.
The procedures in this manual use the
handset key icons. This table shows the
corresponding keys for the base station.
Refer to it when needed.
These keys are used to access the main
menu and utilize functions such as redial
and caller ID.
For details, see 5.2 and 5.4.
•Terminology
When a procedure applies equally to the
handset and the base station, the word
“unit” is used to indicate both.
• Scrolling
“Scroll n” means to use the u and d
keys on the handset or the u and d
keys on the base station to scroll
through a menu or list on the display
screen.
Note: See Section 5 for detailed
descriptions of the functions and use of
the keys of the handset and base station.
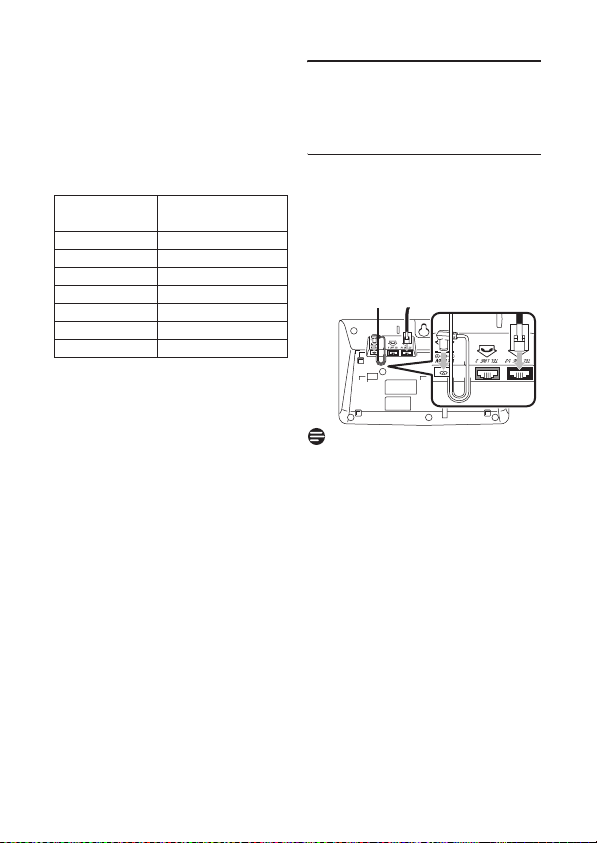
7 Getting started
7.1 Connect the base station
1 Place the base station in a central
location near the telephone line
socket and electricity socket.
2 Connect the line cord(s) and the
power cable to their corresponding
connectors at the back of the base
station.
For 2 line subscriptions, connect the 4-pin
telephone line cord (the black cord) to
the black TEL LINE 1/2 phone jack and to
the telephone wall jack for line 1.
Connect the second telephone line cord
(the gray cord) to the gray TEL LINE 2
phone jack and to the telephone wall jack
for line 2.
If the two phone lines are on one modular
wall jack, connect only the 4-pin
telephone line cord (the black cord) to
the black TEL LINE 1/2 phone jack and to
the telephone wall jack. (Do not connect
anything to the gray TEL LINE 2 phone
jack.)
3 Connect the other end of each of
the line cords to its socket.
Key on
Handset
Key on
Base Station
u
u
d
d
o
Left c key
c
Right c key
i i
* *
# #
Note
Loading ...
Loading ...
Loading ...