Loading ...
Loading ...
Loading ...
English 23
Installation instructions
Step 9. Install the anti-tip device
WARNING
To reduce the risk of tipping, the appliance must be secured by properly installing
the anti-tip device packed with the appliance.
• All ranges can tip, resulting in personal injury.
• Tipping ranges can cause burns from spills, personal injury, and/or death.
• To prevent accidental tipping, install and check the anti-tip bracket following
the instructions and template supplied with the bracket.
An anti-tip bracket and screws, installation
instructions, and template are shipped
with every range (PN DG94-00870B). The
instructions include information necessary to
complete the installation of the anti-tip bracket.
Read and follow the instructions on the sheet
and use the template for anti-tip bracket
installation. If not properly installed, the range
could be tipped by you or a child standing,
sitting, or leaning on an open oven door.
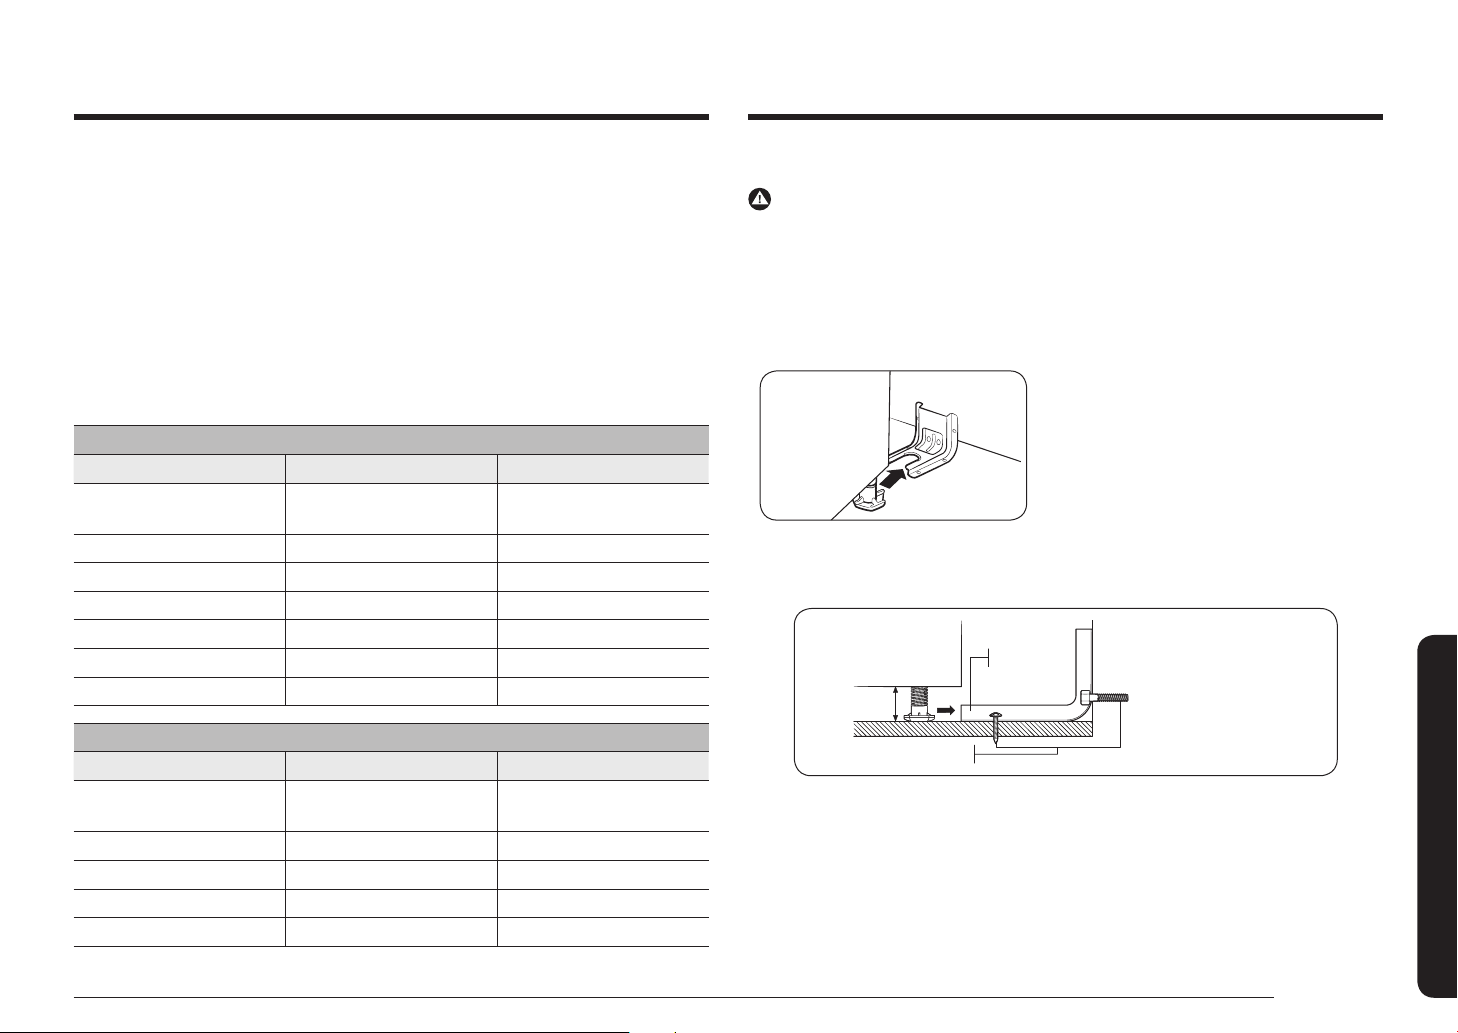
Anti-Tip
bracket
*approximately
/" (16.5 mm)
Screw must enter
wood or concrete
*NOTE: To install the Anti-Tip
bracket, release the leveling leg.
A minimum clearance of /"
(16.5 mm) is required between
the range bottom and the kitchen
oor.
To check if the bracket is installed and engaged properly, remove storage drawer
and look underneath the range to see that the leveling leg is engaged in the bracket.
Carefully tip the range forward. The bracket should stop the range within 4 inches
(10.2 cm) of tipping. If it does not, the bracket must be reinstalled.
If the range is pulled from the wall for any reason, always repeat this procedure to
verify the range is properly secured by the anti-tip bracket. Never completely remove
the leveling legs or the range will not be secured to the anti-tip device properly.
Step 8. Convert to lp gas (optional)
All new gas ranges are shipped from the factory set up to use natural gas. Any
Samsung gas range can be converted to use LP gas. Refer to page 57 in the User
Manual to contact a qualied service technician.
The conversion process should only be performed by a qualied LP gas installer.
Conversion instructions and LP orices will be supplied with the LP conversion kit.
The conversion to LP requires all burner orices to be changed (5 surface burners).
In addition, the nozzle on the gas pressure regulator needs to be reversed. All
replaced orices must be left with the consumer, including the instructions and
retrot sizes and orice indication.
Checking the ame quality all burner after converting to lp gas.
BURNER ORIFICE SIZES AND OUTPUT RATINGS (LP Gas [Propane] 10 in WCP)
Burner Location BTU Rate Orice Size [mm]
RF 16500
In: 0.46/
Out: 0.83 (2 pcs)
LF 11500 1.04
RR 4000 0.62
LR 7500 0.83
CTR 7500 0.83
BAKE 15000 1.15
BROIL 14500 1.12
BURNER ORIFICE SIZES AND OUTPUT RATINGS (Natural Gas 5 in WCP)
Burner location BTU Rate Orice size [mm]
RF 22000
In: 0.85/
Out: 1.36 (2 pcs)
LF 15000 1.78
RR 5000 1.01
LR 9500 1.40
CTR 9500 1.38
Loading ...
Loading ...
Loading ...