Loading ...
Loading ...
Loading ...
English 13
Installation requirements
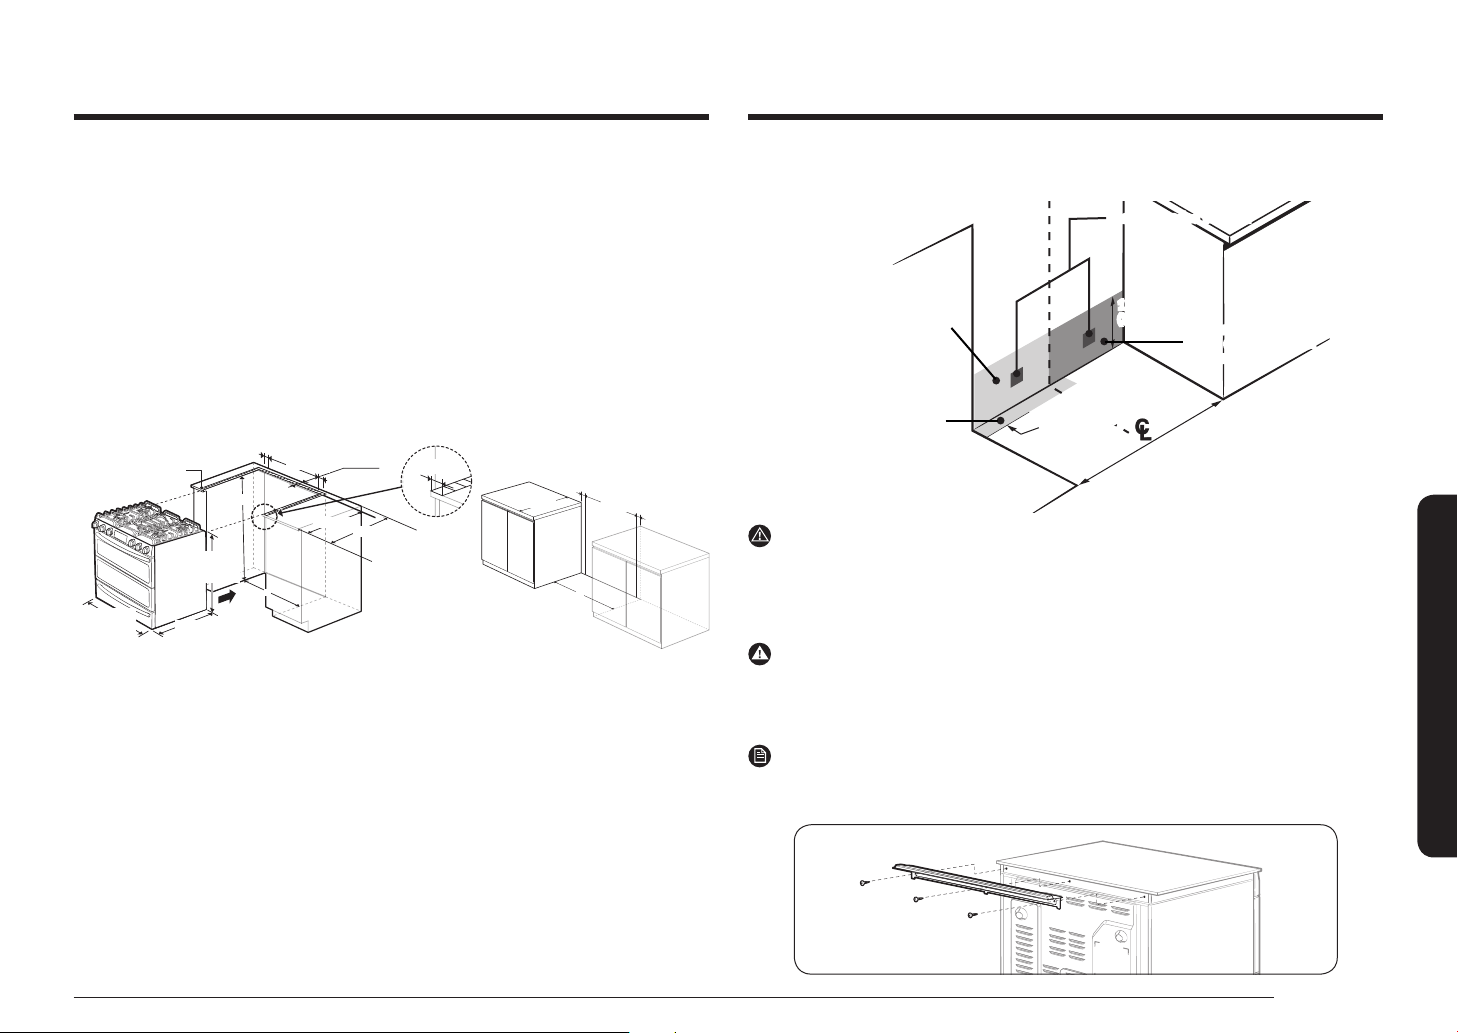
Recommended locations for gas piping and electrical outlets
(For models NY58J9850WS)
Recommended area for
120V electrical outlet
on rear wall
Recommended position
30 in (76.2 cm)
Cabinet Opening
12 in
(30.5 cm)
17 in x 9 in
(43.2 cm x 22.9 cm)
Gas Wall Area
Recommended area
for through-the-wall
and through-the-oor
connection of gas pipe stub
and shut-off valve.
17 in x 2 in
(43.2 cm x 5.1 cm)
Gas Floor Area
CAUTION
You must use the rear ller kit to install the range in a freestanding cutout cabinet.
For more information, see “Optional rear ller kit” as shown below.
Optional rear ller kit
WARNING
Used to ll gap between the range back and wall. Adds a ller strip to the rear
of the range. This kit can only be used when the opening in the countertop is 25"
deep.
NOTE
If the countertop depth is greater than 25", there will be a gap between the ller
kit and the back wall.
Exception 2 : For island installation, maintain 2-½” minimum from cutout to back
edge of countertop and 4” minimum from cutout to side edges of countertop.
IMPORTANT:
To eliminate the risk of burns or re caused by reaching over heated surface
units, avoid having cabinet storage space located above the surface units. If you
have cabinet storage space over the heating elements, you can reduce the risk by
installing a range hood that projects horizontally a minimum of 5 inches beyond
the bottom of the cabinets.
Installation guide
SLIDE-IN CUTOUT FREESTANDING CUTOUT
A
Hatched Faces
should be at and
leveled.
35-⅞"
36
1
/4"
(921.2
mm)
27
3
/4"
(705.5 mm)
29
15
/16"
(761.0 mm)
3"
3"
24"
1" min.
½" min.
23 /"
25"
A
25"
3"
24"
3"
A: Cabinet opening 30" (76.2)
IMPORTANT: If your cabinet have height over 36 4/5", this range cannot be
installed without supporting unit like hard block.
Loading ...
Loading ...
Loading ...