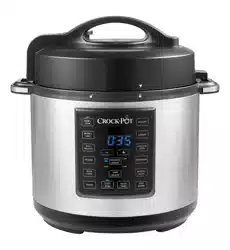
Sunbeam PE6100 Aviva 6L Multi Cooker
Product's Documents
Below are documents related to this product, you can read online or download:
- Owner's manual - (English) Read Online | Download pdf
User manual Pressure Cooker
-706502.png)
-945056.png)
-243117.png)
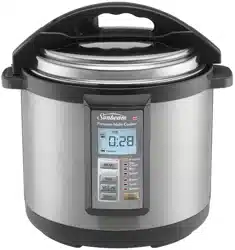
The control panel on the Pressure Cooker is designed to ensure easy use and to show the progress of your cooking. Choose from the 7 cooking menus – Pressure Cook, Slow Cook, Rice, Steam and Frypan (Brown, Sauté, Simmer). Choose your cooking menu, set the time and start cooking.
1. Menu Button
Scroll through the Cooking menus available by pressing the MENU button.
2. Cooking Menu indicator
A light will display next to the various cooking menus, when the MENU button is selected.
Pressure Cook Menu
The Pressure Cook menu has two selectable heat settings LOW (30kpa) and HIGH (70kpa).
Slow Cook Menu
The Slow Cook menu has two selectable heat settings LOW and HIGH.
Rice Cook Menu
Steam Menu
Frypan Menu (Brown, Sauté, Simmer)
The Frypan menu has three heat settings Brown, Sauté and Simmer.
3. Time Button
After you’ve selected your Cooking menu, set the cooking time required by pressing the -732230.png) buttons. (No need to set for frypan menus).
buttons. (No need to set for frypan menus).
4. Delay Button
You can delay the start of your cooking on all menus except the Frypan. DELAY is displayed when the unit is in Delay setting.
-579669.png)
5. Start/ Stop button
Press the START button to begin the selected cooking menu once all settings have been chosen. Press and hold the STOP button for 3 seconds if you wish to change your setting.
6. LCD Screen
The unit needs to gain pressure and/ or temperature before cooking can commence.
Cooking and Keep Warm
These lights indicate if the unit is in cooking or keep warm mode. When the COOKING light is flashing, the unit is gaining pressure or gaining temperature. When the COOKING light is solid the unit has commenced cooking. When KEEP WARM light is on, cooking time is completed and the unit has automatically switched to Keep Warm setting.
High and Low
When you’ve selected Pressure or Slow Cook menu, HIGH or LOW setting will display in the LCD Screen.
Clock display
Will show the remaining time in the COOKING menus, or elapsed time in the KEEP WARM mode.
Time and Delay
DELAY will display when the unit is in the delay start setting. TIME will display otherwise.
7. Power Light
This light will illuminate when the power is switched on. When the unit is not in use, switch off power at the power outlet. Tip: During programming if no button has been pressed after 20 minutes, the unit will enter the stand-by mode, and the LCD screen will turn off.
-572972.png)
The Sunbeam Pressure Cooker has been designed with safety in mind and has various switch off safety measures.
Releasing Pressure at the End of Cooking
a. Natural Release Method. The unit is turned off and left to cool gradually until the pressure releases on its own. The lid is then able to be removed. Depending on the volume of food, this can take 5 – 20 minutes.
b.Quick Release Method. Using an oven mitt flick the tab on the pressure and steam release valve to the ‘RELEASE’ setting. Do not place any part of your hand or body over the steam outlet on the top of the valve as steam is very hot and may scald. Never use this method when cooking liquid ingredients such as casseroles, stocks and soups. The pressure is released when steam is no longer escaping from the valve and the lid opens freely with no force. Only then is it safe to remove the lid and serve food.
Note: Do not force the lid to open. If it does not open freely this means that the unit is still under pressure.
Note: During cooking, steam will build up in the unit, so when lifting the lid use a kitchen glove or mitt to protect your hand.
Tip: Remember if the lid is not shut correctly, if the valves and gasket are clogged and if the pressure and steam valve is not in the ‘SEAL’ position, the unit can not gain pressure and an ERROR message will appear in the LCD screen. Check the gasket seal is placed evenly in the lid. Program Errors are summarised in the Trouble Shooting Display Information Guide on page 30.
Pressure Cooking is an ideal way to create quick, flavoursome and delicious meals. Pressure Cooking is a method of cooking food in liquid (water, stock, wine etc) in a sealed cooking pan. The sealed unit retains steam and builds pressure raising the temperature of the liquid inside the pan above boiling point. The increased temperature of the liquid and the steam results in reduced cooking times. It also causes the fibres in food to break down more quickly, resulting in tender, flavoursome meats. Vitamins and minerals are retained, natural flavours and colours are intensified and less seasoning can be required. As the meats cooked in a pressure cooker tend to be more tender; tougher and mostly cheaper yet flavour filled cuts of meats can be used such as chuck steak.
HIGH Pressure Setting is 70kpa. It is suitable for a wide range of foods.
LOW Pressure Setting is 30kpa. It is more suited to delicate foods like chicken fillet, fish and some vegetables.
KEEP WARM Setting. When cooking time is completed, the Pressure Cooker automatically switches to the Keep Warm setting to prevent overcooking and to keep your cooked food warm until serving - perfect for busy families, those on the run and those who need flexible meal times. This setting is not hot enough to cook, and should only be used to keep hot, cooked food warm for serving.
Ideal Meals to Pressure Cook.
Soups, stocks, casseroles, sauces (e.g. pasta sauces), meat, dried beans (not split peas), rice, firm vegetables (beetroot, potatoes) and desserts (such as pudding, crème caramel).
Capacity. When the unit is used on the Pressure Cook menu, the maximum capacity to use is the MAX PC marking on the inside of the cooking pan. The unit can not gain pressure and therefore can not work without liquid. Using without liquid can severely damage the machine.
Note: The unit can not work without liquid. Ensure a minimum of 250ml of liquid is used inside the removable cooking pan.
Releasing Pressure at the End of Cooking
Note: During cooking, steam will build up in the unit, so when lifting the lid use a kitchen glove or mitt to protect your hand.
Slow Cooking
Slow Cooking achieves flavour filled meals, and tender moist meats cooked to perfection. As the name suggests, meals are not cooked under pressure but are cooked over a long period of time. Slow Cooking provides healthy, simple and economical cooking.
It requires minimal supervision, short preparation times and quick clean up times.
LOW Setting. This is suitable for simmering and slow cooking.
HIGH Setting. This is for faster cooking. Typically 1 hour on HIGH = approximately 2 - 2.5 hours on LOW.
KEEP WARM Setting. When cooking time is completed, the Aviva automatically switches to the Keep Warm setting to prevent overcooking and to keep your cooked food warm until serving - perfect for busy families, those on the run and those who need flexible meal times. This setting is not hot enough to cook, and should only be used to keep hot, cooked food warm for serving.
The Slow Cook menu does not require pressure to cook. It cooks similar to standard slow cookers and uses low temperatures and longer cooking times to achieve tender, flavoursome meals.
Capacity. When the unit is used on the Slow Cook menu, the maximum capacity to use is the MAX PC marking on the inside the cooking pan.
Rice Cooking
When cooking rice, use the ‘Rice’ menu. This is suitable for all types of rice including White and Brown rice.
The Rice menu cooks under pressure for faster cooking. When using the Rice Menu, for rice measurements use the Sunbeam Rice measuring cup included with your Aviva Pressure Cooker.
Capacity. When the unit is used on the Rice menu, the maximum capacity is the 12 CUP marking inside the cooking pan.
Sunbeam Rice Cup
Use the Sunbeam rice cup provided for all rice dishes. Rice cup measurements are not the same as metric cups. One rice cup is approximately 2/3 standard cup measurement.
Steaming
The Steam menu is perfect for gently steaming fish and vegetables. It is pre-programmed to use the Low pressure cooking setting. When steaming, use the cooking rack.
The Steam menu does not cook under pressure as foods tend to be more delicate.
Capacity. When the unit is used on the
Steam menu, the maximum capacity of liquid should be just under the rack wires, so that the liquid is not touching the food.
Brown, Sauté, Simmer
The Frypan mode has three heat settings Brown, Sauté and Simmer. Change the heat setting depending on the food that you are cooking, and your style of cooking. It is ideal to use prior to Pressure Cooking, and Slow Cooking to brown meats, sauté onions, vegetables etc for easy one pot cooking. The Brown, Sauté and Simmer menus do not cook under pressure but cook similar to a frypan. Therefore unless instructed in your recipe, do not use the lid on these menus.
Brown is the highest heat setting and can be used to sear meats for casseroles and soups. Browning meat prior to pressure cooking and slow cooking not only gives your food great colour, it also seals in the juices and flavours and keeps the meat tender.
Sauté is a medium temperature and is suitable to sauté onions, and mire poix (mixture of chopped onion, carrot, celery) often used in pressure cooker and slow cooker recipes. Sautéing onions allows caramelisation which contributes to flavour and colour in the end dish.
Simmer is a lower temperature, around boiling point. Use it to gently simmer sauces.
Capacity. When the unit is used to Brown, Sauté or Simmer it may be best to cook in batches to ensure the food is evenly cooked.
Place the Pressure Cooker on a flat, level surface.
Plug in the unit. The unit will beep, and the indicator lights and the LCD screen will illuminate. The Pressure Cooker will default to the Pressure Cooker menu, on the HIGH (70kpa) setting. ‘Pressure’ and ‘HIGH’ will flash on the display.
buttons, until your desired time appears in the LCD screen. Each button press will adjust the time by 1 minute up to 20 minutes, and increments of 5 mins thereafter to a maximum cooking time of 2 hours.
TIP: The Pressure Cooking settings are in the Cooking Menu Settings Table on page 13.
NOTE: The unit can not work without liquid. Ensure a minimum of 250ml of liquid is used inside the removable cooking pan.
Note: During cooking, steam will build up in the unit, so when lifting the lid use a kitchen glove or mitt to protect your hand.
The Slow Cook menu does not cook under pressure, but does need the lid locked to commence cooking. It cooks similar to standard slow cookers and uses low temperatures and longer cooking times to achieve tender, flavoursome meals.
Place the Pressure Cooker on a flat, level surface.
Plug in the unit. The unit will beep, and the indicator lights and the LCD screen will illuminate. The Pressure Cooker will default to the Pressure Cooker menu, on the HIGH setting. ‘Pressure’ and ‘HIGH’ will flash on the display.
buttons, until your desired time appears in the LCD screen. Each button press will adjust the time by 30 minutes to a maximum cooking time of 9 hours.
Note: As the Slow Cook menu does not cook under pressure, you can remove the lid during cooking to check your slow cooking progress. Only lift the lid if necessary as slow cooking uses very low temperatures to cook, so the unit does not recover lost heat quickly.
TIP: The Slow Cooking settings are in the Cooking Menu Settings Table on page 13.
Place the Pressure Cooker on a flat, level surface.
Plug in the unit. The unit will beep, and the indicator lights and the LCD screen will illuminate. The Pressure Cooker will default to the Pressure Cooker menu, on the HIGH setting. ‘Pressure’ and ‘HIGH’ will flash on the display
buttons, until your desired time appears in the LCD screen. Each button press will adjust the time by 1 minute up to a maximum cooking time of 30 minutes.
Note: As steamed food is delicate, there is no Keep Warm setting on the Steam menu.
TIP: The Steam Cooking settings are in the Cooking Menu Settings Table on page 13.
Note: The unit can not work without liquid. Ensure a minimum of 250ml of liquid is used inside the removable cooking pan.
Note: During cooking, steam will build up in the unit, so when lifting the lid use a kitchen glove or mitt to protect your hand.
These 3 Frypan menus do not cook under pressure. They work similar to standard frypan cooking, requiring dry heat and therefore do not need a lid. Do not use a lid on these 3 menus. If you wish to cover the pan with the lid (e.g. to prevent splatters) do not lock the lid and use the finger tab to turn the pressure and steam valve to the ‘RELEASE’ position.
Place the Pressure Cooker on a flat, level surface.
Plug in the unit, and ensure the removable cooking pan is inside the unit. The unit will beep, and the indicator lights and the LCD screen will illuminate. The Pressure Cooker will default to the Pressure Cooker menu, on the HIGH setting. ‘Pressure’ and ‘HIGH’ will flash on the display.
1. If the menu is not set to Brown, Sauté or Simmer, set the cooking menu by scrolling through the MENU button until a light appears next to the desired frypan setting on the control panel.
2. Press START.
Note: No TIME setting is needed for these 3 frypan menus.
Note: No lid is to be used for these 3 frypan menus.
3. When the unit is gaining temperature, ‘Cooking’ will flash in the LCD screen. When the temperature has been reached, ‘Cooking’ will stop flashing and using tongs carefully add your food to the hot pan.
Note: There is no Keep Warm setting on the Brown, Sauté and Simmer menus.
TIP: Brown, Sauté and Simmer settings are in the Cooking Menu Settings Table on page 13.
Time Delay is available on the Pressure Cooker, Slow Cooker, Rice and Steam menus only. The Pressure Cooker allows you to delay the start of your cooking so that cooking finishes when you need it.
Note: Do not use the Time Delay when the recipe has perishable ingredients such as meat, fish, eggs, or dairy as these may spoil.
1. Set the MENU and cooking TIME using the instructions on pages 15 to 22.
2. After setting the cooking TIME, press the DELAY button, 0:00 and DELAY will flash on the LCD screen to indicate the unit is being programmed on the delay setting.
3. Press the buttons, until you reach the number of hours and minutes your want your cooked to be delayed. I.e. set the amount of time you wish to start the delay of your cooking cycle.
4. Press START button to commence the delay program. DELAY will stop flashing to indicate the unit has been set on the delay setting. The LCD screen will countdown the delay time until 0:00 is reached. When 0:00 is reached, DELAY will remove from the screen to show that time delay has finished, and TIME will be display to show that cooking time will commence. The unit will begin to gain pressure. As per the previous menu instructions, when the unit is gaining pressure, ‘Cooking’ will flash in the LCD screen and the time will not count down. When pressure has been reached, ‘Cooking’ will stop flashing and the time will begin to count down.
Example.
It’s 4pm and you want to have 12 cups of white rice cooked and ready in 2 hours time for dinner at 6pm. You want to set the machine now so you are free to do other things.
By looking at the Rice Cooking chart on page 19, you see it takes 15 minutes to cook. Time to gain pressure varies according to humidity and water temperature, but say it takes 15 minutes to gain pressure. Therefore total time is 30 minutes. Therefore to have the rice ready by 6pm, you will need to delay the start of your cooking by approximately 1 hour and 30 minutes.
Cleaning should only be carried out when the Pressure Cooker is switched off and the plug removed from the socket. Allow the unit to completely cool before cleaning.
Do not use the removable cooking pan on the stovetop, inside a microwave oven or inside an oven. Use the pan only inside the Pressure Cooker unit.
Wash the sealing gasket and lid by hand in warm, soapy water. Dry all parts thoroughly.
Cooking Pan To remove food that is cooked onto the bottom of the removable cooking pan, soak the pan in warm water before cleaning. Wash the removable cooking pan by hand in warm, soapy water. Dry thoroughly before replacing the pan in the unit.
Exterior
Wipe the exterior of the Pressure Cooker with a damp cloth and polish dry. DO NOT use harsh abrasives, scourers or chemicals as these will damage the surfaces. To prevent damage to the unit do not use alkaline cleaning agents when cleaning, use a soft cloth and mild detergent.
Condensation Collector
Empty the condensation collection of water after each use. Wash in warm, soapy water.
Lid and Sealing Gasket
Always examine the gasket before each use. The silicon sealing gasket on the inside of your pressure cooker lid may deteriorate over time. Remove and replace the sealing gasket for cleaning as per Figure 1 below. Hand clean using warm, soapy water and dry thoroughly. Leave the lid upturned for storage as this will also extend the life of the gasket. Sealing gaskets will need to be replaced every 1 – 2 years depending on regular use. Contact your nearest Sunbeam Service Centre.
-736364.png)
Pressure and Steam Release Valve
Ensure the pressure and steam release valve is clear from debris before you commence using the unit. Remove the valve and gently clean. Ensure it is completely dry before replacing.
Steam Release Valve Cover
The steam release valve cover is on the underside of the lid. Ensure it is clear from debris before you commence using the unit. Gently hand clean the cover using warm, soapy water. Do not try to remove the valve cover, just gently lift it up and down to clear debris. Ensure it is completely dry before returning it to your unit.
-314796.png)
Lid Lock Valve
Gently lift the valve and ensure it is clear from debris before you commence using the unit.
Note: Condensation may collect inside the unit under the removable cooking pan. This is normal. Wait and until cool, and then remove using paper towelling or kitchen cloth.
Note: Always make sure that each component (pan, valves, gasket) is completely dry before you put them back into your unit.
| Problem | Possible Reason | Solution |
| Menu lights on the control panel are flashing | The program has not been set | Set the MENU, TIME and press START |
| ‘Cooking’ light is flashing on the LCD screen | The unit is warming up and/or gaining pressure. For the frypan menus, the unit is warming up to the set temperature | Wait until ‘Cooking’ light stops flashing. For the frypan menus, wait until the set temperature has been reached, the ‘Cooking’ light stops flashing and then add food. |
| The unit can not gain pressure as the sealing gasket may not be correctly positioned | Carefully remove the lid, and check the sealing gasket is smoothly in place in the gasket holder. Alternatively the sealing gasket may need to be replaced. | |
| The unit can not gain pressure as the pressure and steam safety valve is not in the ‘Seal’ position | Check the valve and flick to the ‘Seal’ position | |
| The LCD screen is blank | The unit has no power | Check the cord is inserted into the machine, and that the power is switched on at the power outlet |
| The unit is in standby mode as the programming has not been completed and no button has been pressed in 20 minutes | Press any button to return to default screen | |
| Difficult to close the lid | The sealing gasket may not be correctly positioned | Carefully remove the lid, and check the sealing gasket is smoothly in place in the gasket holder. Alternatively the sealing gasket may need to be replaced. |
| Unit not gaining pressure | The pressure and steam safety valve is not in the ‘Seal’ position | Check the valve and flick to the ‘Seal’ position |
| The sealing gasket may not be correctly positioned | Carefully remove the lid, and check the sealing gasket is smoothly in place in the gasket holder. Alternatively the sealing gasket may need to be replaced. | |
| The Pressure and Steam release valve and the safety valve may be clogged | Ensure the valves are clear of debris. | |
| Difficult to open the lid | The unit still has pressure | Wait for the unit to release the pressure. See ‘Releasing Pressure at the end of Cooking’ on page 10. Alternatively check to see if the lid lock rod on the top of the lid is raised. If it’s raised, press gently with a small pencil or chopstick to allow the steam to release. |
| E01 | Sensor malfunction | Contact Sunbeam Customer Service on Australia 1300 881 861 New Zealand 0800 786 232 |
| E02 | ||
| E04 | Pressure can not gain |
Remove gasket entirely from the lid. Clean and dry and replace firmly back into the lid. Refer to page 24 for cleaning guide. Ensure the lid is locked on, and the pressure valve is in the ‘SEAL’ position. If this error occurs again, ensure the gasket and the valves are clear from debris. Then reset the unit. |
| E05 | Temperature is too high. | Open the lid and allow to cool. After the message disappears, relock the lid, ensure the valve is in the ‘SEAL’ position and reset the program. |
| Dry | Dry Error. | There is not enough liquid in the pan Carefully use the finger tab on the pressure release valve and flick to ‘RELEASE’. When pressure has been released, carefully remove the lid using oven mitts and add liquid to the pan. Replace and lock lid, and ensure the valve is in the ‘SEAL’ position. |
| Lid | Lid Error. The lid is locked using the frypan menu | Do not lock the lid on the frypan menus. Remove the lid and reset the program. |