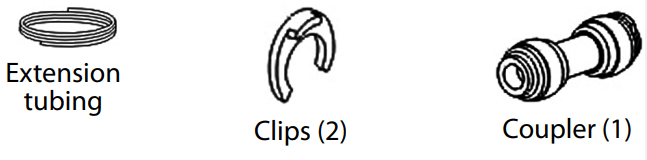
• 1/4" extension tubing (1) (inside the refrigerator drawer)
• Coupler (1) (inside the refrigerator drawer)
• Clips (2) (inside the refrigerator drawer)
• User Guide
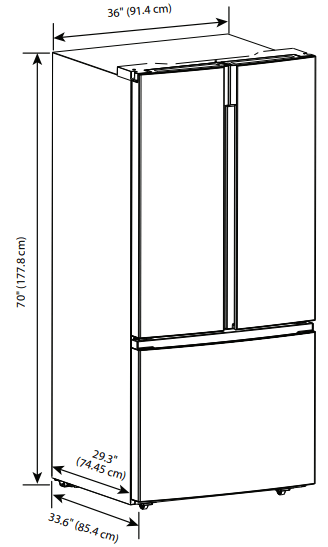
Dimensions
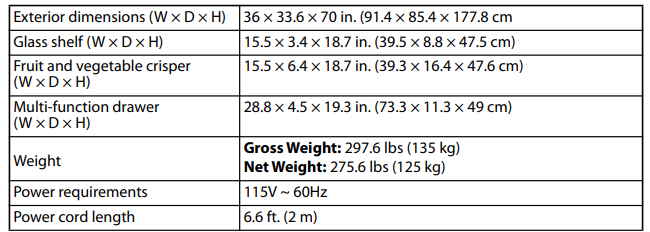
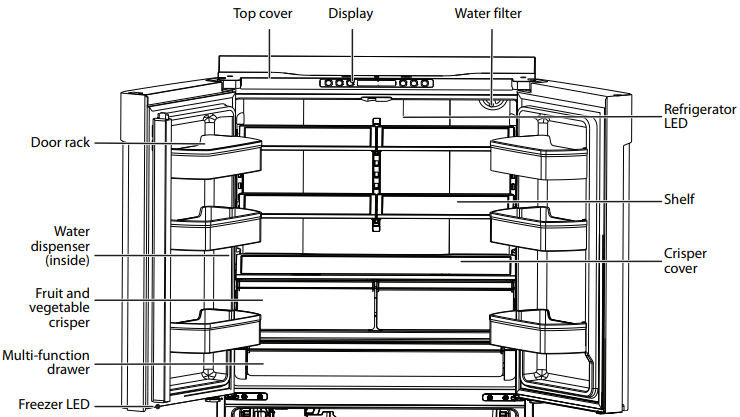
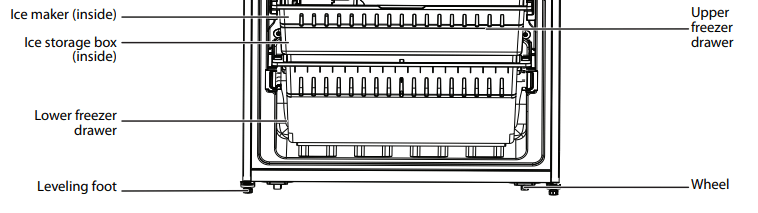
Interior
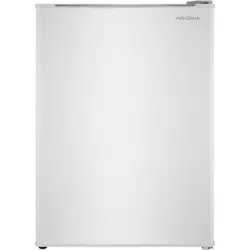
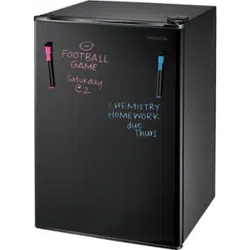
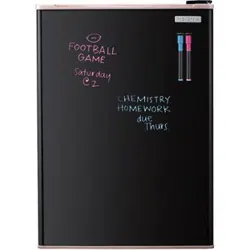
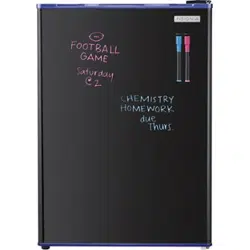
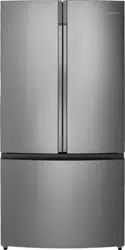
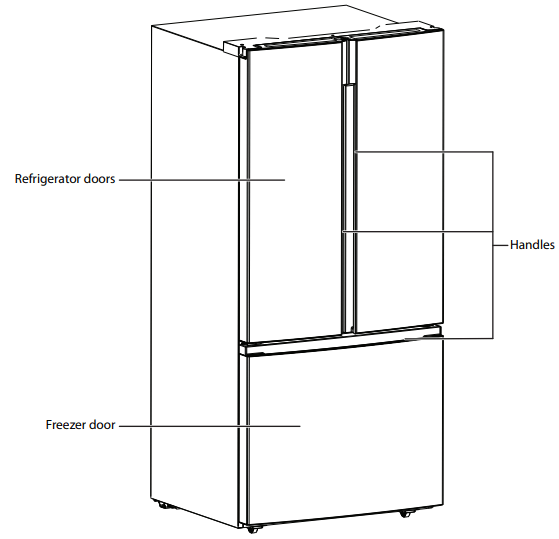
Exterior
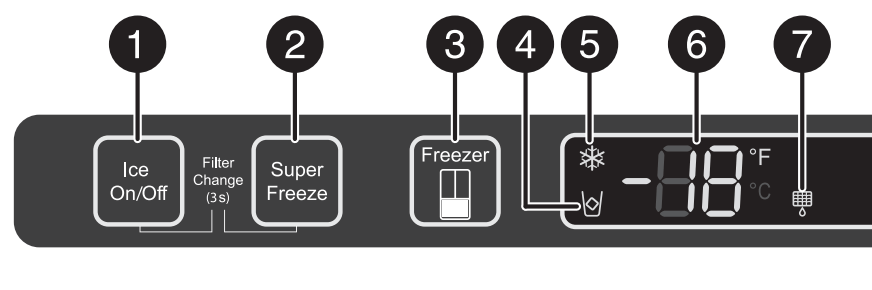
Control panel
The control panel is located at the top of the inside of your refrigerator. The first time you connect your refrigerator to power, all the icons light for three seconds and a buzzer sounds. When you open the refrigerator compartment door, the control panel lights. If you do not push any buttons or close the doors, the lights turn off in 60 seconds.
NO.
TEM
DESCRIPTION
1
Turns the ice maker on or off. See Using the ice maker on page 22
2
Press to reduce the freezer compartment temperature to -11°F (-24°C). See Using Super Freeze to speed freezing on page 23.
3
Press to turn on the freezer compartment temperature control, then press and hold to adjust the temperature. See Setting the freezer temperature on page 22.
4
Lights when the ice maker is on.
5
Lights when the freezer compartment is in Super Freeze mode. See Using Super Freeze to speed freezing on page 23.
6
Freezer temperature display
Displays the current freezer compartment temperature. When you press the Freezer button to change the freezer compartment temperature, displays the available settings one at a time. See Setting the freezer temperature on page 22.
7
Blinks when you need to change the water filter. See Replacing the water filter on page 27.
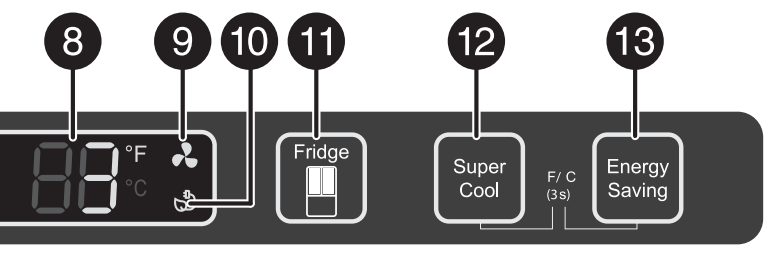
8
Refrigerator temperature display
Displays the current refrigerator compartment temperature. When you press the Fridge button to change the refrigerator compartment temperature, displays the available settings one at a time. See Setting the refrigerator temperature on page 22
9
Lights when the refrigerator compartment is in Super Cool mode. See Using Super Cool to speed refrigerator cooling on page 23.
10
Lights when your refrigerator is in Energy Saving mode. See Using the Energy Saving mode on page 23.
11
Turns on the refrigerator temperature control. See Setting the refrigerator temperature on page 22.
12
Press to reduce the refrigerator compartment temperature to 36°F (2°C). See Using Super Cool to speed refrigerator cooling on page 23.
13
Press to turn on the Energy Saving mode. See Using the Energy Saving mode on page 23.
Connecting the water supply
Your refrigerator comes with a water dispenser and an ice maker. To use these features, you need to connect your refrigerator to a drinking (potable) water supply. In order for the ice maker to operate correctly, the water pressure needs to be between 30 and 125 psi.
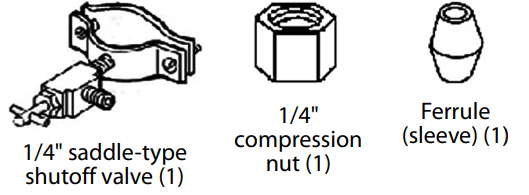
The following parts are included (inside the refrigerator drawer):
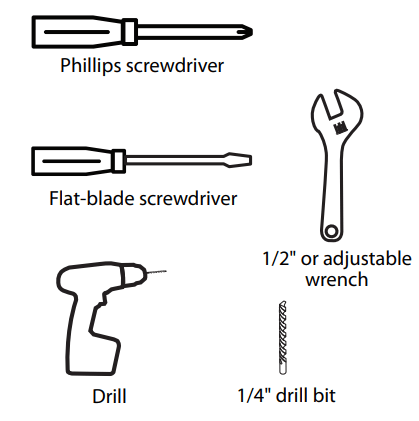
You will need the following tools and parts (not included):
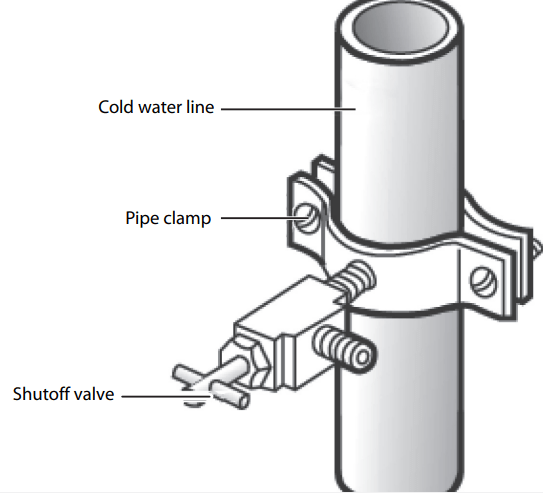
1. Shut off the main water supply.
2. Using a 1/4" drill bit, drill a hole into the cold water line, then install the saddle-type shutoff valve.
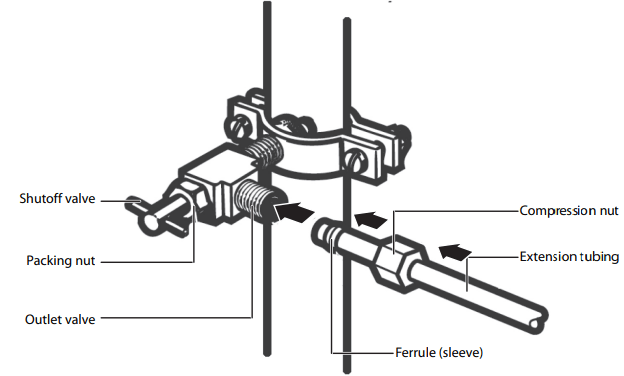
3. Connect the 1/4" extension tubing (included) to the shutoff valve.
4. Turn the main water supply back on, then turn on the shutoff valve and flush out the tubing until the water runs clear
5. Turn off the shutoff valve.
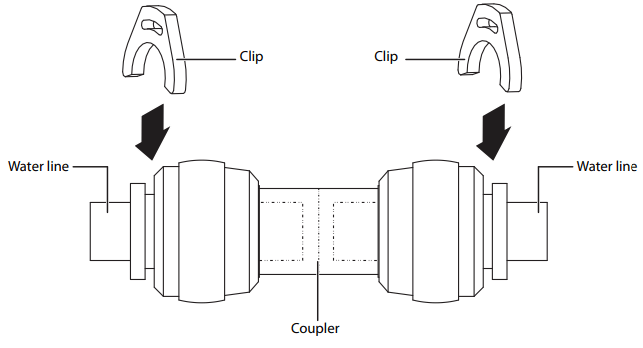
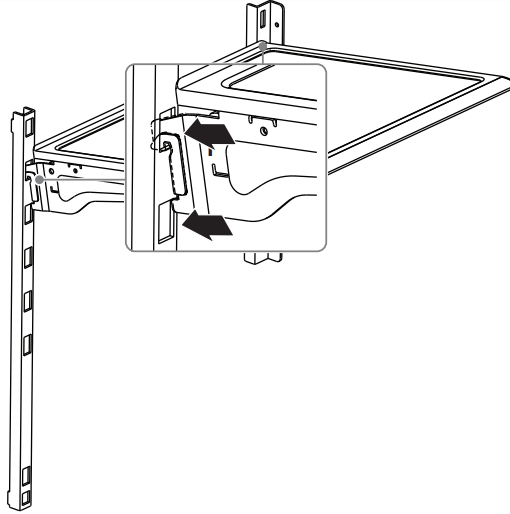
6. Connect the extension tubing to the water connector on the back of your refrigerator and to the coupler. Make sure that you fully insert the extension tubing into the coupler and that the tubing is not bent or pinched. Insert a clip (included) onto the coupler to lock the tubing in place.
7. Connect the extension tubing to the water line in the same way and secure the tubing with a clip (included).
8. Turn on the water and check for any leakage.
9. After you are sure that water is connected correctly, let the water run for about five minutes to flush the water filter
Using your refrigerator
Switching between Fahrenheit and Celsius
To toggle between Celsius and Fahrenheit on the display, press and hold both the Super Cool and Energy Savings buttons for three seconds.
Setting the refrigerator temperature
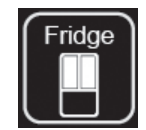
• Press the Fridge button to turn on the refrigerator temperature control, then press and hold the Fridge button to select a temperature setting.
If you have set the temperature type to Fahrenheit, the temperature settings cycle from 47°F to 35°F in one degree increments. If you have set the temperature type to Celsius, the temperature settings cycle from 2°C to 8°C in one degree increments.
Setting the freezer temperature
• Press the Freezer button to turn on the freezer temperature control, then press and hold the Freezer button to select a temperature setting. If you have set the temperature type to Fahrenheit, the temperature settings cycle from 6°F to -12°F in one degree increments. If you have set the temperature type to Celsius, the temperature settings cycle from -14°C and -24°C in one degree increments.
Using the ice maker
The ice maker is located inside the freezer compartment, near the top of the compartment. When the ice maker makes ice, the ice is stored in ice storage box inside the upper freezer drawer.
• Press the Ice On/Off button to turn the ice maker on or off. When the ice maker is turned on, the icon lights.
• To use ice, open the freezer compartment door, then pull open the upper freezer drawer and remove ice from the storage box.
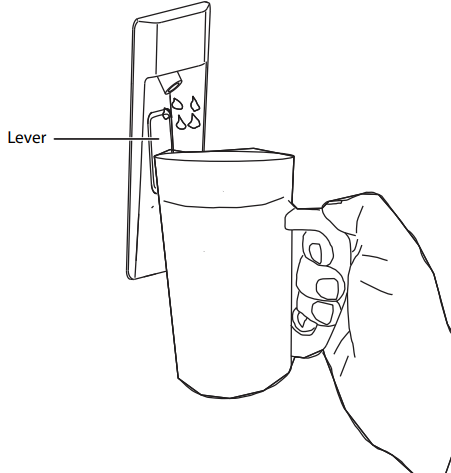
Using the water dispenser
The water dispenser is located inside the left side of the refrigerator compartment.
1. Open the left refrigerator door.
2. Position you glass about 1.5" (4 cm) under the dispenser, then push the lever with the glass.
Using Super Cool to speed refrigerator cooling
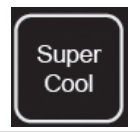
You can quickly lower the refrigerator compartment temperature to cool your food faster than usual. Use the Super Cool mode to speed up cooling when you add a large amount of food to the refrigerator compartment. When the Super Cool mode is on, the refrigerator temperature lowers to 36°F (2°C). The Super Cool mode automatically turns off after three hours, and the refrigerator temperature returns to the last refrigerator temperature setting.
1. Press the Super Cool button. When the Super Cool mode is turned on, the icon lights.
2. To manually turn off the Super Cool mode, press the Super Cool button again.
Using Super Freeze to speed freezing
You can quickly lower the freezer temperature to freeze your food faster than usual. Fast-freezing can help retain more of the vitamins and nutrition in fresh food and keep your food fresh longer. The Super Freeze mode also speeds up freezing when you add a large amount of food to the freezer compartment. When the Super Freeze mode is on, the freezer compartment temperature lowers to -11°F (-24°C). The Super Freeze mode automatically turns off after 26 hours, and the freezer temperature returns to the last freezer temperature setting.
1. Press the Super Freeze button. When the Super Freeze mode is turned on, the icon lights.
2. To manually turn off the Super Freeze mode, press the Super Freeze button again.
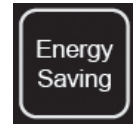
Using the Energy Saving mode
To save energy, you can turn on the Energy Saving mode. When you use the Energy Saving mode, the refrigerator compartment temperature is automatically set to 43°F (6°C) and the freezer compartment temperature is automatically set to 1F (17°C). When you turn off the Energy Saving mode, the refrigerator and freezer temperatures return to the last temperature settings
• Press the Energy Saving button to turn the Energy Saving mode on or off. When the Energy Saving mode is turned on the icon lights.
Using the door baskets
Your refrigerator has six door baskets designed to store canned liquids, bottled drinks, and packaged food. To remove or relocate a door basket:
1. To remove a basket, remove all items from the basket, lift it, then pull it out of the door
2. To relocate a basket, align the basket above the notches in the door, then push the basket down until it stops.
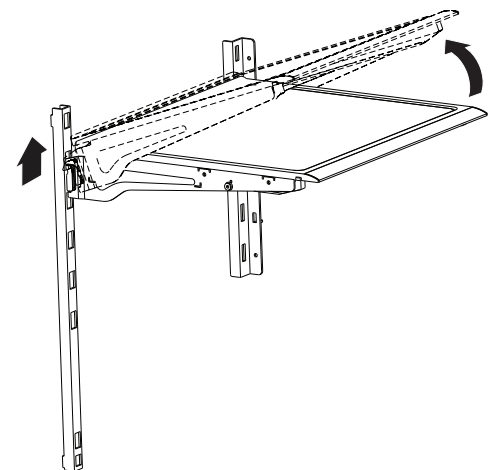
Adjusting the glass shelves
The glass shelves inside the refrigerator compartment are adjustable.
1. To remove a shelf, tilt up the front of the shelf, then lift it vertically up and out of your refrigerator.
2. To install the shelf in a new location, hold the shelf with the front tilted upward, the slide the hooks on the shelf into the slots in the shelf rails and lower the shelf.
Maintaining your refrigerator
Your refrigerator is designed for year-round use with only minimal cleaning and maintenance. When you first receive it, wipe the cabinet with a mild detergent and warm water, then wipe dry with a dry cloth. Do this periodically to keep your refrigerator looking new.
Removing the fruit and vegetable crisper drawers
The fruit and vegetable crisper drawers are designed to store fruits and vegetables. Putting fruits and vegetables inside the drawers helps avoid losing moisture and prevents flavor from getting into other foods. To remove a crisper drawer:
1. Open the refrigerator door all the way.
2. Pull the drawer completely open and move it slightly toward the compartment wall, then lift the drawer up and pull it out of your refrigerator.
Cleaning your refrigerator
We recommend that you do the following every time you clean your refrigerator to keep it running odor-free and efficiently:
1. Unplug your refrigerator from the power outlet.
2. Remove all food.
3. If you want to remove the door baskets, shelves, refrigerator fruit and vegetable crisper drawers, or freezer drawers, see:
• Using the door baskets on page 24
• Adjusting the glass shelves on page 25
• Removing the fruit and vegetable crisper drawers on page 26
• Removing the refrigerator doors (Optional) on page 13
4. Clean the doors, handles, and cabinet surfaces with a mild detergent, then rinse with warm water using a wrung-out sponge or cloth.
5. Wash the inside with a damp warm cloth soaked in a solution of one quart of lukewarm water to two tablespoons of baking soda solution, then rinse with warm water using a wrung-out sponge or cloth.
6. Clean the baskets, shelves, and drawers with a mild detergent and soft cloth, then rinse with warm water.
7. Make sure that you keep the door gaskets (seals) clean so that the door seals tightly. This helps your refrigerator run efficiently.
8. Dry all surfaces and removable parts before putting them back into place.
9. Plug your refrigerator into the power outlet.
Defrosting the freezer compartment
Although the freezer compartment automatically defrosts, a layer of frost may occur on the compartment’s interior walls if the freezer is opened frequently or kept open too long. If the frost is too thick, choose a time when the freezer is nearly empty, then:
1. Unplug your refrigerator.
2. Remove all food from the freezer compartment, and place the food into containers that will prevent it from melting.
3. Leave the freezer compartment open.
4. To speed the defrosting, you can:
• Place open containers with hot water inside the refrigerator.
• Use a plastic or wooden ice shovel (like a spatula) to remove thick layers of ice or frost. Do not use a sharp utensil (like a knife) because you may damage your refrigerator.
5. When you finish defrosting, wipe the inside with a dry towel. If you need to clean the compartment, see Cleaning your refrigerator on page 26.
6. Close the freezer compartment, plug your refrigerator into the power outlet, then put the food back into the freezer compartment.
Replacing the water filter
After your refrigerator has dispensed about 300 gallons of water, the icon blinks to remind you to replace the water filter. For the best water quality, you should replace the water filter about every six months even if the icon is not blinking.
Operating conditions
• Flow rate: 0.5 GPM (1.9LPM)
• Pressure: 30 - 125 PSI (207-862kPa)
• Temperature: 34-100° F (1-38°C)
• Service life: 6 Months
• Capacity: 300 GAL (1,136 L)
• Function: Chemical/Mechanical Reduction
• Flushing: 5 Minutes
Operating Notices
• Do not use with water that is microbiologically unsafe or of unknown quality without adequate disinfection before or after using the filtration system.
• Systems certified for cyst reduction may be used on disinfected water that may contain filterable cyst.
• For cold water only.
• Replace the filter for every 6 months
• Testing was performed under standard laboratory conditions, actual performance may vary.
• Check for compliance with the state and local laws and regulations.
• Systems must be installed and operated in accordance with the manufacturer’s recommended procedures and guidelines.
• Spent adsorption media will not be regenerated and used.
Warranty
• The filter is warranted for a period of 12 months.
• Filters are warranted for defects in material and workmanship only.
• Replacement Cartridge No.: NS-WF26FD9-1
• NSF System No: WF26FD9-1
For estimated costs of replacement elements, contact Best Buy.
To drink the freshest and cleanest water from your refrigerator, change the filter on time.
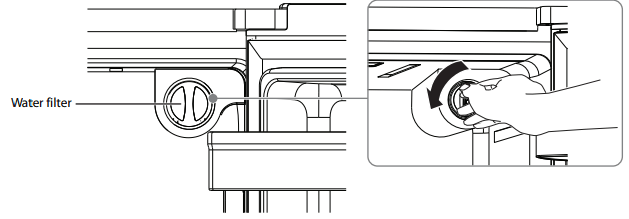
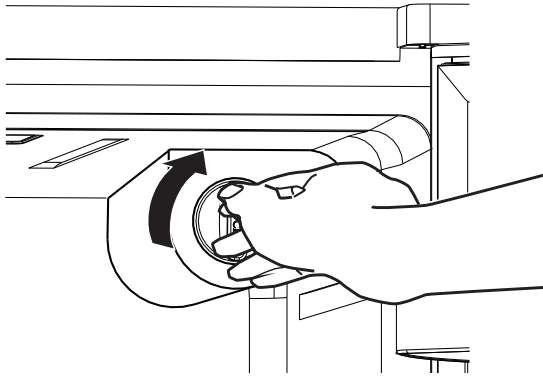
1. Shut off the water supply, then turn off the water shutoff valve on your refrigerator.
2. Turn the old water filter about 1/4 turn counter-clockwise, then pull out the filter.
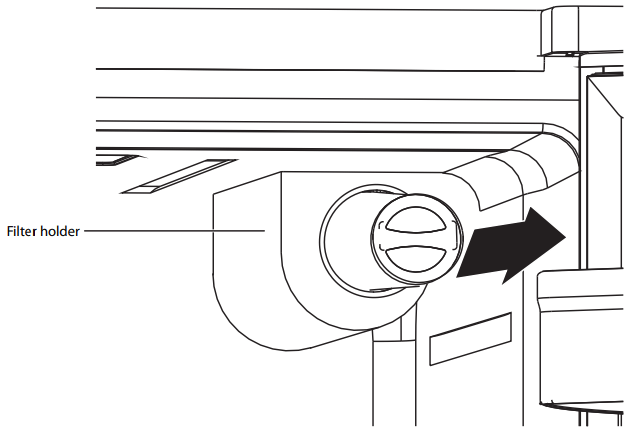
3. Pull the water filter out of the filter holder. Depending on water impurities, you may have to pull hard to remove the filter.
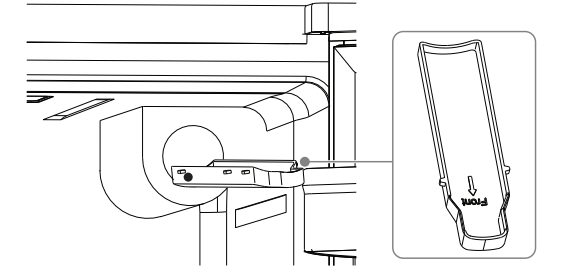
4. Pull out the water filter tray, then empty the tray. Dry around the filter opening, then put the tray back in.
5. Insert the new water filter into the water filter holder.
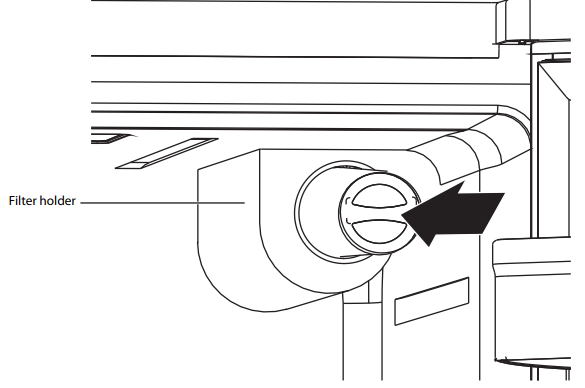
6. While turning the new filter clockwise, push it all the way into the holder until it locks into place.
7. Turn on the shutoff valve and the water supply, then run water through the dispenser until the water runs clear (about five minutes). This cleans the water supply system and removes any trapped air.
8. Open the refrigerator door and make sure that no water leaks from the water filter.
9. After you install the new filter, press and hold both the On/Off and Super Freeze buttons for about three seconds to turn off the icon
Reverse osmosis system
If your cold water supply is connected to a reverse osmosis system:
• The water pressure to the reverse osmosis system needs to be between 40 psi to 60 psi (276 kps to 414 kpa).
• The water pressure at the inlet valve on your refrigerator needs to be between 30 psi to 125 psi (207 kpa to 862 kpa).
If the water pressure to the reverse osmosis system is less than 40 psi and 60 psi (276 kps and 414 kpa):
• Check the sediment filter on the system, and replace the filter if necessary.
• Allow the storage tank on the system to refill after heavy usage.
• If the water pressure is still too low, your refrigerator's water filter may further reduce the water pressure. Remove the water filter.
Replacing the LED light
If the LED light is damaged:
1. Unplug your refrigerator.
2. Remove the light cover by lifting it up.
3. While pressing the connector latch with one hand, pull the LED light out.
4. Replace the LED light and snap it correctly in place, then replace the light cover.
Tips on saving energy
• Locate your refrigerator in the coolest area of the room, away from heat producing appliances or heating ducts and out of direct sunlight.
• Let hot foods cool to room temperature before placing them in your refrigerator. Overloading your refrigerator forces the compressor to run longer. Foods that freeze too slowly may lose quality or spoil.
• Wrap foods correctly and wipe containers dry before placing them in your refrigerator. This cuts down on frost build-up.
• Do not line the refrigerator storage shelves with aluminum foil, wax paper, or paper toweling. Liners interfere with cold air circulation and make your refrigerator less efficient.
• Organize and label food to reduce door openings and extended searches. Remove as many items as needed at one time, and close the door as soon as possible.
Troubleshooting
PROBLEM
SOLUTION
My refrigerator does not work.
• Make sure that your refrigerator is securely plugged into a working outlet.
• Make sure that your power source has the correct voltage. Your refrigerator’s voltage rating is on a label on the back of your refrigerator.
• Check the house fuse or circuit breaker box and replace the fuse or reset the circuit breaker.
The refrigerator compartment has a bad odor.
• Make sure that all food with a strong odor (like onions) is wrapped or stored in airtight packaging.
• Certain containers and wrapping materials (such as paper, foil, or plastic) can cause odors. If you think this might be the case, try using different containers or a different brand of wrapping material.
• Check for spoiled food and remove it.
• Clean the inside of your refrigerator. See Cleaning your refrigerator on page 26.
The refrigerator doors do not close completely
• Make sure that no food packages are in the way.
• Make sure that the door gaskets (seals) are clean. See Cleaning your refrigerator on page 26.
• If the door gasket does not seal, try heating then cooling the seal. You can use an electric hair dryer to heat the seal.
• Make sure that your refrigerator is level. See Leveling your refrigerator on page 12.
• Make sure that the top of your refrigerator is tilted backward about 0.4" (10 mm) to 0.6" (15 mm). See Leveling your refrigerator on page 12.
The temperature is too hot
• You may have left the doors open too long or opened them too frequently.
• Make sure that no obstacle is keeping the doors from closing correctly.
• Adjust the refrigerator or freezer compartment temperature. See Setting the refrigerator temperature on page 22 or Setting the freezer temperature on page 22.
• Your refrigerator may not have enough clearance from walls or the ceiling. See Providing correct ventilation on page 10.
The temperature is too cold
• Adjust the refrigerator or freezer compartment temperature. See Setting the refrigerator temperature on page 22 or Setting the freezer temperature on page 22.
Ice is not dispensing.
• After you install the water supply line, you should wait 12 hours before you try dispensing ice. If the water is not sufficiently cooled, your refrigerator will take longer to make ice.
• Make sure that the water line is connected and the water valve open. See Connecting the water supply on page 19.
• Make sure that the ice dispenser is not in off mode.
• Make sure that no ice is blocking the ice maker bucket or ice chute.
• If the water pressure is less than 30 psi, try installing a booster pump to compensate for the low pressure.
• Make sure that the freezer compartment temperature is not set too warm. Try setting the freezer temperature lower. See Setting the freezer temperature on page 22.
• If you just dispensed a large amount of ice, wait at least 90 minutes before dispensing more ice.
Water is not dispensing.
• Make sure that the water line is connected and the water valve open. See Connecting the water supply on page 19.
• Make sure that the water line is not kinked or bent.
• Make sure that the refrigerator compartment temperature is not set too low. If the temperature is too low, the water in the dispenser tank may freeze. See Setting the refrigerator temperature on page 22.
• Make sure that the water filter is correctly installed. See Replacing the water filter on page 27.
A layer of frost occurs in one of the compartments.
• A layer of frost may occur on the compartment’s interior walls if the freezer is opened frequently or kept open too long.
• Make sure that the air outlets are not blocked by food.
• Make sure that the doors are fully closed.
To remove the frost, see Defrosting the freezer compartment on page 27.
The refrigerator door is hard to open.
• When you open the refrigerator door, warm air rushes inside. When you close the door, the warm air rushes to the condenser which causes a vacuum. This causes the door to be hard to open for about 10 to 15 seconds after closing.
• If the door is hard to open at other times, try rubbing paraffin wax or petroleum jelly along the edges of the entire gasket. Paraffin wax is used for canning and is safe for use around food.
The compressor runs for a long time or turns on and off frequently.
The compressor runs longer if:
• The room temperature is high.
• You just added a large amount of food. Wait for the food to freeze, then check again.
• You open and close the door frequently.
• The door gasket is dirty. Clean the gasket. See Cleaning your refrigerator on page 26.
• Your refrigerator has been disconnected for a period of time. Wait for your refrigerator to cool (about four hours) before adding food.
• You have the temperature set too low.
The light inside the refrigerator does not turn on.
• Make sure that your refrigerator is plugged into a working outlet.
• If a door stays open too long, your refrigerator automatically turns off the light. Close then open the door again.
• Check to see if the light is damaged. If the light is damaged, have it replaced by a qualified service technician. See Replacing the LED light on page 30.
The refrigerator makes unusual noises or vibrations.
The following sounds are normal:
• Compressor running noises.
• Air movement noise from the small fan motor in the freezer compartment or other compartments.
• Gurgling sound similar to water boiling.
• Popping noise during automatic defrosting.
• Clicking noise before the compressor starts.
• Clicking noise when you get the water.
• Motor running noises when you get the ice.
Other unusual noises or vibrations may occur:
• If you have items on the top of your refrigerator. Remove the items.
• If your refrigerator is not level. See Leveling your refrigerator on page 12.
• If your refrigerator is touching walls. Move it away from the walls.
• If the shelves or drawers are installed incorrectly
The outside of the refrigerator is hot.
Heat dissipation from the condenser may make the outside feel hot. This is normal and happens if:
• The room temperature is high.
• You have too much food in your refrigerator.
• You open and close the doors excessively.
Water condenses on the outside of the refrigerator.
• Condensation on the exterior surface and door seal is normal when the room humidity is high.
• When you open the door, warm, moist outside air meets the cold dry air inside your refrigerator. This is normal.
Specifications
General
Water filter
Chlorine Taste and Odor Reduction
This system has been tested according to NSF/ANSI 42 and 53 for reduction of the substances listed below. The concentration of the indicated substances in water entering the system was reduced to a concentration less than or equal to the permissible limit for water leaving the system, as specified in NSF/ANSI 42 and 53.


 icon lights.
 icon lights.
 icon lights.
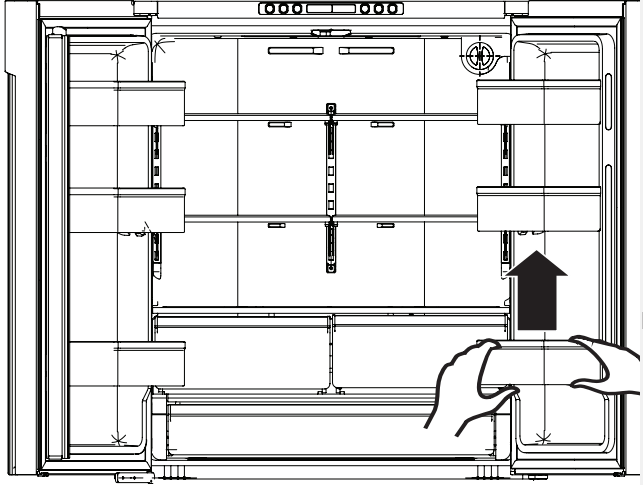

 icon blinks to remind you to replace the water filter. For the best water quality, you should replace the water filter about every six months even if the icon is not blinking.