Loading ...
Loading ...
Loading ...
OPERATING INSTRUCTIONS
1. Install Battery/Learning Process:
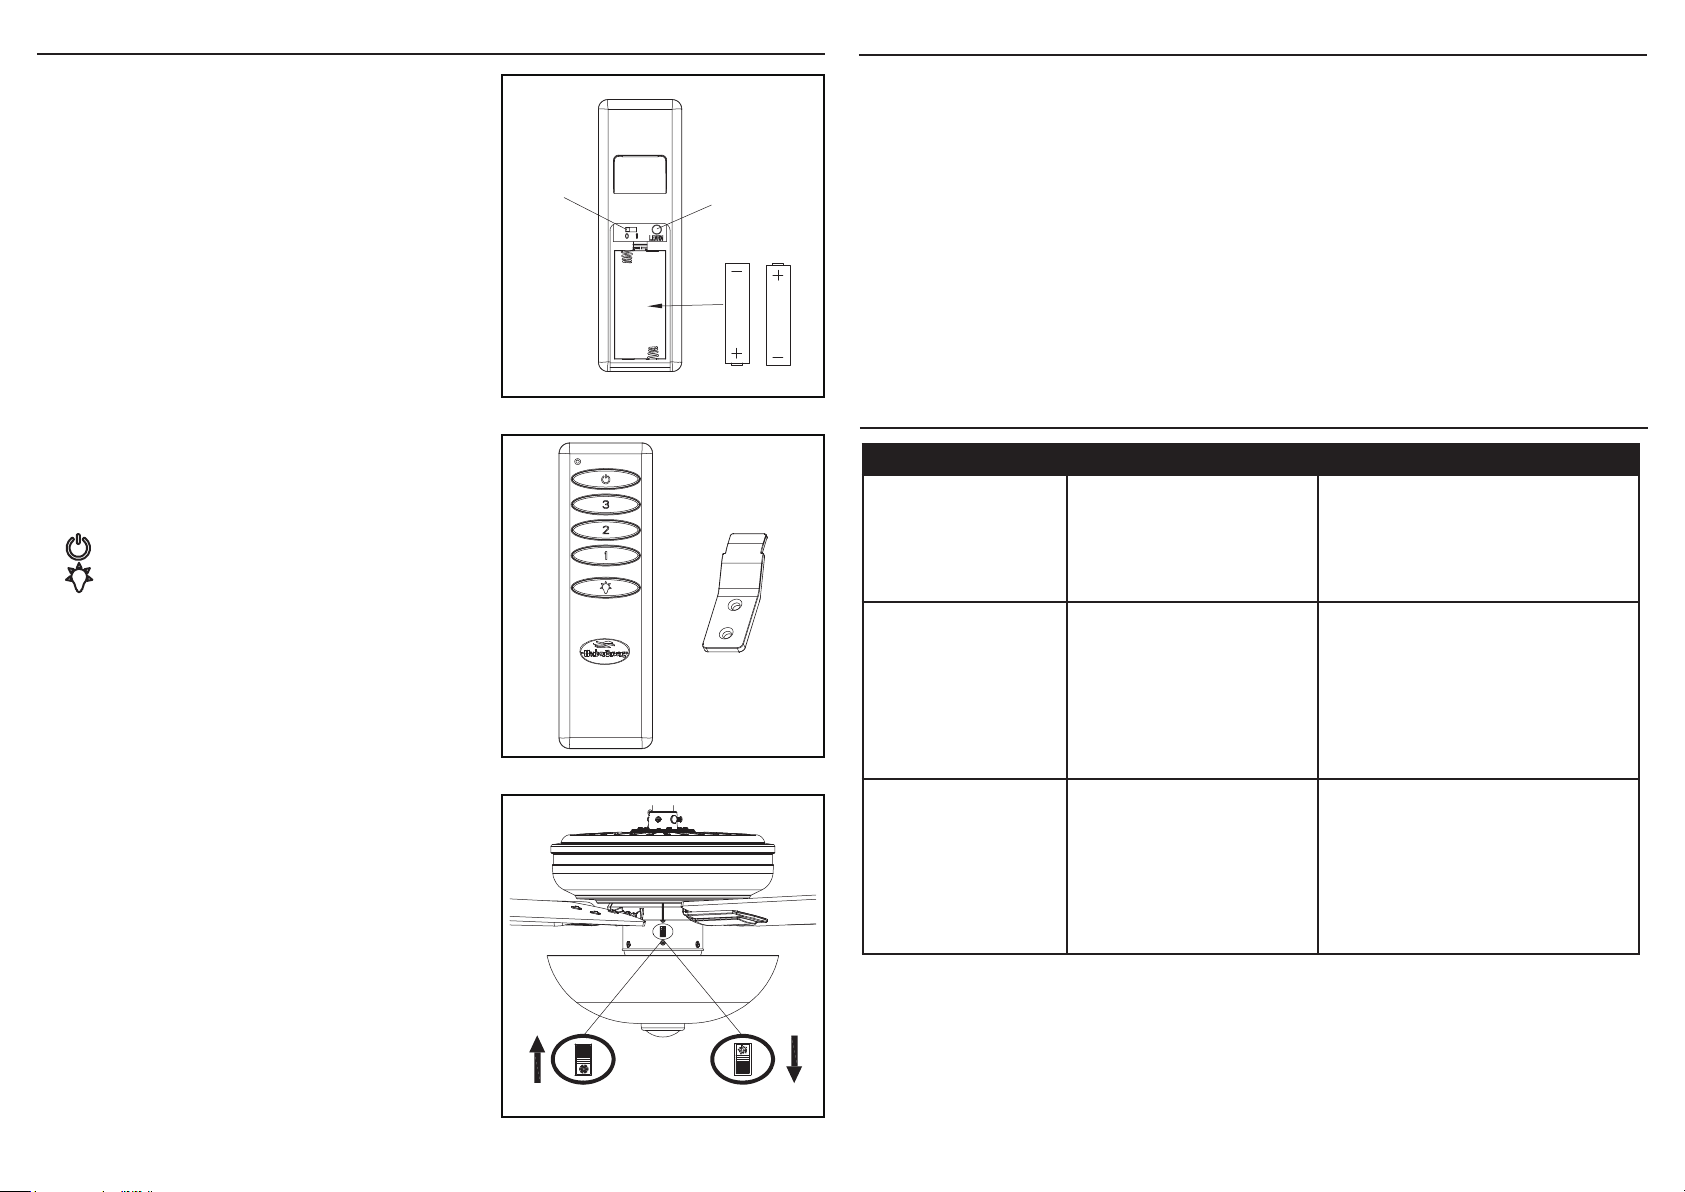
Remove the battery cover from the back of the remote
found in the remote pack (K). Insert the batteries from
the remote pack (K) into the remote; ensure polarity
of batteries matches the polarity indicated in the
battery compartment -- positive (+) to positive (+) and
negative (-) to negative (-). Replace the battery cover.
Slide the dip switch in the battery compartment
to the “1” setting within 30 seconds of turning the
fan’s power on, press and hold the “Learn” button
on the remote control for 1 second. Once pairing is
successful , the fan’s blades will begin to spin.
2. Fan Control/Dimmer:
NOTE: The remote control has already been paired to
the fan for your convenience. If you have two of the same
model fans in your home, please follow the steps below
to control each fan independently.
Learn Key
Dip
Switch
1- Low speed
2- Medium speed
3- High speed
Turns fan off
Turns light on or off
1. REVERSE SWITCH:
When the season changes
, you may want to change
the direction the fan blades spin. To switch between
clockwise and counterclockwise rotation, ip the fan
reversal switch.
WARNING: Wait for fan to stop before reversing
switch.
• In cooler weather, clockwise rotation creates an
upward airow, which moves hot air from the
ceiling into the room. Push the switch UP.
• In warmer weather, counterclockwise rotation
creates a downward airow, which cools the air.
Push the switch DOWN.
Sun icon
Snowflake icon
1514
TROUBLESHOOTING
CARE AND MAINTENANCE
• Important: Shut off main power supply before beginning any maintenance.
• Do not use water or detergents when cleaning the fan or fan blades. A dry dust cloth or
lightly dampened cloth will be suitable for most cleaning.
• Clean fan housing with only a soft brush or lint-free cloth to avoid scratching the nish.
Clean blades with a lint-free cloth. You may occasionally apply a light coat of furniture
polish to blades for added protection.
• At least twice a year, tighten all screws and lower canopy to check mounting bracket
screws and downrod assembly.
• Bulb replacement: Use 6.5-watt max. medium base E26-type A15 shape LED bulbs or
incandescent bulbs up to 60-watts max..
• Battery replacement: Use 2 x AAA Lithium battery for remote control.
PROBLEM POSSIBLE CAUSE CORRECTIVE ACTION
Fan does not move. 1. Faulty wire
connection.
2. Reverse switch not
engaged.
1. Turn power off. Loosen
canopy, check all connections.
2. Push switch rmly either way.
Noisy operation. 1. Blades are loose.
2. Cracked blade.
3. Unapproved speed
control.
1. Tighten all blade screws.
2. Replace blades (call customer
service).
3. Replace with an approved
speed control device.
Excessive wobbling. 1. The blades are loose.
2. Blade brackets
incorrectly attached.
3. The fan is not
securely mounted.
4. Fan too close to
vaulted ceiling.
1. Tighten all blade screws.
2. Reinstall blade brackets.
3. Turn power off. Carefully
loosen the canopy and
remount securely.
4. Lower fan or move it to
another location.
NOTE: For the dimmer function, press and hold the light
button. Light will dim. Release the light button when light
is at desired level.
NOTE: This remote control has a memory function. The
receiver stores the fan speed and light setting when the
fan is turned off. When the fan is turned on again, it will
start with the most recent settings.
Loading ...
Loading ...
Loading ...