Loading ...
Loading ...
Loading ...
1312
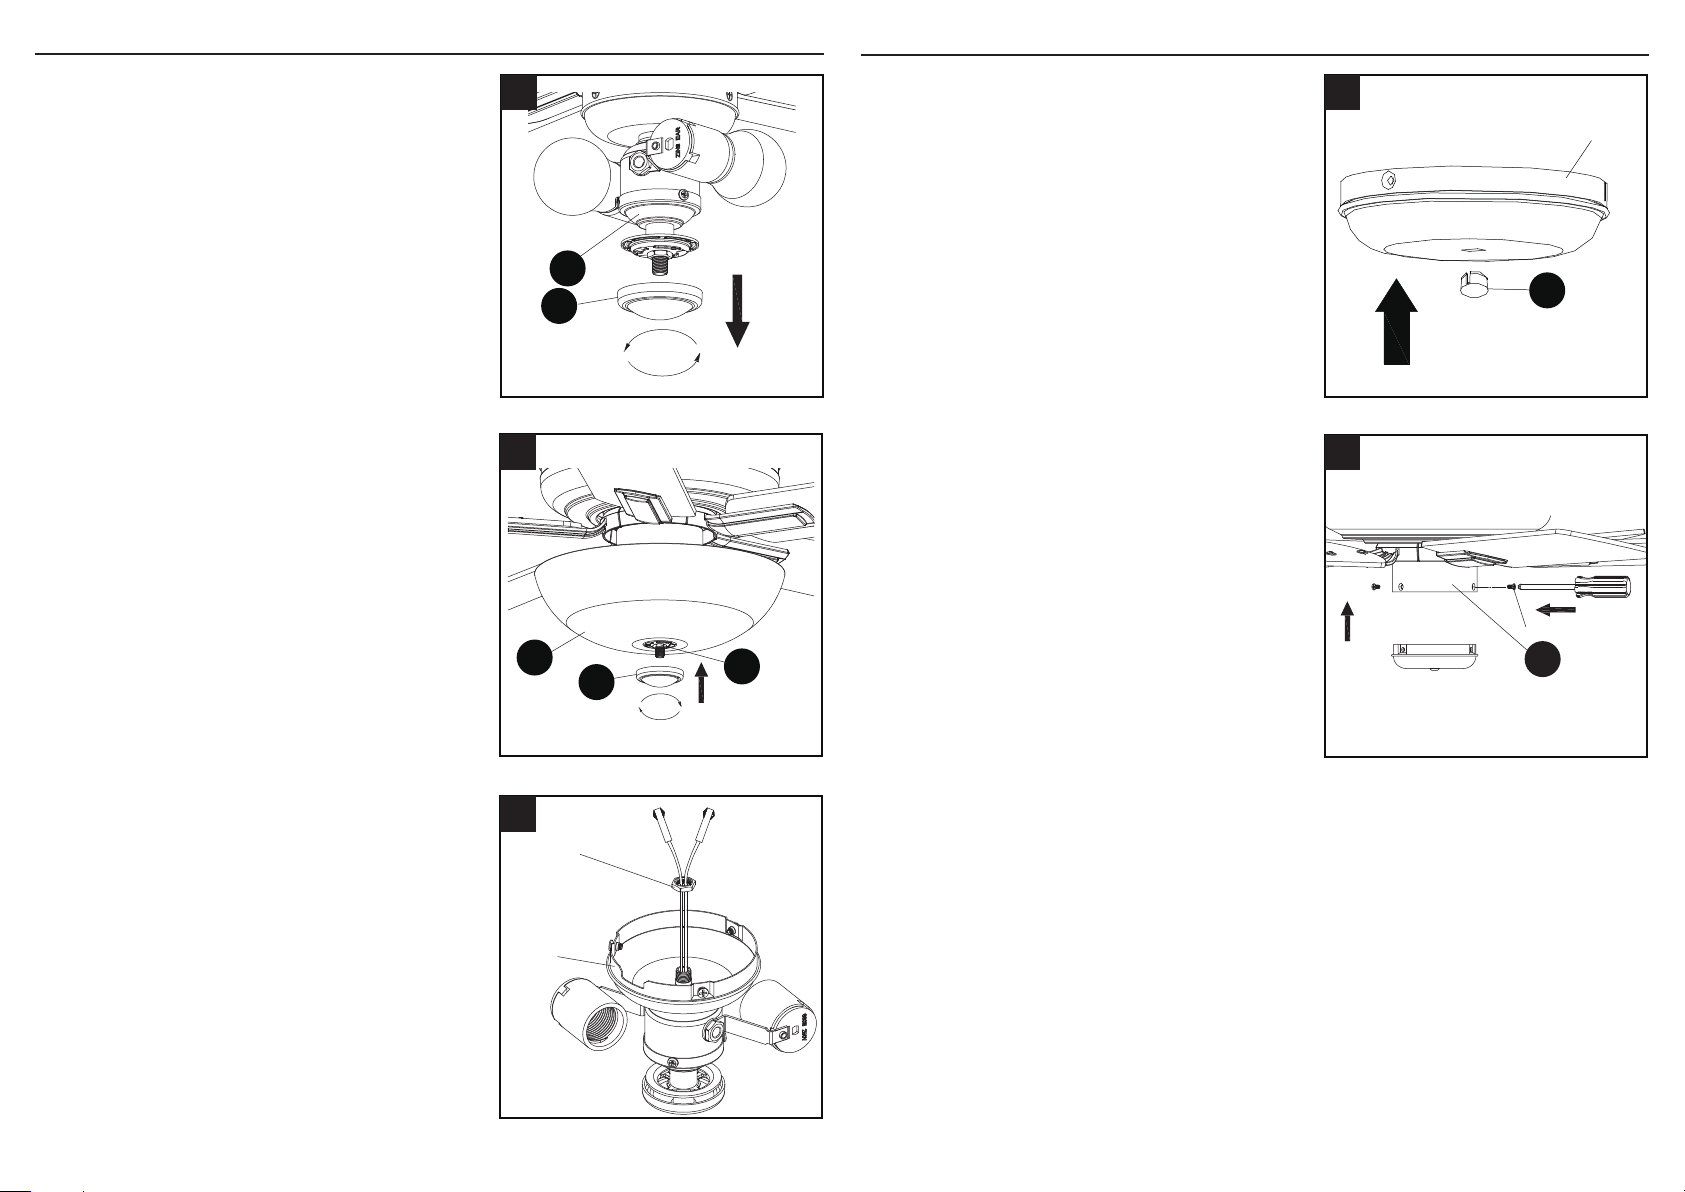
FINAL INSTALLATION
8. Remove the preassembled bowl cap (H) from
the light kit (G).
G
H
8
9. Place glass (J) on the preassembled pipe
on light kit (G) until it is ush with the
preassembled metal disk. Secure with
previously removed bowl cap (H). Tighten
securely.
Installation is now complete.
G
J
H
9
To install the fan WITHOUT the light kit (G),
you must special order a plug (XX) for the switch
housing cover of the light tter assembly from our
customer service department at
1-866-473-4537,
8 a.m. - 6 p.m., EST, Monday - Thursday,
8 a.m. - 5 p.m., EST, Friday.
FINAL INSTALLATION
Hex Nut
Switch
housing
cover
10
10. Remove the hex nut preassembled inside the
switch housing cover of the light tter assembly
(G) and detach the switch housing cover.
XX
Switch
housing
cover
Switch
housing
cover plug
(special order)
11
Screw
D
12
11. Press the plug (XX) into the center hole of the
switch housing cover.
12. Remove and save the three preassembled
screws from the switch housing cover. Align the
holes in the switch housing cover and the motor
assembly, re-installing the previously removed
screws to attach the two parts. Tighten securely
Installation is now complete.
Loading ...
Loading ...
Loading ...