Loading ...
Loading ...
Loading ...
1110
FINAL INSTALLATION
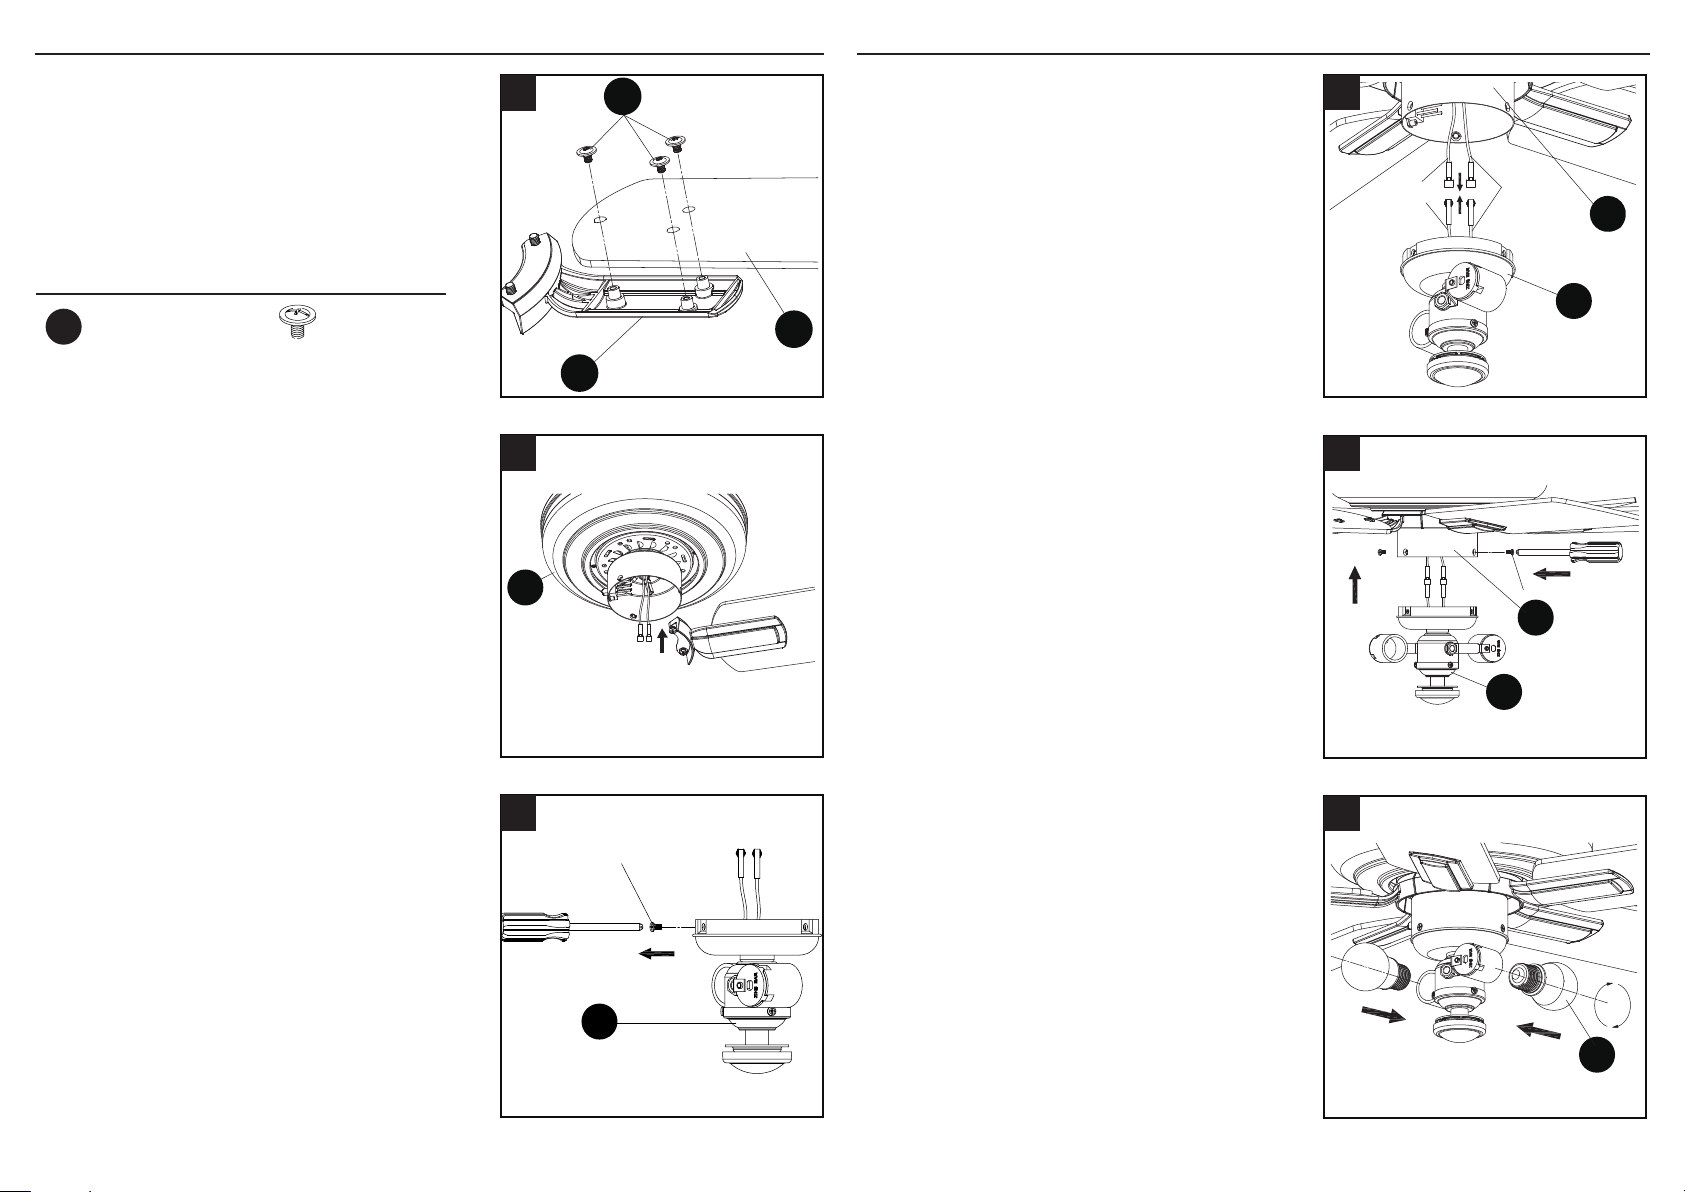
2. Attach blade (F) to a blade bracket (E) using
three blade screws (BB).
Repeat for remaining blade assemblies.
3. Align the holes of the blade bracket (E)
and motor assembly (D). Install the blade
assembly to the motor assembly (D) using
the preinstalled blade bracket screws. Tighten
each blade bracket securely.
Repeat this step for the remaining blade
assemblies.
To install the fan WITHOUT the light kit (G),
proceed to page 12 step 10.
To install the fan WITH the light kit (G),
4. Remove and save the three preassembled
screws from the switch cover on the light kit (G).
BB
E
F
2
D
3
Screw
G
4
Hardware Used
Blade Screw x 15
BB
5. Connect the adapter plug of the BLUE wire
from the fan motor assembly (D) to the
adapter plug of the BLACK wire from the light
kit (G) and connect the adapter plug of the
WHITE wire from the fan motor assembly (D)
to the adapter plug of the WHITE wire from
the light kit (G).
D
White
Black
Blue
G
5
FINAL INSTALLATION
WARNING: To avoid possible re or shock,
power should be turned off prior to any removal
of the light kit.
6. Attach light kit (G) to the bottom of the motor
assembly (D) by aligning the holes in each
part and re-installing the previously removed
screws (Step 4, page 10). Tighten securely.
7. Install bulbs (I) into sockets in light kit (G).
G
Screw
D
6
I
7
Loading ...
Loading ...
Loading ...