Loading ...
Loading ...
Loading ...
20
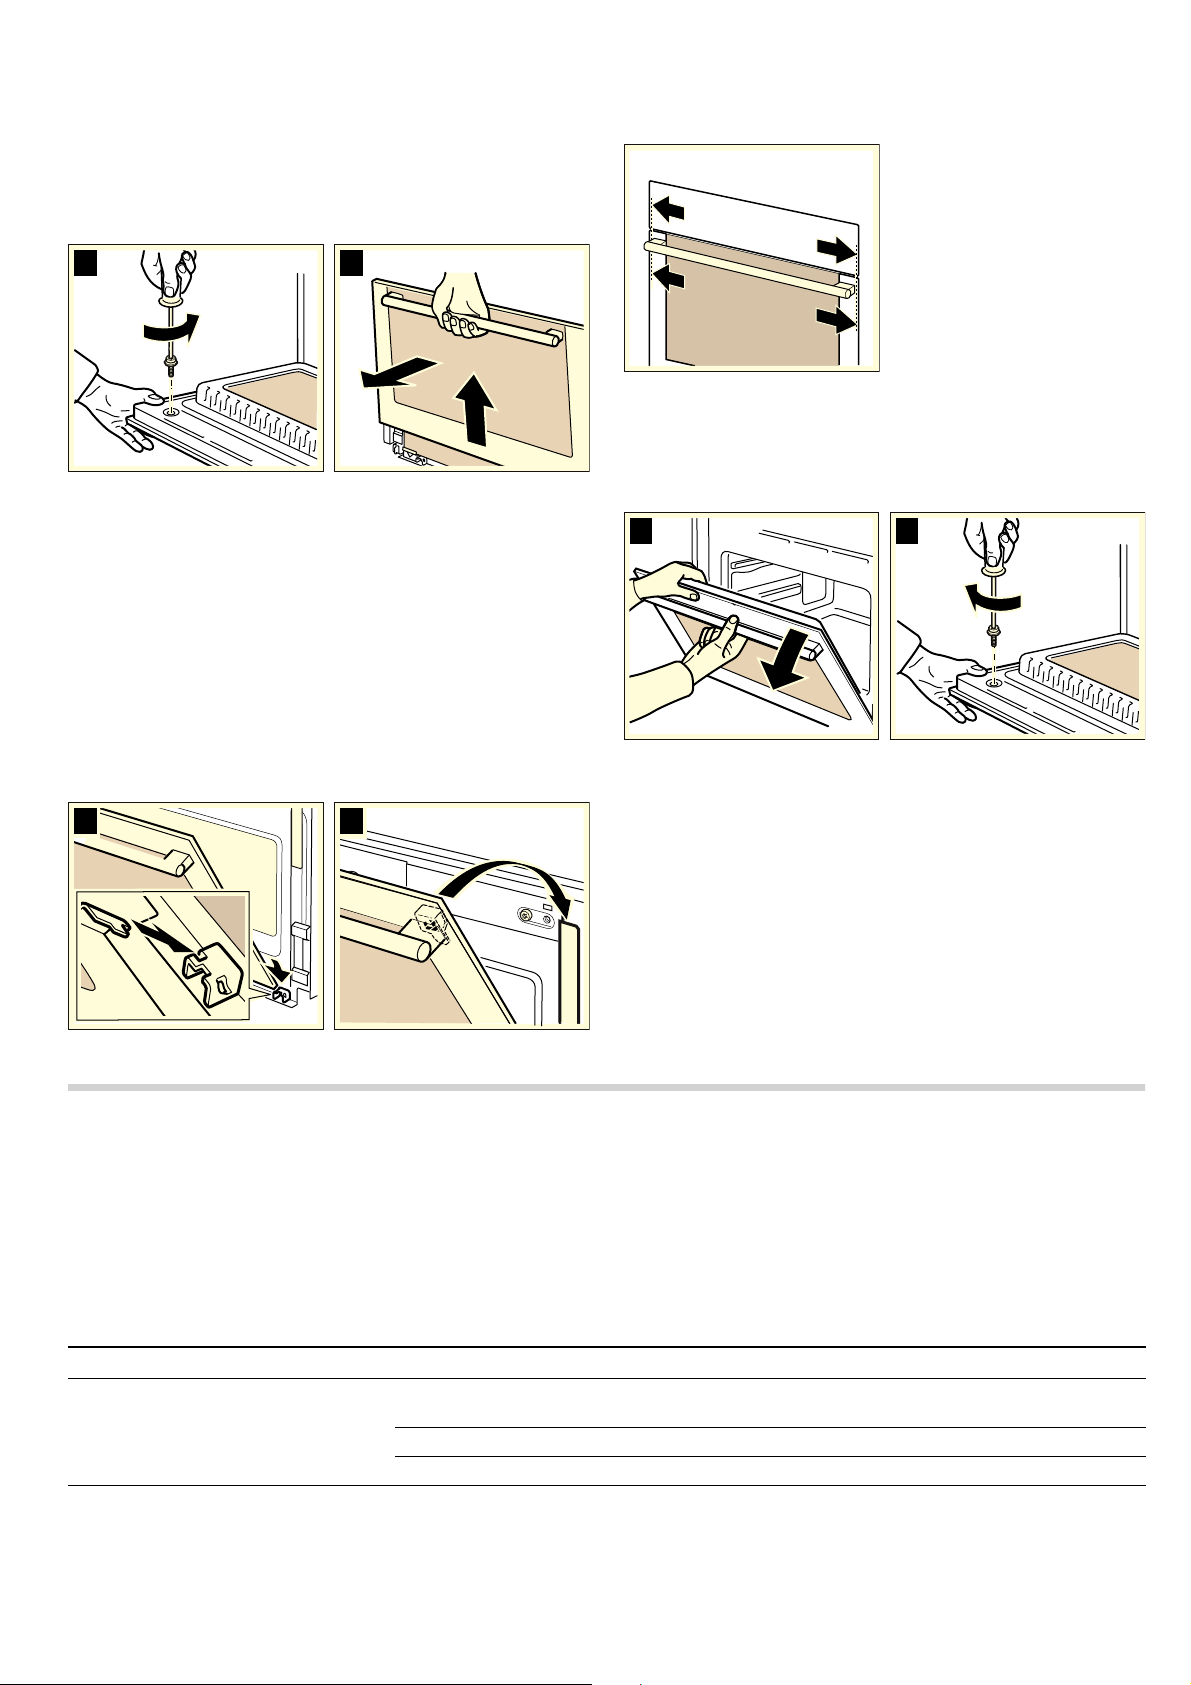
Removal
1. Open the oven door.
2. Undo the two screws on the door using a TORX screwdriver
(TORX 20). Hold the door panel firmly while doing this (Fig.
A).
3. Position the door at an angle and pull out the panel upwards
by the door handle. (Fig. B).
4. Close the door.
Note: Clean the glass panels with glass cleaner and a soft
cloth.
: Risk of injury!
Scratched glass in the appliance door may develop into a
crack. Do not use a glass scraper, sharp or abrasive cleaning
aids or detergents.
Refitting
1. Insert the door panel into the guide with both hands. (Fig. A).
2. Push the door panel downwards, lift it slightly and hook it in
at the top (Fig. B).
Caution!
Make sure that the door panel is sitting flush with the control
panel.
3. Fully open the door, while holding the panels firmly with one
hand (Fig. C).
4. Push the door downwards again and tighten the screws
hand-tight using a TORX screwdriver (TORX 20) and close
the door. (Fig. D).
Caution!
You must not use the oven again until the panels have been
properly refitted.
Malfunction table
Malfunctions often have simple explanations. Please refer to the
malfunction table before calling the after-sales service.
If a meal does not turn out exactly as you wanted, refer to the
Tested for you in our cooking studio section, where you will
find plenty of cooking tips and tricks.
: Risk of electric shock!
Incorrect repairs are dangerous. Repairs may only be carried
out by one of our trained after-sales engineers.
Malfunction table
$
%
$
%
&
'
Problem Possible cause Remedy/information
The appliance does not work. Faulty circuit breaker Look in the fuse box and check that the circuit
breaker is in working order.
Plug not plugged in Plug it in.
Power cut Check whether the kitchen light works.
"Basic setting Clock 00:00" appears in
the display. The time displayed is not
the current time.
Power cut Turn the rotary selector to set the correct time,
then press the
0 button.
Loading ...
Loading ...
Loading ...