Loading ...
Loading ...
Loading ...
15
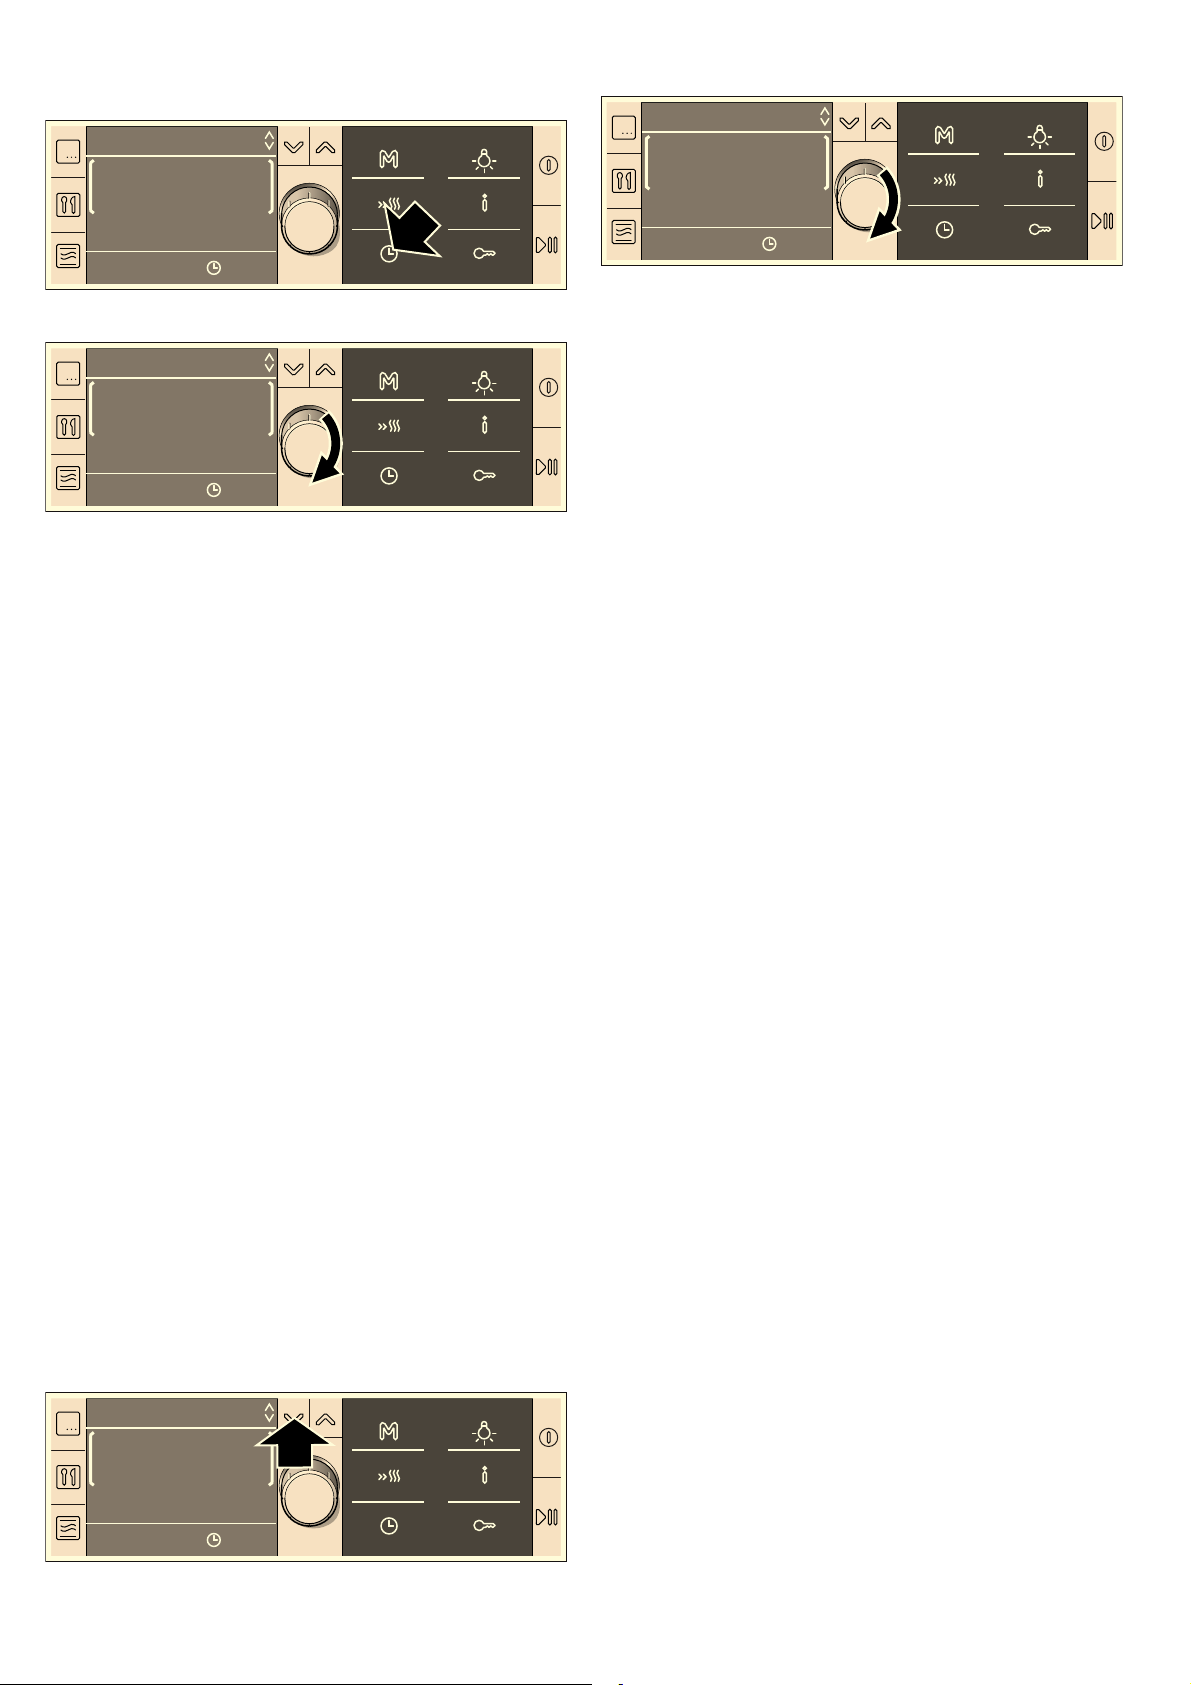
1. Press the 0 button.
The time-setting options menu appears.
2. Turn the rotary selector to set the cooking time.
3. Press the 0 button.
The time-setting options menu closes.
4. If operation has not yet been started,
press the
n button.
You can see the cooking time counting down in the status bar.
The cooking time has elapsed
A signal sounds. The oven stops heating. The status bar shows
the cooking time as 00:00:00. You can cancel the signal early
by pressing the
0 button.
Cancelling the cooking time
Press the
0 button to open the menu. Set the cooking time
to 00:00:00 using the rotary selector. Press the
0 button to
close the menu.
Changing the cooking time
Press the
0 button to open the menu. Change the cooking
time using the rotary selector. Press the
0 button to close the
menu.
Setting a later end time
Please remember that easily spoiled foods must not be allowed
to remain in the cooking compartment for too long.
Example: you put the food in the cooking compartment at 9:30
am. It takes 45 minutes to cook and will be ready at 10:15, but
you would like it to be ready at 12:45 instead. Change the end
time from 10:15 to 12:45. The oven goes into standby.
Cooking starts at 12:00 and finishes at 12:45.
In some programmes, it is not possible to move the end time.
Moving the end
Prerequisite: The selected operation has not already begun. A
cooking time must be set. The time-setting options menu
0 is
open.
1. Switch to "End" using the X button.
The time at which operation is ended is displayed in the
second line.
2. Set a later end time by turning the rotary selector.
3. Press the 0 button to close the time-setting options menu.
4. Confirm by pressing the n button.
The setting is adopted. The oven is in
0... standby. The end
time is displayed in the status bar. When operation starts, the
cooking time starts counting down in the status bar.
The cooking time has elapsed
A signal sounds. The oven stops heating. The status bar shows
the cooking time as 00:00:00. You can cancel the signal early
by pressing the
0 button.
Correcting the end time
This is possible while the oven is in standby. Press the
0
button to open the menu. Press the
X button and correct the
End time using the rotary selector. Press the
0 button to close
the menu.
Cancelling the end time
This is possible while the oven is in standby. Press the
0
button to open the menu. Press the
X button and reset the
End time using the rotary selector. Press the
0 button to close
the menu.
Setting the timer
The timer runs independently of the oven. You can use it as a
kitchen timer and set it at any time.
1. Press the 0 button.
The time-setting options menu appears.
2. Set the running time for the timer using the rotary selector.
3. Press the 0 button to close the Time-setting options menu.
The display returns to its previous state. The
U symbol for the
timer appears, and the time can be seen counting down.
When the time has elapsed
A signal sounds. The time has elapsed. The display shows
U 00:00. You can cancel the signal earlier by pressing the 0
button.
Cancelling the timer time
Press the
0 button to open the time-setting options menu.
Using the rotary selector, turn the time back to 00:00. Press
the
0 button to close the menu.
Changing the timer time
Press the
0 button to open the time-setting options menu. Use
the rotary selector within the next few seconds to change the
time on the timer. Press the
0 button to close the menu.
Setting the clock
The oven must be switched off before you can set or change
the clock.
Following a power cut
Following a power cut, the "Basic settings" heading appears in
the display.
1. Set the right time using the rotary selector.
2. Press the 0 button.
The time is applied.
7LPHVHWWLQJRSWQ
([LWZLWK
&RRNLQJWLPH
(QG
7LPHVHWWLQJRSWQ
([LWZLWK
&RRNLQJWLPH
(QG
7LPHVHWWLQJRSWQ
([LWZLWK
7LPHU
(QG
7LPHVHWWLQJRSWQ
([LWZLWK
7LPHU
(QG
Loading ...
Loading ...
Loading ...