Loading ...
Loading ...
Loading ...
31
INSTALLATION
Check the appliance is electrically safe and gas sound when you have nished.
ArtNo.070-0014 - Stability bracket - Wall fitting
Cooker
Stability
bracket
Floor
Stability
location
bracket
Wall
ArtNo.070-0014 - Stability bracket - Wall fitting
Cooker
Stability bracket
Floor
Stability
location
bracket
Typical oor mounting
Alternate positions
for stability location
bracket
ArtNo.010-0004 Moving the cooker
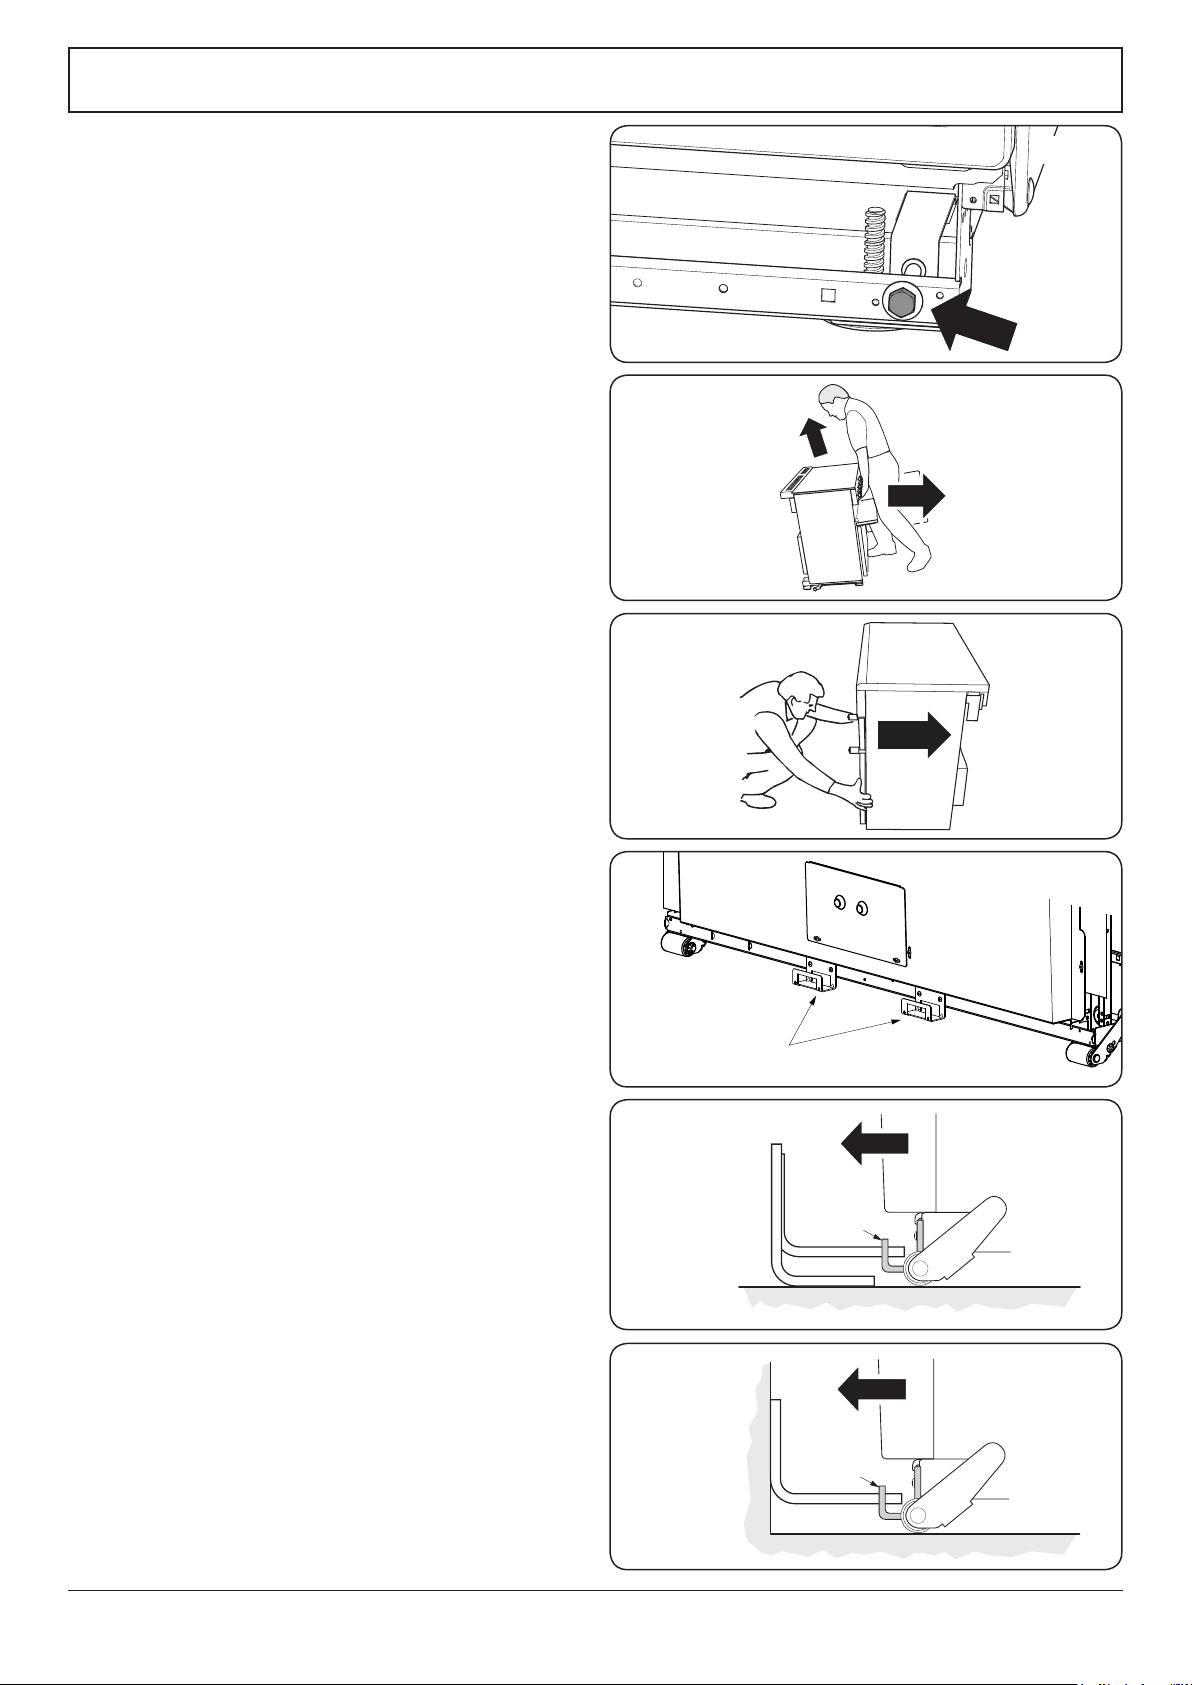
Lowering the Two Rear Rollers
To adjust the height of the rear of the cooker, rst t a 13 mm
spanner or socket wrench onto the hexagonal adjusting nut
(Fig. 7.5).
Rotate the nut – clockwise to raise – counter-clockwise to
lower. Make 10 complete (360°) turns clockwise.
Make sure you lower BOTH REAR ROLLERS.
Completing the Move
Unfold the rear edge of the cardboard base tray. Open the
grill door and right-hand oven door so that you can get a
good grip on the bottom of the fascia panel as you move the
oven (Fig. 7.6).
Carefully push the cooker backwards o the base tray.
Remove the base tray.
Position the cooker close to its nal position, leaving just
enough space to get behind it (Fig. 7.7).
DO NOT use the door handles or control knobs to
manoeuvre the cooker.
Fitting the Stability Bracket
If you are using a stability bracket; rst attach the bracket
location device to the rear of the cooker (Fig. 7.8). Then
adjust the bracket to engage through the slot of the device
(Fig. 7.9 and Fig. 7.10).
Repositioning the Cooker Following
Connection
If you need to move the cooker once it has been connected,
make sure it is switched o at the supply switch before
gripping under the fascia panel and lifting the front of the
cooker slightly (Fig. 7.6). Check behind the cooker to make
sure that the electricity cable is not caught.
As you progress, always make sure that the cable has
sucient slack to allow the cooker to move.
When you replace the cooker, check behind it again once
more to make sure that the electricity cable is not caught or
trapped.
Levelling the Cooker
It is recommended that you use a spirit level on a shelf in one
of the ovens to check for level.
Place the cooker in its intended position. Take care not to
twist it within the gap between the kitchen units as damage
may occur to the cooker or units.
The front feet and rear rollers can be adjusted to level the
cooker.
To adjust the height of the rear of the cooker use a 13 mm
spanner or socket wrench to turn the hexagonal adjusting
nuts at the front bottom corners of the cooker.
To set the front turn the feet bases to raise or lower.
Fig. 7.5
Fig. 7.6
Fig. 7.7
Fig. 7.8
Fig. 7.9
Fig. 7.10
Loading ...
Loading ...
Loading ...