Loading ...
Loading ...
Loading ...
15
C
A B
C
A B
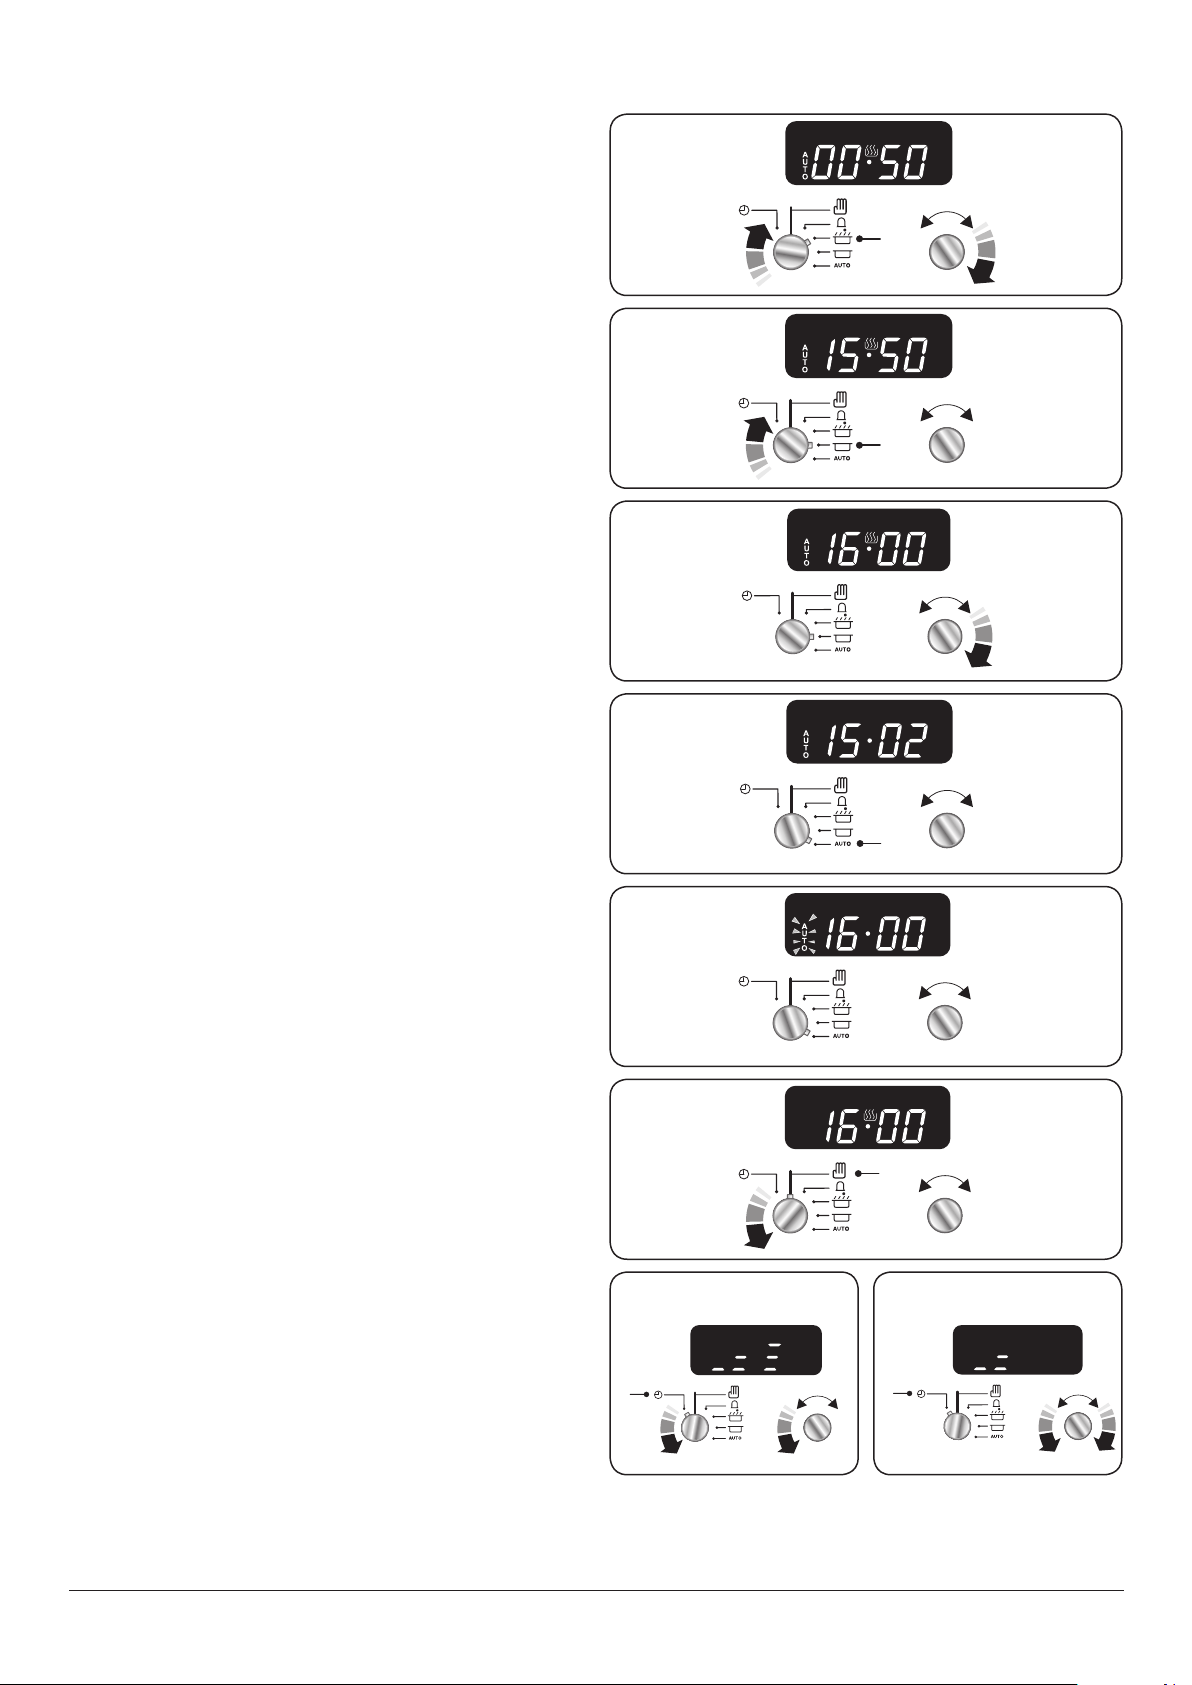
To Start and Stop the Oven
Automatically
The timer allows you to automatically start and stop by a
combination of the length of the cooking time and the stop
time. Giving you the exibility to cook casseroles etc while
you are out. You cannot set the actual start time.
1. Turn the Timer (A) knob to the Cook Time (F) setting.
Turn the Adjusting (B) knob clockwise to set the length
of the cooking time required (Fig. 3.9).
2. Turn the Timer (A) knob to the Stop Time (G) setting
(Fig. 3.10). The display will show the current time of day
plus the ‘cook time’ you just set.
3. Turn the Adjusting (B) knob to set the time of day you
want the oven to stop cooking (Fig. 3.11).
4. Set the oven to the required cooking temperature and
function mode.
5. Turn the Timer (A) knob to the Auto (H) setting
(Fig. 3.12). If the display shows the current time and the
word ‘AUTO’ the oven is set to turn on and o.
6. When the program starts the oven, the cooking symbol
will appear on the display. Once the specied time has
elapsed it will emit an alarm and the Multifunction Oven
will stop working. The ‘Cooking’ symbol on the display
will disappear and the word ‘AUTO’ will ash (Fig. 3.13).
7. Once the specied time has elapsed it will emit an
alarm. There are two ways to cancel the alarm, refer to
“Cancel the Timer Alarm” on page 13
• The ‘cook period’, which is the length of time you want
the oven to cook for.
• The ‘stop time’, which is the time of day you want the
oven to stop cooking.
Reset to Manual Cooking
To cancel any automatic settings turn the Timer (A) knob to
the Manual (D) setting and release (Fig. 3.14).
NOTE: Whilst this operation cancels all automatic program
settings, it does not cancel the minute minder.
Beeper Tone Adjustment
The beeper tone can be adjusted to three dierent levels.
Turn the Timer (A) knob to the Clock (C) setting. Turn the
Adjusting (B) knob counter clockwise until the tone bars are
displayed (Fig. 3.15).
To adjust the tone of the alarm, release the Adjusting (B)
knob and then turn counter clockwise again (Fig. 3.16). The
tone of the alarm will change. Repeat these steps until the
desired alarm tone is set.
A B
D
A B
A B
G
A B
F
A B
Fig. 3.9
Fig. 3.10
Fig. 3.11
H
A B
Fig. 3.12
Fig. 3.13
Fig. 3.14
Fig. 3.15 Fig. 3.16
Loading ...
Loading ...
Loading ...