Loading ...
Loading ...
Loading ...
• 8 •
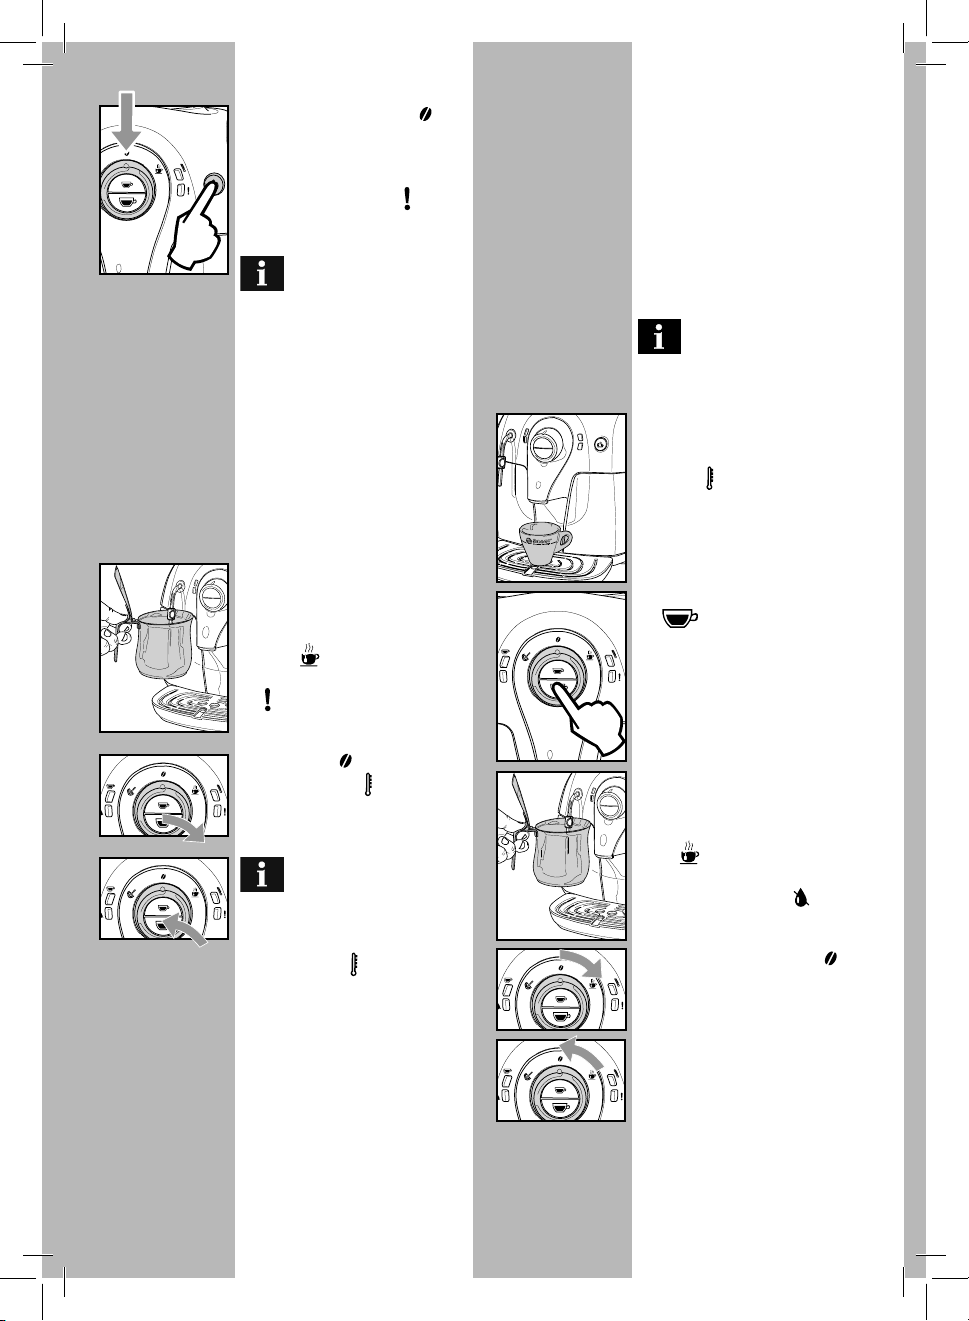
• Make sure control dial is on “ ” posi-
tion; if this is not the case, set it to that
position.
• Simply press the ON/OFF button to
turn the machine on; the “ “ light will
begin to blink rapidly indicating that
the water circuit must be primed.
Note: Before starting the
machine for the first time,
prime the water circuit.
Using the machine for the
first time or after a long
period of inactivity.
These simple operations will make it pos-
sible to always brew excellent co ee.
They have to be performed:
A) At rst start-up.
B) When the machine remains inactive
for a long time (more than 2 weeks).
Dispensed water must be em-
ptied into an adequate drain.
It is not suitable for food use.
1 Place a container under the dispensing
spout.
2 Before starting the procedure, check
that the “
“ light is steady on.
Priming the Water Circuit
• To prime the water circuit, place a
container under the hot water / steam
wand.
• Turn the control dial clockwise to set it
to the “
” position and wait.
When water steadily comes out and the
“
“ light will blink slowly - indicating
that the knob can be turned o - rotate
the control dial counter-clockwise to set
it back to the “
” position.
• At this point the “ “ light begins to
blink slowly, indicating that the ma-
chine is in warm-up mode.
When warm-up is complete,
the machine performs a rinse
cycle of the internal circuits.
• When the above steps are complete,
check that the “
“ light is on steady.
The machine is now ready for use.
• To brew co ee, dispense hot water or
steam, and for a proper use of the ma-
chine, carefully follow the instructions
provided.
3 Brew one co ee. Press and release the
“
“ button. The machine starts
brewing co ee.
4 Wait until brewing is complete and
remove the container.
5 Place a container under the steam wand
(Pannarello, if supplied).
6 Turn the selector switch clockwise to
the “
” position.
7 Dispense water until the no water
signal is displayed. The “
” light re-
mains steady on.
Now turn the selector switch counter-
clockwise to set it back to the “
” po-
sition.
8 At the end, fill the water tank again.
Then the products can be brewed as
described in the following sections
Loading ...
Loading ...
Loading ...