Loading ...
Loading ...
Loading ...
14 15
The Lava Stone BBQ allows you to BBQ meats and fish with out the use of oils. The lava stones placed
under the electric element enables a constant temperature (250°C) and the absorption of fats without
smell and vapor. The grid, tray and lava stones are easily removed for cleaning. Before turning on the
appliance, check that all parts are well installed. To turn on the BBQ rotate the knob to the desired
setting between “1” and “12”; the indicator light will be illuminated, indicating that the appliance is
working. When the knob is turned to the “0” position the appliance is turned OFF and the indicator
light will go out. Important: To grill, we recommend pre-heating the grill element and lava stones
for approximately 10 minutes on position “12”, this allows the lava stones to reach the required
temperature to vapourise the fats and liquids from the meat to enhance the flavour of the produce
being cooked.
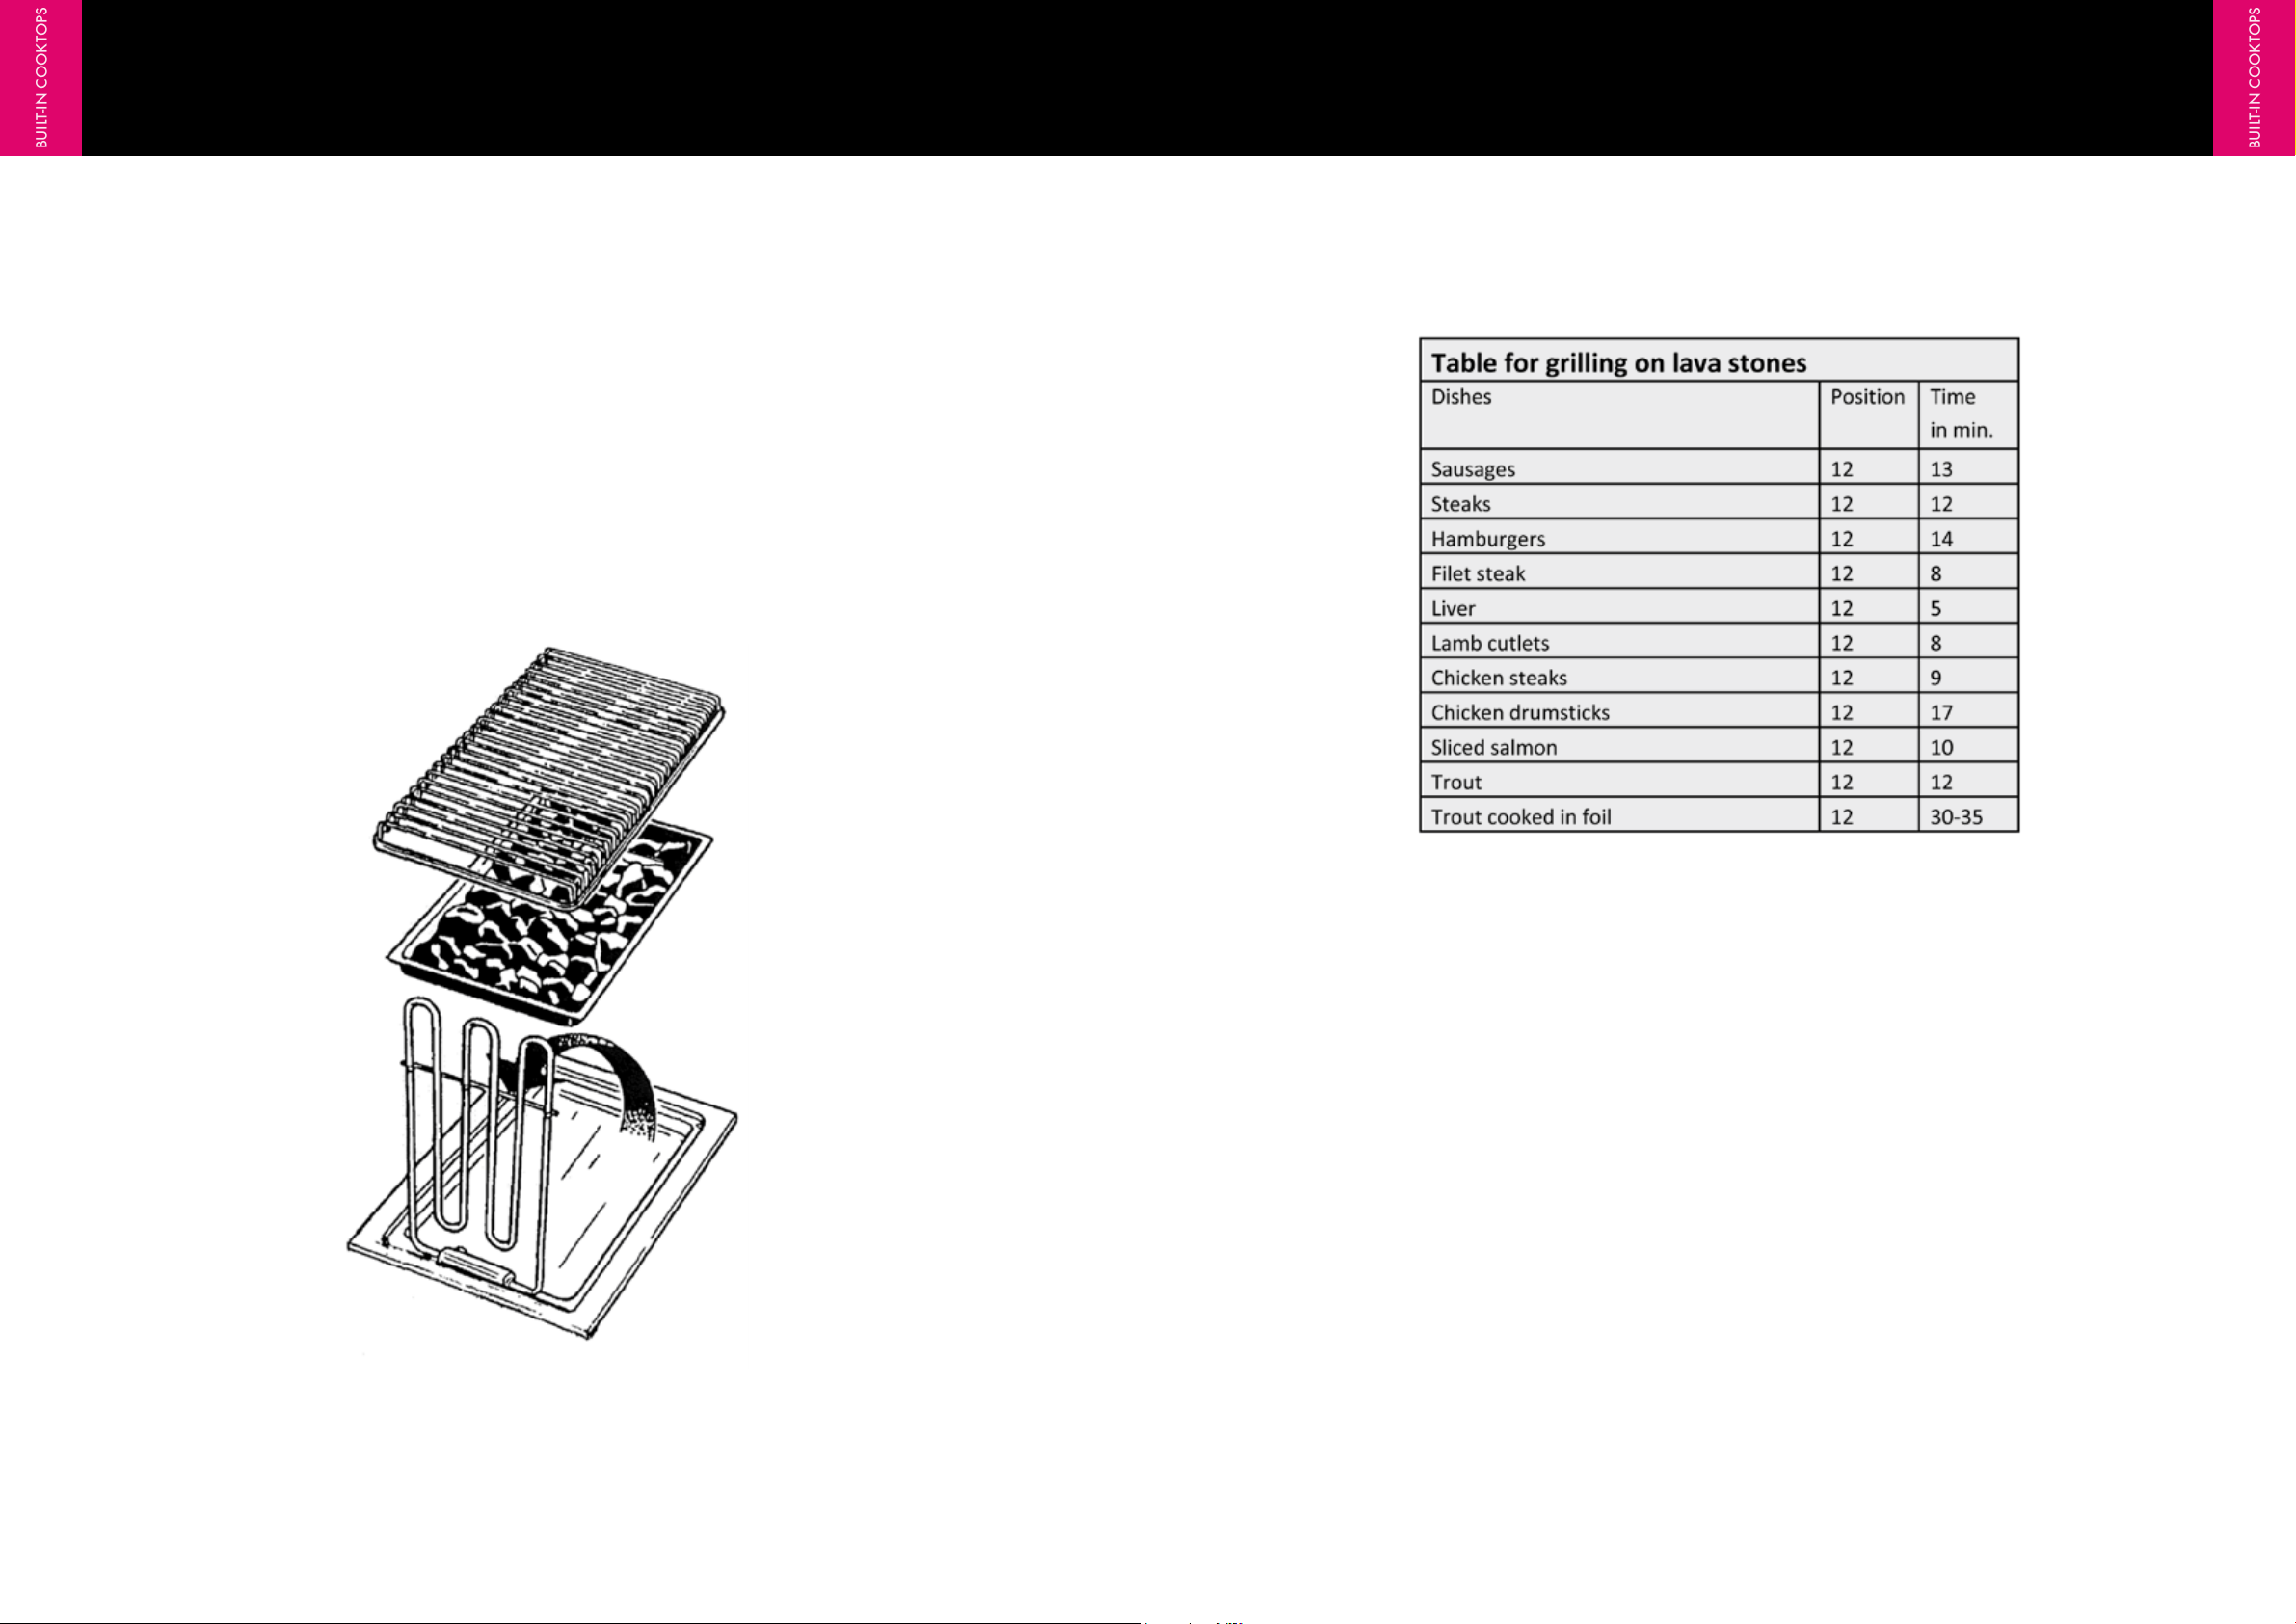
Cooking Table
CARING AND CLEANING FOR YOUR LAVA STONE BBQ
Before cleaning, disconnect the appliance from the mains. Cleaning must be carried out when the
appliance is cold. Remove all the removable parts. Remove the grid, lift the heating element and take
away the hob bed with lava stones. Stainless steel parts must be cleaned with water and detergent, then
dry with a soft cloth carefully. Under no circumstances use corrosive or abrasive detergent, this could
damage the appliance. Stainless steel, brass or copper parts must be treated by using the proper
products, thus keeping the brightness for a long time.
Control Panel and aluminium parts must be cleaned by means of de greasing detergent.
To clean the Lava Stones, you can wash them gently in hot soapy water and then allow them to dry well
before re-use. Alternatively, you can put them into a stocking or perforated sleeve/cloth, place them on the
top basket of your dishwasher and use a hot wash cycle with NO powder.
ELECTRIC BBQ (LAVA GRILL)
BUILT-IN COOKTOPS
BUILT-IN COOKTOPS
ILVE COOKTOPS OPERATING MANUAL ILVE COOKTOPS OPERATING MANUAL
Loading ...
Loading ...
Loading ...