Loading ...
Loading ...
Loading ...
22 23
Burners, Injectors & Mega-joules
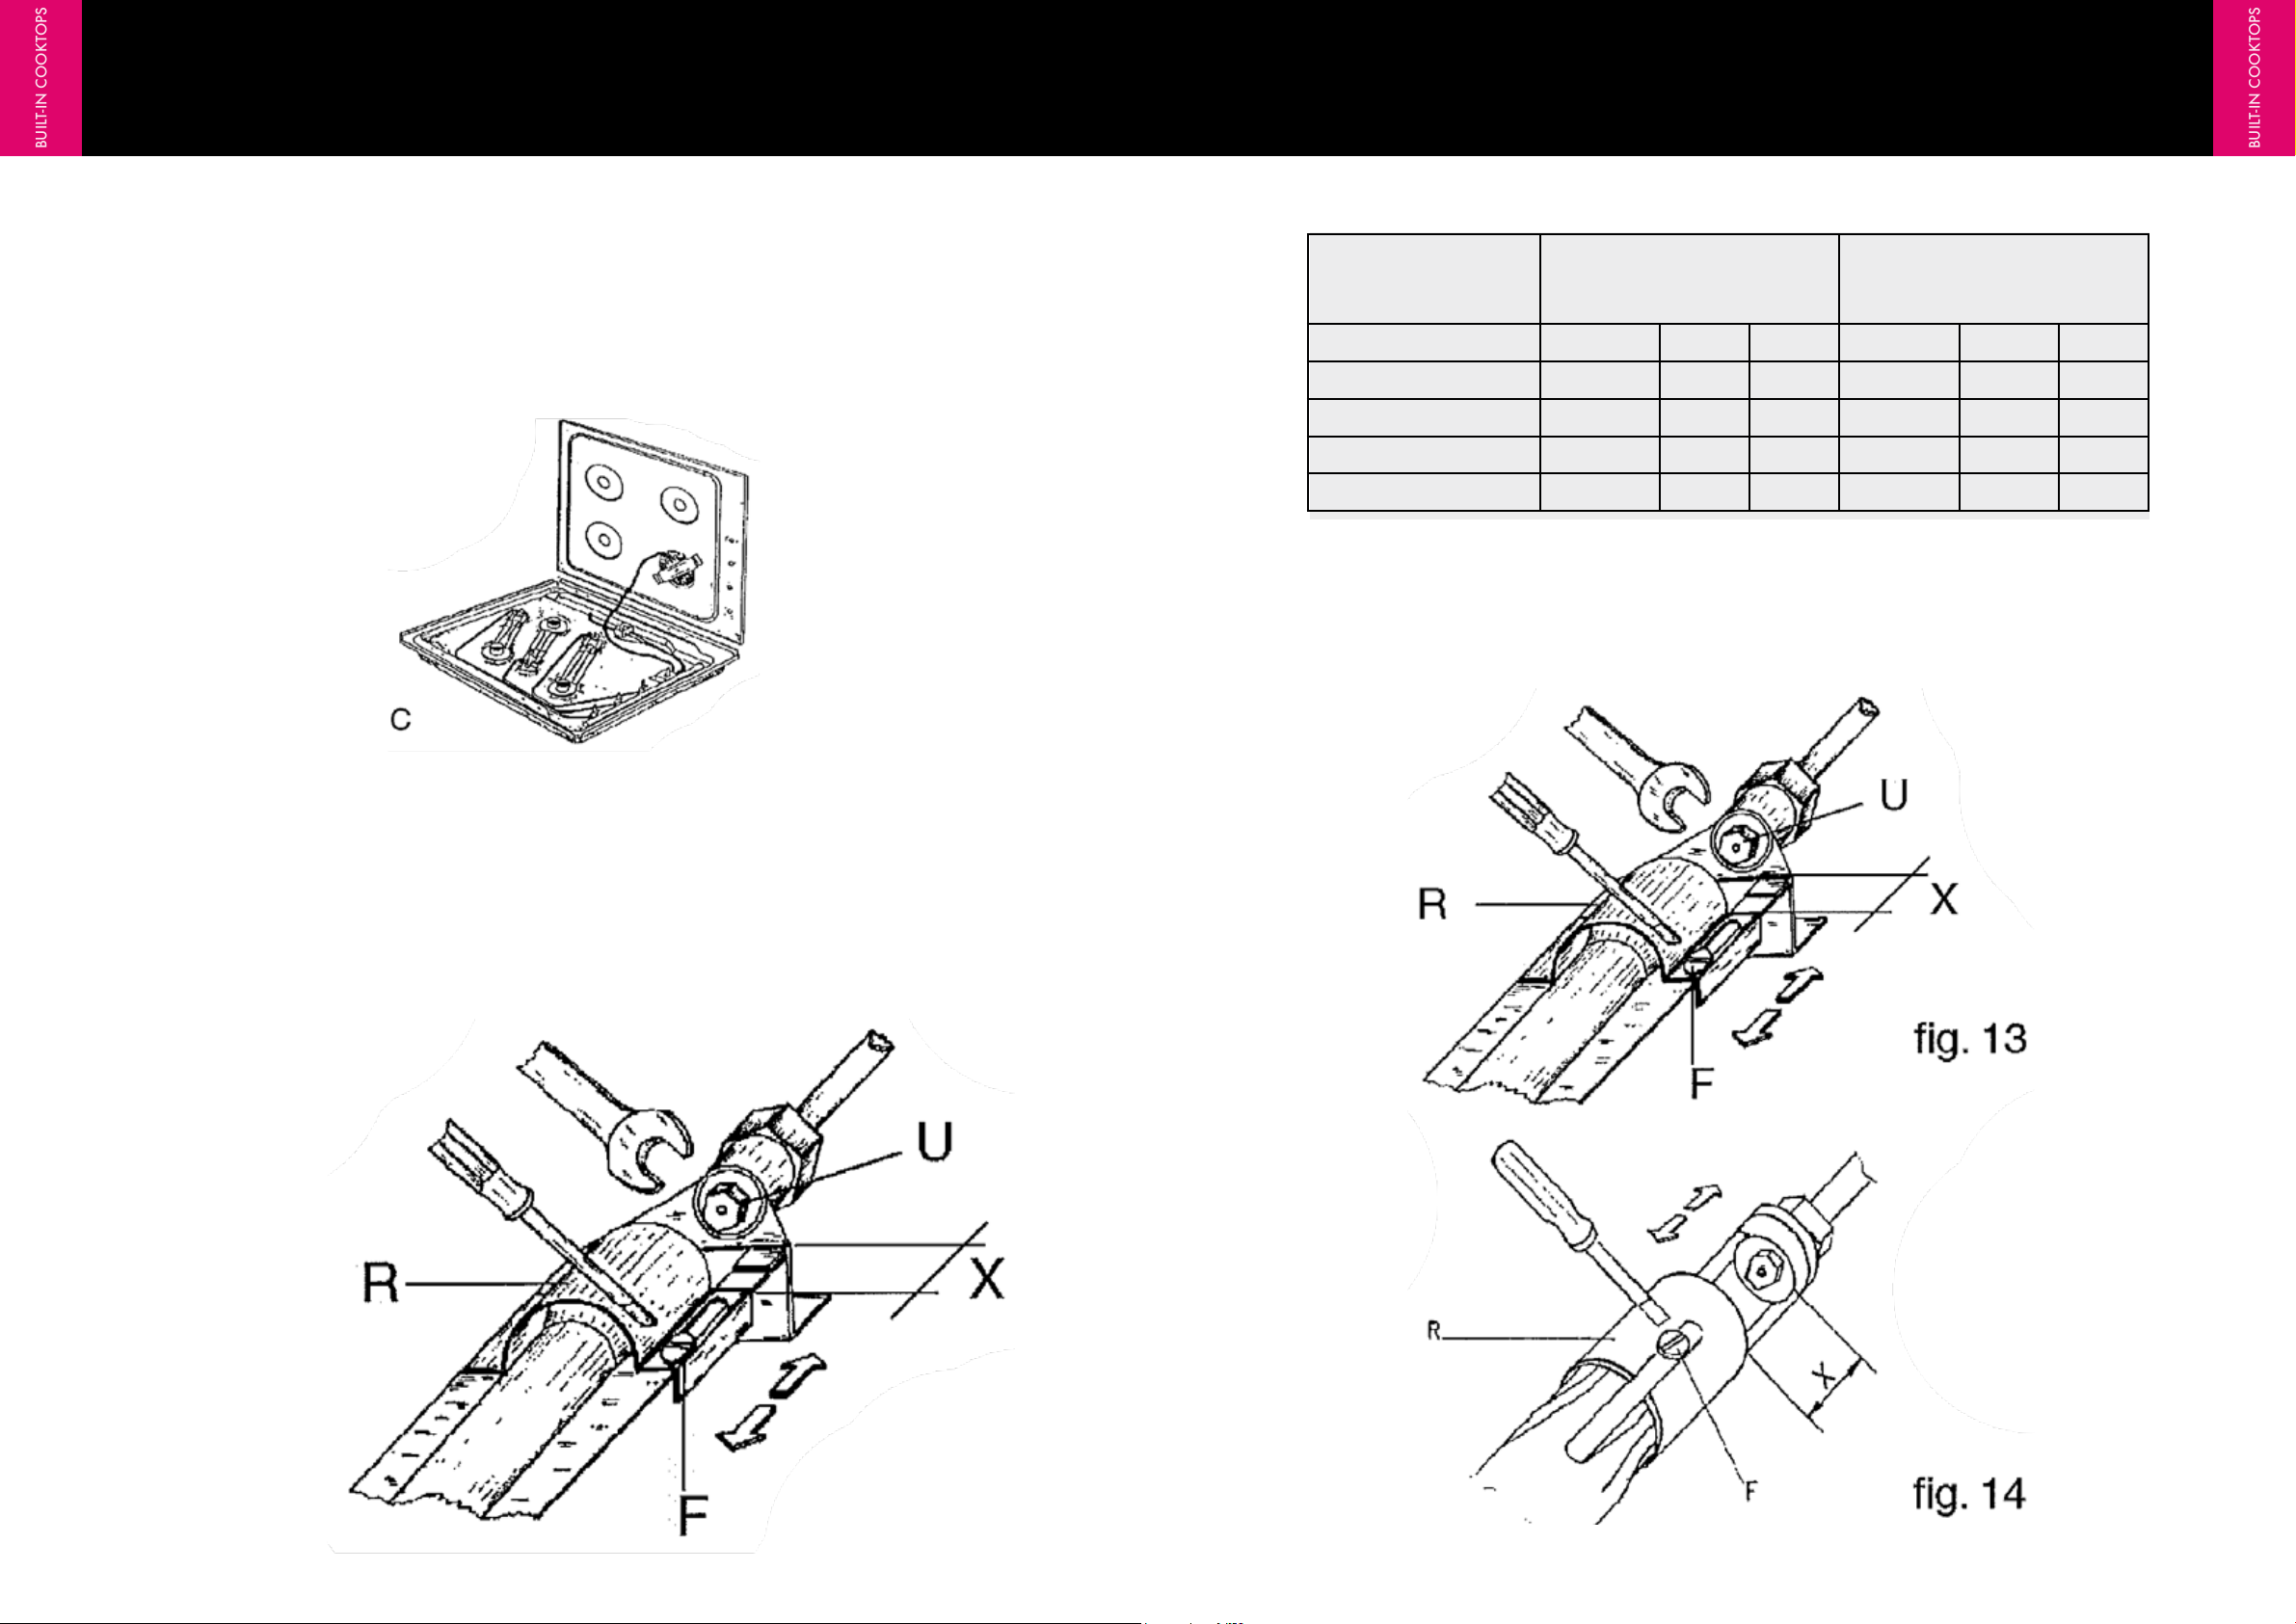
AIR ADJUSTMENT
The air adjustment is to be carried out with the flame at the maximum, with a screwdriver loosen screw
“F” and move the cylindrical sleeve “R” towards the injector to decrease the air, move it away from the
injector to increase the air. Once the correct aeration is achieved tighten screw “F” to fix the position.
The cooking hob is supplied as a natural gas unit and should not require any adjustment of the aeration. If
the appliance is ordered and specified as a ULPG gas then it will be converted by Eurolinx prior to
dispatch and should not require any adjustment to the aeration. Follow the steps below to convert to LPG
and to adjust the aeration of the burners. Remove the pan supports, caps and burners from the hob.
Remove the screws from under each burner that are securing the hob to the base and lift top up to gain
access to the burner venturie.
Note: Some models that do not have a one piece hob will have securing around the outside edge of the
spillage bowl that will also need to be removed to gain access to the underside of the cooking hob.
Remove screw “F” and remove air damper “R” Replace the Natural gas injector
that is located at entry point of the venturie “U” with the ULPG injector. Use the
chart below to identify the correct injector for each type of burner. Replace the
air damper “R” and refit screw “F” leave lose to allow adjustment of aeration.
BURNER NATURAL GAS
Inj Mj/h Kpa
ULPG
Inj Mj/h Kpa
DUAL WOK
1.60/0.68 14/2.2 1.00 0.86/.040 11.5/2 2.75
SINGLE WOK
1.70 13.8 1.00 0.92 11.00 2.75
LARGE
1.40 10.0 1.00 0.82 9.00 2.75
MEDIUM
1.10 6.2 1.00 0.68 6.00 2.75
FISH / TEPANYAKI
1.60 12.5 1.00 0.85 10.00 2.75
ADAPTATION TO DIFFERENT TYPES OF GAS
BUILT-IN COOKTOPS
BUILT-IN COOKTOPS
ILVE COOKTOPS OPERATING MANUAL ILVE COOKTOPS OPERATING MANUAL
Loading ...
Loading ...
Loading ...