Loading ...
Loading ...
Loading ...
W
14
5
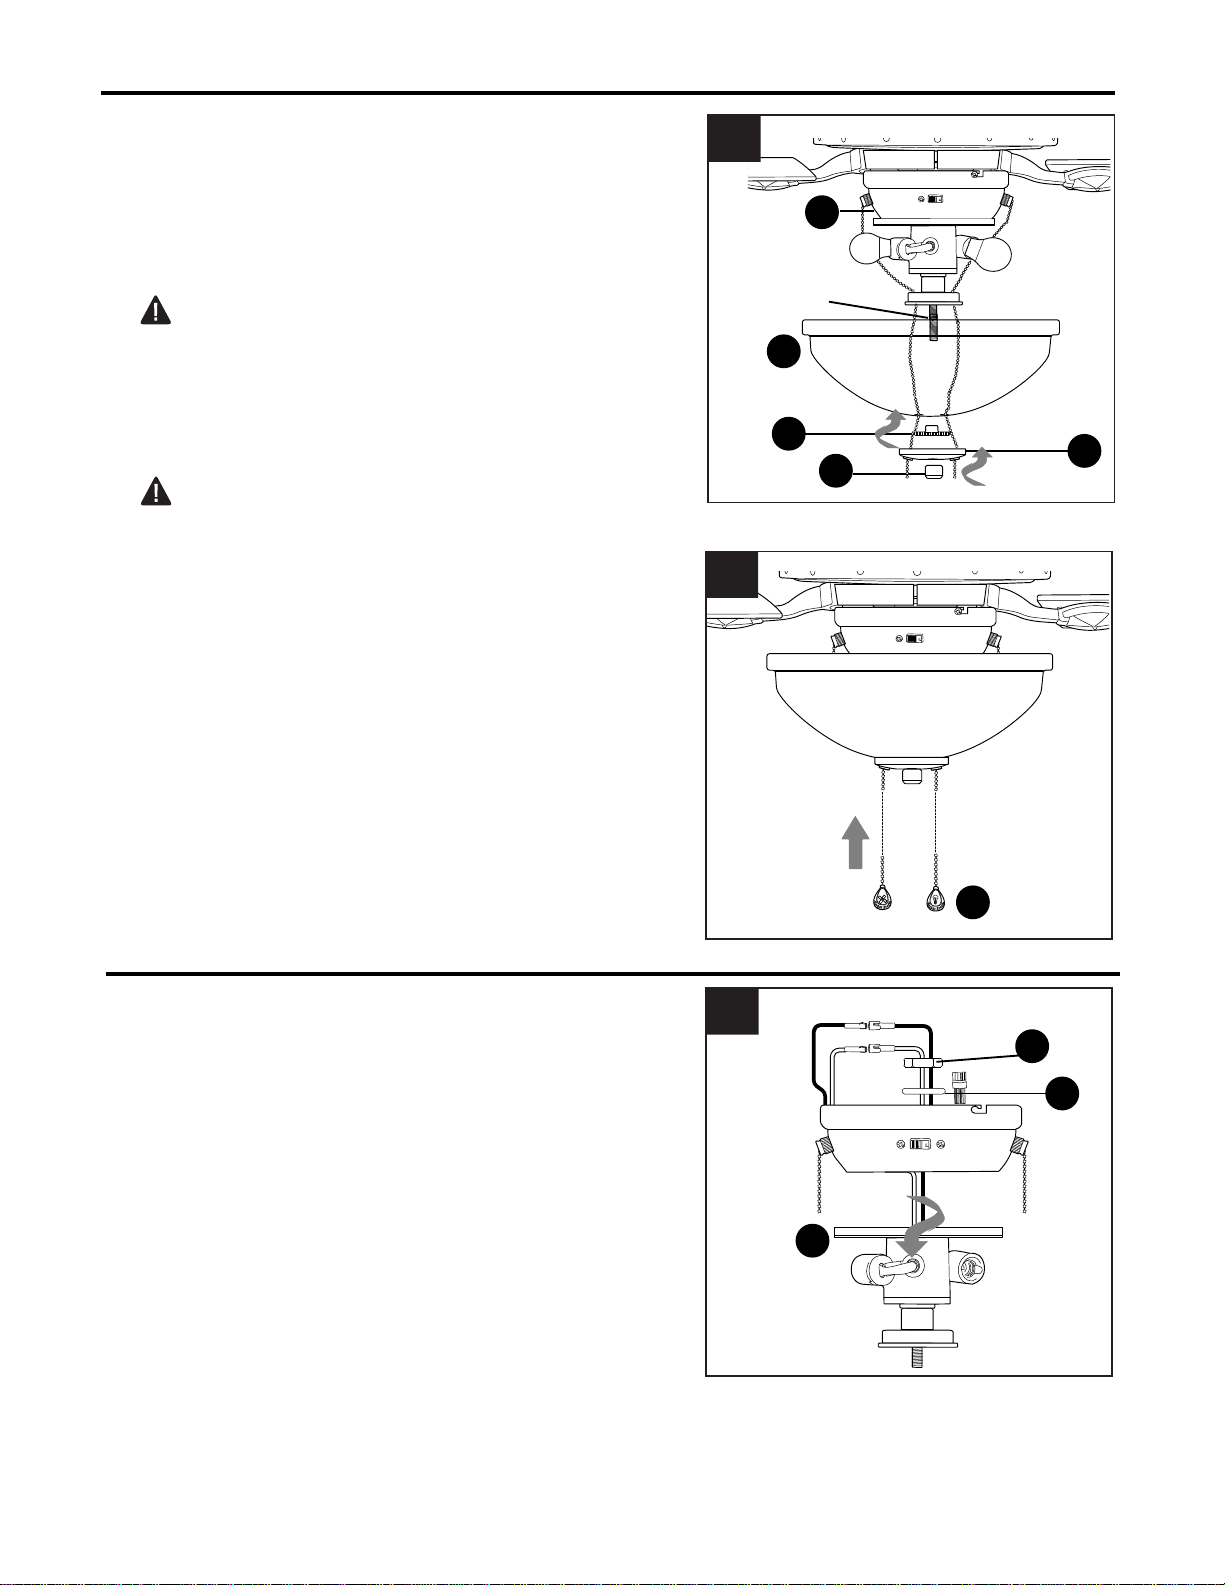
Allow preassembled pull chains to come through light
kit fitter (I) slots. Then, align center hole in glass shade
(J) with threaded rod, allowing pull chains to come
through corresponding holes in glass shade (J). Push
up gently on glass shade (J) until threaded rod comes
through hole. Secure glass shade (J) with threaded
washer (L).
CAUTION: Do NOT overtighten threaded washer
(L) as glass may crack or break.
Thread pull chains through appropriate holes in finial
plate (K) and push up on finial plate (K), allowing
threaded rod to come through hole in middle of finial
plate (K). Secure with previously removed finial (M).
CAUTION: Do NOT overtighten finial (M) as glass
may crack or break.
4.
Attach pull chain extensions (W) or custom pull chain
extensions (not included) to fan and light pull chains.
Assembly is now complete.
5.
1.
1
If you do NOT wish to use the light kit, locate
wires in switch housing at top of light kit fitter (I)
labeled FOR LIGHT and gently pull molex
connections apart in order to disconnect these
wires.
Remove the hex nut (X) and 10 mm lock washer (Y)
from the threaded rod at the top of the light kit fitter
(I). Unscrew the switch housing to remove it from
the light kit fitter (I).
INSTALLING FAN WITHOUT LIGHT KIT
X
Y
I
Switch
Housing
Molex
INSTALLING FAN WITH LIGHT KIT
L
K
M
I
J
Threaded
Rod
4
I
I
Loading ...
Loading ...
Loading ...