Loading ...
Loading ...
Loading ...
O
I
N
S
R
G
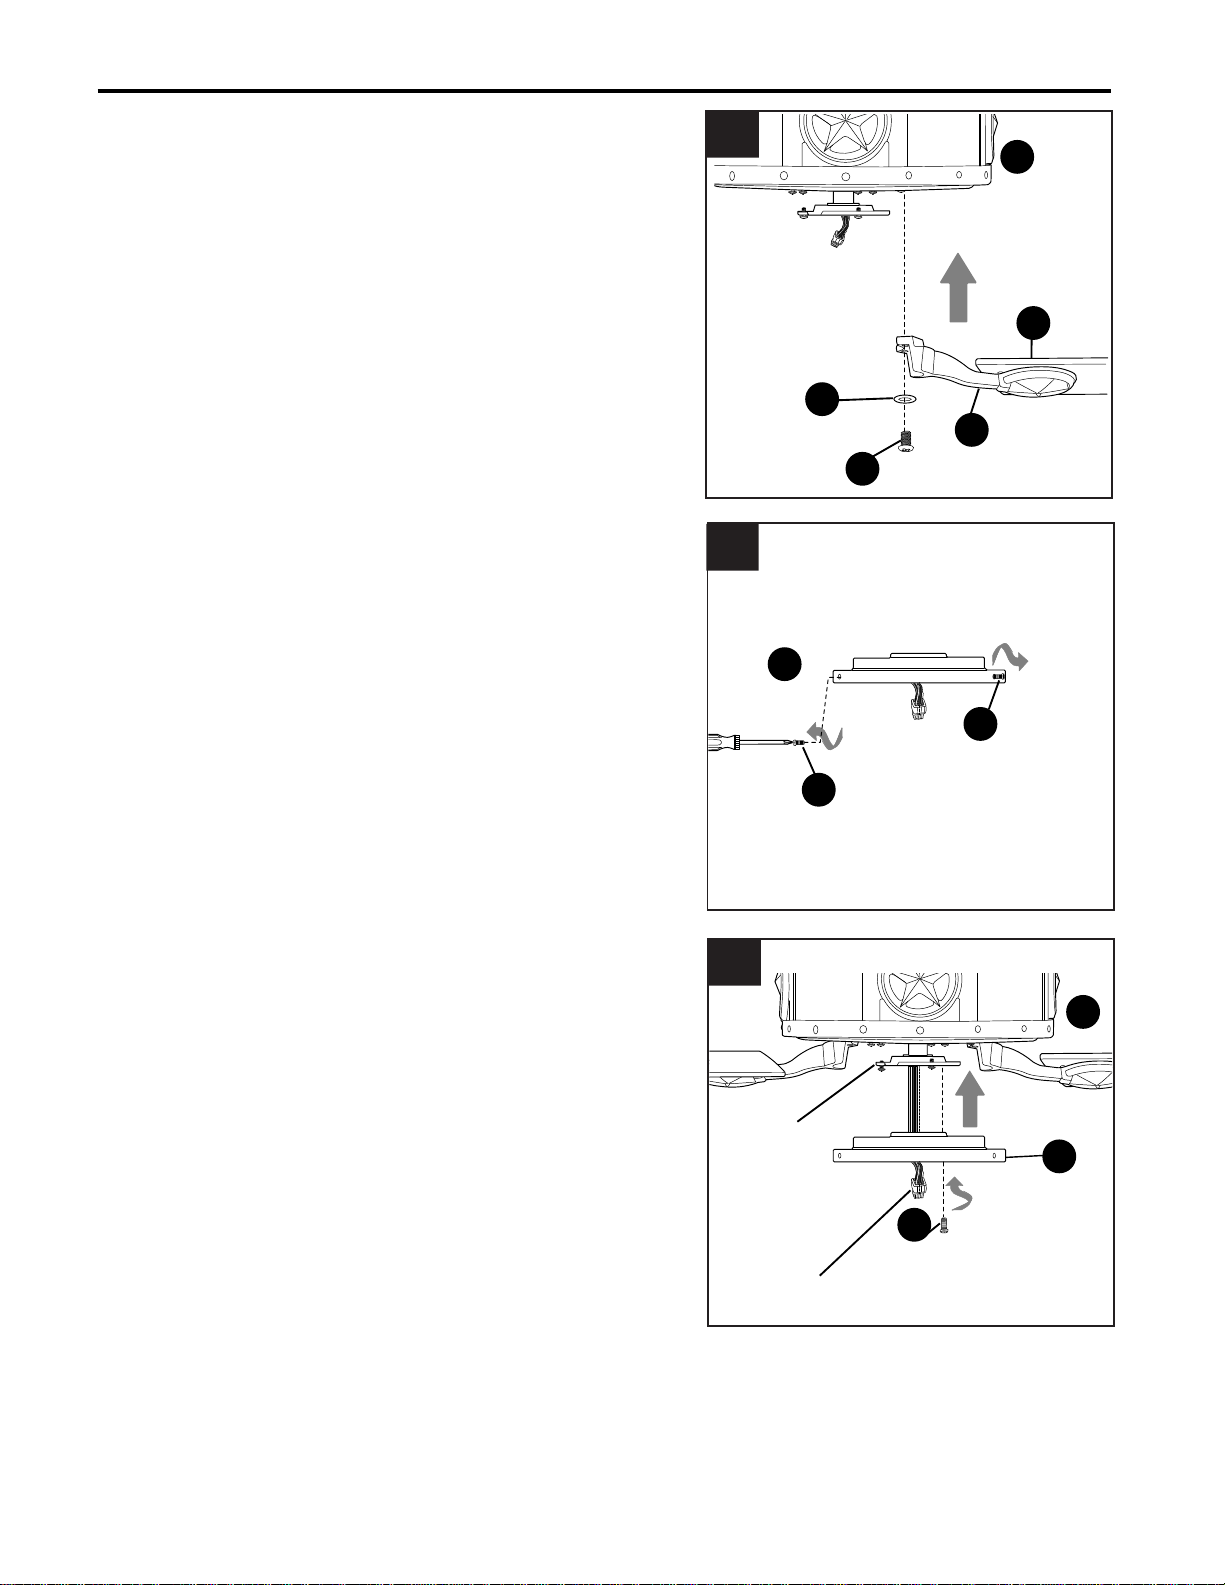
Insert two motor screws (R) along with lock washers
(S) previously removed (Step 5, page 7) through
one blade arm (N) and back into the holes on the
underside of motor housing (G). Tighten motor
screws (R) securely. Repeat with remaining blade
arms (N), making sure to completely secure each
blade arm (N) before proceeding with the next.
3.
FINAL INSTALLATION
3
12
5.
Partially loosen two motor plate screws (V) in motor
plate on underside of motor housing (G) and
remove the other screw. Align slotted holes in
switch housing plate (H) with loosened motor plate
screws (V), allowing male plug from motor housing
(G) to come through hole in switch housing plate
(H). Twist switch housing plate (H) to lock.
Re-insert the motor plate screw (V) that was
removed and securely tighten all three motor plate
screws (V).
5
Partially loosen two switch housing screws (U) from
outer edge of switch housing plate (H) and remove
the other screw. Save for later use.
4.
4
To install the fan with the light kit, proceed to
INSTALLING FAN WITH LIGHT KIT on next page.
To install the fan without the light kit, skip to
INSTALLING FAN WITHOUT LIGHT KIT on page 14.
I
H
I
U
Motor
Plate
Male
Plug
I
H
I
V
G
I
U
Loading ...
Loading ...
Loading ...