Loading ...
Loading ...
Loading ...
76
Chapter 5
Panorama shooting (Cont.)
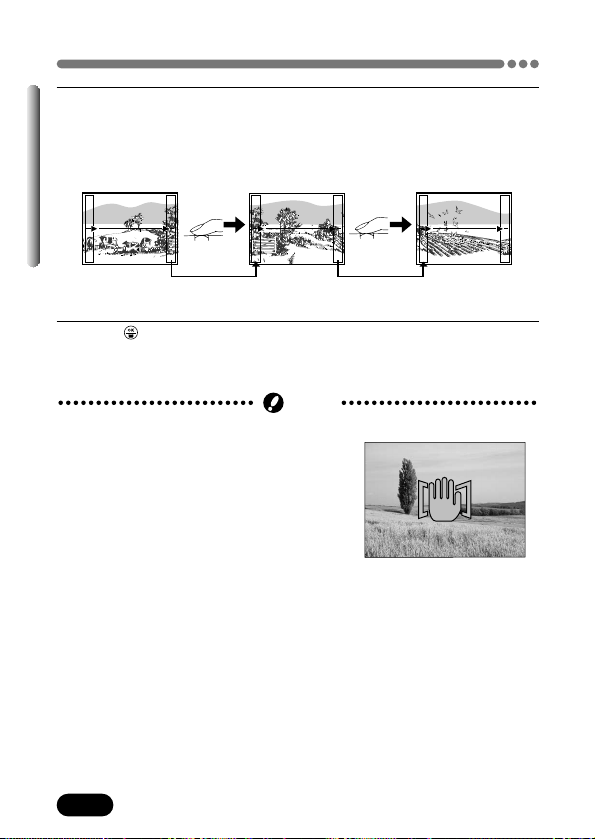
4
Make sure that the edges of images overlap, then take your pictures.
● Focus, exposure and white balance are set by the first picture. Do not
select an extremely bright subject (such as the sun) for the first picture.
● You cannot adjust the zoom after the first picture.
● Panorama shooting is possible for up to 10 pictures.
5
Press to finish panorama shooting.
● Frames on the edges of the screen disappear, and the camera returns
to the normal shooting mode.
● During panorama shooting, the flash is disabled.
● The limit for Panorama shooting is 10
pictures. If you take 10 pictures, a warning
screen appears and no more pictures can
be taken.
● The Panorama mode is only available with the OLYMPUS CAMEDIA-brand
SmartMedia cards.
● The camera itself cannot connect panorama pictures. To connect each
picture, the CAMEDIA Master software is necessary.
● Your computer's memory may be insufficient if you take too many panorama
pictures in the HQ/SHQ modes.
● Images are saved in JPEG format when panorama shooting is done in the
TIFF mode. The size of the image does not change.
● If the mode dial is moved during panorama shooting, the camera cancels
the panorama mode and returns to normal shooting.
Note
Shutter
button
● When shooting, be sure to have the edges (right/left/top/bottom) of images
overlap, so you will know which pictures should be connected.
Shutter
button
Loading ...
Loading ...
Loading ...