Loading ...
Loading ...
Loading ...

User Manual 16
Lighten/Darken Use the light-
en/darken switch on the right
side of the lens barrel to adjust
the exposure of your shot. To
get a brighter photo, move the
lighten/darken switch right to
the plus/lighten position. For a
darker photo, move the light-
en/darken switch left to the
minus/darken position. These
two settings correspond to
different Exposure Values (EV).
The camera’s Exposure Values
are +½ EV (when you move the
switch to plus/lighten) and -½
EV (when you move the switch
to minus/darken).
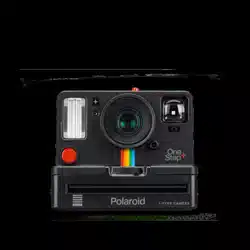
5. Using the viewnder
The OneStep+ uses a tradition-
alviewfinderlocatedonthe
right side of the lens barrel. To
usetheviewfinder,simplyalign
youreyewiththeviewfinder
barrel and use the image you
see to compose your shot.
Note Remember that the
viewfindersitsslightly
above and to the right
of the camera’s lens —
above and to the left from
your perspective when
shooting — so you will
need to adjust your aim
to compose your shot
correctly when shooting
at distances of 1.2 meters
or less.
6. Compose your photo
The OneStep+ has two
high-qualitylenses;astandard
lens, intended for photographs
shot from 60 cm (2 feet) away
andfurther;andaportraitlens,
intended for photographs shot
from as close as 30 cm (1 foot)
away to 90 cm (3 feet) away. To
select the desired lens, use the
Lens Switch located above the
Lens Barrel. To avoid a blurry
photo, make sure you are at
least 60 cm (2 feet) away from
your subject when shooting
with the standard lens, or
30 cm (1 foot) away when
shooting with the portrait lens.
For the best results, always try
to shoot with your light source
behind you.
7. Take the photo
Press the shutter button all
the way in to take the photo.
Loading ...
Loading ...
Loading ...