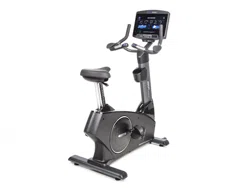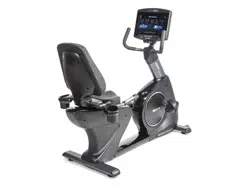
Congratulations and Welcome to the BODYCRAFT Family
Thank you for selecting BODYCRAFT. Your choice reflects a wise investment in you and your
facility. We hope you use it for many healthy years!
BODYCRAFT offers a complete array of high-quality fitness equipment. Please refer to our website at
www.bodycraft.com to view more ways to enhance your lifestyle.
Your BODYCRAFT machine has all the quality and design elements to make your workout extremely efficient
and comfortable. Your new unit is a serious cardio machine that will keep you motivated, challenged and
within reach of your fitness goals. Strength & cardiovascular training is vital for all ages which will provide an
effective workout, producing results that will encourage you to reach your fitness goals and maintain the
body you have always wanted.
Spending 15 to 30 minutes a day, three times a week, is all you need to start seeing the benefits of a
regular exercise program.
As a premium exercise equipment manufacturer, we are committed to your complete satisfaction. If you have
questions, suggestions or find missing or damaged parts, we guarantee your complete satisfaction through
our authorized dealer network or by contacting us directly. Please call your local dealer or BODYCRAFT.
BODYCRAFT (a division of Recreation Supply, Inc.)
7699 Green Meadows Dr.
Lewis Center, OH 43035
Phone: 800-990-5556 9 am - 5 pm EST Email: service@bodycraft.com
Proof of purchase must be supplied to validate warranty and the product must have been
registered with BODYCRAFT via online at www.bodycraft.com or by calling 800-990-5556 or
740-965-2442 M-F 9 a.m. - 5 p.m. EST.
Purchaser’s Reference Information:
IT IS IMPERATIVE THAT YOU FILL IN THE FOLLOWING
INFORMATION AND REFER TO IT SHOULD THE NEED
FOR SERVICE ARISE.
Product Name: XXXXXX Console
Serial Number: E/R/U _ _ _ _ _ _ _ _ _ _ _ _
Proof of purchase must be supplied to validate warranty and the product must have been
registered with BODYCRAFT via online at www.bodycraft.com or by calling 800-990-5556 or
740-965-2442 M-F 9 a.m. - 5 p.m. EST.
2

Energy Saving function: These consoles are equipped with power saving function.
This means after 10 minutes of inactivity it will automatically power off. Press any
key on the console for X-9LCD or touch the screen for X-10TS/X-16TS to wake up
the console from power save mode.
We at BODYCRAFT believe in the continued improvement processes and reserve the right to
make changes at any time without notice that may or may not affect color, parts and
materials.
Page
Console Operation Instructions
16” Smart Touch Console Operating Instructions ..………………………… 4 - 19
10” Smart Touch Console Operating Instructions .…………………………. 4 - 19
9” LCD Console Operating Instructions .…………………………………… 18 - 23
Heart Rate Monitoring Device & Exercise Tips …………………………… 24 - 25
Product Warranty
Product Warranty ..…………………………………………………………………… 26
Warranty Registration ..……………………………………………………………… 27
Contact Us Information …………………………………………………………….. 28
Table of Contents
3
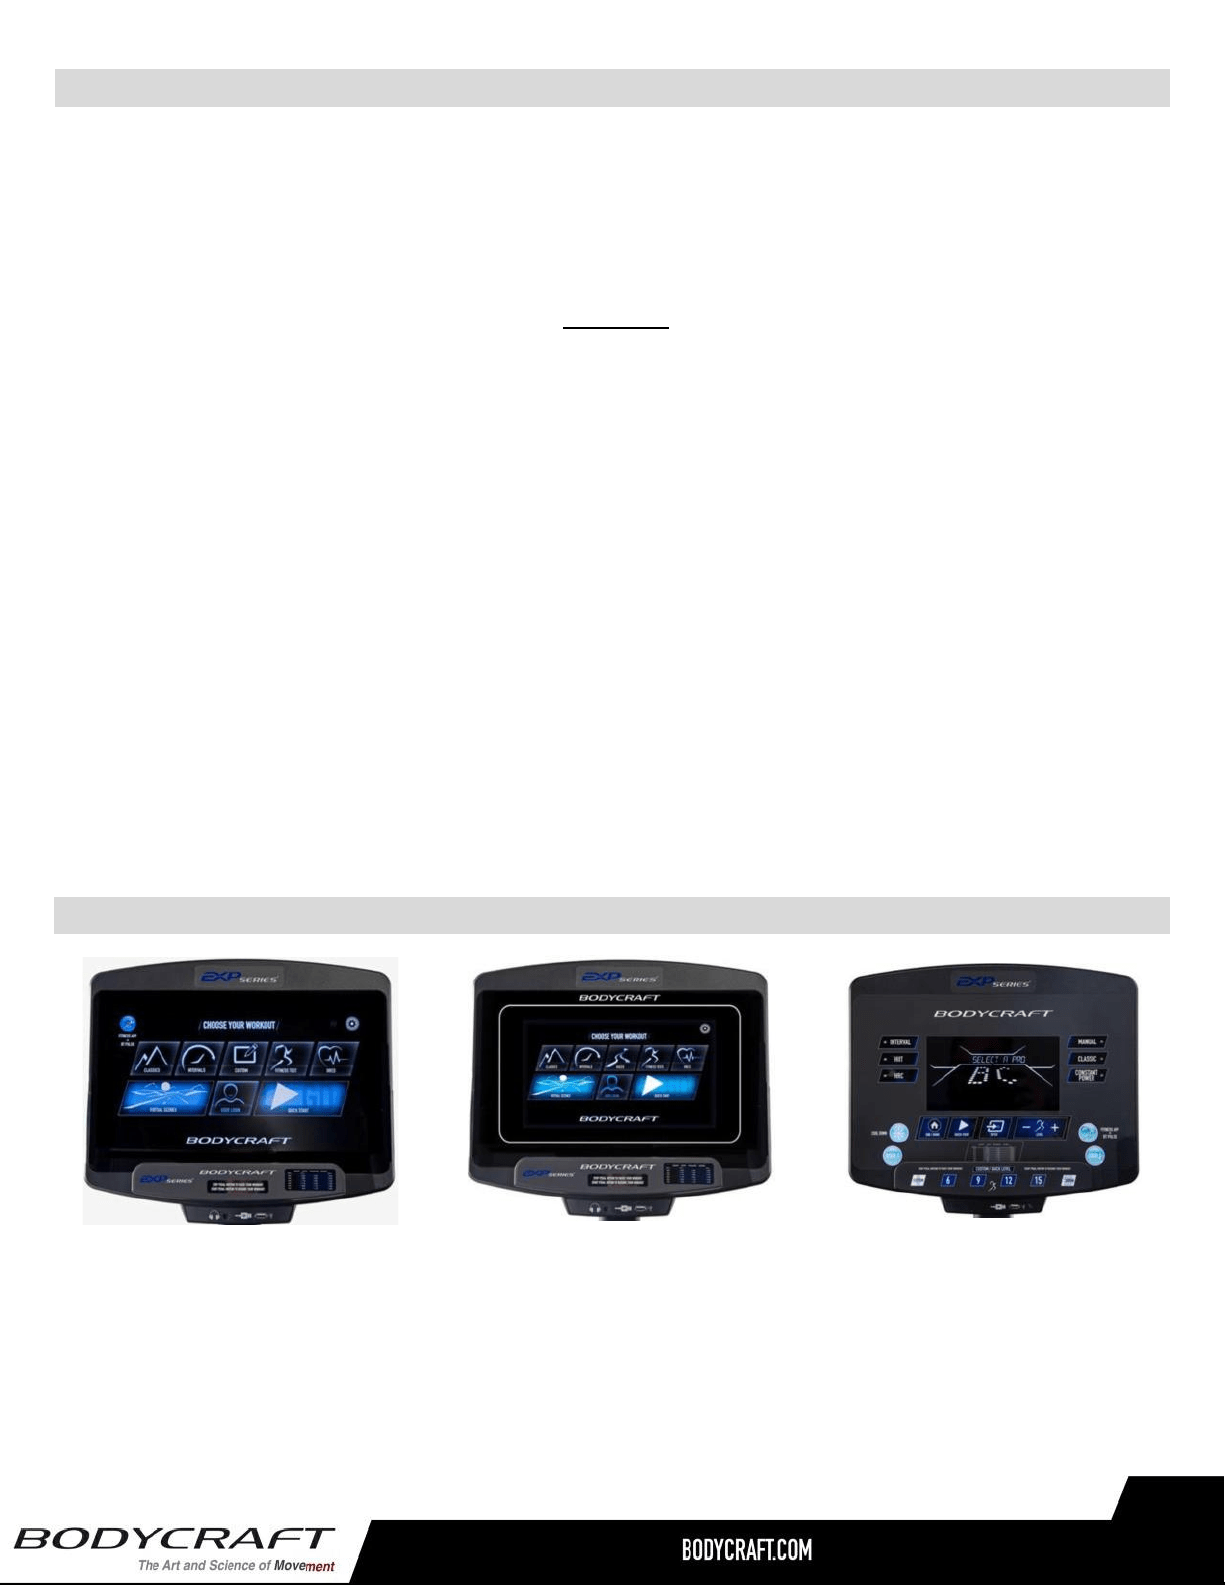
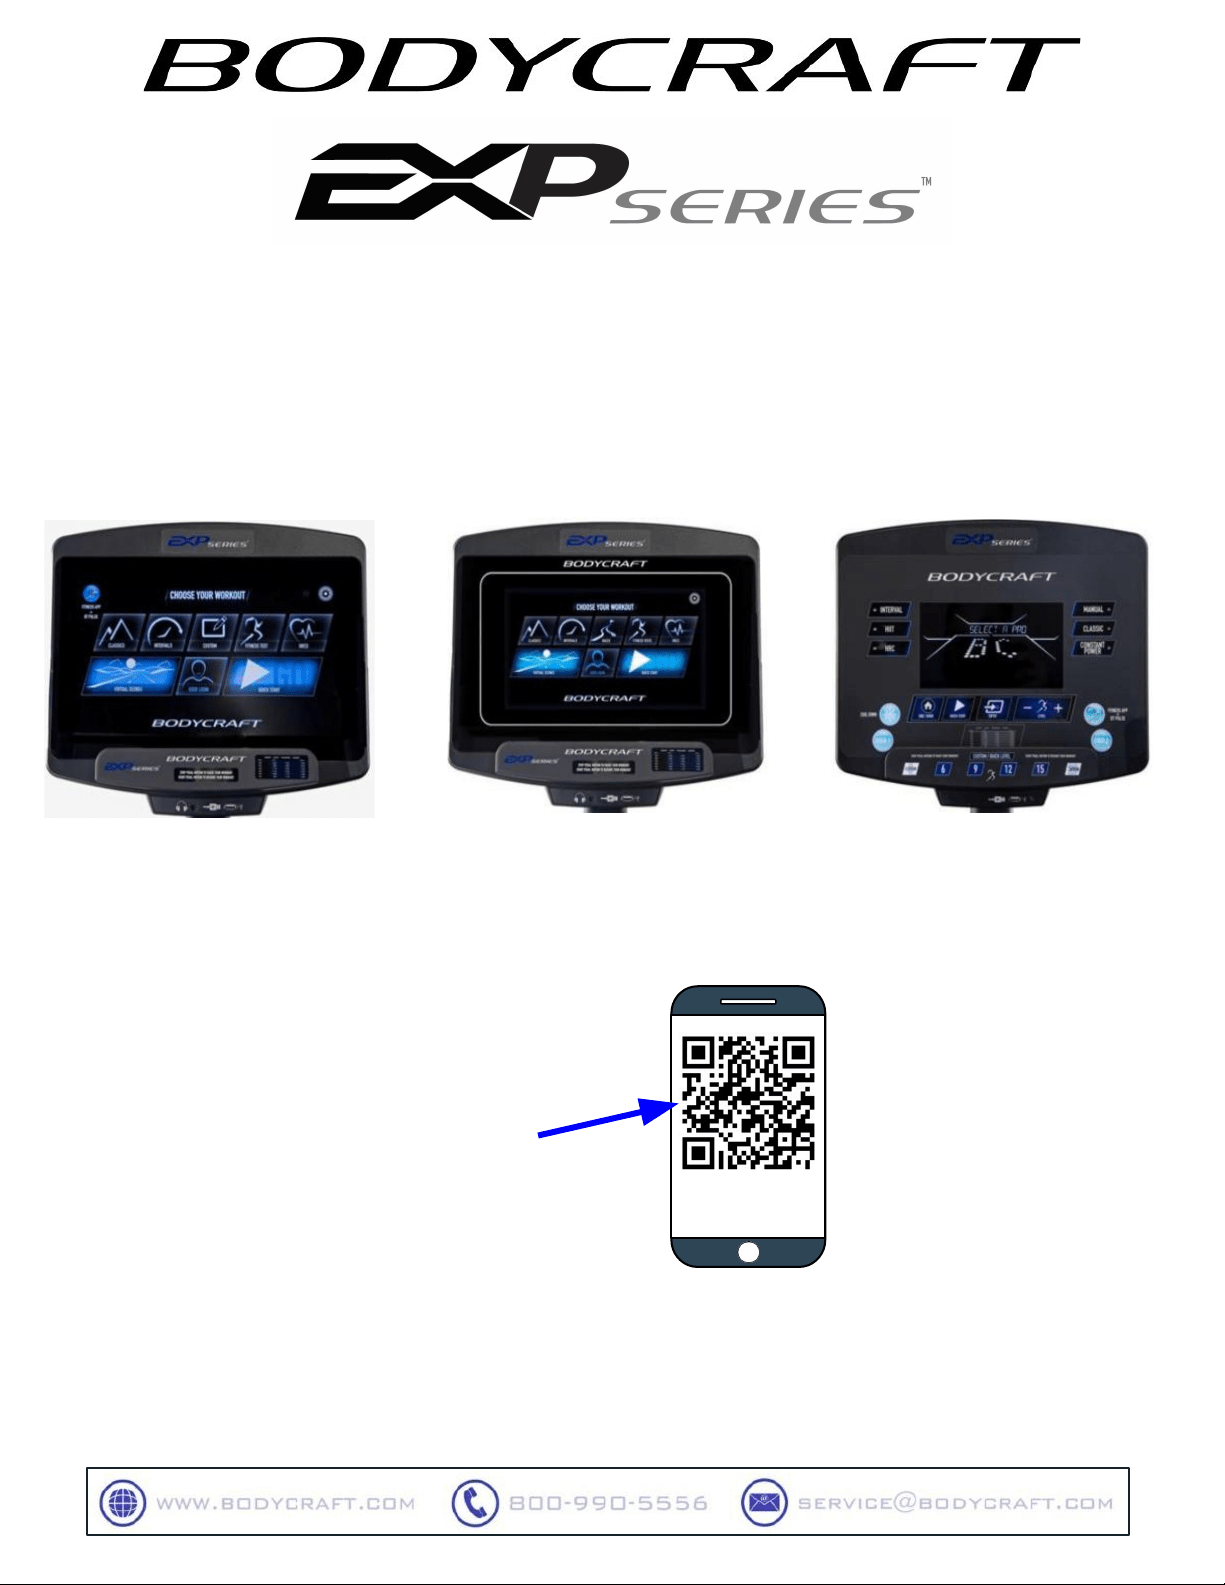
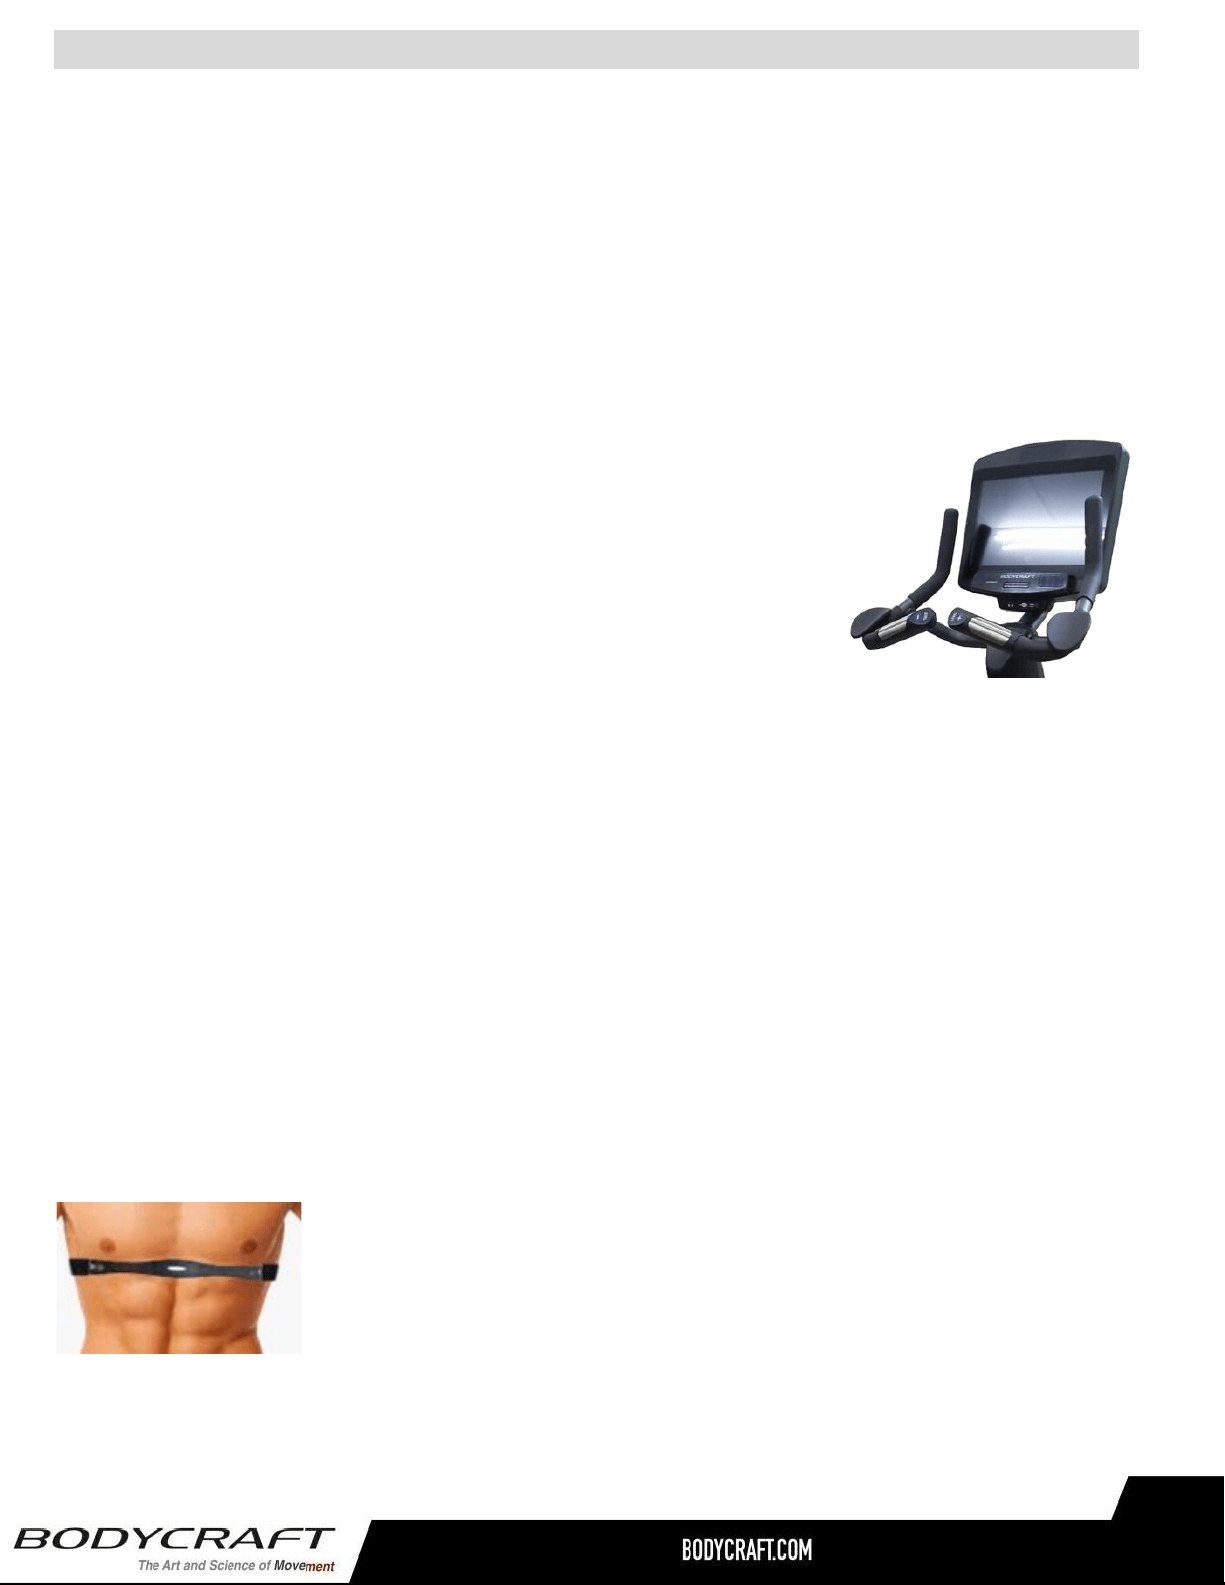
10” SmartTouch
(X-10TS)
16” SmartTouch
(X-16TS)
9” LCD
(X-9LCD)
Always turn off and unplug your unit when not in use for extended period of time or during lightning
storms.
Please read the console operation instruction thoroughly and get familiar with the console layout. Practice
using this console before you start in order to get a better understanding of the functions. Below is the
console layout and detailed operation instructions.
Important
● Power up first: Locate the adapter plug it into a 120V, grounded wall outlet. The console will
wake up and get into idle mode. Always unplug the adapter when not in use. You may use it as a
self-powered product without plugging in the adapter if it is paired with the X-9LCD console.
● Note: There is a rechargeable battery built into the product which is rechargeable by either
pedaling or AC adapter.
● Pairing of the console: The console needs to be paired with the product model correctly to
ensure smooth operation. When the console is powered on the first time, it needs to be set up
correctly. Please follow the message window prompts to select the model number and calibrate if
necessary, before use.
Console Operation Instructions and Warning
Console Options Types
4
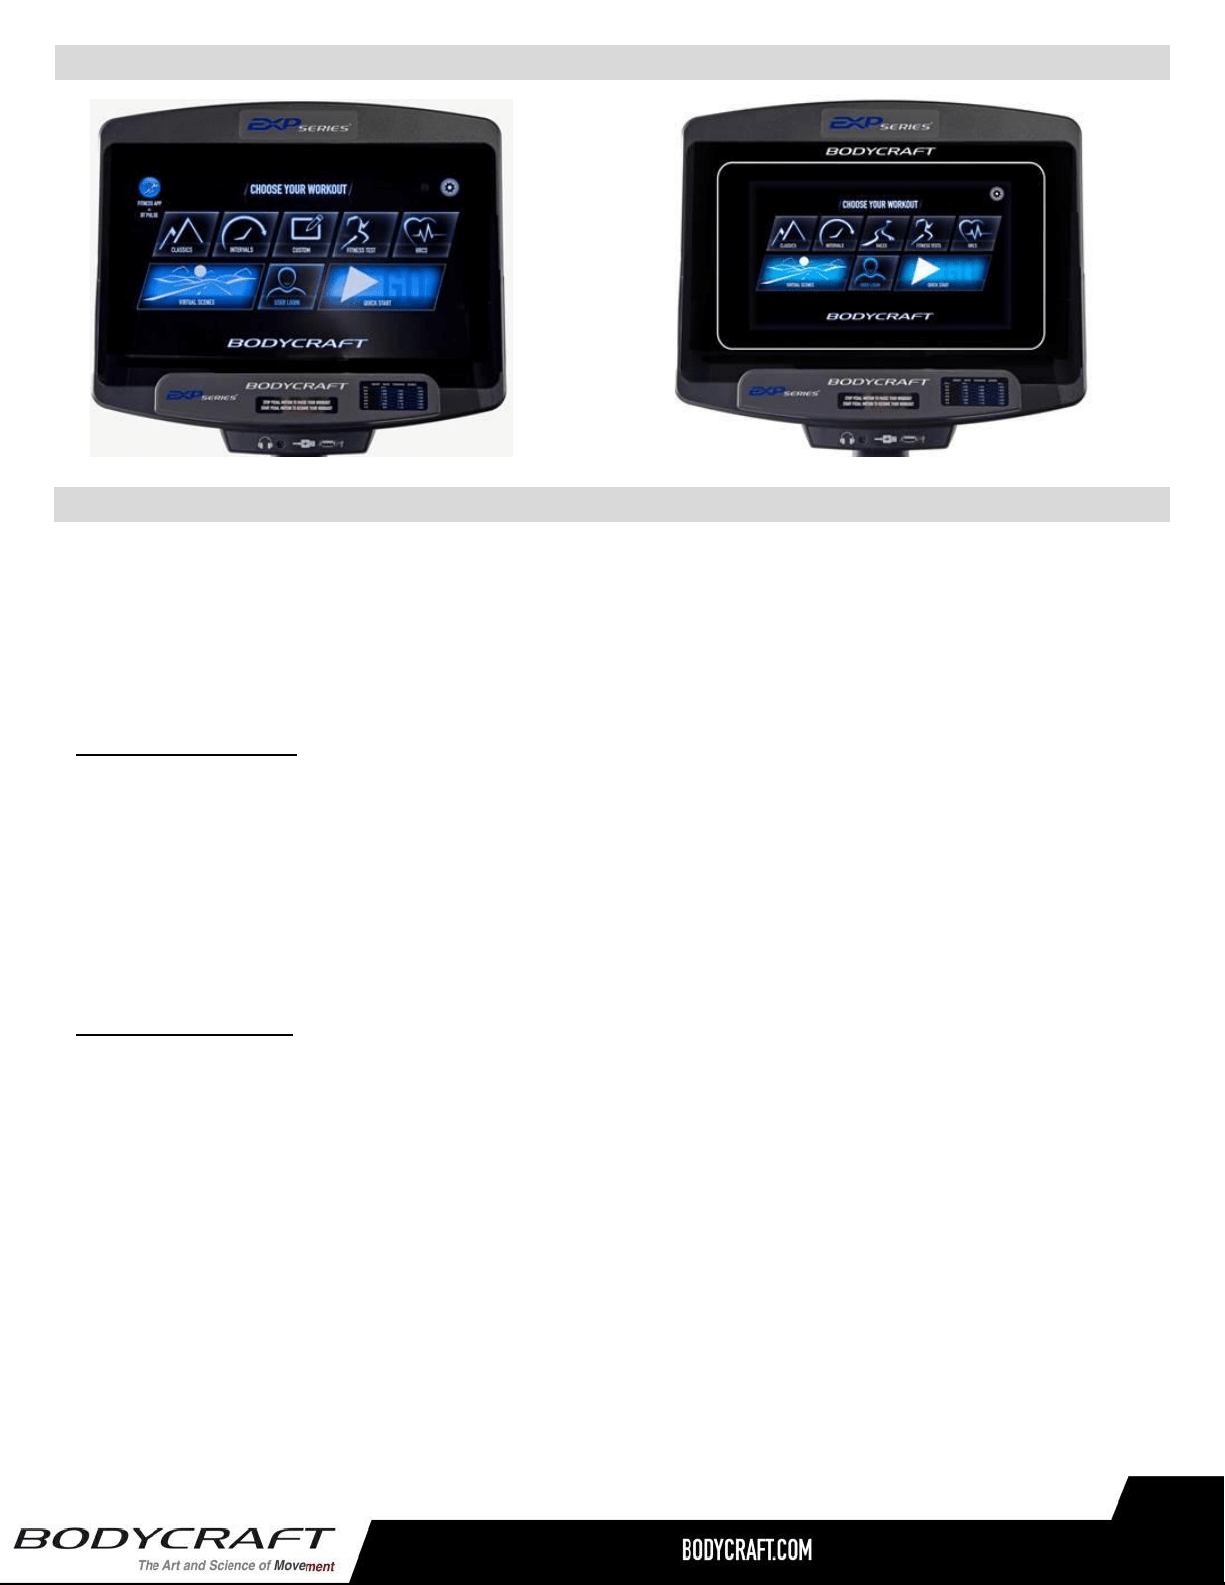
10” & 16” Touch Screen Layout:
Device Ports & Connectives
Touchscreen Display
The display is equipped with a capacitive touchscreen technology and it is more responsive than a resistive
screen. Because of this, capacitive screen can be controlled with very light touches of a finger. Capacitive
touchscreens can only be touched with a finger and will not respond to touches with a regular stylus, gloves or
most other objects.
Front of the console
USB port:
Charge your device up to 1A or update console software. (Device not included)
It also used for media (music & video) playing.
Headphone Jack:
Standard 3.5mm audio jack used to connect headphones to the console during media playback.
Back of the console
CSAFE port x 2:
One for Charging 3
rd
party compatible devices (not included)
One for communicating with 3
rd
party compatible devices such workout data transmitting.
HDMI Input & Ethernet port & WIFI:
Video, internet connections
Bluetooth & ANT+ connectivity:
Bluetooth & ANT+ heart rate straps as well as Bluetooth headphone & speaker audio devices
Note: Your media device compatibility with the USB & CSAFE
Charging will depend on the brand and model.
5

Physical Keys
● Level +/- keys: There are +, - keys on the handles. Use these keys to adjust the Level/Target
HR/Watt settings during exercise.
● E1200 Quick Stride Keys: There are 2 sets of keys for Stride length adjustment: one set on handles
and one set on the housing. There are 7 stride length settings from 19” – 25”; press Stride +/- keys
on the handlebar to adjust the setting one at a time or press the quick keys to rapidly change the
most 5 common Stride length settings during exercise.
Touch Screen Navigation
Home Screen
Home Screen is where user can login to see user workout data or select from various program options to
begin workout or get into various engineering settings to make this console more user friendly.
● User Login: To get into user setting, build custom workout program and track user workout.
● Quick Start: To start a workout with default setting right away.
● Classics: To get into 6 preset Classic programs: Goal, Random, Hill, Plateau, Constant Power &
Race.
● Intervals: There are 3 interval programs inside this category: Classic, HIIT & Custom Intervals.
● Custom: It is easy to use finger slide custom building your own profile program.
● Fitness Test: It is an industry standard fitness test protocol.
● HRCs: 4 heart rate control programs: Target HR, HR interval, Fat Burn & Cardio.
● Virtual Scenes: This category comes with 4 beautiful scenic landscape videos to make your
exercise more interesting.
6
● Setting: To do the initial console setting such as System setting, Bluetooth, Wireless & Language
setting to make this console function properly.
● “Fitness App + BT pulse” button: Press this button on the home screen to connect with
the compatible fitness Apps and/of connect with Bluetooth/ANT+ heart rate transmitter.
● The “I” information button: when this button is lit up, you may press this button to learn more about
this product.
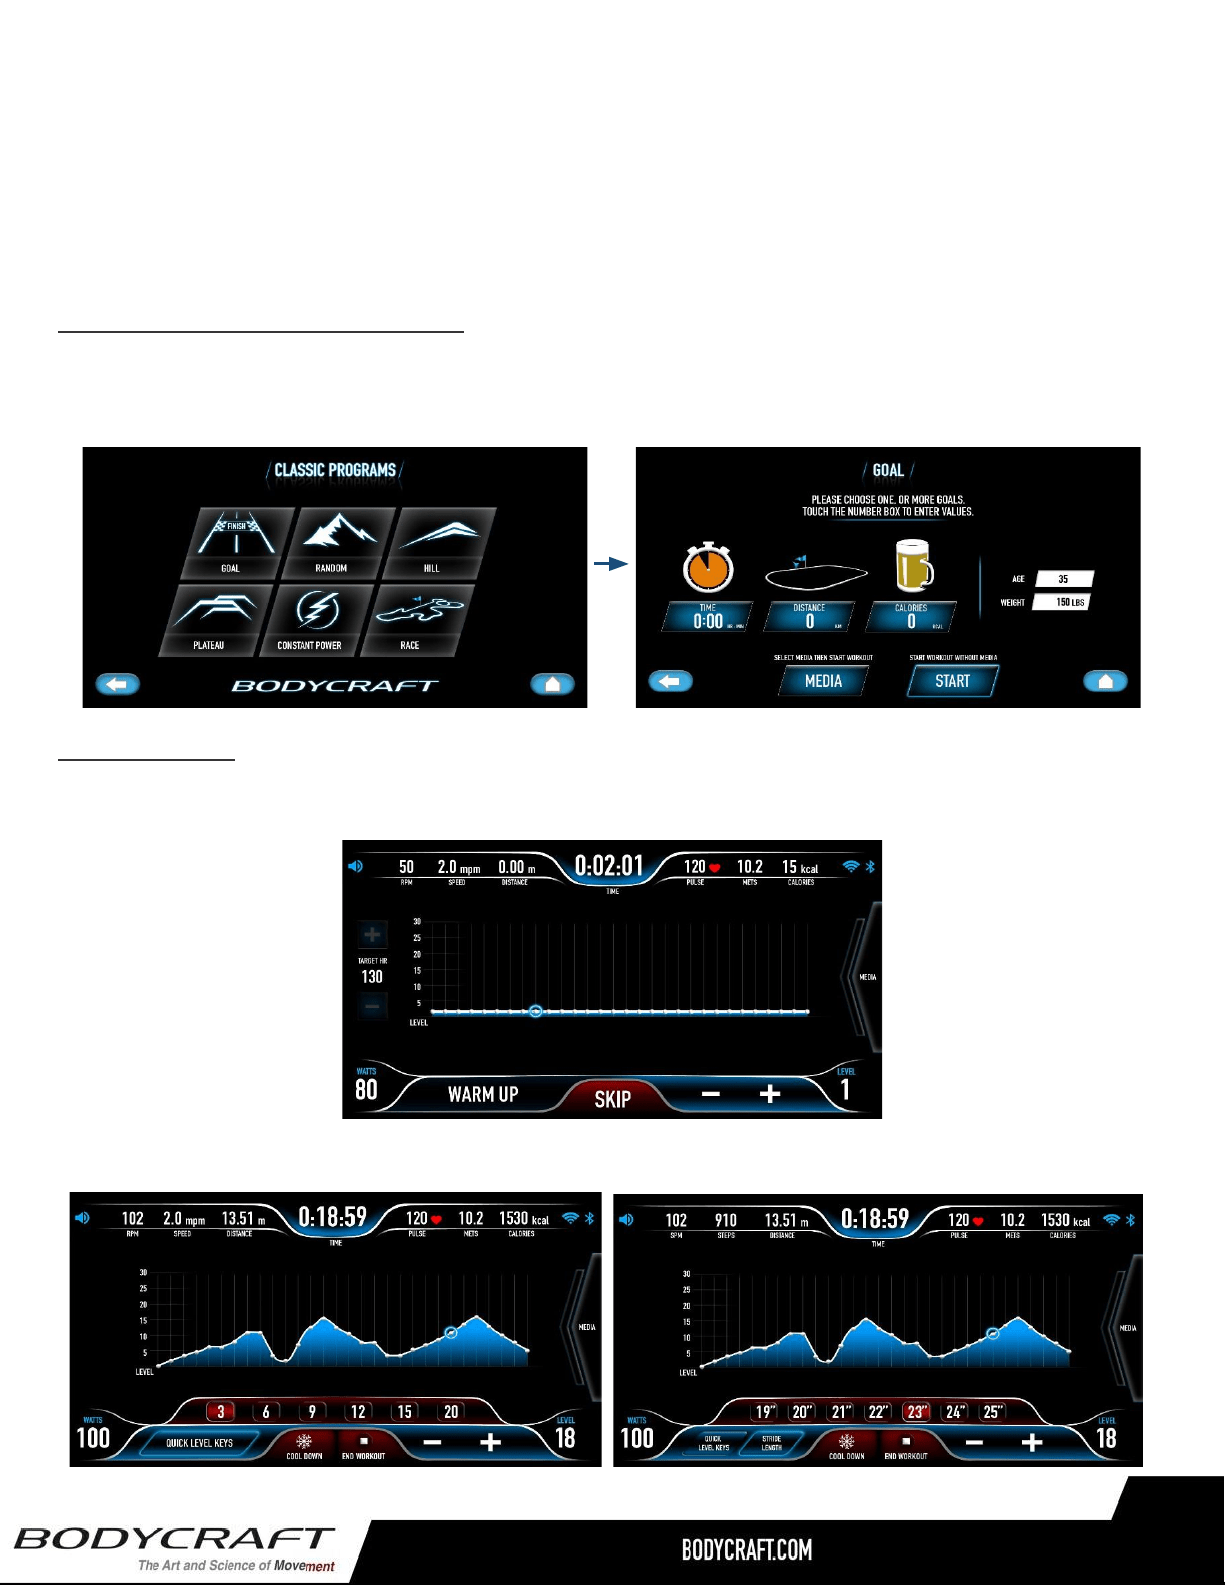
Program Selection & Setting Screens
Touch the desired program category, it will open the program selection screen under each category. Then
touch the desired program to open program setting screen. Fill in the necessary values to finish the
program settings and press START button to start the program. For example, to start a goal program:
Exercise Screen
Some program will start with a 3-minute Warm Up. The time will count down and level is defaulted at 1.
You may adjust it during this period.
After Warm Up or as soon as the “SKIP” button is pressed to begin the program will start exercise screen.
7
● Data displays:
○ For U/R1000 products: Time, Pulse, Mets, Calories, Distance, RPM, Speed, Distance are
on the top and Watts as well as Level are on the bottom.
○ For E1000/E1200 products: SPM & STEPS will be on the top instead of RPM & Speed.
● COOL DOWN button: To end program and start Cool Down period.
● END WORKOUT button: To end the exercise and review summary.
+/- keys to adjust level setting.
● Quick Level Keys: press this button to open 6 preset levels for quick adjustment.
● E1200 only: Stride Length button to open 7 stride length settings for quick adjustment.
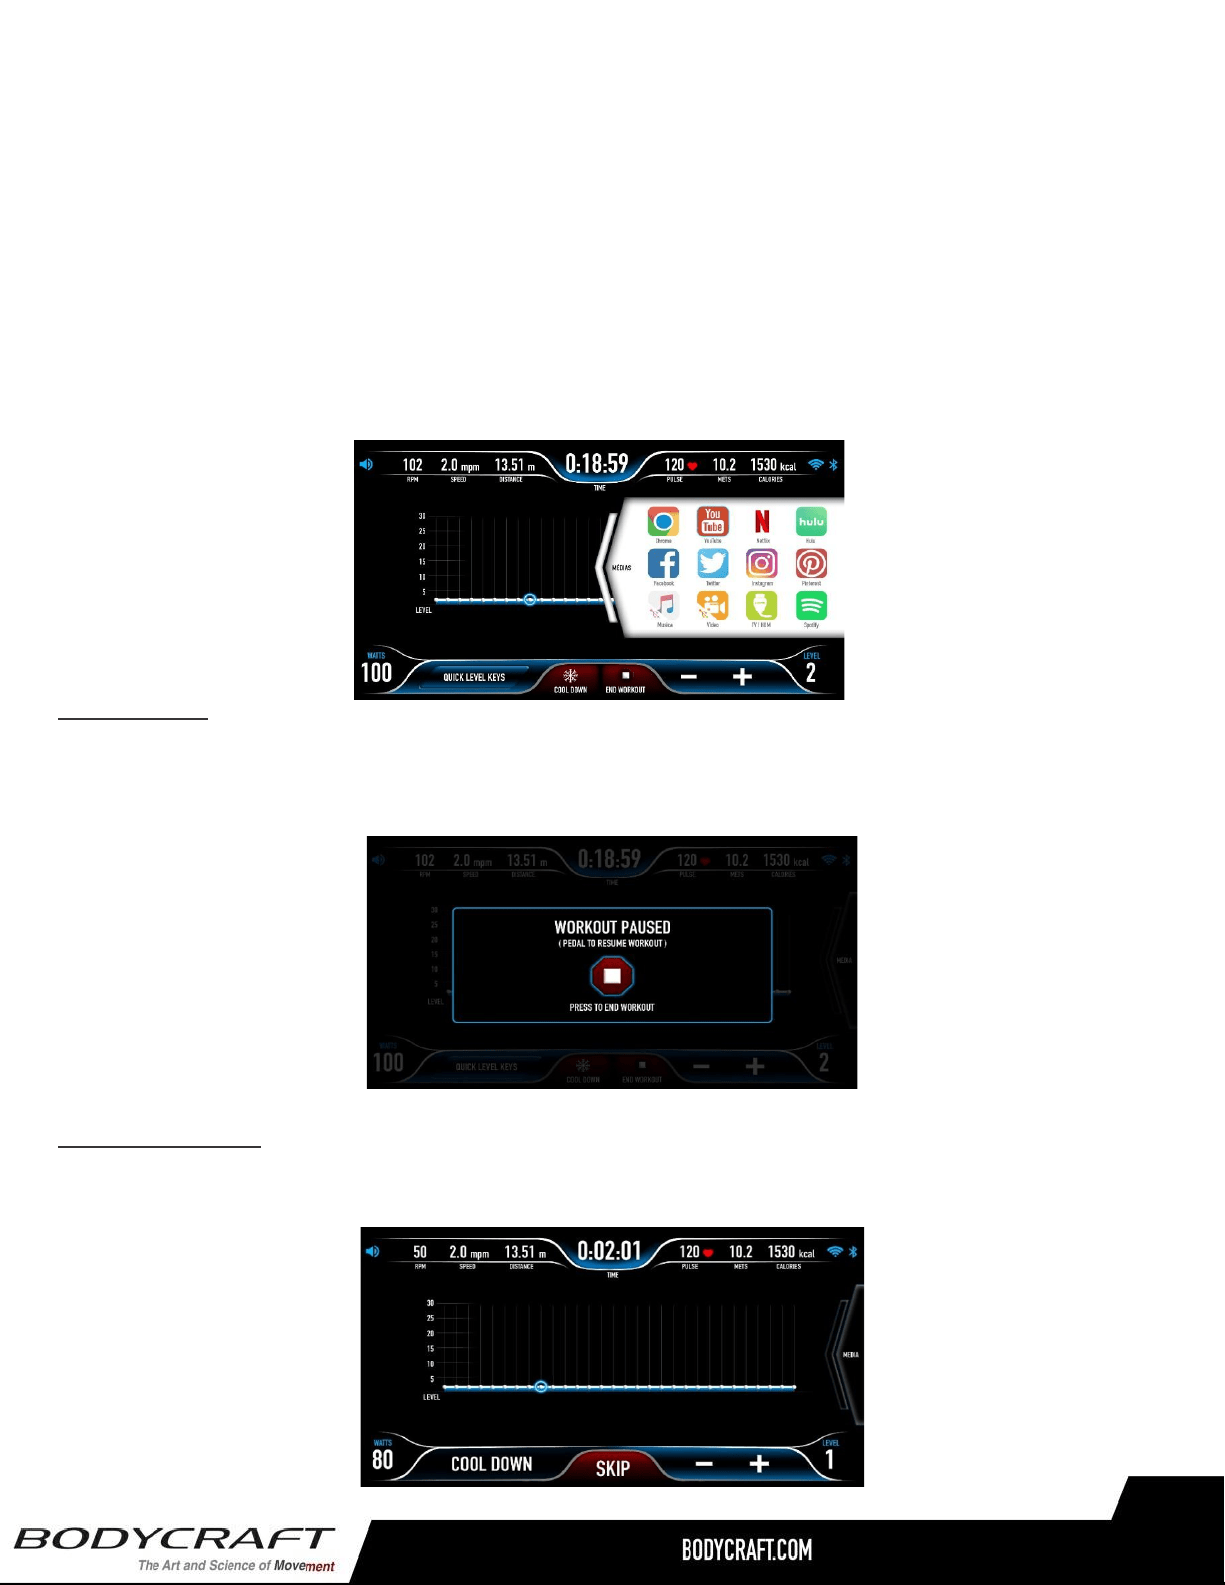
● Media: Swipe the media tab to open the Media selection.
Pause Screen
During exercise, you may simply stop pedaling to pause the product for up to 10 minutes. The data will
stop accumulating. You may pedal again to resume back to previous activity or press “STOP” to end the
program. If no key pressing for these 10 minutes, the console will reset and back to idle mode.
Cool Down Screen
After program time is up or “COOL DOWN” is pressed, a 3-minute Cool Down mode will start. Same as
Warm Up, the level is defaulted at 1. You may adjust it during this period.
8
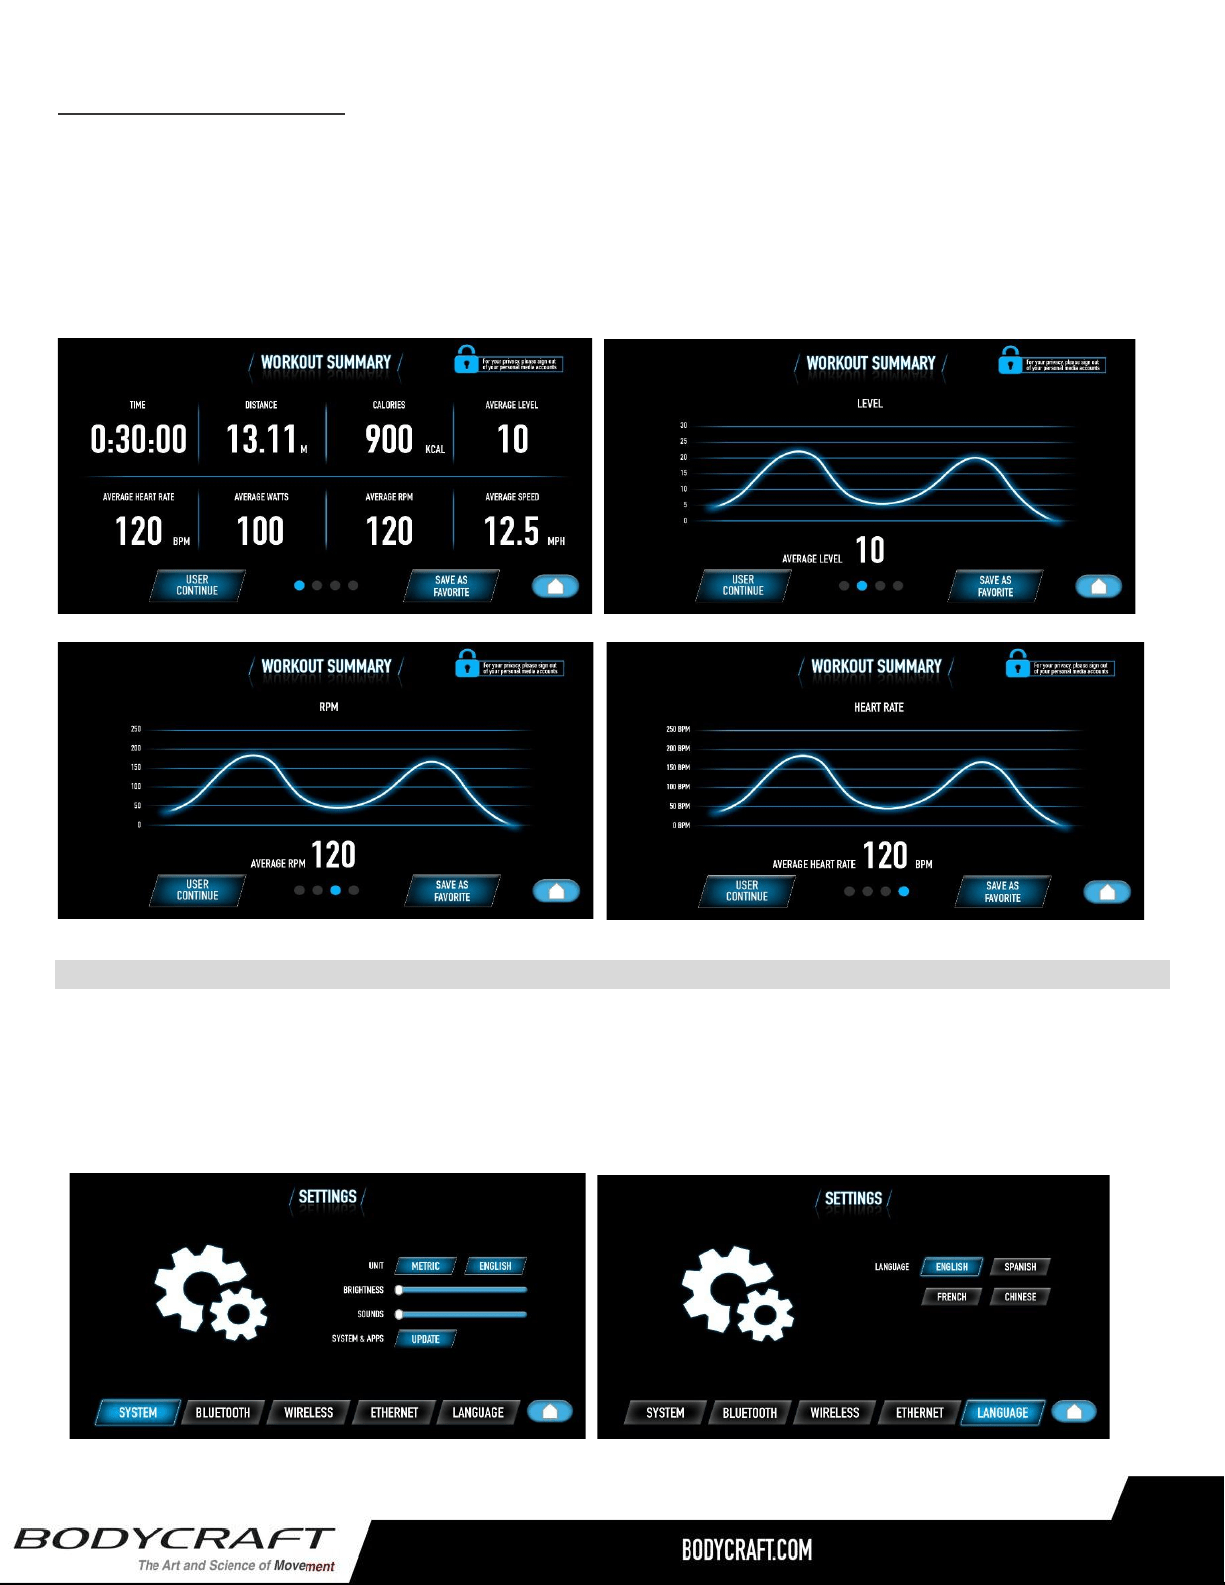
Workout Summary Screen
When “STOP” button is pressed during Pause or Cool Down period ends, or “SKIP” button is pressed
during Cool Down, the program will end and enter summary review screen. There are 4 pages of
summary for you to review. Swipe the screen to see the next page.
If “Save As Favorite” option is available, you may save this program into your favorite program by
pressing the “Save As Favorite” button and follow on-screen instruction to save it.
Initial Setup
To ensure this product runs smoothly and accurately, please initiate the product setting before using the
equipment. Touch the “SETTING” button the on the right top corner of the Home screen to start.
There are the selections listed on the bottom of the screen. Select unit setting to your liking. To pair
Bluetooth device and/or WIFI setting if you want. Lastly, select your langue if prefer certain one.
9
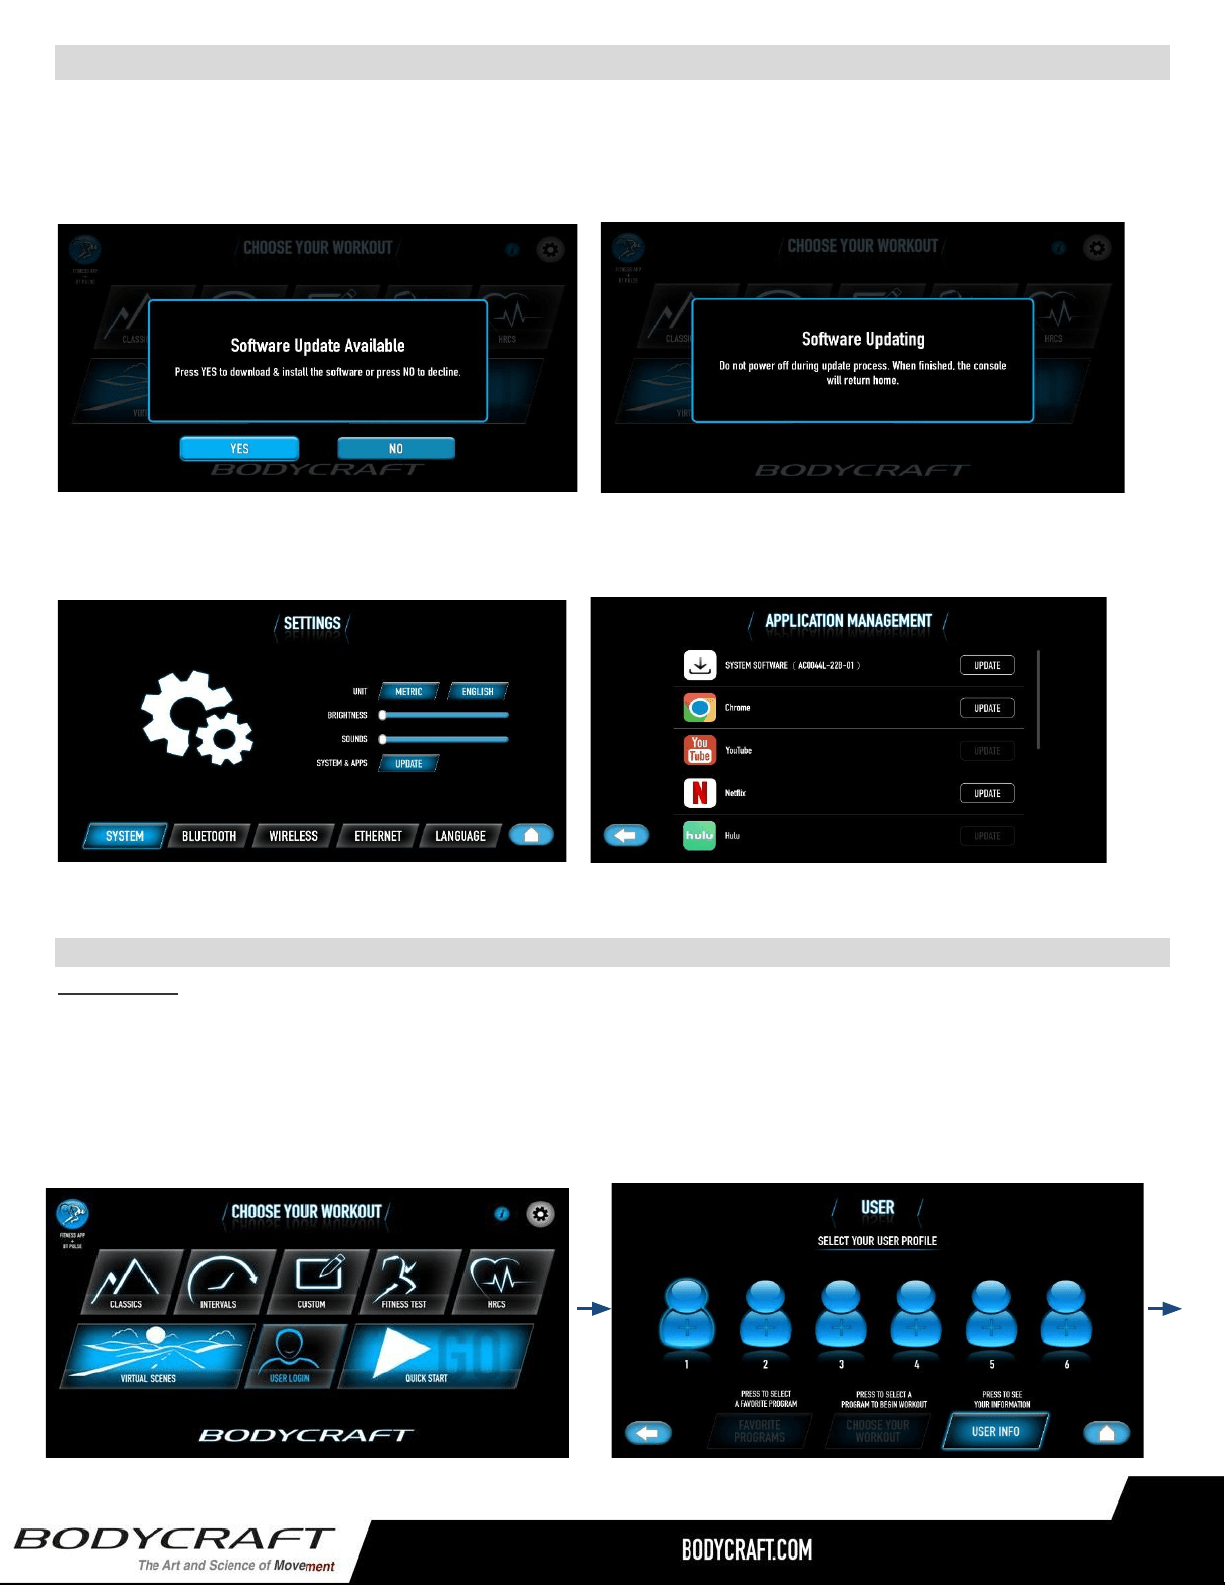
System Software Update
Before start using this product, it is recommended to check and install latest system software. To do so, you
may check the Custom Support on BODYCRAFT website for the latest software available. Download it to a
USB drive to install. Or if available, the new software can be updated via Cloud with a message showing on
the home screen to notify you.
Finally, to install the latest Media Apps’ software, go to “SYSTEM & APPS” under SETTINGS” for the
update.
Basic Operation
User Login
User section is designed with you in mind. You can store your user profile, build a custom workout as well
as review your workout history. If you are the owner of this product, you will want to set up your user profile
to utilize the utmost of this console has to offer. There are 6 user profiles can be stored in this console. Each
person has up to 10 favorite program spaces. If you start each program with the user login, all your workout
data will be tracked and stored here for your future review.
10
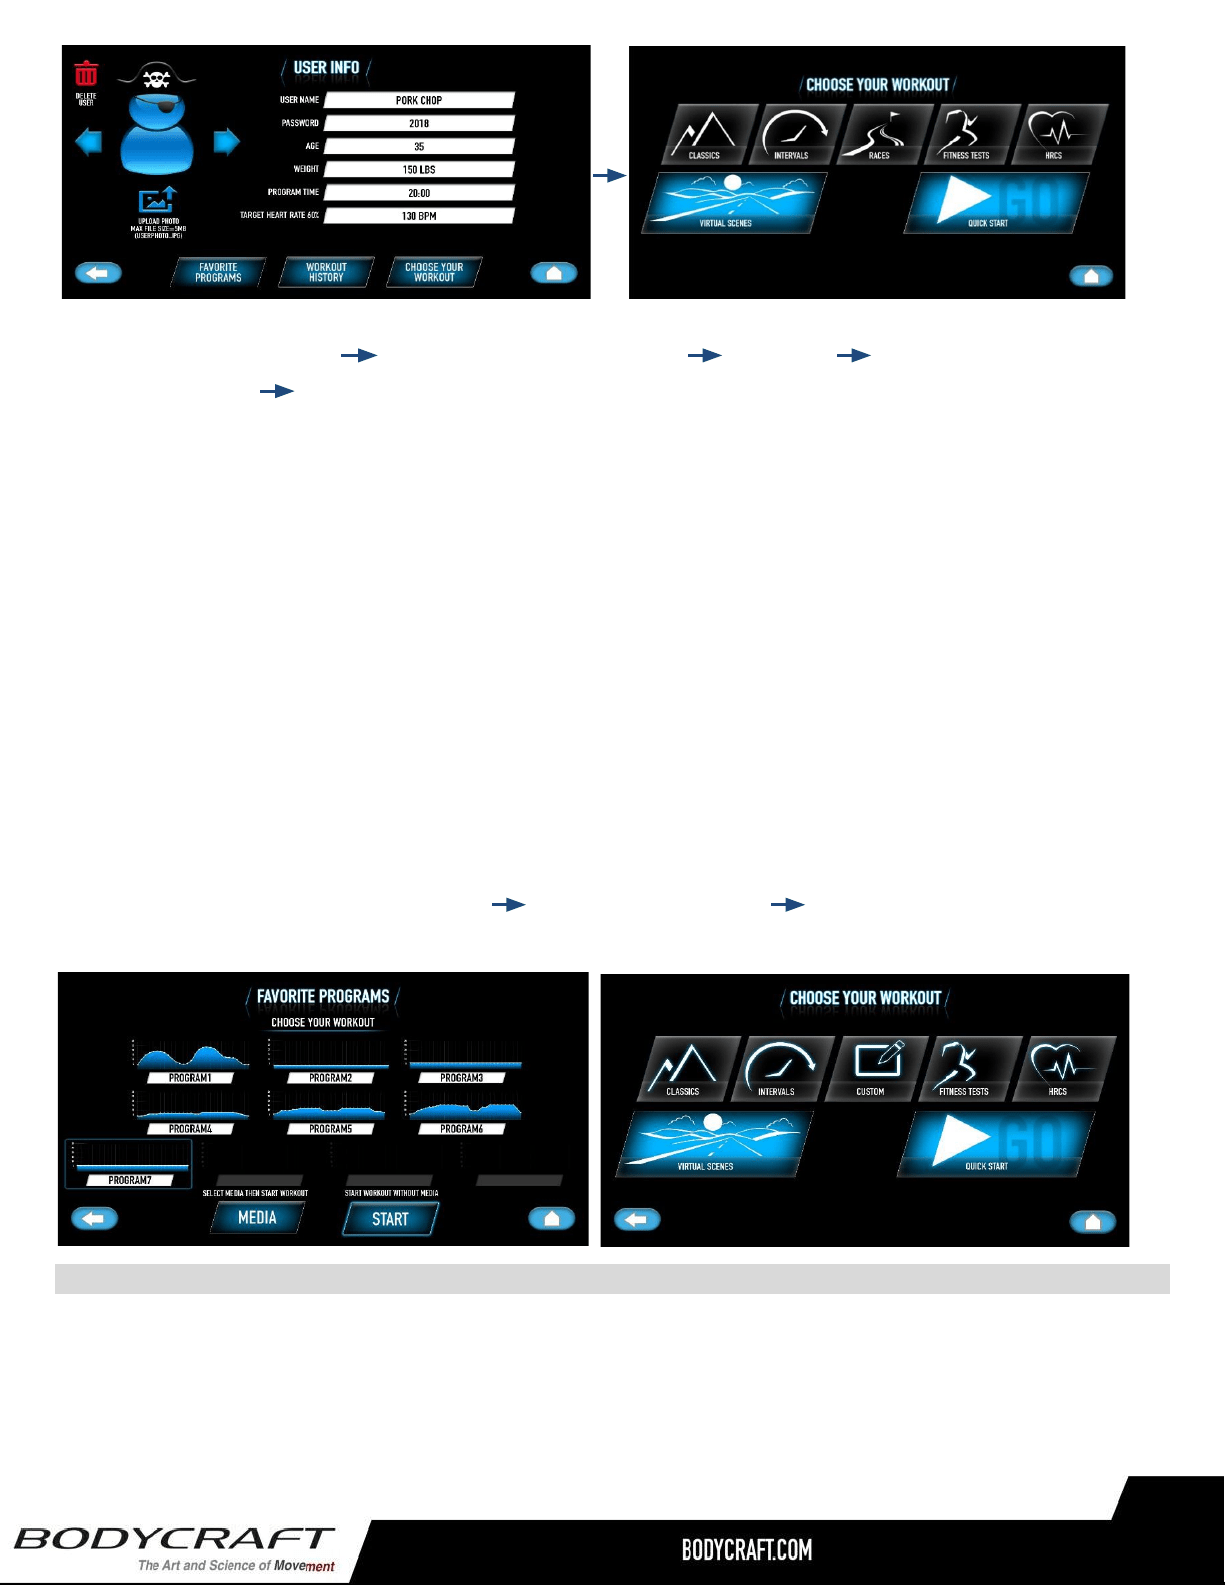
For the first time using User, you must build your user profile first.
Select User Login button Select a Username/number User Info Set up all your
user information. Choose an Avatar or upload a picture via USB disk.
Note: If you are uploading a picture via USB, for the console to recognize the picture, you must first store
the picture with a file name “userphoto.jpg”, then insert the USB disk. Keep in mind, the max file size
cannot exceed 5MB Otherwise, it will not work properly.
For security purpose, the password will be activated once you enter a password here. It will be required to
enter the correct password next time you log in.
Note: If your password is forgotten, you may press & hold the top left corner for a few seconds to
reset password. If you do not want password, just leave the password box blank.
Once user information is filled in, you may now choose your workout or review workout history if you have
done a workout under this user before.
Select User Login on the home screen Pick your user profile Select a favorite program
/ Choose your workout
Program Basics
There are two ways to select and start any program: select a program directly on the home screen or go thru
User Login to select a program. The difference is the user information. If you select a program directly from
home screen, the program setting will start with default values and you can change it for data calculation
accuracy, but the workout data will not be stored and tracked on your user profile.
11

Quick Start
Quick Start program allows you to start exercise immediately without any product setting steps. Just press
Quick Start on the home screen, it will start the product right away. It will start with default values of age &
weight for calories calculation. You may go thru User Login 🡪 Choose Your Workout 🡪 Quick Start to begin
this program. The console will then use your user data for calculation.
● The program will start with level 1.
● The program time will count up from 0.
● You may adjust level any time during program.
● Stop pedaling to pause the program. Cool Down button to start Cool Down or End Workout button to
end the program and review summary.
Classic Programs
There are six programs inside Classic program category. Follow on screen instruction to enter user
information and start exercise right away.
12
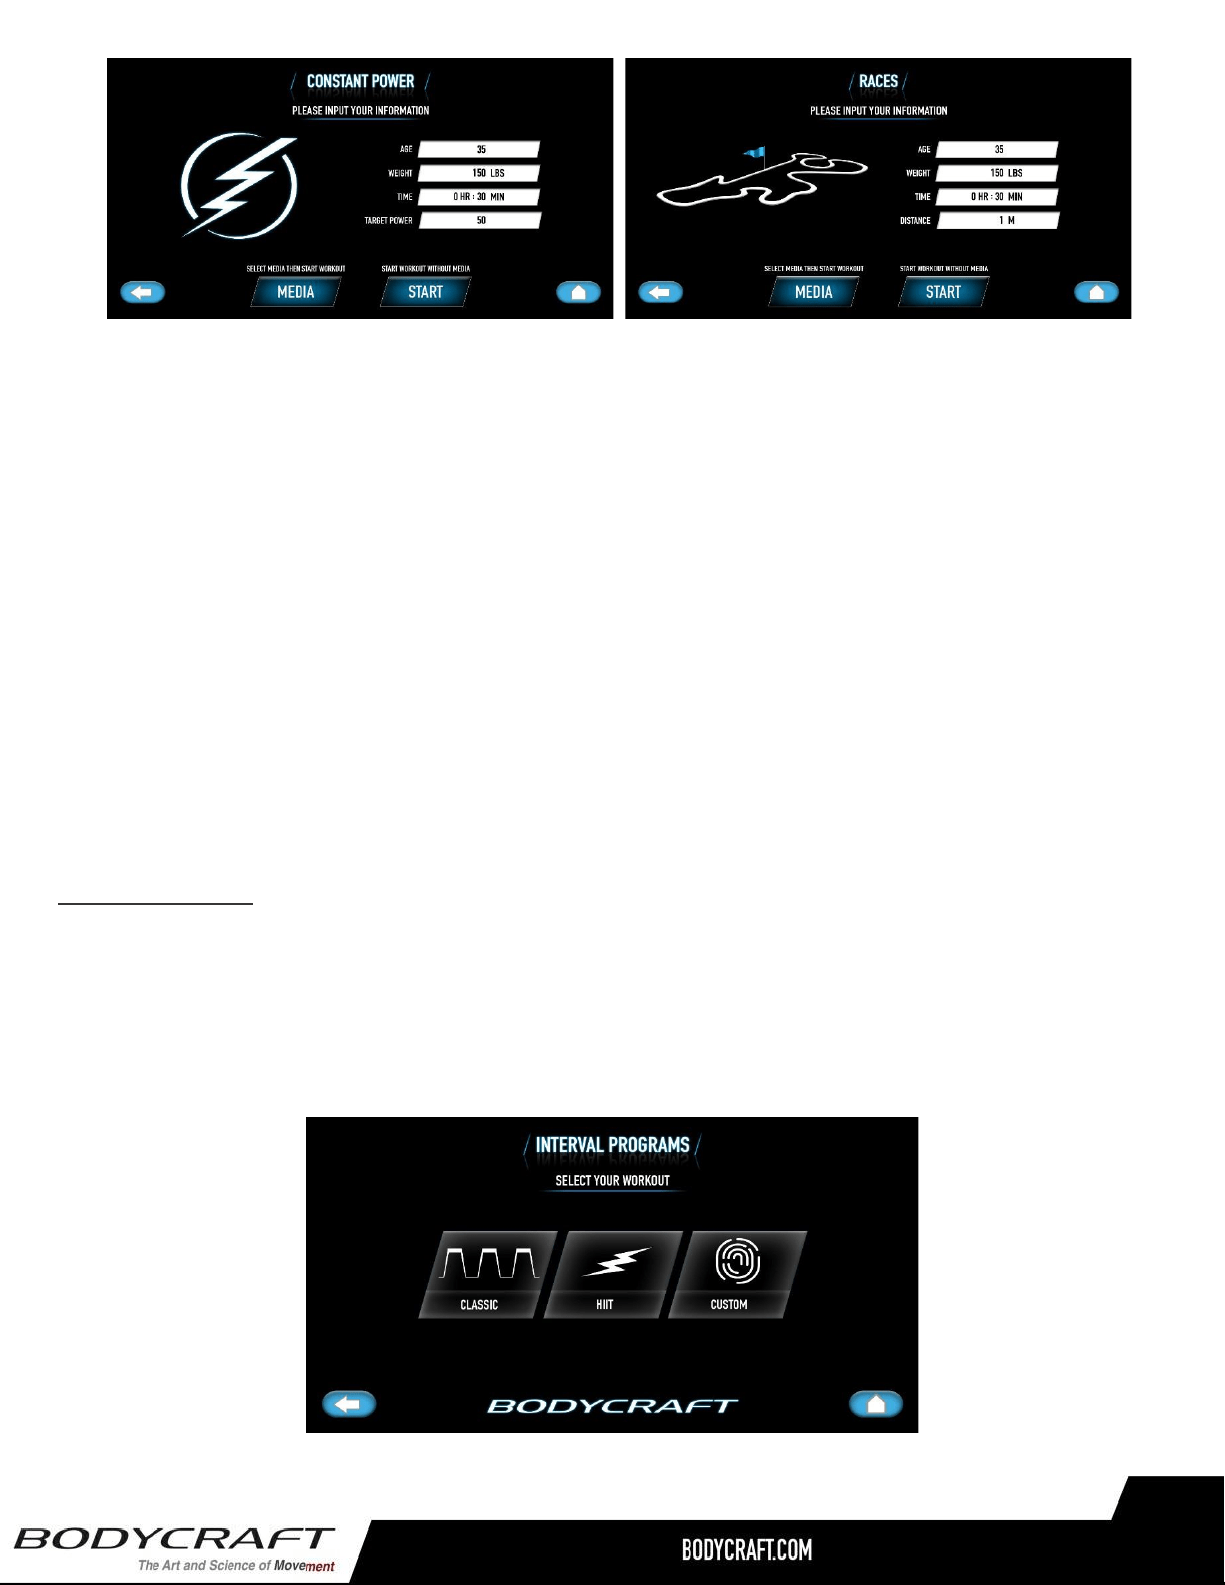
● Goal program: user may select up to 3 goals: Time, Distance & Calories. Every goal selected will
count down when the exercise starts.
● Random program: Console will randomly generate a new level profile each time this program is
selected. You may set your max level limit for the console not to go over when generates the
profile.
● Hill & Plateau programs: These are also preset level profile programs with ability to set up max
level.
● Constant Power program: This is a Power/Watt control program. Console will automatically adjust
the level to maintain the target power/watt range. The level is not adjustable during program;
however, you may adjust the target power/watt during workout.
● Race program: You set your time goal and distance goal to start the program. The calculated pace
indicator (arrow) will light up to guide you or race you (avatar indicator).
Interval Programs
There are three interval programs inside this category for cardio condition training purpose. Each program
comes with a set of work intervals and a set of rest intervals. It is designed to train your cardio condition
during work intervals and then rest & recover during rest intervals. The work intervals are the same
throughout, so when you adjust the work interval setting, it will apply to all the remaining work intervals,
same as rest intervals. These programs will start with 3-minute Warm Up period.
13
● Classic intervals: This is a preset level intervals program with the ability to set max level.
● Custom HIIT (High Intensity Interval Training): This program is designed to workout at an
extremely high intensity level in a short period. There are 4 interval work vs rest time ratios to
choose from. For example, 10:30 meaning 10 seconds of work and 30 seconds of rest. You will
then repeat this interval with your preset repetition times (up to 100 times).
● Custom Interval: You design your own work & rest interval time, level & repetition.
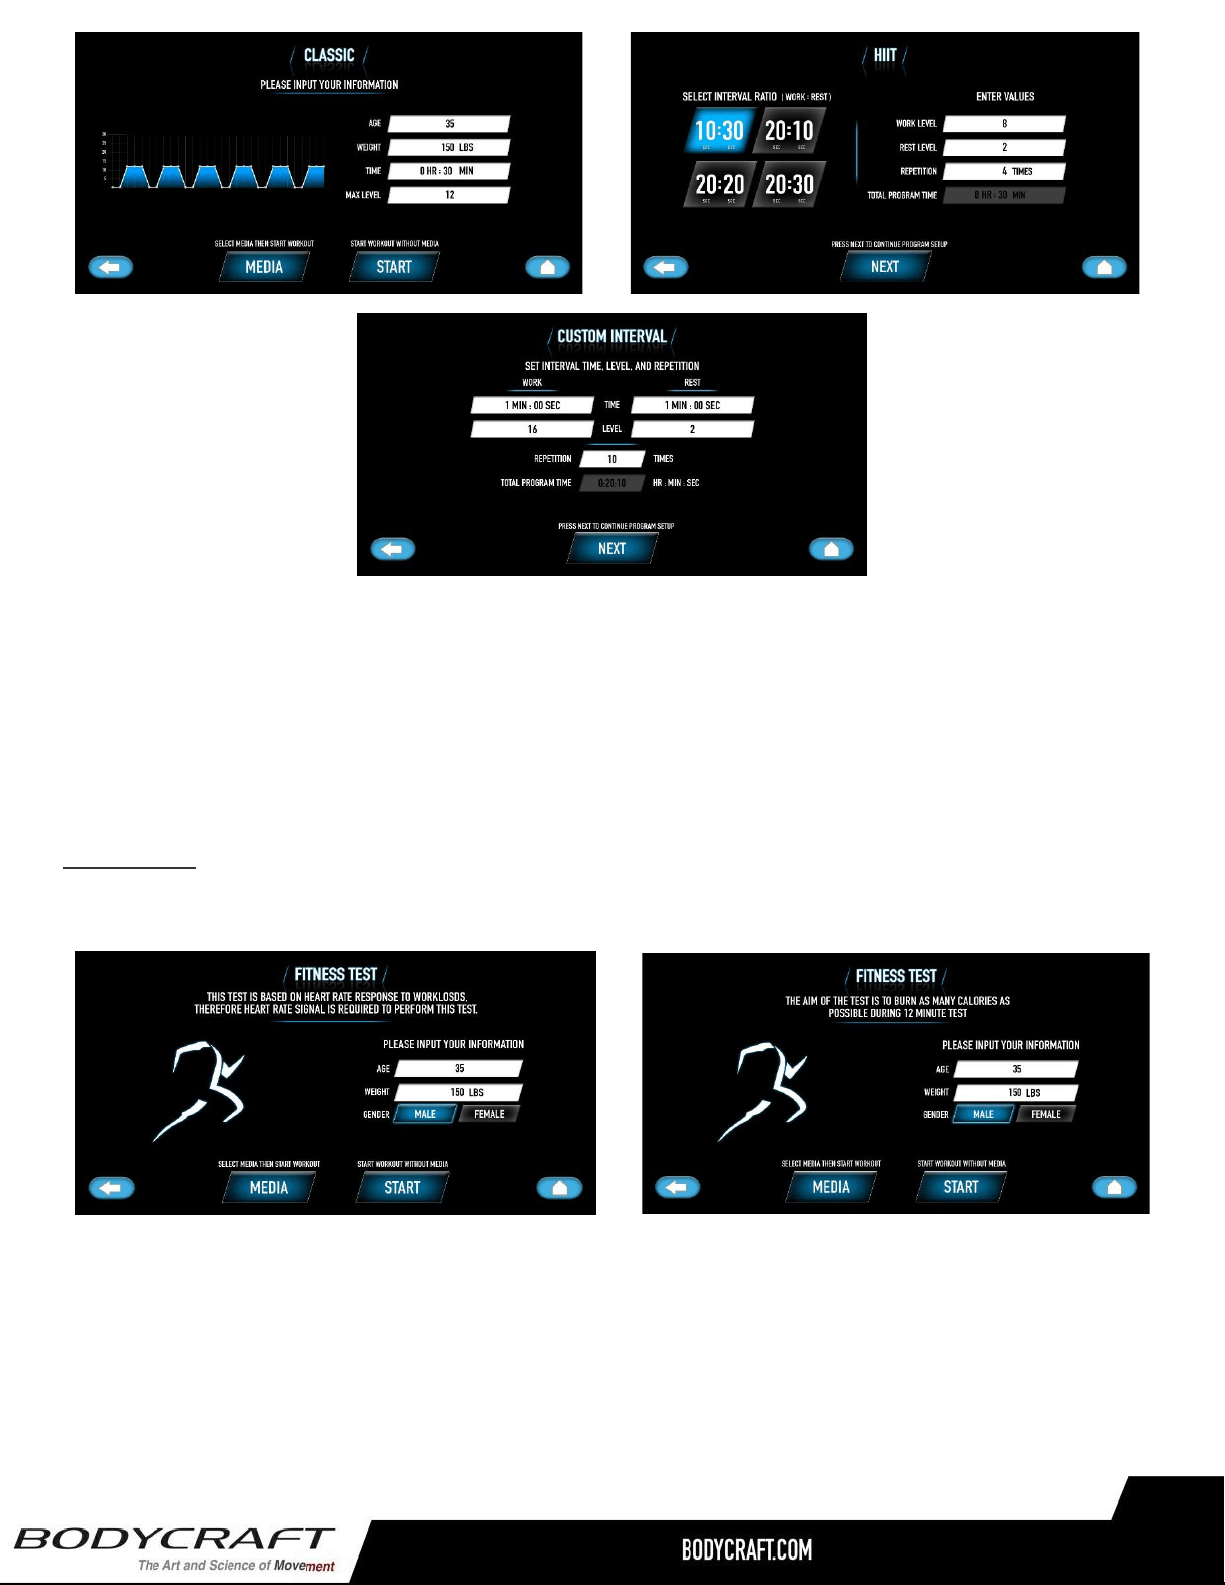
Fitness Test
The fitness assessment protocol is built into this console. Bike version protocol is based on YMCA fitness
test protocol and Elliptical version is based on PRT protocol. They are widely used by fitness experts.
● U1000/R1000 Bike version: The program is tested base on the heart rate condition at 50 rpm range.
Heart rate signal must be valid throughout the test to calculate the score. It is critical to maintain the
speed at 50 rpm range, then the console will adjust level automatically according to the protocol to
raise your heart rate. Depending on how soon your heart rate reaches 85% max, the computer will
calculate & present a test score. Pause function is not allowed with this test, therefore if there is no
valid heart rate signal or stop pedaling before the test is completed, the test will fail.
14
● E1000/E1200 Elliptical version: The Program is tested with a preset 12-minute goal. The protocol is
measured how fast and how much resistance you can do in this period, the higher watts you can
maintain thru the program, the higher score you will get. Pause function is not allowed with this test,
therefore if you stop pedaling before the test is completed, the test will fail.
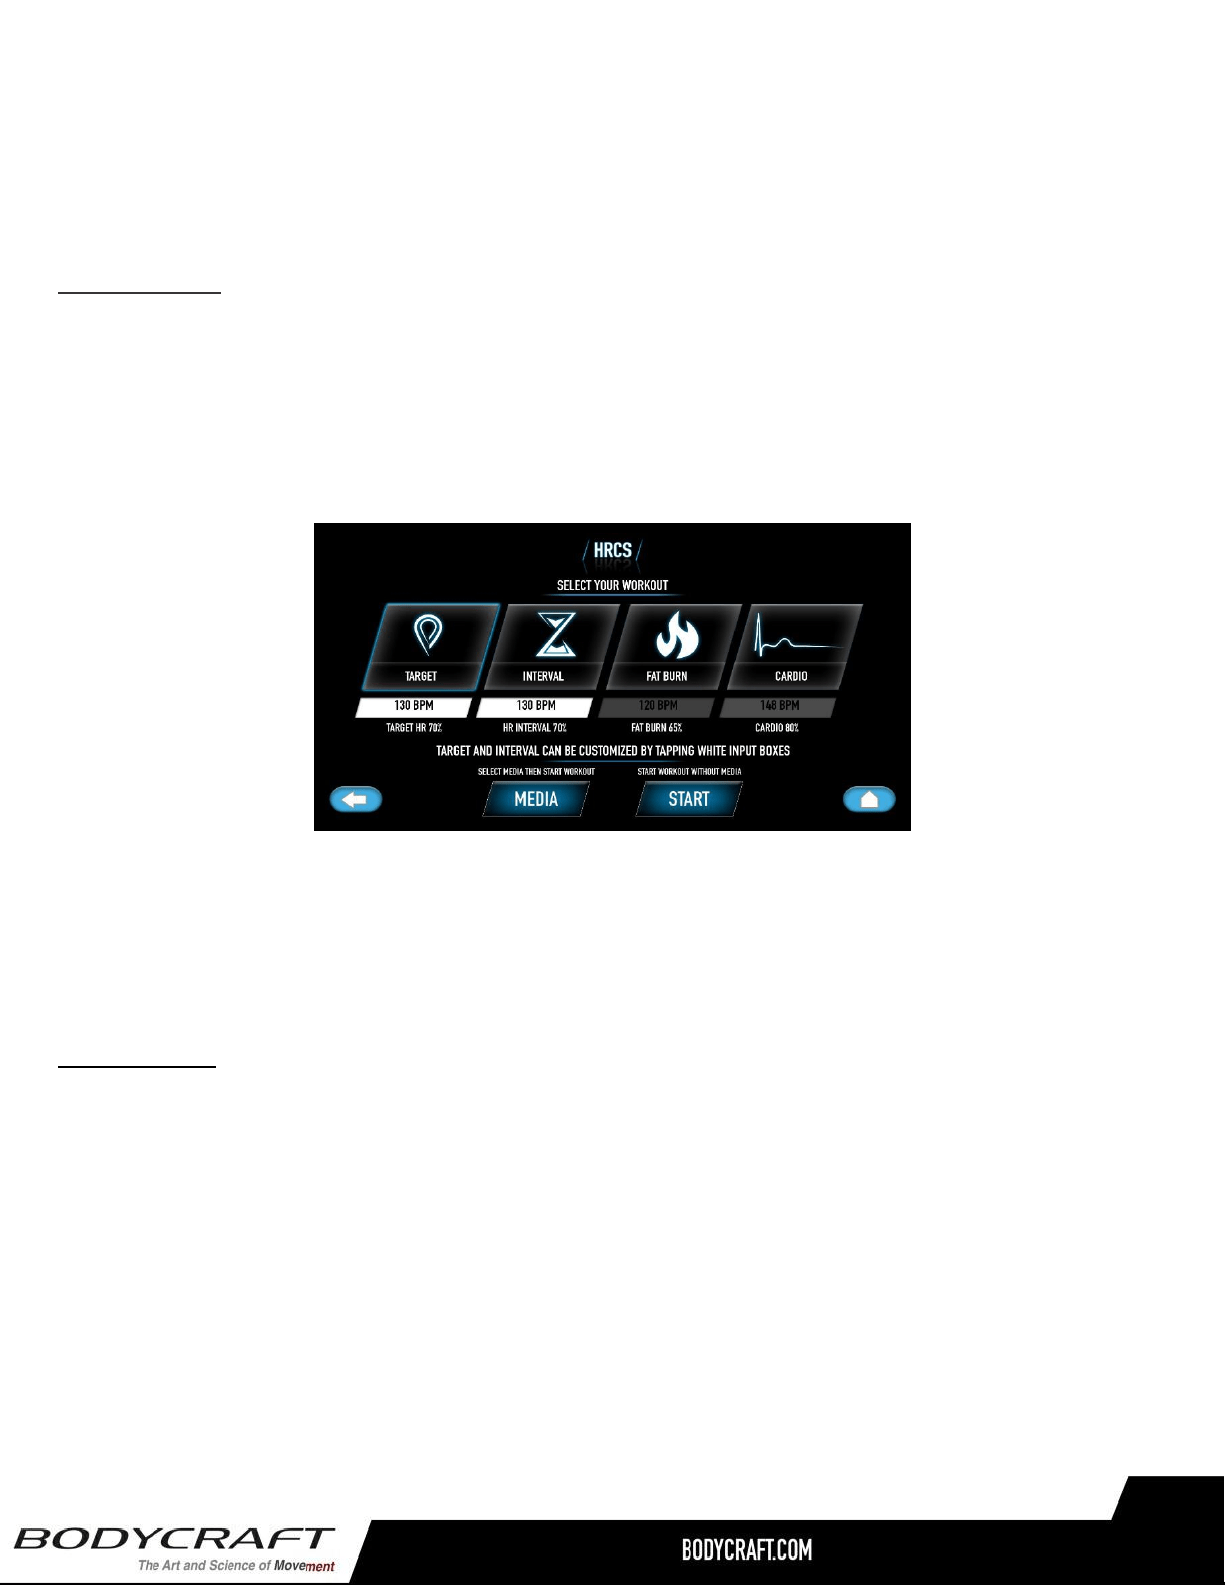
HRC Programs
The Heart Rate programs are designed to keep you training at the chosen heart rate level. These
programs will only work when there is a valid heart rate signal. It is recommended to use wireless
heart rate chest strap rather than hand grip pulse sensors for these programs. There are Target, HR
interval, Fat Burn and Cardio programs. Follow the on-screen messages to select your HR program as
well as program settings. Please note that Fat Burn & Cardio programs are defaulted with 65% & 80%
target heart rate respectively and therefore their target heart rates setting can’t be changed.
These programs will start with a 3-minute warm up period which user will be able to adjust the level. After
warm-up, the heart rate program begins, the console will take control and adjust the level automatically to
ensure your target heart rate is achieved and maintained during the entire program. You may still adjust the
target HR during exercise by pressing the “+/-“keys.
Virtual Scenes
There are four Tropical, Beaches, Forests & Mountains scenic landscape videos built in to bring your run to
the outdoor experience virtually. You may select to sync your speed with the video playing speed or just
viewing a video along the way of your run. Every part of the program works the same way as other programs
as you can adjust level anytime during the exercise; however, the profile display will be replaced with scenic
video.
Please note: Each video is 60 minutes long with normal playing speed. If you synchronize the video speed
with your run speed or you are running more than 60 minutes, the video will be repeated.
Please note: The Media function will be disabled during Visual Scenes program.
15
Media Selection
5.4KHz Polar compatible, Bluetooth & ANT+ heart rate monitoring:
This console is equipped with 5.4KHz Polar compatible, Bluetooth as well as ANT+ heartrate monitoring.
The console will automatically scan and connect with the closest 5.4KHz transmitter. However, to pair with
Bluetooth/ANT+ transmitter, you must first press the Bluetooth pulse button.
Bluetooth headphone/speaker feature:
To pair a device with the console, tab Setting on the homepage 🡪 Bluetooth 🡪 pair with the device.
Please note: there is only one audio device & a heart rate transmitter can be paired at one time.
Fitness App Connecting:
Download a compatible Fitness App on your mobile device. To connect: Tab Fitness App button on home
screen 🡪 open the App on your smartphone/tablet 🡪 Pair with the product 🡪 Start exercise.
Please note: There is only one App can be synced with the console at one time.
Please check our website for Compatible Apps.
16
CSAFE port feature:
This is reserved for 3
rd
party devices, such as personal TV which draws power from CSAFE port. Please
contact BODYCRAFT service for more information.
HDMI device connection:
Plug the HDMI cable into the HDMI receptor on the back of the console 🡪 Slide the media option and
select HDMI 🡪 Watch video.
USB Music & Video features:
Plug the USB flash drive contains the music/video that you want to listen/see 🡪 Slide the media option and
tab the music or video button 🡪 Select the music or video from the playlist. (Note: not every music or video
format is supported.)
CSAFE port feature:
This is reserved for 3
rd
party devices, such as personal TV which draws power from CSAFE port. Please
contact BODYCRAFT service for more information.
17

9” Console Layout:
Device Ports
USB port –
Charge your device up to 1A. (Device not included)
CSAFE port – on the back of the console
Charging 3
rd
party compatible devices (not included)
Please note: Your media device compatibility with the USB & CSAFE
Charging will depend on the brand and model.
9” LCD Displays
18
Keys
● Quick Start key: Pressing this key during idle mode before you select a program will activate the
Quick Start program immediately with default user values. Or pressing this key during the program
setup after a program is selected will start the selected program. You may press this key to bypass
the Warm Up mode and start program right away.
● Cool Down key: Pressing this key during exercise to end program and enter Cool Down right away.
● End/Home key: Press this key once during exercise/Cool Down to end the program. Press this key
the 2
nd
time to end summary review and return home. Press & hold this key for a few seconds to
reset the console and back to idle mode.
9” LCD Displays
● Dot matrix profile window:
Displays program profile during program setting and executing. The program profile will be
different according to which program is selected. HRC program profile represents the actual pulse
vs. target and other program profiles represent the level.
Each profile contains 10 columns of LED representing 20 segments of time; each segment time =
total program time divided by 20 columns, except Quick Start program which represents 1 minute
instead.
● Data display windows:
For U/R1000: There are 8 data display windows displaying “CALORIES, TIME, DISTANCE, RPM,
WATTS, PULSE, LEVEL & SPEED” during exercising.
For E1000/E1200: There are 8 data display windows displaying “CALORIES, TIME, DISTANCE,
SPM, WATTS, PULSE, LEVEL & STEPS” during exercising. STRIDE LENGTH display is for
E1200 model only.
● Alphanumeric display window: this display will prompt instruction messages to assist you setting up
the program and during exercising.
19
● Level +/- keys: There are 2 sets of +, - keys (console & handles) for adjusting. Use these keys to
adjust the user settings during program as well as the Level/Target HR/Watt settings during exercise.
● Enter key: Used to confirm program and data entry.
● Level quick keys: press these quick keys to rapidly change the Level settings during exercise. For
your convenience, you may press and hold the “Custom” key to save the current Level setting into
the key as a new custom quick key.
● E1200 Quick Stride Keys: There are 2 sets of keys for Stride length adjustment. There are 7 stride
length settings from 19” – 25”; press Stride +/- keys on the handlebar to adjust the setting one at a
time or press the quick keys to rapidly change the most 5 common Stride length settings during
exercise.
● Bluetooth key: Press this key to connect with 3
rd
party App or to use Bluetooth/ANT+ heart rate
transmitter.
● USER 1 & 2 keys: Press the key to start User program or press & hold the key for a few seconds
during summary review to save the current program setting into User 1/2.
Basic Operation
● Pause a program: Simply stop pedaling, the console will enter Pause mode and stop accumulating
data. The pause time is 10 minutes. After that, the console will reset back to idle mode. Within pause
mode, pedal again to resume the program.
● Power save function: This console is equipped with power save function. This means after 10
seconds of inactivity the console will automatically power off. Press any key to wake up the console
from power save mode.
● Start a program: To begin a workout program during idle mode, press the “Quick Start” key to quick
start the program or any “Program” key to select a program and “Enter” key to confirm a program.
Then follow the instruction on the alphanumeric window to set up the personal data. When finished
entering data, press the “Start” key to begin program executing sequence. Start pedaling and as
soon as the console detects an RPM, it will begin the countdown. (You may press “Start” key anytime
during setup to bypass and start the executing sequence immediately.)
20

● Default values: Initially the console is coded with a set of defaults for express quick start. If you didn’t
adjust these values before the program started, they will be used for data calculations, such as
calories. It is recommended you adjust these values with your own personal data to get the most
accurate workout feedbacks. The factory defaults are:
○ Age: 35
○ Weight: 150 lbs or 70 kg
○ Program time: 30 minutes
○ Program goal for Manual program: Time
● End a program and review summary: When program time is reached or Cool Down key is pressed,
it will end the program and enter Cool Down. When Cool Down is finished or End key is pressed, it
will enter summary review mode. There are 30 seconds for you to review and record the workout
summary before it resets and back idle mode.
○ During summary review, you may press & hold USER 1 or 2 key for a few seconds to store
this program as a USER program. Your user information will be stored as well for quick and
easy access for future use.
● Units switching: The default units setting is English. To switch this to Metric system, press and hold
“ENTER & Level +” keys at the same time in idle mode for 2 seconds to go to “Engineer mode”. The
message window will prompt a couple of messages. When you see “UNITS: ENGLISH or METRIC”
message, press “Level +/-” key to switch and a “MILE” or “KM” indicator will show on the current
setting. Afterwards press Enter key to confirm the setting. Press “STOP” key for a few seconds to get
back to idle mode.
Workout Programs
Besides Quick Start function, there are built-in program options for your selection: Manual, Classic, Constant
Power, Interval, HIIT, HRC, User 1 & 2.
Quick Start: Pressing “Quick Start” key during idle mode will quick start the console. The program will use
factory defaults for calculation and display. The time will count up and each segment of profile equals 1
minute. You may press “COOL DOWN” key to enter Cool Down mode or press “END” key to end the
program.
Manual (Goal) program: The default level for Manual program is 1. You may set up to 3 goals: Time ,
Distance or Calories. During program setting, whichever goal is set with value other than 0, it will be taken
as the program goal(s). The new goal(s) will be counting down from target during program. The program will
not end when the goal(s) is reached, it will continue with goal(s) counting up. You may press “COOL DOWN”
or “END” key to end the program.
21

Preset programs: This group includes Classic, Interval & HIIT programs.
These programs are preset profile programs and behave similar. There are a few programs stored inside
Classic program key. Continue pressing the Classic program key will bring up a different program each time.
When the desired program appears on the screen, press Enter key to confirm. Then follow the instruction to
set up the user data and start the program. You may adjust the level by pressing “+/-” quick key any time
during program. The dot matrix profile will update accordingly.
● Classic programs: There are Random, Hill & Plateau programs inside this program key. Each of the
program is with a preset level profile. Follow the message prompts to enter program settings/max
level setting and start the program. The program profile will be modified according to the new max
level. However, you can still increase the level in individual segment during program.
● Interval programs: There are Interval and HIIT programs. These programs are behaving similar as
Classic program described above, however the program is divided with work & rest intervals. Follow
the message prompts to enter program settings/max level setting and start the program. The program
profile will be modified according to the new max level. Interval programs will start with a 3- minute
warm up period. You may press START key to bypass it.
○ Speed Interval: default work level = 12 and rest level = 2. You may adjust the level during
exercising; however, it will apply only to either work intervals or rest intervals depending on
which segment you are adjusting at.
○ HIIT (High Intensity Interval Training): This program is designed with a fast-paced workout
routine. There are 4 different W: R (work: rest) time settings (in seconds) for you to choose
from: 10:30; 20:10; 20:20 & 20:30. Press +/- key to toggle between these settings and ENTER
to pick your preference. Then follow the message prompts to finish program setting and start
the program. Always start slow and ramp up intensity level as your fitness improves.
Constant Power Program: This program is a Power/Watt control program. Follow the message prompts to
set the Target Power and the console will automatically adjust the level depending on your pedaling speed to
maintain the target power/watt range. The program will start with 3-minute warm up period and you may
press START key to bypass it. Once power control portion begins, you may still adjust the Target Power by
pressing +/- keys during program. The program will adjust the level according to your new power setting.
22

HR programs: The Heart Rate programs are designed to keep you training at the chosen heart rate level.
These programs will only work when there is a valid heart rate signal. It is recommended to use
wireless heart rate transmitter rather than hand grip pulse sensors for this program because it is more
accurate.
There are Target HR and HR interval programs. Follow the message prompts to set your target HR as well
as Max level setting during the program.
These programs will start with a 3-minute warm up period which user will be able to adjust the level. After
warm-up, the heart rate program begins, the console will take control and adjust the level automatically to
ensure your target heart rate is maintained during the entire program. You may still adjust the target HR
setting by pressing “+/-“ keys during exercise.
This console is equipped with 5.4KHz Polar compatible, Bluetooth as well as ANT+ heartrate monitoring.
The console will automatically connect to a nearby 5.4KHz transmitter or you may press the Bluetooth pulse
key to scan & connect the Bluetooth/ANT+ transmitter.
User 1& 2 programs: These programs are the spaces for you to build your own workout profiles and store
for future use. If you save a program before, you may recall it and press “Quick Start" key to begin
immediately without the hassle of entering user information again.
To build your own profile, just follow the message prompts to set up your personal data. Once user data is
set, you can then build the level profile by adjust the level setting in individual segment, press “Enter” to
confirm the setting each time. After a few segments, if you want, you can press & hold the “Enter” key for a
few seconds to bypass the rest of the level profile. Once the profile is set, the user information & profile is
stored for future use.
23
Pulse Hand Grips
This product comes standard with stainless steel pulse hand grips. To activate, gently grasp both hand
grips to obtain a heart rate reading. (Note: It is recommended to wear a chest strap for Heart Rate control
program, as it is more accurate. If you wear a chest strap and use hand grips at the same time for heart
rate monitoring purpose, please note the console will take the measurement of the chest strap.) For safety,
it is not recommended to use the Heart Rate Sensors when exercising at high speeds. The Sensors may
not always be accurate for any user at all speeds. Individual physiology is a factor that can determine
accuracy, or even if the Sensors work for you at all. The Touch Heart Rate reading is not intended to be
used for medical purposes.
Pulse Grip Operating Tips: If you are not getting a consistent reading while using the hand pulse option,
we recommend the following suggestions:
● Make sure that the palms of the hands are touching the contact area
of each hand pulse grip.
● Maintain an even pressure on the grips.
● Do not hold the hand pulse grips too tightly.
● Make sure your palms are warm and slightly moist.
● Excessive movement especially on an elliptical handrail is not
optimum for hand grips or any High Intensive Exercise while on a
machine.
Built in Wireless Heart Rate Receiver
Note: Chest strap transmitter does not come with this unit; contact BODYCRAFT,
or your dealer for purchase.
This product is equipped with a built-in receiver for your heart rate monitoring. Any heart rate telemetry strap
that transmits at 5 KHz or Bluetooth is compatible. To get an accurate reading using these devices, you will
need to be within three feet of the console, and a minimum of four feet from others using a heart rate
monitoring device.
Note: The transmitter may fluctuate erratically if you are too close to other heart rate monitoring equipment
or there is other electronics nearby, such as TV, Radio…
While using heart rate control modes, the computer monitors the exact measurement of your pulse. Heart
rate frequency is displayed while the computer continually compares heart rate to the preprogrammed
personal data. The computer adjusts the wattage to maintain heart rate at the preprogrammed level.
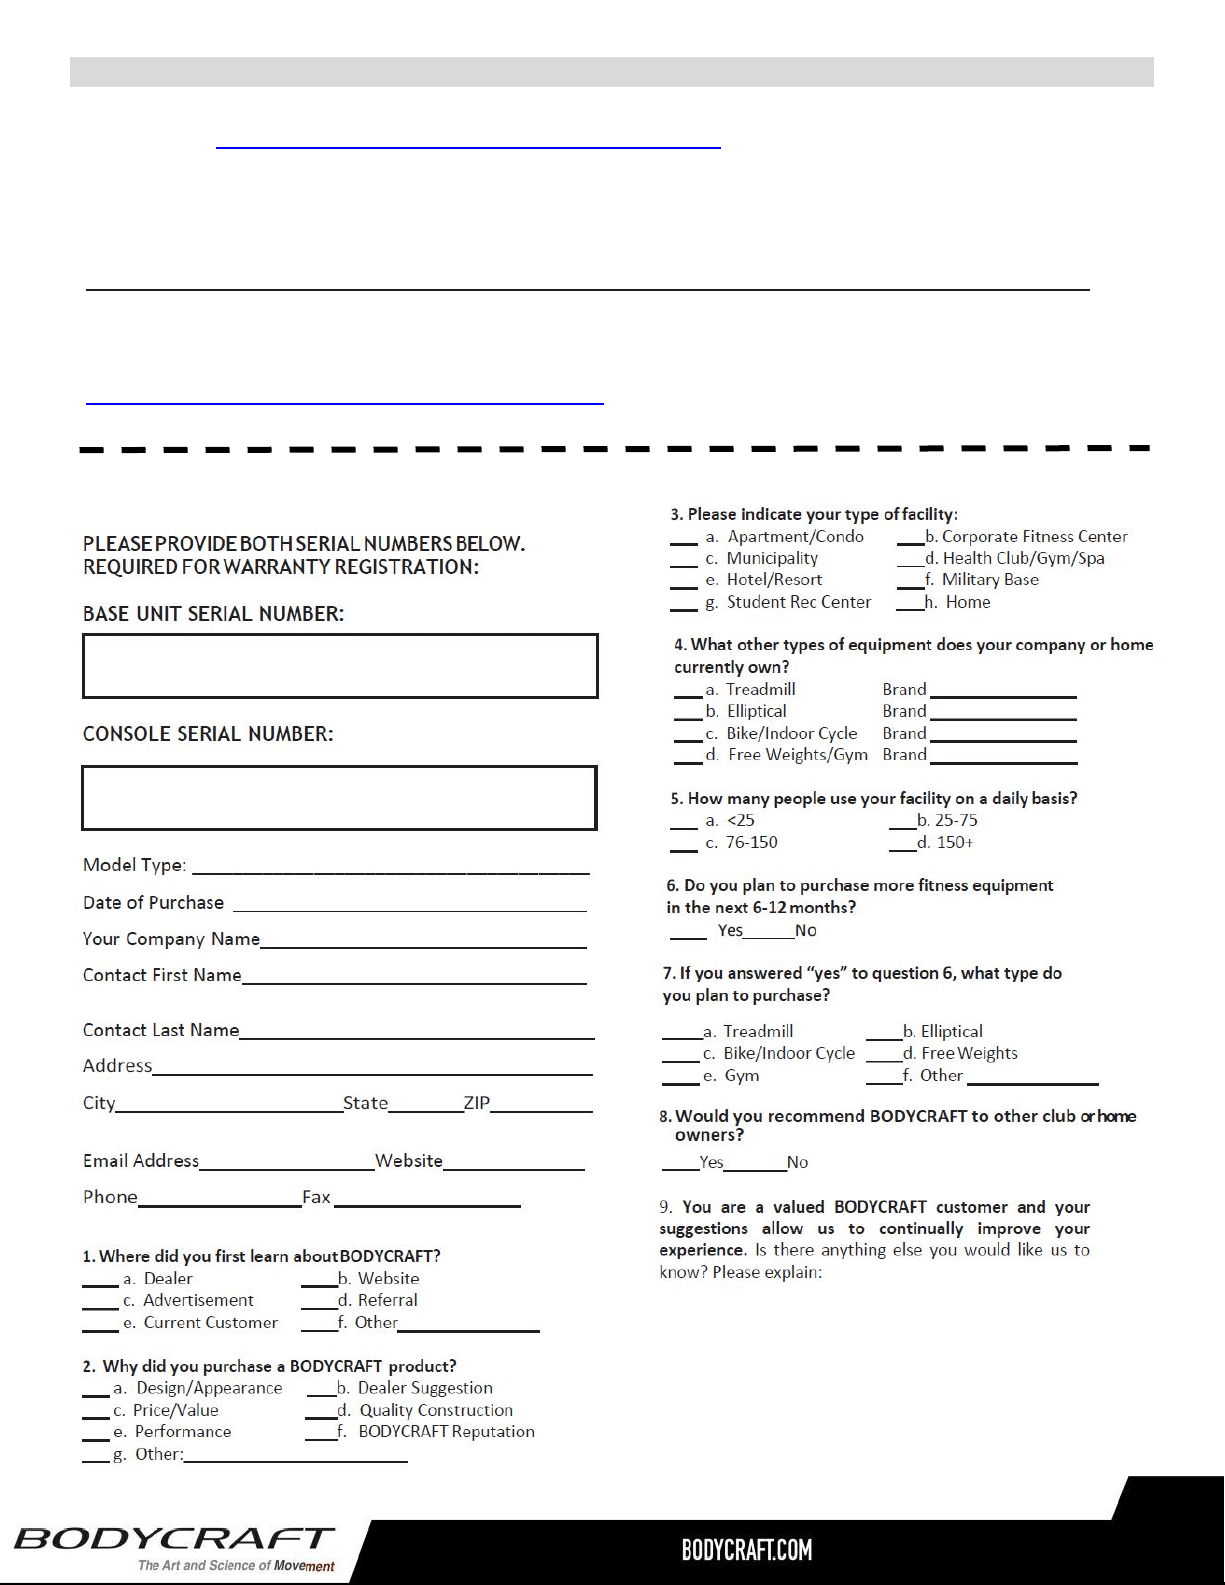
How to Wear Your Sensor/ Transmitter (Chest Strap)
○ Buckle one end of the chest strap onto the transmitter.
○ Adjust the band length so that the fit is snug, but not too tight.
○ Buckle the other end of the chest strap onto the transmitter.
○ Center the transmitter on your chest below the pectoral muscle (breasts).
○ Stretch the transmitter away from your chest and moisten the conductive
electrode strips located next to the buckles with water.
Note: The transmitter is on automatically when being worn. It is off when it is not connected to your body.
However, as moisture may activate the transmitter, thoroughly dry the transmitter to prolong battery life.
Heart Rate Monitoring Device & Exercise Tips

Erratic Heart Rate Readings:
Erratic readings on the receiver can be caused by electromagnetic disturbances. If the heart rate
readings appear to be abnormal, check that your product is not within range of other strong
electromagnetic signals. Common sources are televisions, computers, cars, cell phones, TV antennas
and high voltage power lines (both above and below ground). Please note: Static electricity in clothing
or a flapping shirt can cause electrical interference, so some items of clothing, i.e. man-made fibers,
can also be the cause. Please try wetting the t-shirt in the area where the transmitter is.
If the battery of the transmitter is running low, the transmission range decreases and may cause errors
similar to the ones listed above in this document.
Heart rate is an important key to your exercise
Medical research has shown us that there is an amount of exercise, which is enough to condition the
cardiorespiratory system and the muscles of the body. This amount of exercise is between 60% and
85% of your maximum heart rate measured during a training session. This range allows enough
exercise to achieve fitness, but not an excessive amount to cause injury. Your heart rate is an excellent
indicator of the amount of stress placed on the cardiovascular system.
If exercise intensity is too low or too high, no gains will be made in fitness. If the intensity is too low, the
stress levels are ineffective. If the intensity is too high, injury or fatigue may set your exercise program
back as you try to recover. Your target heart rate, the intensity needed to improve cardiovascular
fitness, depends primarily on your age and not your state of fitness. It is calculated as a percentage of
your maximum heart rate, estimated as 220 minus your age. It is most effective to train at your target
heart rate between 60% and 85% of your maximum heart rate.
Get a smart start on exercising.
Anyone over the age of 35, as well as younger persons whom are overweight, should check with
his/her physician before beginning any type of exercise program. People who have diabetes or high
blood pressure, a family history of heart disease, high cholesterol or have lead a sedentary lifestyle
should protect themselves with a medical check-up and a stress test, preferably administered during
exercise by a healthcare professional.
● Always stretch before your workout to loosen muscles, and afterwards to cool down.
● The first few minutes of your workout should be devoted to warming up muscles before a
vigorous workout and building your heart rate slowly.
● After your aerobic workout of about 24-32 minutes, spend 10 minutes gradually reducing your
heart rate with a lower resistance level.
Remember, to start slow, with intensity low, until you build endurance and strength. And always consult
your physician before beginning any exercise program.
Heart Rate Monitoring Device & Exercise Tips
25
Residential Warranty :
Frame: Lifetime, Parts: 10 years, Console: 3 years, Labor: 2 years
Headphone Jack, HDMI, CSAFE, ETHERNET & USB Port: 90 days and Labor: None
Commercial Warranty:
Frame: 10 years, Parts: 5 years, Console: 3 years, and Labor: 1 year.
Headphone Jack, HDMI, CSAFE, ETHERNET & USB Port: 90 days and Labor: None
This warranty excludes the following:
1. The warranty does not cover normal maintenance or labor charges unless labor terms are listed
above.
2. Normal cosmetic wear on parts such as paint, seat coverings, foot rails, labels and logos.
3. Consumables such as batteries and heart rate belts that do not have a replaceable battery.
4. Eprom/Software version upgrades unless determined as necessary.
5. Any accessories not included in the original packaging.
* This warranty is in lieu of all warranties, expressed or implied, and/or all other obligations or liabilities on
our part, and we neither assume nor authorize any person to assume for us any other obligation or liability
in connection with the sale of your BODYCRAFT product. Under no circumstances shall we be liable by
virtue of this warranty or otherwise for damage to any person or property whatsoever for any special,
indirect, incidental, secondary or consequential damage of any nature whatsoever arising out of the use or
inability to use the BODYCRAFT product.
Register your product’s warranty at www.bodycraft.com/product-registration.html
VALID FOR USA AND CANADA ONLY
(Please consult with your local distributor for warranty info specific to your region).
BODYCRAFT warrants its products to be free of defects in materials and workmanship for the time stated
below to the original purchaser.
Register your product within 30 days of purchase at www.bodycraft.com or call 800-990-5556 This
warranty is valid only in accordance with the following conditions:
The warranty begins on the original purchase date at retail and ends when the original owner
disposes of it, either through sale, gift, or otherwise. This warranty is not transferable and is only valid to
the original purchaser.
This warranty is available only for purchases made within and the original purchaser currently residing in
the USA and Canada. Please consult with your local distributor for warranty information specific to your
region. The product must have been registered within 30 days of the original purchase date or supply
proof of purchase to validate warranty (original sales invoice).
This warranty does not extend to any losses or damages due to accident, misuse, abuse, neglect,
negligence, unauthorized modification or alteration, use beyond rated capacity, unsuitable power sources or
environmental conditions, water, tampering, cosmetic damages, or improper installation, handling, repair,
maintenance, or application, or lack of proper maintenance.
If the item exhibits such a defect, BODYCRAFT will, at its option, repair or replace it without cost for parts.
Shipping and handling charges may apply. (BODYCRAFT may require return of the part(s) or photographic
evidence of the damaged part(s) prior to replacement.) Serial number is required.
Parts repaired or replaced will be warranted for the remainder of the original warranty period only.
Product Warranty
26
Warranty Registration
27
Thank you for purchasing a BODYCRAFT product. To validate the product warranty the fast and easy way, please go
on-line now to https://www.bodycraft.com/product-registration.html and register your product. The information
you provide will never be distributed to any other individuals or agencies for any purpose. If you prefer to mail
your warranty card, have the owner of the product complete the information below and return it to BODYCRAFT
within 30 days from the date of equipment installation.
Please Note: Failure to register this product will result in no servicing or authorization of parts to be shipped.
To mail your warranty information, please fill in the information below and mail to: Service Dept., BODYCRAFT ,
7699 Green Meadows Dr. Lewis Center, Ohio 43035 (or save postage and register online at
https://www.bodycraft.com/product-registration.html )
Warranty Registration
28