Owner Guide Blood pressure monitor
Getting to know your instrument
The upper arm blood pressure monitor is used for non-invasive measurement and monitoring of adults’ arterial blood pressure. This allows you to quickly and easily measure your blood pressure and to display the last recorded measurement. The values determined are classified and graphically evaluated according to WHO guidelines.
Blood pressure measurements determined by this monitor are equivalent to those obtained by a trained observer using the cuff/stethoscope auscultation method, within the limits prescribed by the U.S. Department of Health and Human Service (World Health Organization; WHO).
It is recommended to check the performance every 5 years or after repair. Please contact customer service.
Package Contents
- Blood Pressure Monitor Model BM 55
- Universal arm cuff 8.7 in - 16.5 in (22 – 42 cm)
- Instruction manual
- Quick Start Guide
- Storage pouch
- 4 x 1.5 V AAA alkaline batteries
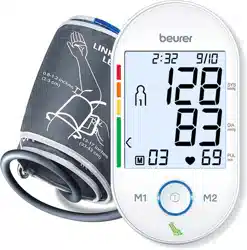
Device description

- Arm Cuff
- Air Tube
- Air Tube Connector
- LCD Display
- Memory buttons M1/M2
- START/STOP Button

- Resting Indicator
- Risk Category Indicator
- Air Tube Port
- Battery Compartment (on backside)
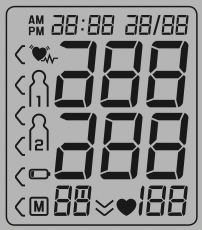
Icons in the display:
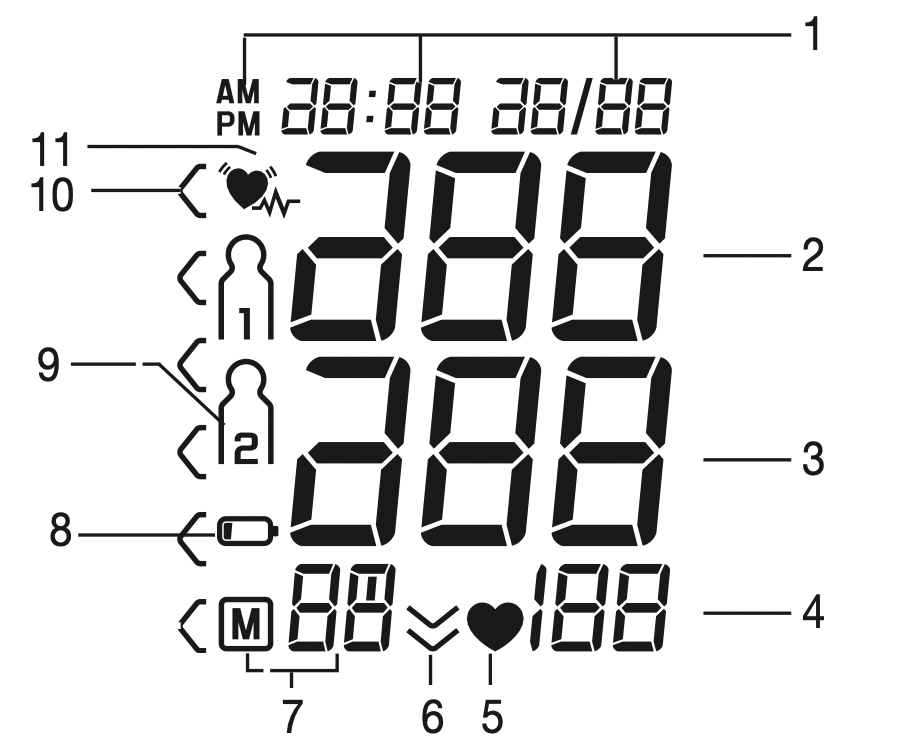
- Date / time
- Systolic pressure
- Diastolic pressure
- Pulse rate
- Pulse symbol

- Deflation Indicator

- Memory space number/ average value (
 ), morning (
  ), evening (
  )
)
- Low Battery Indicator

- User memory

- Risk Category Indicator
- Irregular Heartbeat Indicator

Getting started
NOTE: To conserve the batteries, the monitor switches off automatically if you do not press any buttons for 3 minutes.
Inserting/replacing batteries
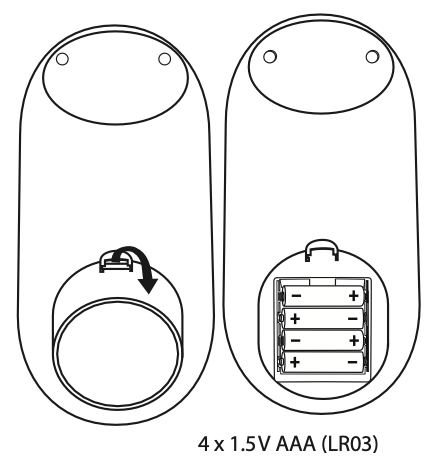
- Remove the battery cover from the back of the monitor.
- Clean the battery contacts and those of the device prior to installation with a soft dry cloth.
- Insert or replace with only four AAA alkaline batteries. Make absolutely sure that you insert them with the correct polarity (+/-) as indicated (see the diagram inside the battery compartment). Do not use other types of batteries.
- Replace the battery cover carefully.
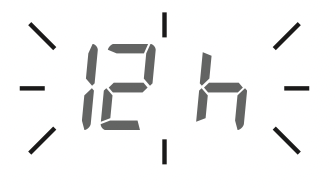
All display elements are briefly displayed and 12 h flashes in the display. To set the time and date, refer to section ‘5.3 Setting the date and time’
If the battery change icon  is continuously illuminated, measurement is no longer possible and you must replace all the batteries.
Cuff selection
This unit includes 1 size of arm cuffs:
- Universal size fits 8.7 in – 16.5 in (22 – 42 cm)
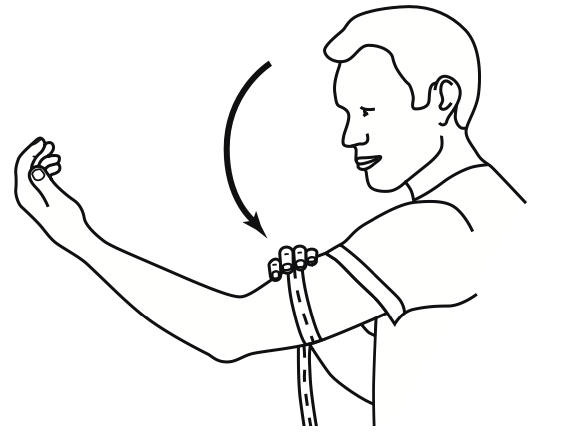
Measure your arm circumference around your bicep using a normal measuring tape.
Setting the date and time
The following section describes the functions and settings available on the blood pressure monitor.

It is essential to set the correct date and time. Otherwise, you will not be able to save your measured values correctly with a date and time and access them again later.
Note: If you press and hold the M1 or M2 memory button, you can set the values more quickly.
Hour format
- Press and hold the START/STOP button
 for 5 seconds.
- Choose the desired hour format with the M1/M2 memory buttons and confirm with the START/STOP button
 .
.
Date
The year flashes on the display.
- Choose the desired year using the M1/M2 memory buttons and confirm with the START/STOP button .
The month flashes on the display.
The day flashes on the display.
- Choose the desired day using the M1/M2 memory buttons and confirm with the START/STOP button .
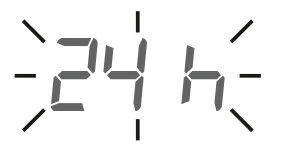
Note: If the hour format is set as 24 h, the day/month display sequence is reversed.
Time
The hours flash on the display.
- Choose the desired hours using the M1/M2 memory buttons and confirm with the START/STOP button .
The minutes flash on the display.
- Choose the desired minutes using the M1/M2 memory buttons and confirm with the START/STOP button .
Measuring blood pressure
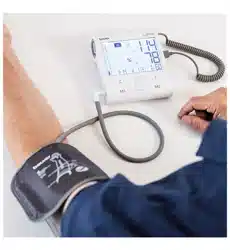
Positioning cuff
NOTE: Always properly position the Arm Cuff on the arm at heart level, according to the following instructions.
Fit the cuff round your bare left upper arm. Do not place the arm cuff over heavy clothing (e.g. a jacket or sweater sleeve) as the blood pressure monitor will not be able to take a proper measurement. Blood circulation in the arm should not be restricted by tight clothing or other objects.
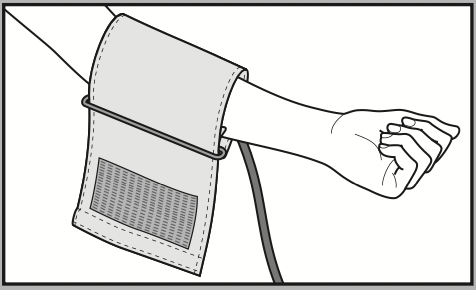
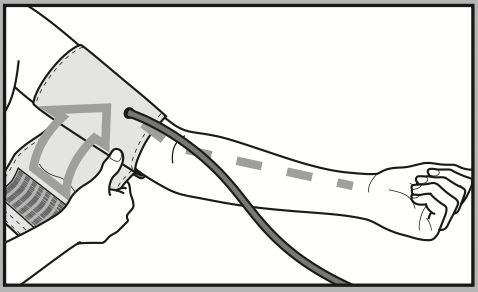
The cuff should be placed on the upper arm so that the lower edge is 0.8 in to 1.2 in (2 to 3 cm) above the bend of the elbow and above the artery. The tube should be in line with the centre of the palm.
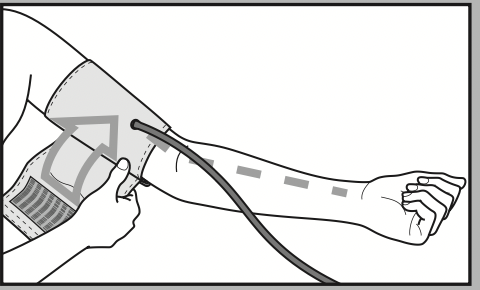
Now place the free end of the cuff snugly, but not too tightly, around the arm, and fix it with the Velcro fastener. The cuff should be fitted tight enough to allow just two fingers to fit beneath the cuff.
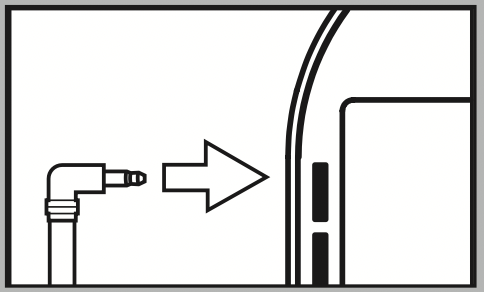
Insert the cuff tubing into the socket for the cuff attachment on the left side of the unit. Make sure it is inserted securely in the main unit and that there are no kinks in the cuff tubing.
Important: This device should only be operated with the original cuff. The cuff included with the device is suitable for an upper arm circumference of 8.7 to 16.5 in (22 – 42 cm). Replacement cuffs from other models cannot be used with this model. Doing so, will result in inaccurate readings or error messages.
- In order not to distort the result, it is important to keep still during the measurement and not talk. The most precise measurement results are obtained if you strive for a relaxed measurement situation. You may close your eyes and breathe calmly during the measurement and don’t cross your legs.
- Please note that any muscle movement during inflation or deflation can cause measurement error.
General notes
- For reliable monitoring and reference of blood pressure, keeping long-term records is recommended.
- To minimize measurement variations due to physical activity, rest at least 5 minutes before measuring your blood pressure (or 15 minutes after strenuous activity). You should not be physically tired or exhausted while taking measurement.
- In order to obtain a resting condition blood pressure, avoid eating, drinking alcohol and caffeinated beverages, smoking, exercising, and bathing for at least 30 minutes before taking a measurement.
- Stress raises blood pressure.
- Perform measurements in a quiet and relaxed environment at room temperature.
- Always wait at least 5 minutes between measurements to allow the blood circulation in your arm to return to normal. You may need to increase the wait time depending on your individual physiological characteristics. Because of normal physiologic changes and the many external factors influencing blood pressure, it is unusual to obtain identical blood pressure measurements, even when taken a few minutes apart. Speak with your physician to determine what is affecting your blood pressure and which variation may be seen as normal in your case.
- The accuracy of any blood pressure measurement with this device can be affected by a multitude of causes. Some can be avoided some have to be accepted at the time of measurement. Speak with your physician about possible causes affecting your blood pressure.
- Do not inflate the cuff unless wrapped around arm.
- If no button is pressed for approx. 3 minutes the automatic shutoff function shuts off the unit in order to preserve the batteries.
- Do not touch the unit, the tube and cuff and/or press any buttons when measurement is in progress, except for stopping the measurement. Doing so may cause incorrect readings.
Taking measurement
NOTE:
If you are using the unit for the first time, please remove the protective film from the display.
- Put on the cuff around your bare left upper arm as described previously and assume the position in which you want to carry out the measurement.
- Switch on the blood pressure monitor with the START/ STOP button .
- Before the measurement, the last saved test result is briefly displayed. If there is no measurement in the memory, the instrument always displays the value ‘0’.
- The cuff is pumped up. Cuff air pressure is released slowly.
Performing a blood pressure measurement
As described above, attach the cuff and adopt the posture in which you want to perform the measurement.
- To start the blood pressure monitor, press the START/STOP button . All display elements are briefly displayed.
The blood pressure monitor will begin the measurement automatically after 3 seconds.
The cuff automatically inflates.
Note: Measuring can be cancelled at any time by pressing the START/STOP button .
The cuff’s air pressure is slowly released. If you already recognize a tendency for high blood pressure, you should reinflate the cuff and increase the cuff’s pressure again. As soon as a pulse is found, the pulse symbol is displayed.
- Systolic pressdiastolic pressure and pulse measurements are displayed.
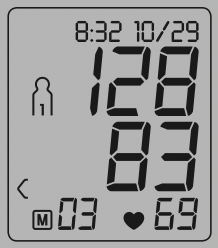
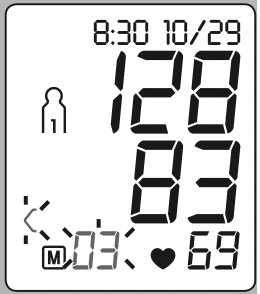
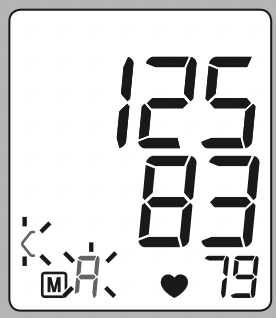
- A symbol at the bottom of the display also lights up to indicate whether you were sufficiently relaxed during the blood pressure measurement (green symbol = sufficiently at rest; red symbol = not at rest).

- Observe the chapter on interpreting results/measuring the resting indicator in these instructions for use.
 appears if the measurement could not be performed properly. Observe the chapter on error messages/troubleshooting in these instructions for use and repeat the measurement.

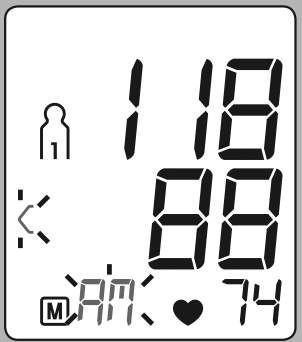
- Now select the desired user memory by pressing the M1 or M2 memory buttons. If you do not select a user memory, the measurement is stored in the most recently used user memory. The relevant symbol
 or
or  appears on the display.
- Using the START/STOP button , switch off the blood pressure monitor. The measurement is then stored in the selected user memory.
- If you forget to turn off the device, it will switch off automatically after approx. 3 minutes. In this case too, the value is stored in the selected or most recently used user memory.
- Wait at least 5 minutes before taking another measurement!
Displaying and deleting measurements
User memory
The results of every successful measurement are stored together with the date and time. If there are more than 60 measurements, the oldest measurements are lost.
- To access memory recall mode, the blood pressure monitor must first be started. To do this press the START/STOP button .
- Within 3 seconds of the full-screen display appearing, select the desired user memory (
 ) with the M1 or M2 memory button.
- To view the measurements for user memory
 , press the M1 memory button.
- To view the measurements for user memory
 , press the M2 memory button.
Your last measurement will appear on the display.
Average values
- Press the relevant memory button (M1 or M2).
Note:
If you have selected user memory  , the M1 memory button must be pressed.
If you have selected user memory  , the M2 memory button must be pressed.
 flashes on the display.
The average value of all saved measured values in this user memory is displayed.
- Press the relevant memory button (M1 or M2).
 flashes on the display.
The average value of the morning measurements for the last 7 days is displayed (morning: 5.00 a.m. – 9.00 a.m.).
- Press the relevant memory button (M1 or M2).
 flashes on the display.
The average value of the evening measurements for the last 7 days is displayed (evening: 6.00 p.m. – 8.00 p.m.).

Individual measured values
- When the relevant memory button (M1 or M2) is pressed again, the last individual measurement is displayed (in this example, measurement 03).
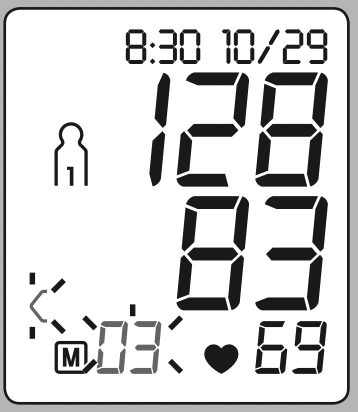
- When the relevant memory button (M1 or M2) is pressed again, you can view your individual measurements.
- To switch the device off again, press the START/ STOP button or wait 30 sec.
Note: You can exit the menu at any time by pressing the START/STOP button .
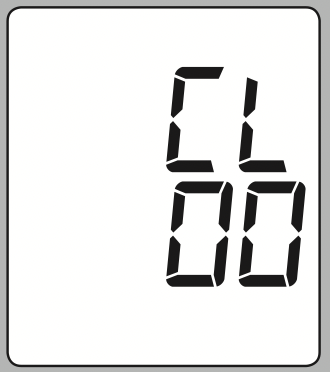
Deleting measured values
- To clear the memory of the relevant user memory, you must first select a user memory.
- Start individual measurement access.
- Press and hold the M1 & M2 memory buttons for 5 seconds.
All the values in the current user memory are deleted.
Evaluating results
NOTE: A single measurement does not provide an accurate indication of your true blood pressure. You need to take and record several readings over a period of time. Try to measure your blood pressure at the same time each day for consistency.
Irregular heartbeat symbol
This symbol  indicates that certain heartbeat/pulse irregularities were detected during the measurement.
NOTE:
- Talking, moving, shaking or an irregular pulse during the measurement can result in the appearance of this symbol.
- Repeat the measurement if the flashing icon
 is displayed after the measurement. Please note that you should rest at least 5 minutes between measurements and not talk or move during the measurement. If the icon continues to be displayed in subsequent readings, we recommend you to consult your physician in order to determine if it is cause for concern. Do not try to interpret readings or attempt to treat any condition yourself. Always follow the guidance of a health professional. If you have an emergency call 911 immediately.
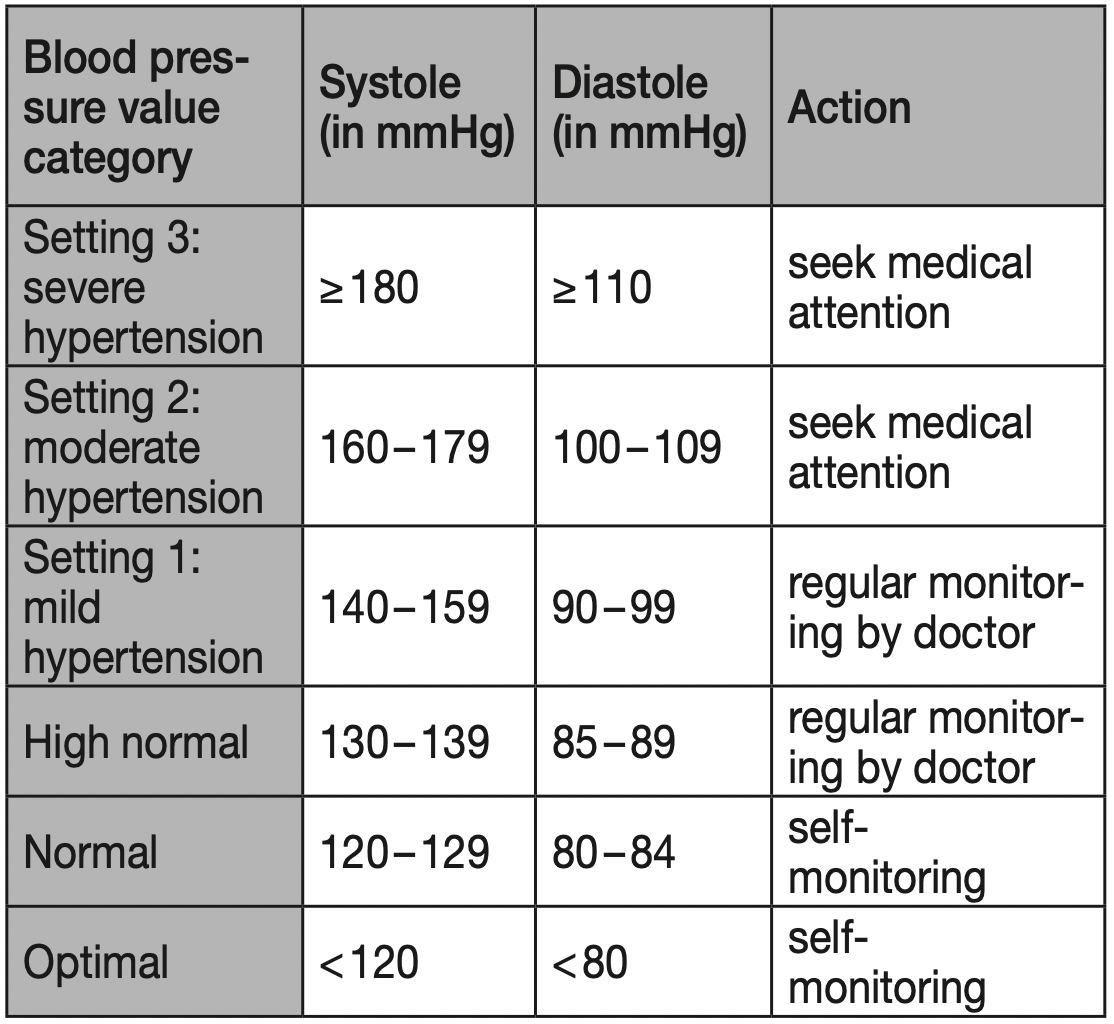
World Health Organization (WHO) classification
According to WHO Guidelines/Definitions and the latest findings, the test results of adults can be classified and evaluated according to the following chart.
Measuring the resting indicator (using the HSD diagnosis)
The most frequent error made when measuring blood pressure is taking the measurement when not at rest (haemodynamic stability), which means that both the systolic and the diastolic blood pressures are distorted.
While measuring the blood pressure, the device automatically determines whether you are at rest or not.
If there is no indication that your circulatory system is not sufficiently at rest, the symbol  (haemodynamic stability) lights up green and the measurement can be recorded as a reliable resting blood pressure value.
 GREEN: haemodynamically stable
Measurement of the systolic and diastolic pressure is increased when the circulatory system is sufficiently at rest and is a very reliable indicator of resting blood pressure. However, if there is an indication that the circulatory system is not sufficiently at rest (haemodynamic instability), the  symbol lights up red.
In this case, the measurement should be repeated after a period of physical and mental rest. The blood pressure measurement must be taken when the patient is physically and mentally rested, as it will be the basis for a diagnosis and regulation of the patient’s medical treatment.
 RED: lack of haemodynamic stability
It is very probable that the systolic and diastolic blood pressures have not been measured whilst the patient is at rest and the resting blood pressure measurement has therefore been distorted.
Repeat the measurement after a rest and relaxation period of at least five minutes. Go to a sufficiently quiet and comfortable spot and remain there calmly; close your eyes, breathe deeply and evenly and try to relax.
If the next measurement also shows insufficient stability, you can repeat the measurement after another resting period. If the measurements continue to show some instability, identify these blood pressure measurements as having been taken when the circulatory system had not been sufficiently rested.
In this case, nervousness or inner anxiety may be the cause and this cannot be cured by brief periods of rest. Existing cardiac arrhythmias may also prevent a stable blood pressure measurement.
A lack of resting blood pressure can have various causes, such as physical or mental strain or distraction, speaking or experiencing cardiac arrhythmias during the blood pressure measurement.
In an overwhelming number of cases, the HSD diagnosis will give a very good guide as to whether the circulatory system is rested when taking the measurement. Certain patients suffering from cardiac arrhythmia or chronic mental conditions can remain haemodynamically unstable in the long-term, something which persists even after repeated periods of rest. The accuracy of the resting blood pressure results is reduced in these users. Like any medical measurement method, the precision of the HSD diagnosis is limited and can lead to incorrect results in some cases. The blood pressure measurements taken when the circulatory system was at rest represent particularly reliable results.
NOTE: This standard, however, is a general guideline as an individual’s blood pressure varies among different people, age groups, etc. Please consult your physician for proper diagnosis.
The bar graph in the display and the scale on the unit indicate the range of the blood pressure which has been recorded.
NOTE: If the values for systolic and diastolic pressure are in two different WHO ranges (e.g. systolic in the pre-hypertension range and diastolic pressure in the normal range) the graphic WHO classification on the unit indicates the higher range (pre-hypertension in the example described).
Care, maintenance and disposal
NOTE:
Further documents which include information for the Calibration of the device can be asked at the service address. The device can be tested in case of supposed inaccuracy every two years. Please contact the nearest service address.
To keep your blood pressure monitor in the best condition and protect the unit from damage follow the directions listed below:
- When storing the device, make sure that no heavy objects are placed on top of it.
- Do not fold the cuff and tubing tightly. The cuff tube should not have any sharp kinks and keep it away from sharp edges.
- If the unit is stored near freezing, allow it to acclimate to room temperature before use.
- Always store the unit in its storage bag after use.
- This unit may not meet its performance specifications if stored or used outside of the temperature and humidity ranges (see section ‘10. Technical Specifications’).
- No component of this blood pressure monitor can be maintained by the user. Circuit diagrams, component part lists, descriptions, calibration instructions, or other information, that will assist qualified service personnel to repair parts that are designated as repairable, are available on request.
- Avoid storing the unit in high temperatures and direct sunlight.
- To clean, moisten a soft cloth with Ethyl alcohol (75-90%), squeeze it and wipe the inner side of the cuff (the side touching the skin). Then allow the cuff to air dry.
- It is recommended to clean the cuff after the usage of every 200 times.
- The cuff integrity is maintained after 1,000 open–close cycles of the closure.
- Use the unit consistent with the instruction provided in this manual.
Disposal: Observe the local regulations for material disposal. Dispose of the device in accordance with local regulations. If you have any questions, please contact the local authorities responsible for waste disposal.
Error messages / troubleshooting
- In the event of errors, the error message
 appears on the display.
Error messages may appear if:
- systolic or diastolic pressure could not be measured (
 or
or  appears on the display),
- systolic or diastolic pressure was outside the measurement range ( Hi or Lo appears on the display),
- the cuff is fastened too tightly or loosely (
 or
or  a pears on the display),
- the pump pressure is higher than 300 mmHg (
 appears on the display),
- pumping up takes longer than 160 seconds or pressure is higher than 15 mmHG (
 appears on the display),
- there is a system or device error (
 ,
,  ,
,  or
or  appears on the display),
- the batteries are almost empty
 .
.
In such cases, repeat the measurement. Ensure that you do not move or speak.
If necessary, reinsert or replace the batteries.