Loading ...
Loading ...
Loading ...
HID312, HID525 and HID540
Installation and User’s Manual
September 2020
Page 12
Initial Start Up
Final check list:
1. Is the icemaker-dispenser installed indoors, in a
location where the air and water temperatures
are controlled, and where they do not go beyond
design limitations?
2. Is there an electrical disconnect (switch or
plug as required) within sight of the installed
machine? Is the machine on a separate circuit?
Has the voltage been checked and compared to
nameplate requirements?
3. Have all of the plumbing connections been made
and checked for leaks?
4. Has the machine been leveled?
5. Is there a minimum of 3 inches of clearance at the
left and right sides of an air cooled machine?
6. Is there clearance at the top and back of the
machine for service and utility connections?
7. Is there a water shut o valve installed near the
machine?
Start Up
1. Remove upper front panel
2. Open the water hand valve, observe that water
enters the water reservoir, lls and then shuts o.
Check for leaks. Repair any leaks before going
any further.
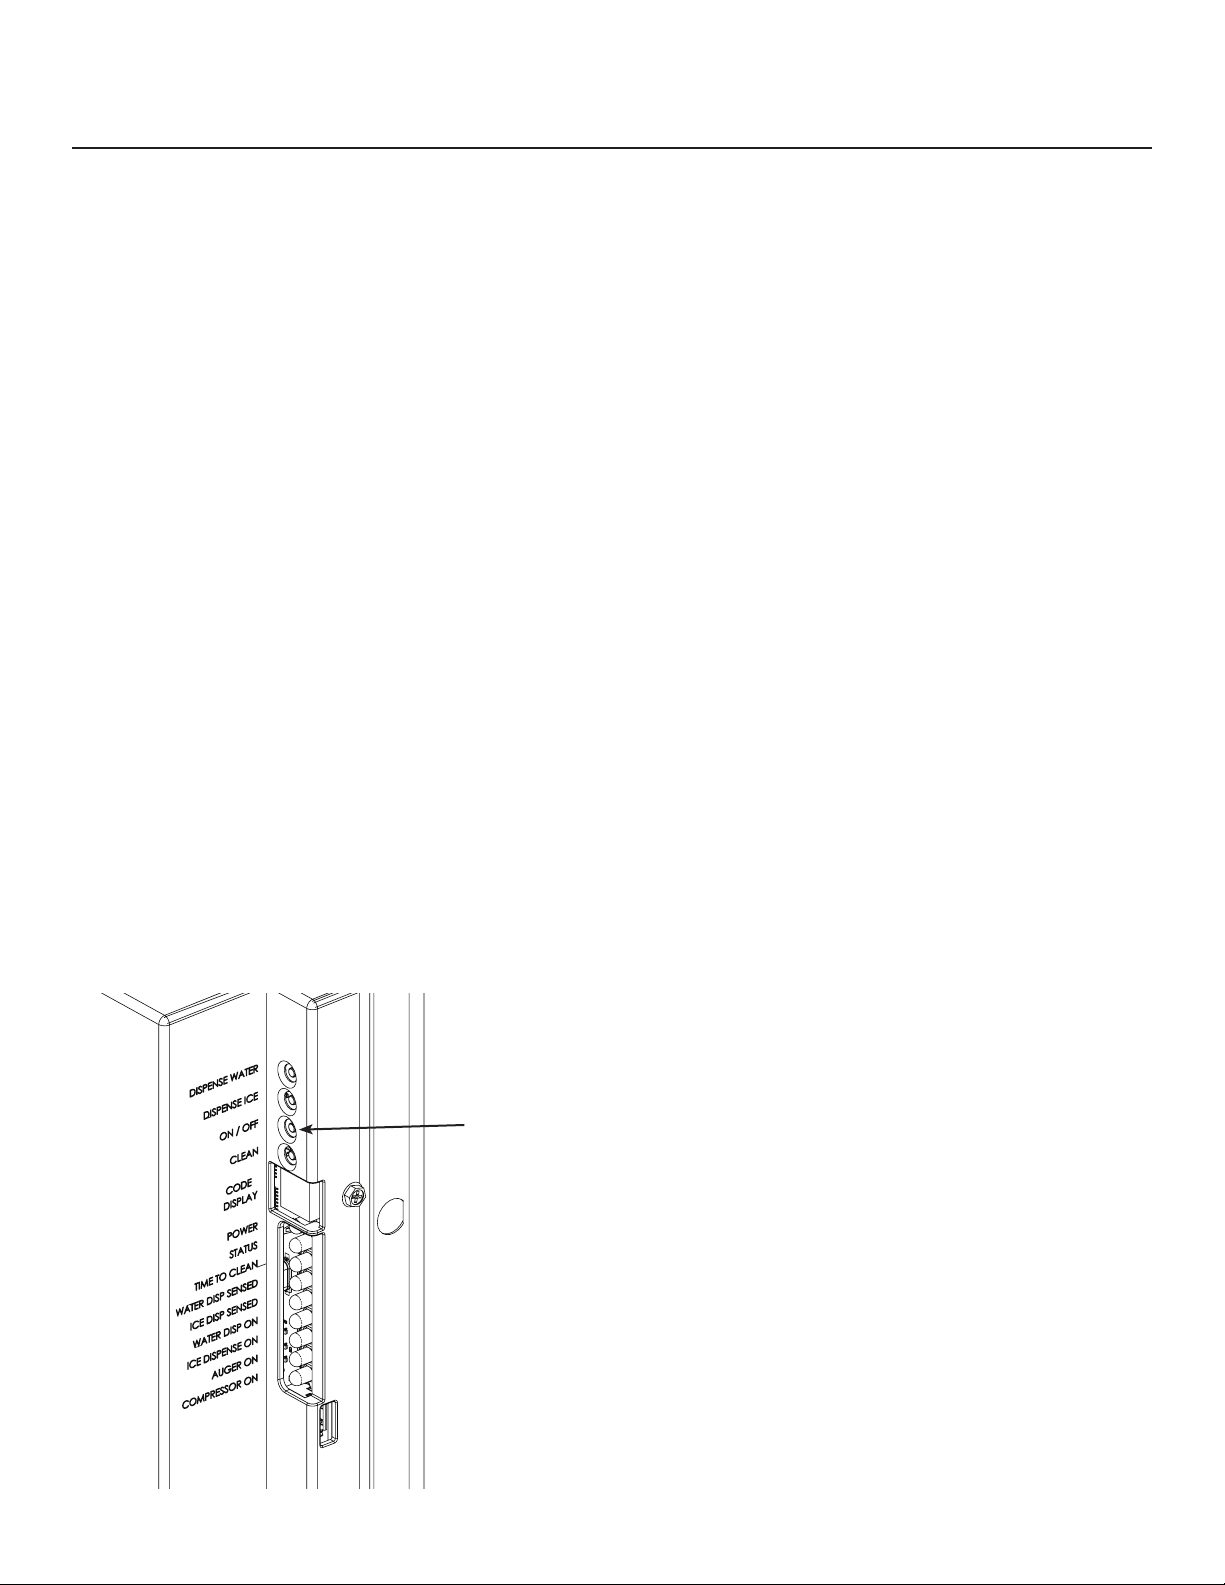
3. Switch electrical supply on. Lights on controller
will ash and then the power light will remain on.
The code display will show O.
4. Push and release the On/O button. The machine
will start the ice making process. The code display
will show F. Air cooled models will discharge warm
air out the right side, water cooled models will
discharge warm (about 110°F.) water out of the
condenser drain.
5. In minutes ice will begin to fall into the dispensing
bin. Check ice dispensing:
Touch-Free dispensing models: hold a
container in front of the Touch-Free ice sensor
(just below the ice delivery spout). Ice should
ow from the spout when a container
is present, and stop dispensing when
the container is removed.
Button activated dispensing models: press the
ice button for 2-3 seconds and release.
Ice will ow when button pressed and stop
when released.
6. Check water dispensing:
Touch-Free dispensing models: hold a
container in front of the Touch-Free water
sensor. Water will ow when a container is
present and stop when it is removed.
Button activated dispensing models: press the
water button for 2-3 seconds and release.
Water will ow when button pressed and stop
when released.
7. Push the On/O button to switch the machine o.
8. Unplug or disconnect electrical power.
9. Remove the top panel and the top of the ice
storage bin. Scoop out any ice in the bin and
sanitize the interior of the ice storage bin by wiping
it with a locally approved sanitizer or a mixture of
1 ounce of household bleach to 2 gallons of water,
allow to air dry.
10. Reconnect electrical power.
11. Push the On/o button to switch the machine on.
12. Replace all covers and panels.
13. Give the owner/user the user manual, instruct
him/her in the operation and maintenance
requirements of the unit. Make sure they know
who to call for service.
14. Fill out the Customer Evaluation and Warranty
Registration form, and mail it in to Scotsman
or register the unit at Scotsman’s website
(www.scotsman-ice.com).
ON / OFF
Loading ...
Loading ...
Loading ...