Loading ...
Loading ...
Loading ...
16
INSTALLATION INSTRUCTIONS
Installation instructions:
1
Ensure the refrigerator is NOT plugged into
a powersupply.
2
Locate a cold water supply/feed that is
suitable for a water connection.
3
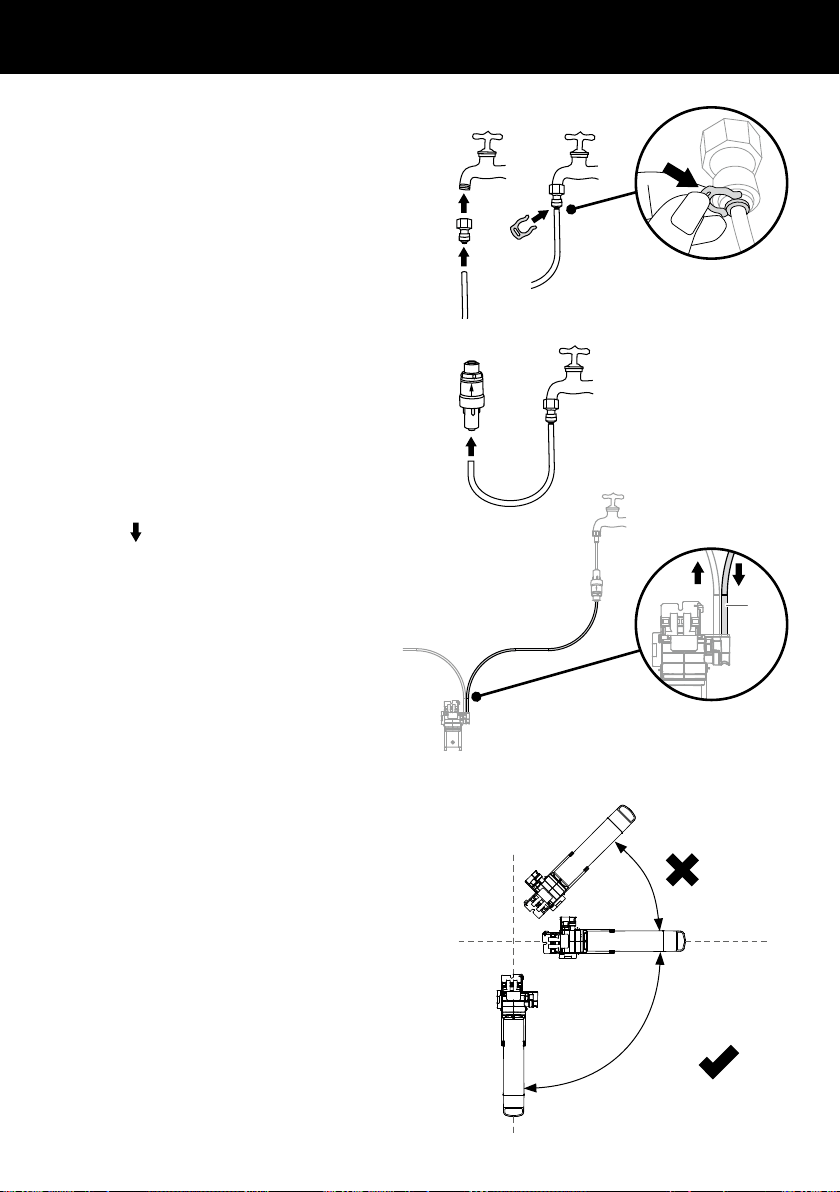
Connect the faucet connection fitting (
A
)
to the faucet. Connect the short tubing (
B
)
to the outlet of the faucet and secure with
the locking key (
C
) (refer to Diagram 1)
4
Connect the inlet of the PRV (
D
) to the
tubing connected to the faucet (refer to
Diagram 2). Ensure the arrow on the PRV is
pointing away from the faucet. The arrow
indicates the direction of waterflow.
5
Connect the inlet tube from the filter head
to the PRV (refer to Diagram 3). The inlet
tube can be identified by the downward
arrow on the filter head and a red mark
on the tube.
IMPORTANT!
Ensure the outlet tubing is correctly
connected to the refrigerator water valve.
Refer to Diagram 3.
6
Determine the mounting position for the
water filter noting the following:
The water filter MUST not be mounted
with the filter head position below the
base of the filter (refer to Diagram 4).
We recommend fitting the water filter
in a vertical orientation with the filter
head at the top. This will minimise water
leakage during replacement of the water
filter.
Ensure the water filter is in a convenient
location to access every 6months
for replacement. We recommend that
this location is beside the water filter
supply faucet in a cupboard beside the
refrigerator.
A minimum clearance of 2” (50mm)
from the bottom of the water filter is
required to perform filter removal.
Diagram 1
Inlet
tube
Diagram 2
Diagram 3
0° – 90°
Diagram 4
water flow
from PRV
water flow to
refrigerator
Loading ...
Loading ...
Loading ...