Loading ...
Loading ...
Loading ...
4
Control Panel Settings
Setting the Clock
1. Tap CLOCK.
On the display, the colon between minutes and seconds blinks.
2. Via the numeric pad, enter the current time (e.g., if the time is
12:08, tap 1-2-0-8).
3. Tap # to set AM or PM.
4. Tap START/CONTINUE.
The colon between minutes and seconds stops blinking.
IMPORTANT
• The clock cannot be set during time-delay cooking if one of the timers is in
use or if self-clean or Sabbath mode is active.
• When power resumes after an outage, the time display flashes, reminding
you to reset the time.
• After touching the clock key, you must enter the time, and touch
START
within 6 seconds, or the previously set time reappears.
Switching to 24-Hr (Military) Time
The default clock display is 12-hr time. You can change to 24-hr
1. Tap-hold CLOCK for 6 seconds.
The display shows the current time mode.
2. On the numeric pad, tap # to change to 24-hr mode.
3. Touch CANCEL/SECURE.
The display shows the time of day in 24-hr mode.
Setting the Temperature Scale
You can select Fahrenheit (factory default) or Celsius as the cook-
ing temperature scale.
1. Tap-hold BROIL (under UPPER OVEN on double ovens) for 6
seconds.
The display shows the current temp scale (“F” or “C”).
2. Touch # to change the scale.
3. Touch CANCEL/SECURE.
The display shows the selected temperature scale.
About the Control Panel
“Beep”
The control panel beeps when you tap a key, when a timer reaches
zero (Pg. 8), when there is an error, and when the oven
performs certain functions. You can silence/activate the beep.
1. Tap-hold START TIME for 6 seconds until “beep” appears on
the display.
2. Tap # to switch off/on the beep.
3. Tap CANCEL/SECURE to set your selection.
Before Cooking
•
500°F to burn off residual oils used in manufacturing. This
removes undesirable odors that the oven may otherwise emit
• PREHEATING: When baking/roasting, the oven preheats auto-
matically. Preheating time varies depending on the tempera-
ture setting and your community’s type of electrical supply.
Preheating cannot be used for broiling.
CAUTION
To avoid staining/pitting the oven’s porcelain surfaces, immediately wipe up
food acids (e.g., citrus juices, tomato sauces).
Positioning the Oven Racks
You may use either rack type on any level inside the oven.
WARNING
To reduce the risk of burns, position the racks when the oven is cool. If you
must reposition a rack when the oven is hot, use potholders.
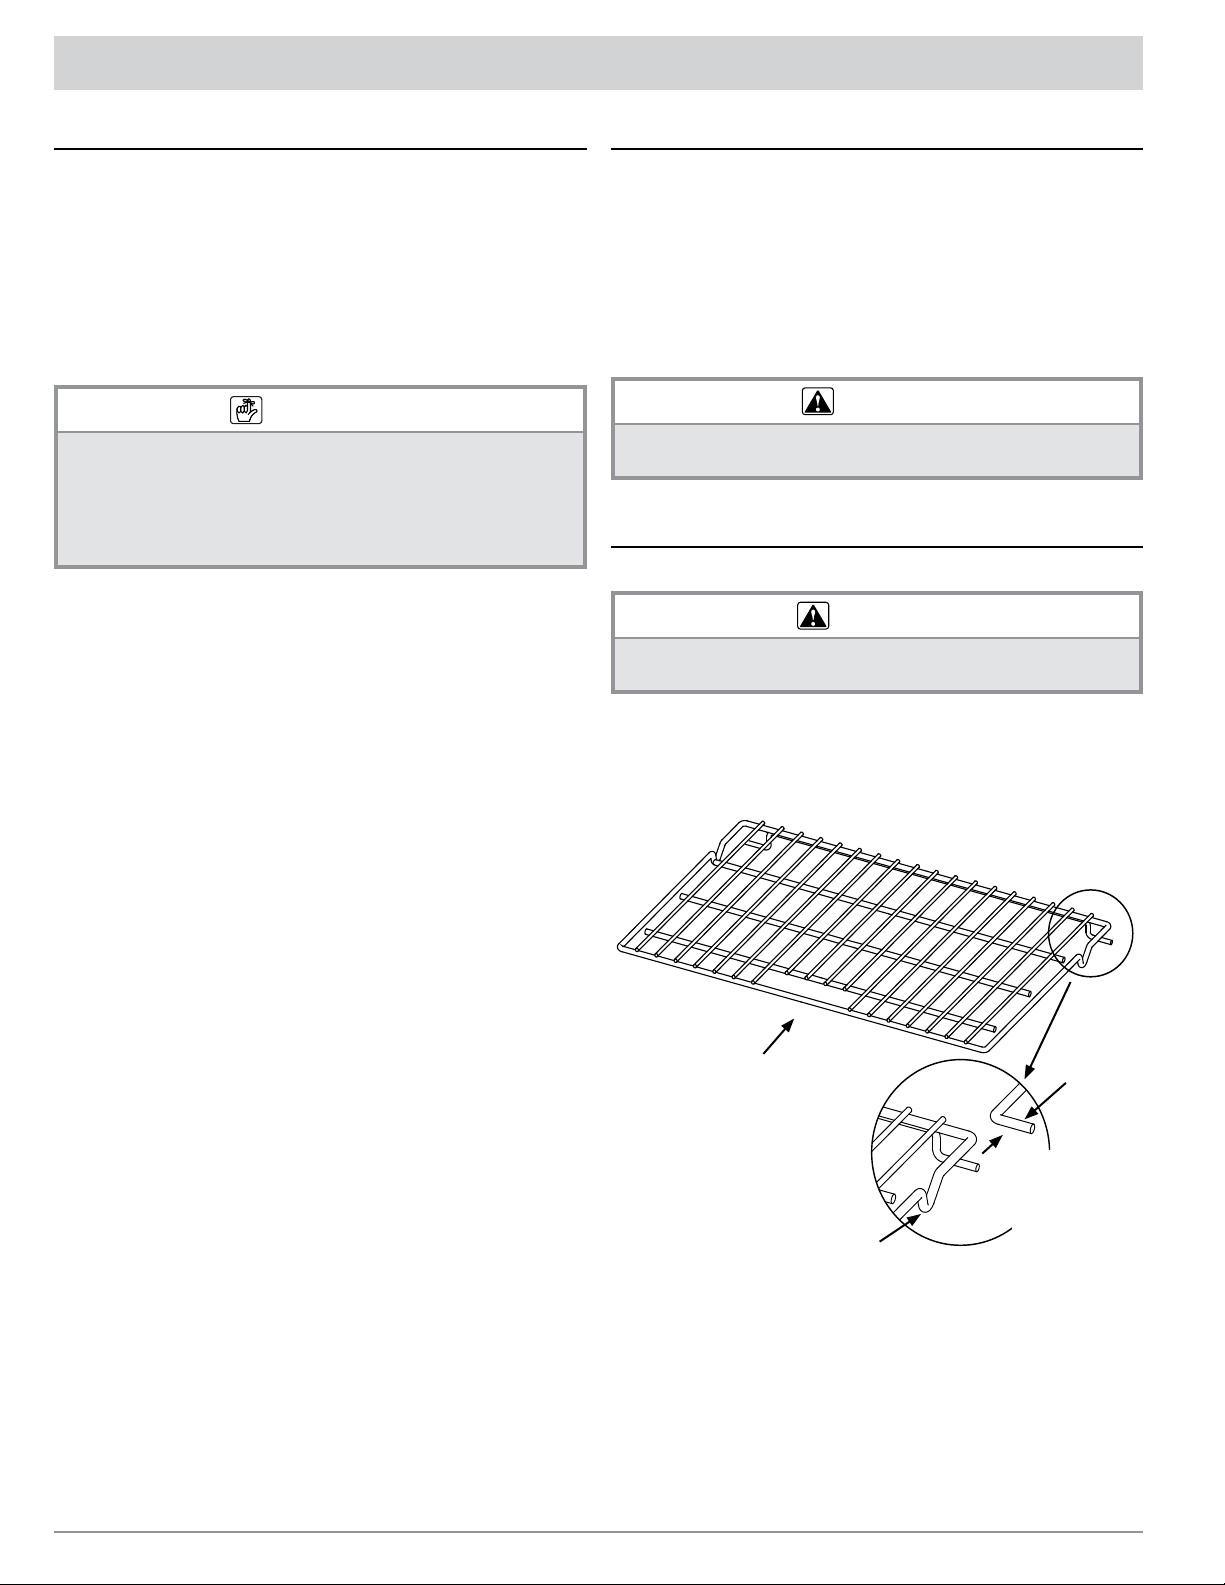
Inserting/Removing a Standard Oven Rack
1. Grasping the front of the rack, slide it onto the left- and right-
side supports as shown in the graphic.
2. Begin sliding the rack in, then tilt the front up so the safety
notches clear the ends of the rack supports.
3. With both hands, push the rack all the way in.
4. Grasp the front of the rack with both hands, and pull gently
outward until the rack stops.
5. Lift the front of the rack 6 inches to clear the safety guides,
and pull the rack completely out.
Inserting/Removing a GlideRack™ Oven Rack
OPERATING THE OVEN
Front
Safety notch
Rack
support
Slide rack onto
supports between
rack bars
Loading ...
Loading ...
Loading ...