1. SAFETY INSTRUCTIONS-------------------------------------------------------------------
2. ELECTRICAL REQUIREMENTS------------------------------------------------------------
3. PARTS SUPPLIED----------------------------------------------------------------------------
4. OPTIONAL ACCESSORIES---------------------------------------------------------------
5. INSTALLING THE HOOD ------------------------------------------------------------------
6. OPERATION-----------------------------------------------------------------------------------
7. SPECIAL FUNCTION-----------------------------------------------------------------------
8. CLEANING AND MAINTENANCE------------------------------------------------------
9. TECHNICAL DATA--------------------------------------------------------------------------
10.TROUBLE SHOOTING-------------------------------------------------------------------
11.ENVIRONMENTAL PROTECTION----------------------------------------------------
12.WARRANTY INFORMATION-----------------------------------------------------------
2
5
6
6
7
12
12
13
14
14
14
15
Always turn hood on when cooking over high heat
To Reduce The Risk Of Fire And Electric Shock,
Install This Rangehood Only With Integral Blowers
Manufactured by Chinabest Home Appliance Co.,
Ltd, Model CTH03-128D.

Anti-Vibration Pad
Wall Anchor
Wire Nut 3
Mounting
Template
12' extension chimney
Elux PN:EHW12X62AS
8' extension chimney
Elux PN:EHW08X62AS
14' extension chimney
Elux PN:EHW14X62AS
Recirculation Kit with
screws
Elux PN: EHW62RKT
Side Sponge strip
Front Sponge strip
15.
Short screw M4 8
Cross socket Head
Screw M4 14
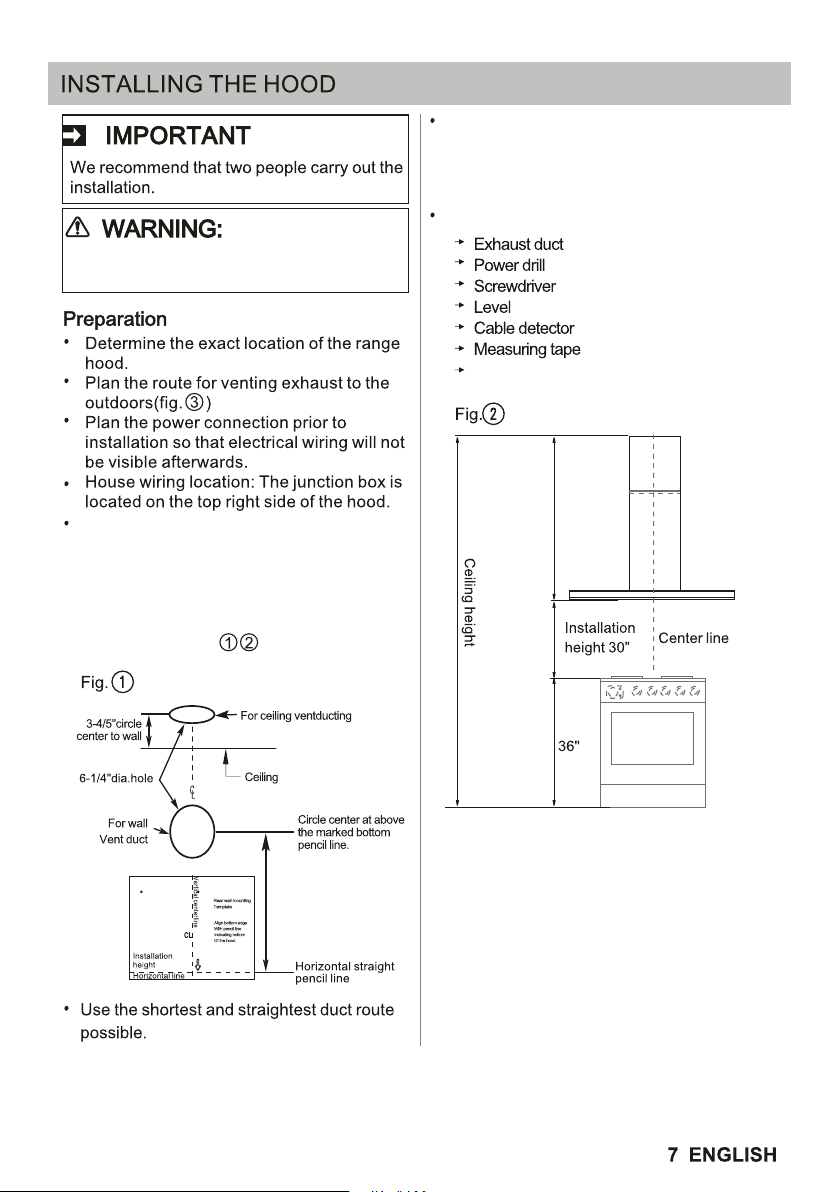
Wiring should enter the back wall at
least 20" above the bottom of the hood
at height install and be contained within
the flue covers.
It is best if the wiring is located offset to
the right of center to avoid interference
with ducting(Fig. ).
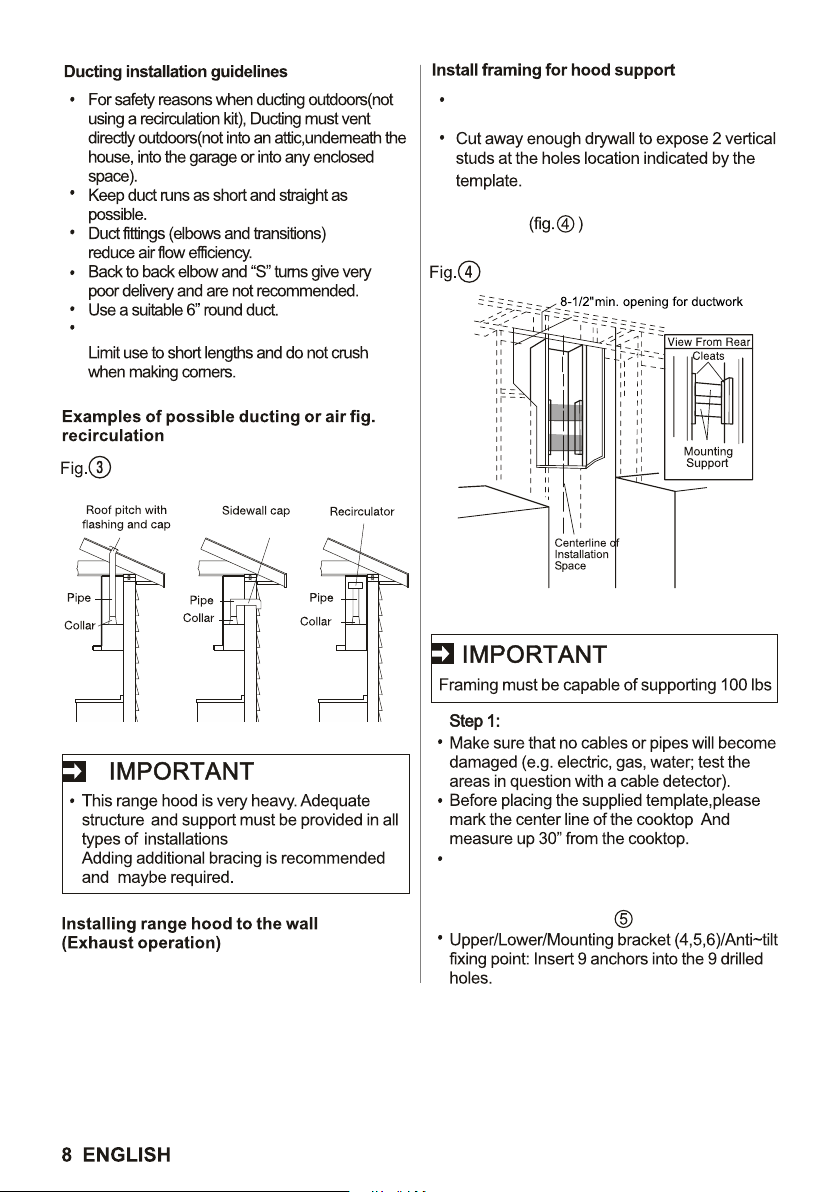
Any wall modifications needed (i.e.
support structure, wiring, ducting) must
be completed prior to installation of the
range hood.
Tools Required (not included):
Foil backed tape
Turn off electrical power at service
entrance before wiring.
Flex metal ducts are not recommended
Install horizontal supports
between the wall studs at all mounting
locations
Using the dimensions or the template,
mark the locations needed for support.
Using supplied mounting template(Item 15)
mark and drill 9 holes in the wall. Drill the
holes according to the measured distances
from the diagram(fig. )
.
Refer to Mounting Template(Item 15)
1. Install the Anti-Vibration Pad (Item 9) to
the rear of the hood body (fig ). Peel off
the backing and stick the sponge strips
(Item 7,8) to the front and sides of the upper
fan housing as shown in (fig ).
2. Carefully install the hood on the mounting
bracket until it rests on the wall. Make sure
to check that the hood is centered over the
cook-top and between cabinets if applicable
before moving to next step.
3. Install mounting screws as shown in (fig
) to prevent tilting and vibrations.
This range hood is very heavy.
Two persons are needed to lift the hood
onto the mounting bracket.
Install and secure the duct as shown in (fig 10).
Assure that connections are airtight, observe all
best practices, local codes, and regulations for
hood exhaust venting.
.
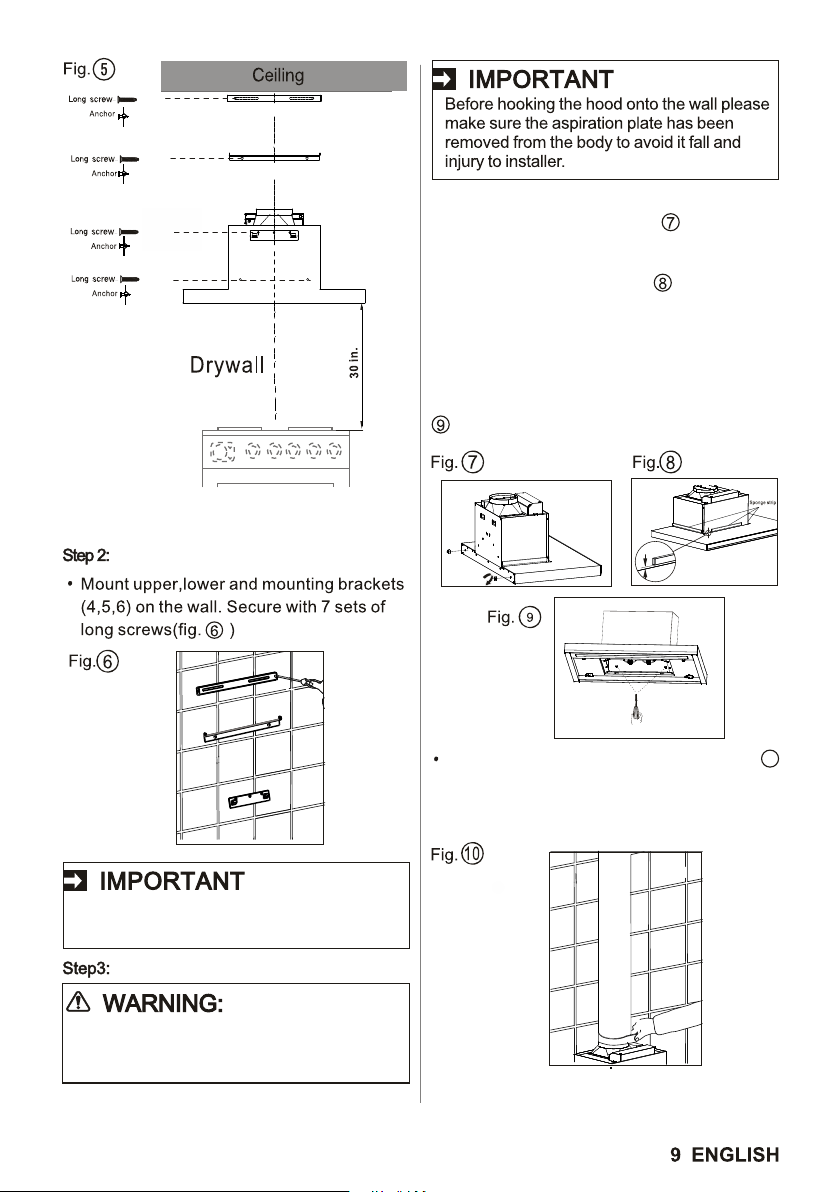
5
mm
Lower bracket is not required for 8 feet
ceiling's installation.
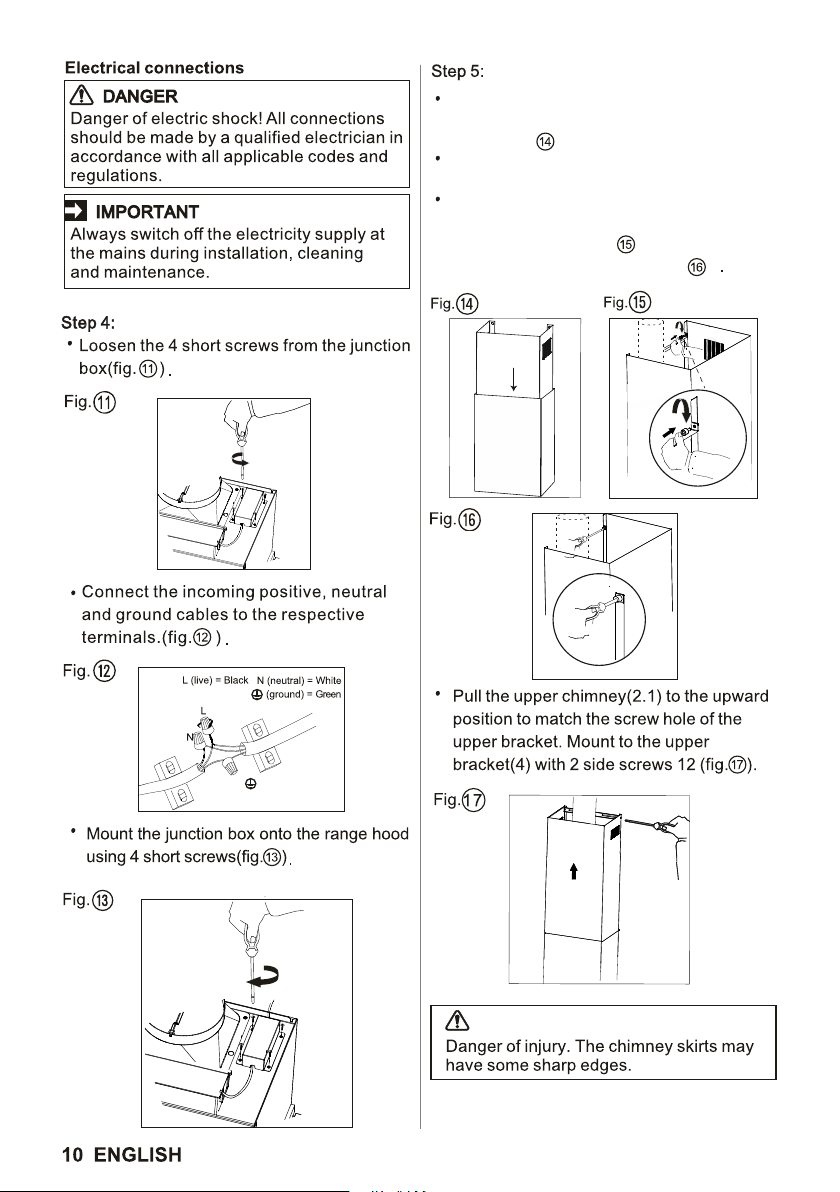
Insert the upper chimney (Item 2.1) into
the lower chimney (Item 2.2) from top to
bottom (fig. ).
Mount lower chimney (Item 2.2) on the
range hood (Item 1).
Fit the lower chimney (Item 2.2) to the
lower bracket (Item 5) using 2 screws
(Item 14) by hand (fig. )then tighten the
screws using screw driver(fig. )
CAUTION
Makeup Air
Local building codes may require the
use of makeup air systems when using
ventilation systems greater than
specified CFM of air movement. The
specified CFM varies from locale to
locale.
Consult your HVAC professional for
specific requirements in your area.
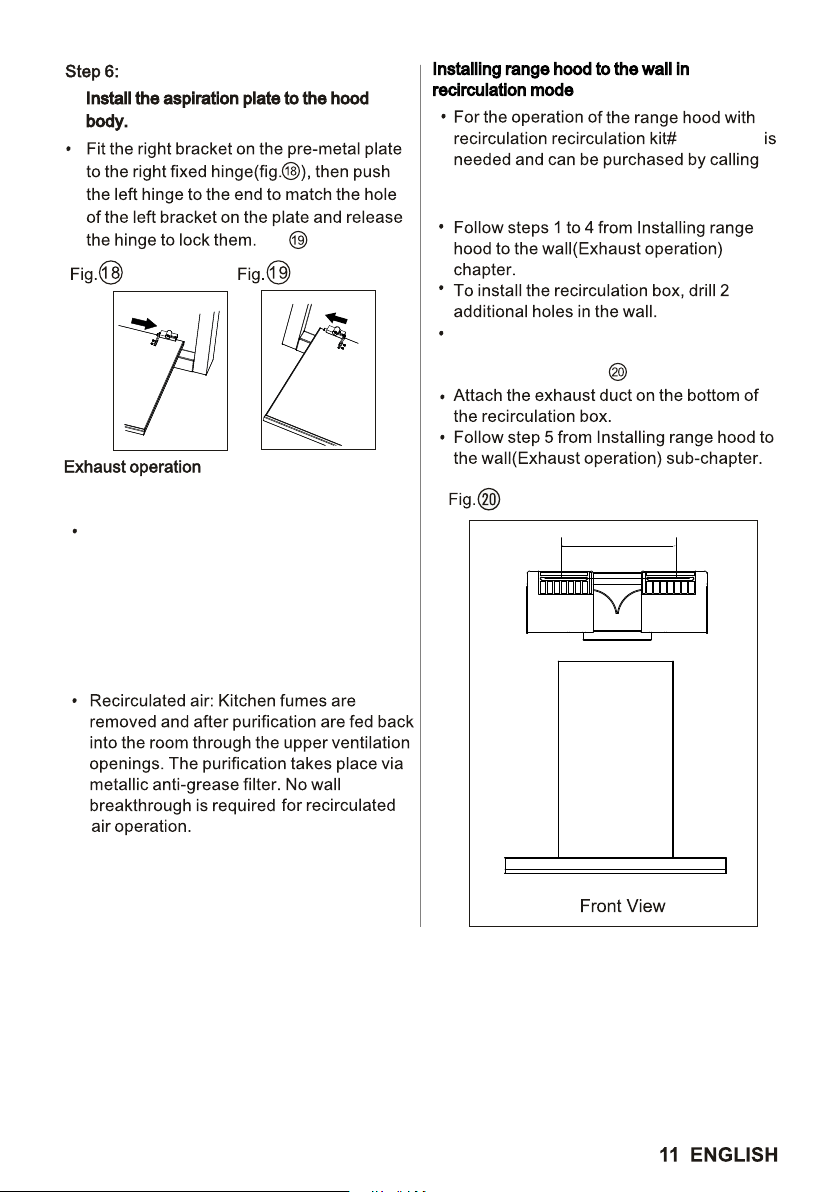
EHW62RKT
Fix the recirculation box to the wall with
2 sets of long screws (Item 11) and wall
plugs (Item 10) (fig. ).
(fig. ).
51/2"~111/2"
1-800-944-9044 (USA) or
1-800-265-8352 (Canada)
Press the fourth time or the
Power button to turn the light off.
It is recommended to use the range hood
while cooking and for several minutes
after cooking to reduce humidity and
odors inside your kitchen space.
This product is equipped with a heat
sensor that will automatically turn the
vent fan ON at medium speed when high
temperatures are detected (over 158°F
or 70°C).
If the vent fan is already running at low
speed and high temperatures are
detected, the vent fan will automatically
change to medium speed.
During this event, the vent fan speed can
be changed manually to high speed, but
not low speed or off.
When the heat sensor detects a
significant drop in temperature, then the
appliance will operate normally.
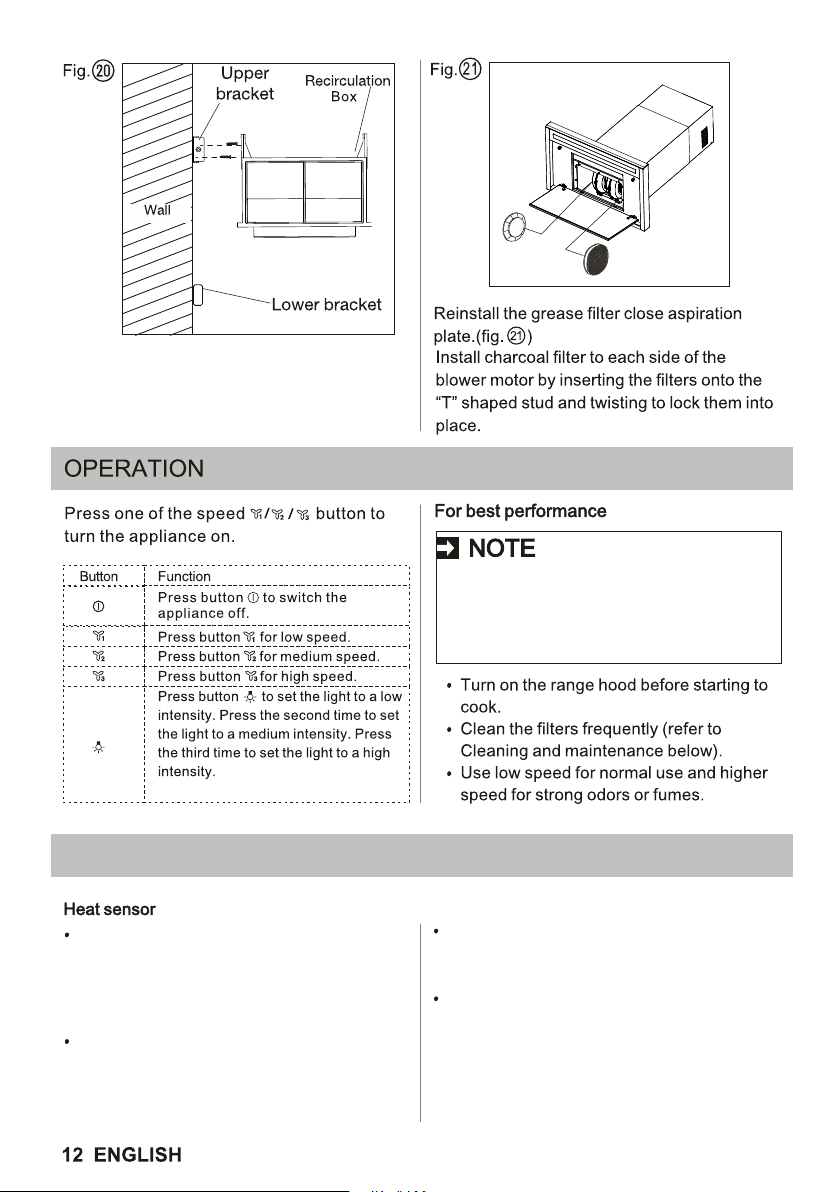
Side View
SPECIAL FUNCTION
.

Aluminum filter:
servicing should be referred to a qualified
technician.
Parts and accessories not provided
with your hood, or for replacement,
can be purchased at
or by calling 1-800-944-9044 (USA) or
1-800-265-8352 (Canada).
www.electrolux.com
All other


09050102431 A (EN) September 2020
