Loading ...
Loading ...
Loading ...
7
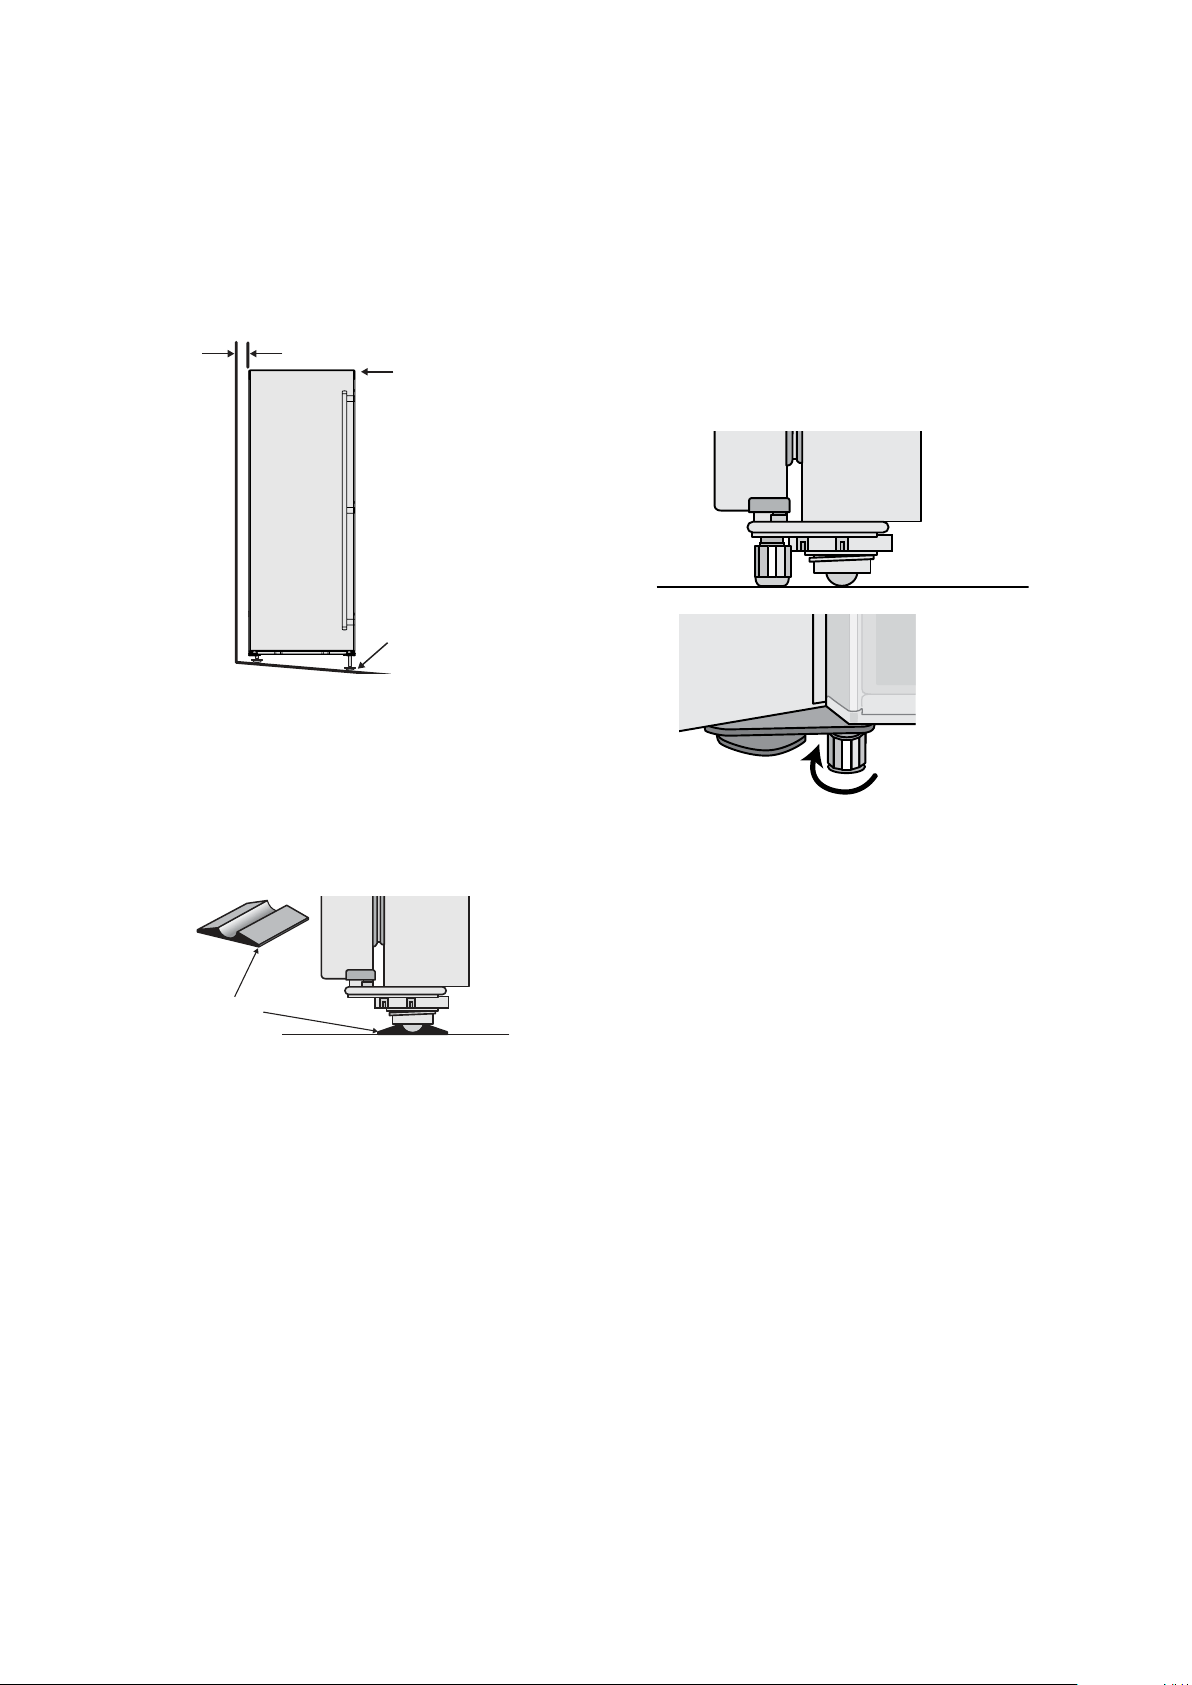
4. Check the alignment of the freezer to the surrounding
cupboards to see if it is level. You can adjust the level
with the rollers as detailed in step 3.
aligned to cupboards
ie. even gap
Adjust front rollers
for uneveness of floor
eg. wind this roller
down or up
top of freezer is level
ie. horizontal
5. If you find your freezer rocks from corner to corner, it
means your floor is uneven. Find a piece
of plastic or hardboard etc. and pack it firmly under
the roller.
6. On certain floor surfaces the freezer may roll forward
during operation. Where provided a “Roller Stop”
can be placed under the front rollers. If Roller Stop is
required, contact customer service on
1300 363 640.
roller stop
7. You may now need to fine-tune the installation by
repeating Steps 3, 4 and 5.
8. When you have the appliance in its final position, it
needs to be stablisied. Wind the stability foot down
to the floor until it just makes contact with the floor.
Lift the front of the appliance to take the weight off
the stability foot, then turn it ¼ turn further to ensure
firm contact with the floor. Whenever you need to
move the appliance, be sure to wind the foot back
up so that the appliance can roll freely and be sure to
reset it when reinstalling.
Stabilising foot
wound down
side view
front view
9. Clean your freezer thoroughly following the
instructions on page 16 and wipe off any dust that
has accumulated during shipping.
10. Plug your freezer straight into its own powerpoint
and never use a double adapter. If you need to roll
the freezer to get to the plug, remember to raise the
stability foot first.
11. Before you put any food in your freezer, it’s
recommended you leave it on for 2 or 3 hours to
check it is running properly.
Congratulations! You have successfully installed your
new freezer.
INSTALLING YOUR FREEZER
INSTALLATION
Loading ...
Loading ...
Loading ...