Loading ...
Loading ...
Loading ...
8
|
Installation
PREPARATION
Remove and recycle packing materials. Remove labels and
protective plastic lm from the grill.
Place briquette trays in the grill above the burners with ash
tubes positioned at the front. Refer to the illustration below.
Place burner grates directly above the briquette trays with
square openings in the grates at the front.
POWER TRANSFORMER
For built-in installation, secure the transformer box in a dry
location, away from the grill rebox and excessive heat area,
but within .6 m of the right rear opening. Do not install the
transformer box inside the insulating liner.
For cart installation, mount the transformer box by the two
screws located at the bottom right rear corner of the grill
cart, behind the pull-out shelf. Utilize the same transformer
for the side burner if installed.
FLASH TUBE
Flash tube position.
CART INSTALLATION
1 Two mounting screws are provided at the bottom right
rear corner of the cart for the power transformer. Install
the transformer box.
2 Remove front mounting screws from the cart. Place grill
onto the cart, allowing enough space at the back to
make connection to the transformer.
3 Make connections from the wiring harness located at the
right rear of the grill to the transformer, then slide the grill
back until it is fully engaged with the cart.
4 Secure grill to cart with four screws provided. Mounting
holes in the upper back corners of the grill will align with
holes in the cart. Secure with two screws. Remove the
drip tray. Install two screws through side mounting holes
below the grill front panel and into the cart.
INSTALLATION
Side Burner Installation
The Wolf side burner can be installed on the right side of
any Wolf grill cart.
PREPARE GRILL CART
1 If installed, the right side shelf must be removed. To
remove, lift shelf up so the lower front screw is exposed,
then remove screw. Refer to the illustration below.
2 Fold side shelf down and remove the upper front screw,
then remove the side shelf and front bracket. Refer to the
illustration below.
LOWER SCREW
UPPER
SCREW
SIDE SHELF
FRONT
BRACKET
Side shelf lower screw. Side shelf upper screw.
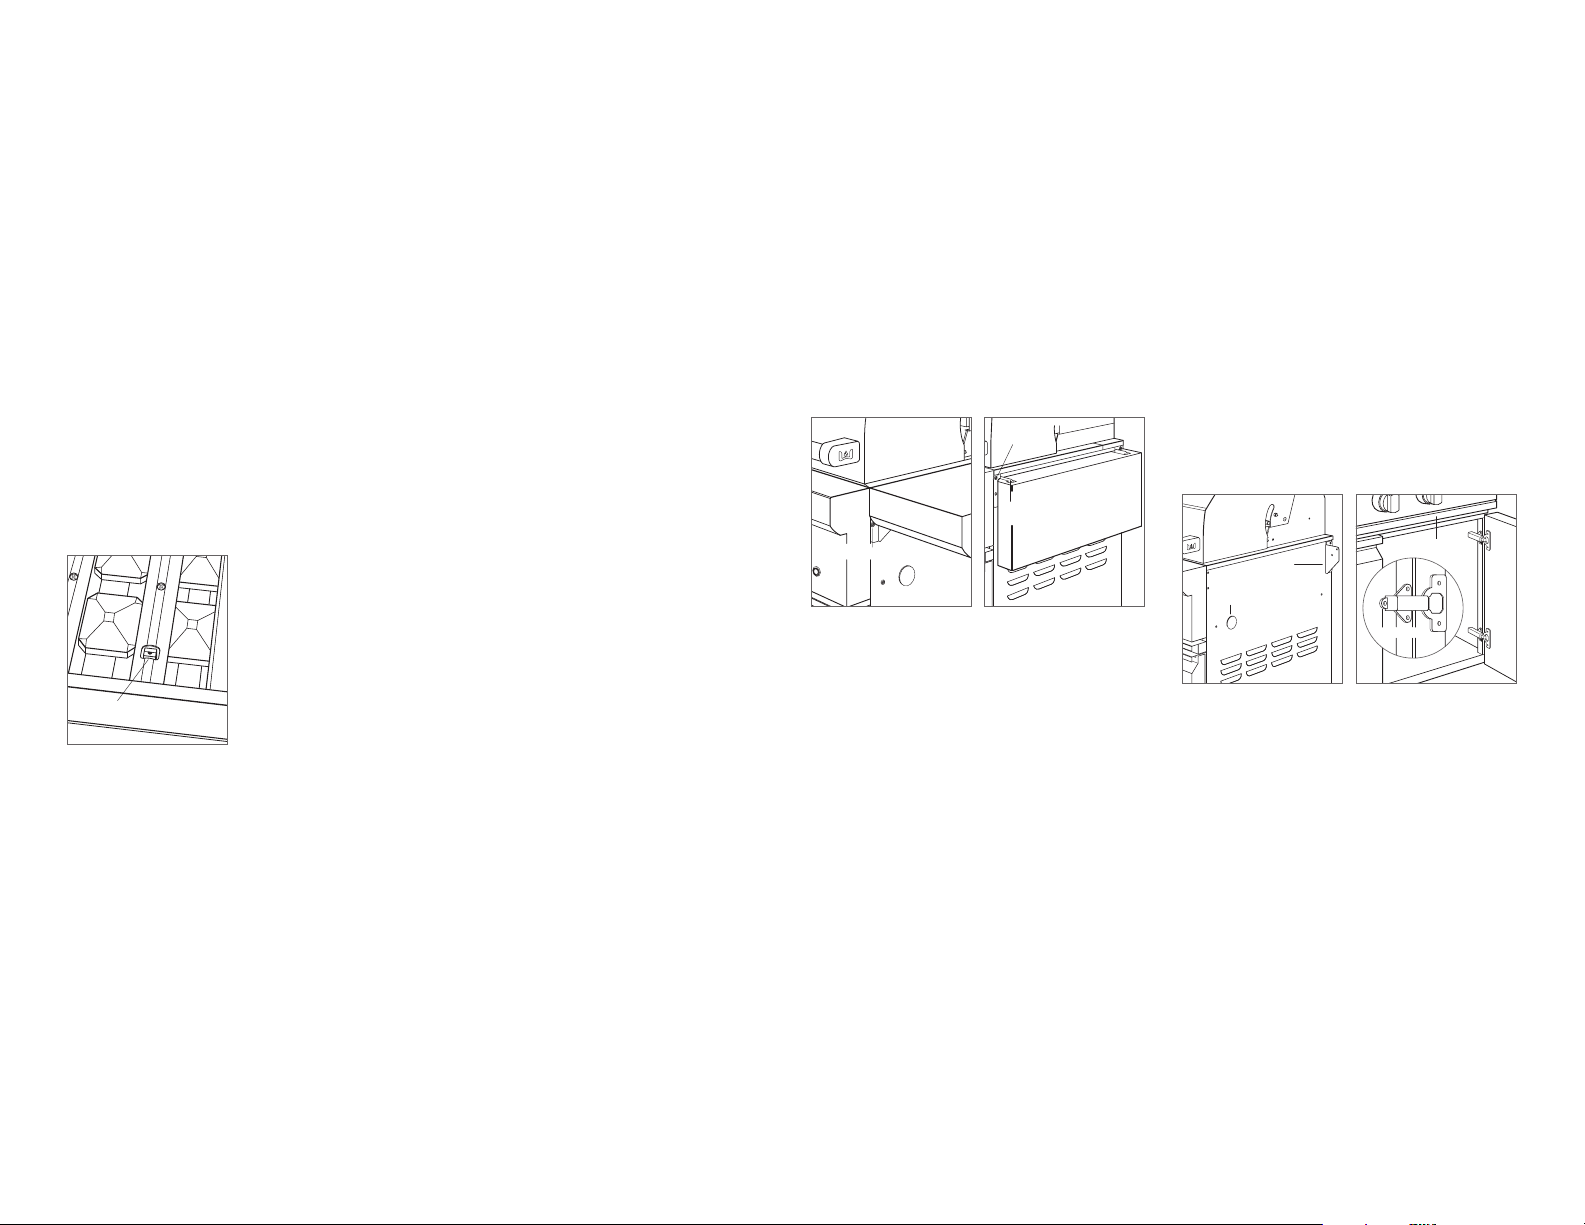
3 Remove the rear screws and bracket, then remove the
cart plug from the access hole by pushing out from
inside the cart. Refer to the illustration below.
4 For easier access, the upper rear panel and right side
door of the cart can be removed. Remove the rear panel
by removing four screws.
5 To remove the right side door, depress the rear lever on
each hinge, then remove door. Refer to the illustration
below.
6 For easier access, the drip tray of the grill can be
removed. To remove, slide forward and lift out.
7 Insert the plastic bushing provided through access
hole from inside the grill cart, where the cart plug was
removed previously.
REAR
BRACKET
CART PLUG
REAR LEVER
DRIP TRAY
Remove rear bracket and plug. Remove cart door.
Loading ...
Loading ...
Loading ...