Loading ...
Loading ...
Loading ...
10
|
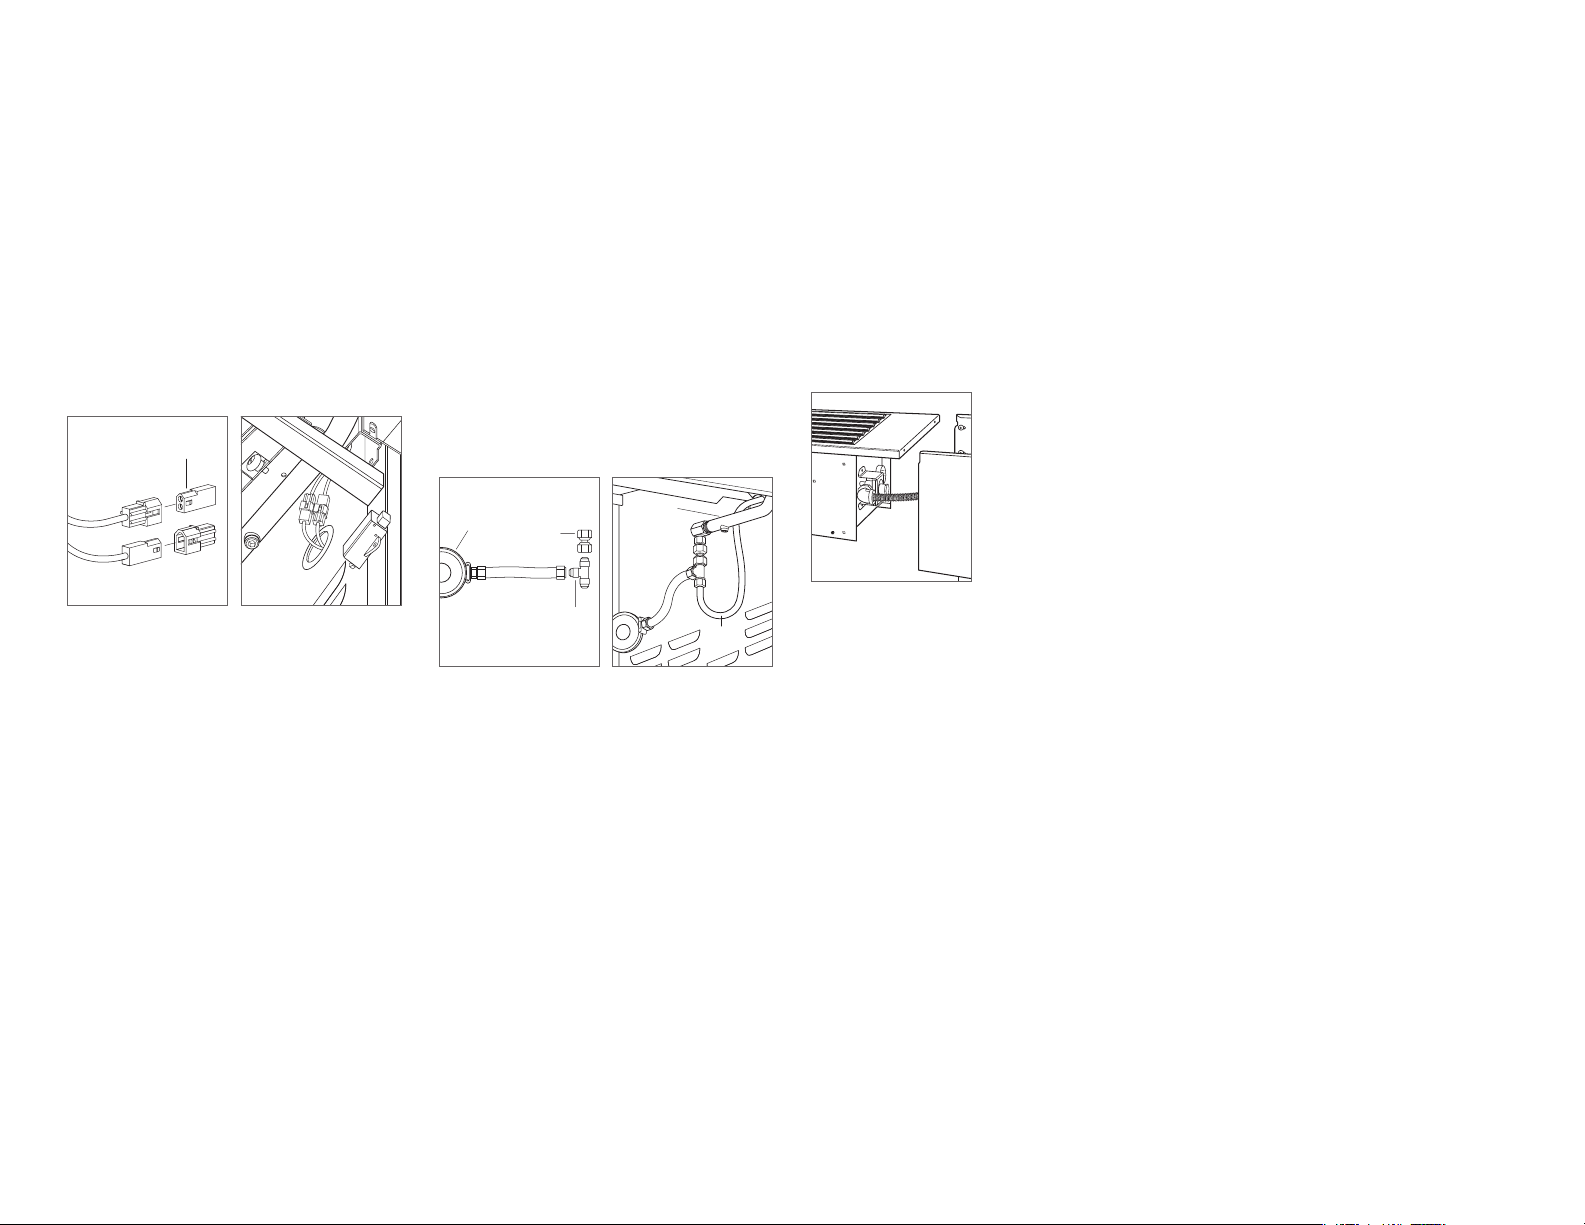
Side Burner Installation
ELECTRICAL CONNECTION
1 Depending on the serial number of the grill, there may
be one or two connectors near the front of the grill just
above the manifold. Locate the connectors by looking
above the manifold near the front of the grill.
2 Remove the unpopulated connector housings from the
wire harnesses coming from the grill as shown in the
illustration below.
3 Attach the appropriate connector housing from the side
burner to the grill. Refer to the illustration below.
INSTALLATION
UNPOPULATED
CONNECTORS
UNPOPULATED
CONNECTORS
AUXILLARY
HARNESS
Connectors. Connector housing.
LP GAS CONNECTION
1 Connect 2-stage LP gas regulator to are tee at location
shown. Connect are swivel connector to one end of
are tee. Refer to the illustration below.
2 Connect regulator assembly to exible gas line coming
into grill cart from side burner as shown in the illustration
below.
3 Connect regulator assembly to grill manifold at are
swivel connector as shown in the illustration below.
4 Reinstall rear panel and door of grill cart. Reposition grill
drip tray. Place burner cap on burner head, place grate
on burner pan and afx knob to bezel with bezel nylon
liner.
NATURAL GAS CONNECTION
1 Split high pressure natural gas line into two lines, one to
attach to grill natural gas regulator and one to attach to
side burner via exible line and
1
/2" NPT adapter. Place
exible gas line through cart access hole.
2 Place exible gas line through cart access hole and
attach to side burner regulator at pipe elbow. Elbow may
be rotated to face downward for larger adapters. Do not
rotate elbow upward. Refer to the illustration below.
FLARE
SWIVEL
LP GAS
REGULATOR
FLARE
TEE
FLEXIBLE
GAS LINE
GRILL
MANIFOLD
LP gas regulator assembly. LP gas connection.
Natural gas connection.
Note - Cart and Side Burner not available in Australia - Built in models only
Installation Checklist
IMPORTANT NOTE: To ensure a safe and
proper installation, The following checklist
should be completed by the installer to
ensure that no part of the installation has
been overlooked.
Any questions or problems about the
installation should be directed to your
authorised Wolf customer care at
1300 808 859
You can also visit our website at
subzero-wolf.com.au
1) All packaging material has been
removed.
2) Specified clearances to combustible
materials have been maintained.
3) All burners light properly, individually
and with adjacent burners lit.
4) All flames appear normal.
5)
6)
The drip tray slides freely and is
properly placed.
The correct gas pressure regulator is
connected for natural or LP gas and set
according to specifications on page 5.
8) The LP gas cylinder is in an upright
position and the hose is not kinked.
9) The outdoor product has been tested and
is free of any gas leak.
10) The homeowner has been informed of
the gas supply shut-off valve location.
Loading ...
Loading ...
Loading ...