Loading ...
Loading ...
Loading ...
www
www
.foscam.co
.foscam.co
m
m
Shenzhen
Shenzhen
Foscam
Foscam
Intelligent
Intelligent
Technology
Technology
Co.,
Co.,
Limited
Limited
Tel:
Tel:
86
86
755
755
2674
2674
5668
5668
Fax:
Fax:
86
86
755
755
2674
2674
5168
5168
28
Click Infra led and there are three modes to adjust the infrared led: Auto, Manual and Schedule.
Auto: Select it and the camera will adjust the infra led (on or off) automatically.
Manual: Select it and turn off the infra led manually.
Schedule: Select it and the IR led light will be off at the schedule period. If you want to define or change the IR
led lights schedule time, please go to Settings→Video→IR LED Schedule page.
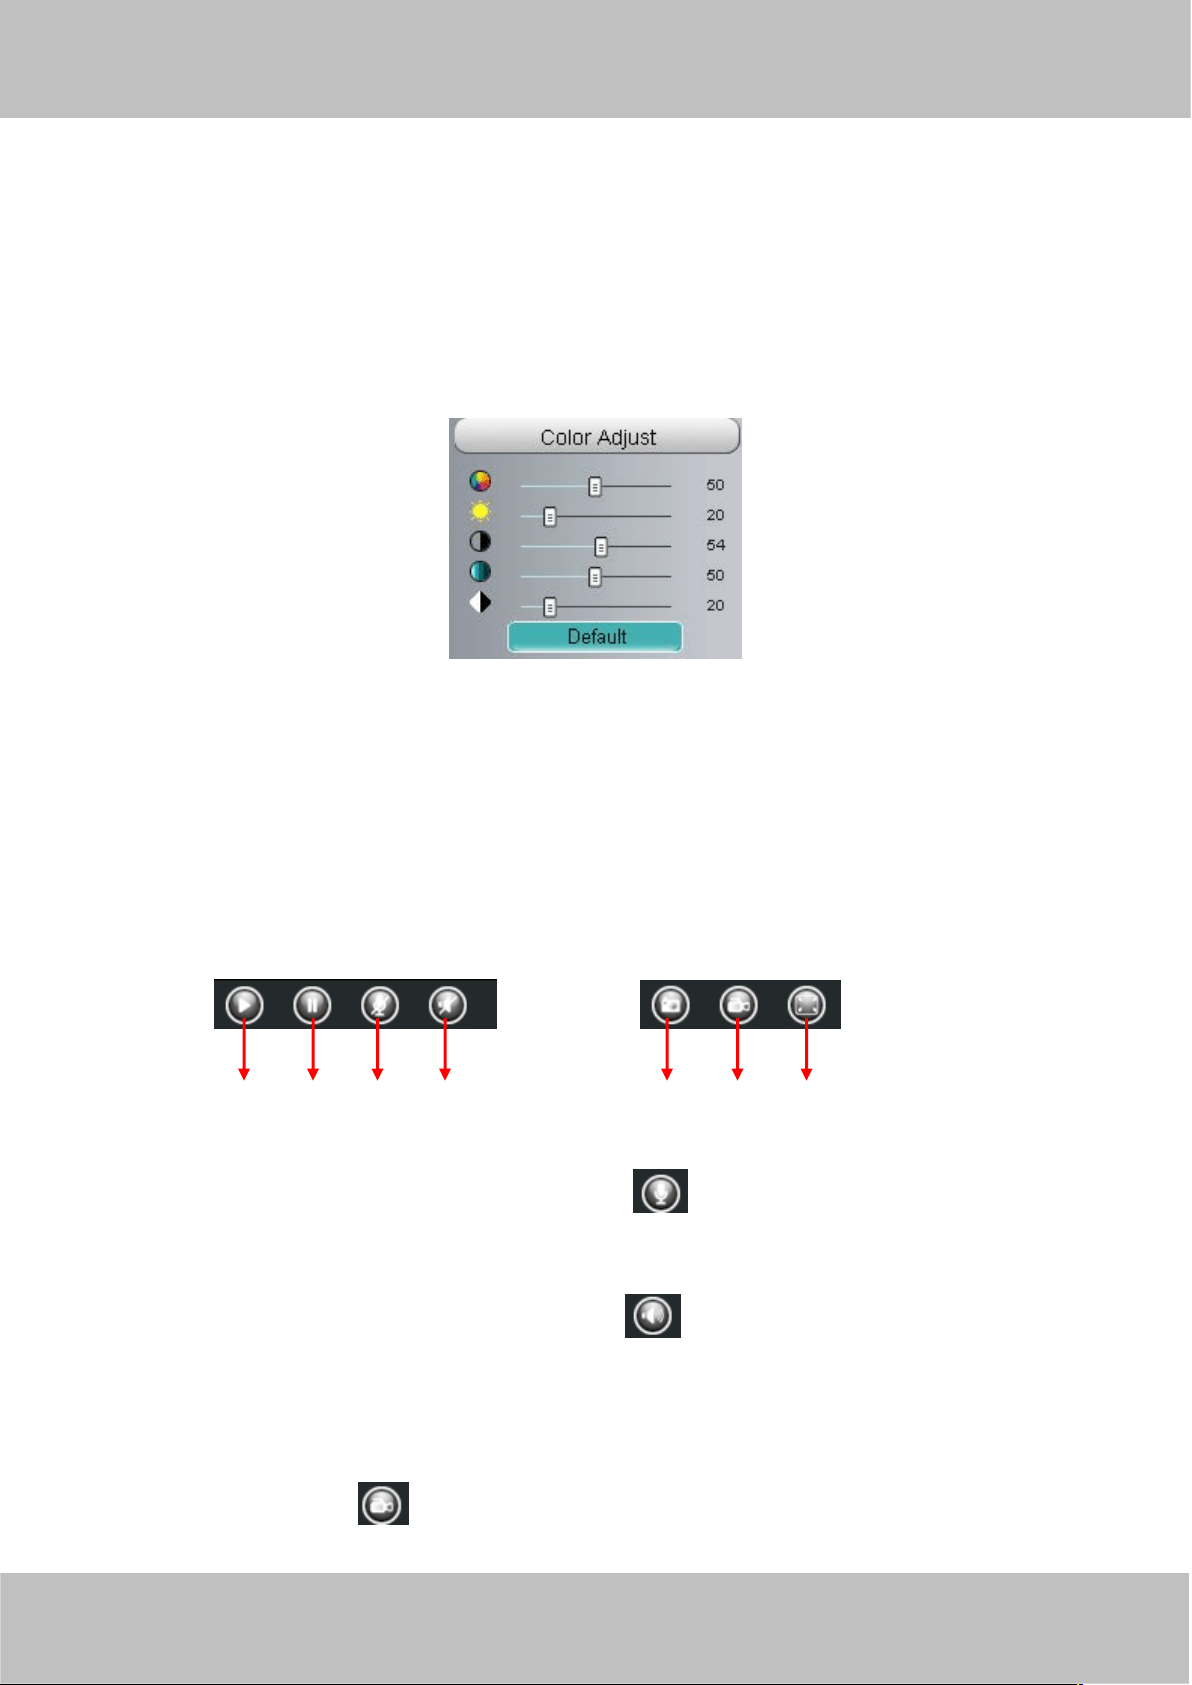
Section7 Image quality settings
In this page, you can tune Hue, Brightness, Contrast, Saturation, and Sharpness to get higher quality.
Section8 OSD
If you have added time and camera name in the video, you can see it in the live window.
Go to Settings ---Basic settings---Camera name panel, and you can change another device name. The
default device name is anonymous.
Go to Settings ---Basic settings---Camera time panel and adjust the device time.
Go to Settings ---Video---On Screen Display panel, you can add or no add OSD.
Section9 Play/Stop/ Talk/Audio/ Snap/ Record/ Full screen button
1------Play Click it to play the video of the camera
2------Stop Click it to stop the video of the camera
3------ Talk: Click the button and the icon will become to , then talk to the microphone that connected
with PC, people around the camera can hear your voice if the camera has connected with audio output device.
Click the icon again and stop talking.
4------ Audio Click the button and the icon will become to , you can hear the sound around the camera if
the camera has connected with other audio input device through the Audio Input port of the camera, Click the
icon again and stop audio.
5----- Snap: Click it to make snapshot and it pop up a window which picture you snapshot, right click in the
window and save the picture to anywhere you want.
6----- Record: Click the icon and the camera start recording, you can see a green dot in the live window.
Click again and stop recording. The default storage path is C:\IPCamRecord. You can change the storage path:
1
2
3
5
6
7
4
Loading ...
Loading ...
Loading ...