Loading ...
Loading ...
Loading ...
Countertop
Dishwasher
Door
1/2”
Min.
Installation Instructions
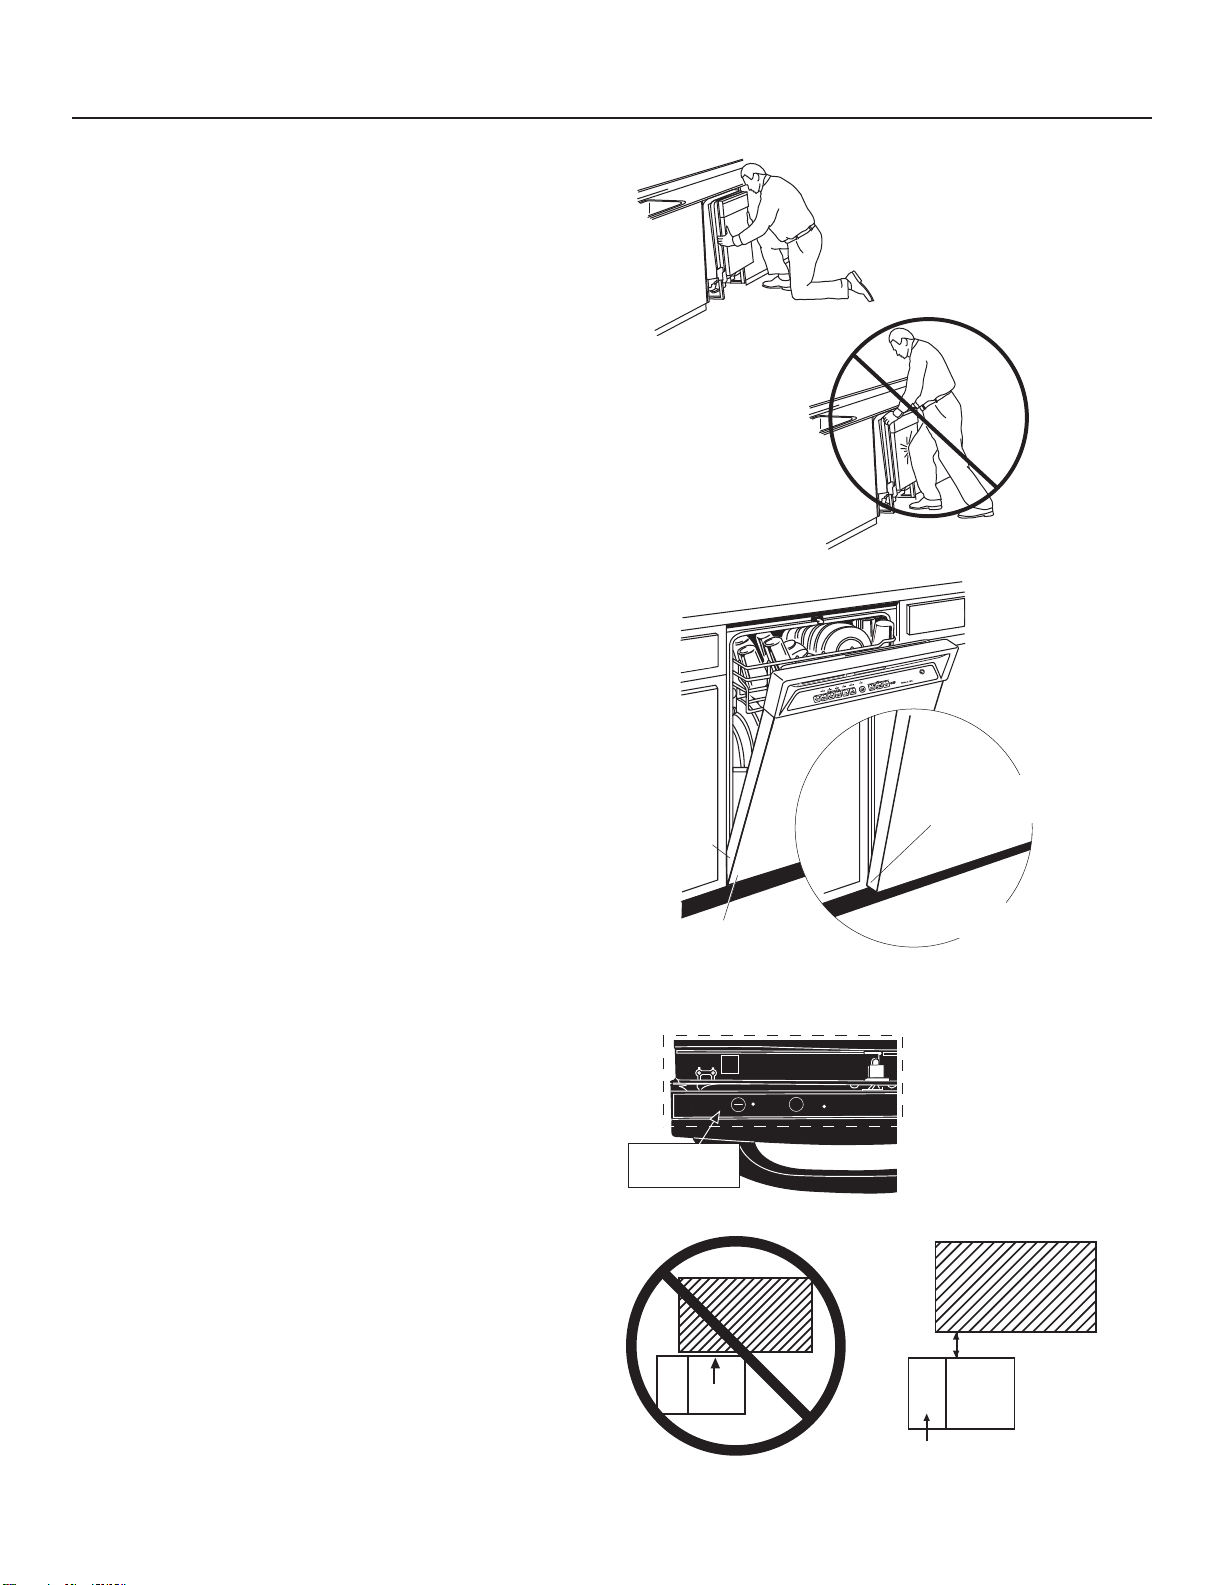
STEP 9 POSITION DISHWASHER
UNDER COUNTERTOP
3XVKWKHGLVKZDVKHULQWRWKHFDELQHW
3XVKWKHVLGHVZLWK\RXUKDQGV'RQRWXVH\RXUNQHH
against the door since door damage will occur.
&KHFNWKDWWKHWXELQVXODWLRQEODQNHWGRHVQRWJHW
³EXQFKHGXS´RULQWHUIHUHZLWKWKHVSULQJVDV\RXVOLGHLW
into the cabinet.
&HQWHUWKHGLVKZDVKHULQWKHRSHQLQJ
)URQWRIGRRUSDQHOVKRXOGEHÀXVKZLWKIDFHRIFDELQHW
&DUHIXOO\RSHQDQGFORVHWKHGRRUWRHQVXUHWKDWWKHGRRU
panel does not catch or rub on the cabinet frame.
,IWKHGRRUFDWFKHVRUUXEVRQWKHIUDPHUHSRVLWLRQDQG
RUOHYHOWKHXQLWVHH6WHSXQWLOWKHGRRUPRYHVIUHHO\
and does not contact the cabinet frame.
The controls on these models are designed to be hidden by
\RXUFRXQWHUWRS$OLJQWKHGLVKZDVKHUDVVKRZQLQ)LJXUH
4/HDYHDPLQLPXPJDSEHWZHHQWKHXQGHUVLGHRIWKH
countertop and the top of the dishwasher door as shown in
)LJXUH7
Note: If the drain hose gets trapped behind the unit it can
prevent the controls from being hidden by the countertop.
Note:,IWKLVGLVKZDVKHULVUHSODFLQJDQH[LVWLQJ
dishwasher, the old countertop bracket screw holes may
not be in the correct position to accept a top-control model.
New holes may be required.
Tip: The leveling legs can be used to increase or decrease
the amount of gap between the controls and the countertop
affecting the visibility of the controls.
IMPORTANT – Leave a 1/2" minimum gap between
the controls and the underside of the countertop to
prevent condensation and damage to the control panel
from screwheads.
Figure P
Figure Q
Figure R
Figure S Figure T
AT_^bXcX^]3XbWfPbWTa
Qh6aPb_X]V1^cW
BXSTbFXcW7P]Sb
3^=^c?dbW0VPX]bc
5a^]c3^^a?P]T[FXcW
:]TT3P\PVTc^CWT
3^^a?P]T[FX[[>RRda
3^^a
5XcbP]S
BfX]Vb
1PRZ
1TWX]S
2PQX]Tc
5aP\T
2^aaTRc
0[XV]\T]c
3^^a2PcRWTb
^]2PQX]Tc5aP\T
8]R^aaTRc
0[XV]\T]c
Countertop
Control
Panel
ON
OFF
DELAY
START
LOW RINSE AID
1 - 24 HRS.
Top View
Controls Hidden
by Countertop
Loading ...
Loading ...
Loading ...