Loading ...
Loading ...
Loading ...
Installation Instructions
STEP 16 DISHWASHER WET TEST
Ŷ
Turn on power supply (or plug power cord into outlet,
if equipped).
Ŷ
Start the unit to check for leaks.
±3UHVV212))EXWWRQWRWXUQXQLWRQ
±3UHVV&<&/(6(/(&7EXWWRQXQWLOOLJKWEHORZ5,16(
cycle illuminates
Ŷ
&ORVHGRRU
Ŷ
&KHFNWREHVXUHWKDWZDWHUHQWHUVWKHGLVKZDVKHU,I
water does not enter the dishwasher, check to be sure
that water and power are turned on.
Ŷ
&KHFNIRUOHDNVXQGHUWKHGLVKZDVKHU,IDOHDNLVIRXQG
turn off power supply, then tighten connections. Restore
power after leak is corrected.
Ŷ
&KHFNIRUOHDNVDURXQGWKHGRRU$OHDNDURXQGWKHGRRU
could be caused by door rubbing or hitting against
DGMDFHQWFDELQHW5HSRVLWLRQWKHGLVKZDVKHULI
QHFHVVDU\6HH6WHS
Ŷ
7KHGLVKZDVKHUZLOOGUDLQDQGWXUQRIIDERXWWR
PLQXWHVDIWHUWKHILUVWILOO&KHFNGUDLQOLQHV,IOHDNVDUH
found, turn power off at the breaker and correct plumbing
as necessary. Restore power after corrections are
PDGH6HH6WHS
Ŷ
Open dishwasher door and make sure most of the water
has drained. If not, check that disposer plug has been
UHPRYHGDQGRUDLUJDSLVQRWSOXJJHG6HH6WHS
Also check drain line for kinking.
Ŷ
Run the dishwasher through another fill and drain cycle.
&KHFNIRUOHDNVDQGFRUUHFWLIUHTXLUHG
Ŷ
$WWKHHQGRIGUDLQRSHQGRRUDQGSUHVV212))EXWWRQ
to turn unit off.
Figure HH
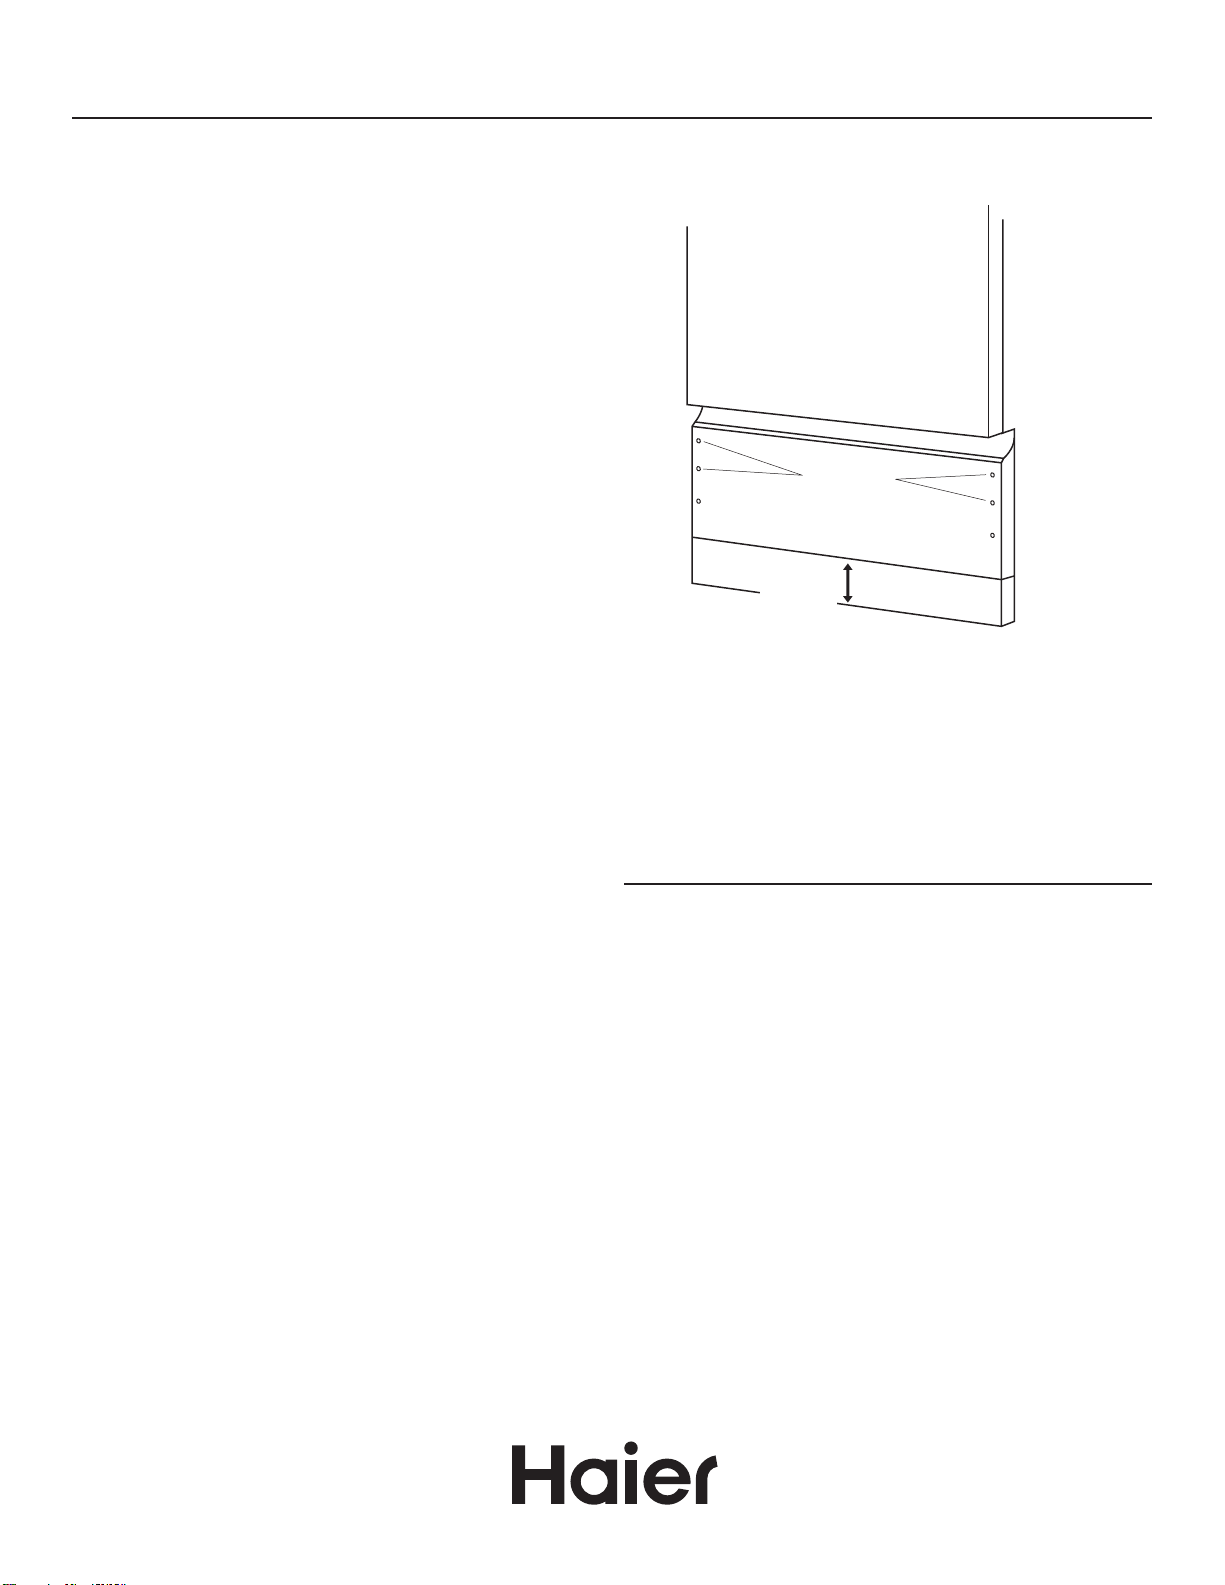
STEP 17 REPLACE TOEKICK
3ODFHSLHFHWRHNLFNDJDLQVWWKHOHJVRIWKHGLVKZDVKHU
3ODFHWKHLQQHUWRHNLFNSLHFHZLWKVORWVDJDLQVWWKH
toekick bracket. The slots should align with toekick
EUDFNHWVFUHZKROHV$OORZWKHWRHNLFNWRWRXFKWKHÀRRU
3ODFHODUJHUWRHNLFNRYHUWKHLQQHUSLHFHDQGLQVWDOO
toekick screws.
8VHDGGLWLRQDOVFUHZVIRULQVWDOODWLRQVRYHUKLJK
• Use both toekick pieces for all installation heights.
STEP 18 LITERATURE
• Be sure to leave complete literature package and
Installation Instructions with the consumer.
63(&,),&$7,21668%-(&772&+$1*(:,7+287127,&(
2-Piece Toekick
Adjust Up
or Down
Use Top 4
Screw Holes
Loading ...
Loading ...
Loading ...