The Voyager II® can be set to rotate between 40° and 360° (preset at 180°)
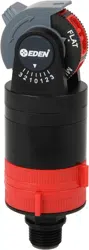
1. Turn the top of the head all the way to the left until it stops and then all the way to the right. The top of the head must be in this position to make adjustments. (Figure 1).
2. Insert the plastic end of the key into the pattern adjustment hole (Figure 2).
3. Turn clockwise to increase rotation; counterclockwise to decrease rotation. Each full turn increases/decreases rotation by 90˚ (Figure 3).
Head installation
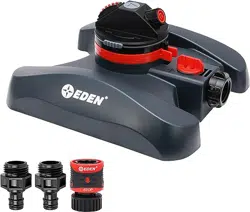
Flush sprinkler lines. 2. Thread the sprinkler onto a riser and set the head flush with the finished turf height (Figure 4).
Flush sprinkler lines.
Thread the sprinkler onto a riser and set the head flush with the finished turf height (Figure 4).
Note: DO NOT use pipe dope on the threads. If necessary, use thread seal tape.
Set the spray distance after installation
Set with water on under system’s normal operating pressure. Note: Preinstalled nozzle (# 7) adjusts from 25 ft. to 45 ft. depending on system water pressure.
Insert the hex (metal) end of the key into the distance adjustment slot (Figure 2).
Turn clockwise to decrease distance; counterclockwise to increase distance. Caution: DO NOT turn the adjustment screw too far in either direction—screw may come free of threads.
Replace the nozzle
See Nozzle Specs for other distance ranges and replace the nozzle if needed.
To access the nozzle, insert the plastic end of the key into the lifter socket (Figure 2).
Turn the key 90° and pull upward. Note: the spring inside the canister is very strong.
Firmly grip the sprinkler stem.
Insert the hex (metal) end of the key into the distance adjustment slot (Figure 2).
Turn the screw counterclockwise until it is just clear of the nozzle.
Apply water pressure to your system and the nozzle will popout of the head. Or use pliers to grip the edge of the nozzle and pull it out.
Insert the replacement nozzle so that the diffuser screw channel is on top and turn the diffuser screw back into place (Figure 5).
Adjust distance if necessary (see Set the Spray Distance).
Clean the filter
Remove grass and dirt around the sprinkler head so you can see the top 1 ½ in.
Unscrew the cap and remove the stem assembly.
Use pliers to extract the filter from the bottom of the stem assembly.
Clean out debris and replace filter.
Replace the stem assembly to the sprinkler body and screw tightly.
CAUTION
For outdoor use with cold water only.
Do not spray near electrical connections.
Precaución
Para uso en exteriores con agua fría solamente.
No rocíe cerca de conexiones eléctricas.
Specification
proof no: 1
date: 07.20.10
des: SM spck: XX
job no: NA
client: Orbit sku: 55660
upc: NA
file name: 55660-24 rA.indd
software: InDesign CS5
dimensions:
flat: w: 11.25" h: 5.5"
finished (folded): w 3.75" d: 0" h 5.5"
colors
additional instructions:
· Translations Approval Code: ·
Denotes square spacing.
Denotes equilateral triangular spacing. Data represent test results in zero wind. Adjust for local conditions.
Questions & answers
1. I lost the set screw for the adjustment nozzle any suggestions to where i can find a new set screw?
I would suggest finding an old Orbit Voyager pop-up - I always buy a couple to replace when the internal gears fail. Since this is the only feature which fails (the gears) It pays to keep a old spare for other parts which might need to be replaced such as when you hit the case with the lawnmower, or other things like losing the set-screw.
2. Do they actually rotate constantly 360* in 1 direction or do they rotate to a set point and reverse rotate?
They do both they go 360 and you can adjust 1/4 1/2 3/4 or full
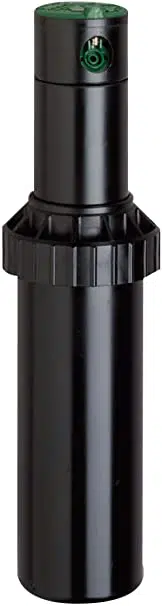
3. What is the sprinkler dimension?
About 8” tall and another 5” or so when the sprinkler pops up.
4. Are they easy to assemble
No assembly except installing the nozzle size you need and setting spray pattern
5. How Deep does the sprinkler have to go underground to be flush with the lawn ?
This is Janice from Orbit! That would depend on the ground you are putting it into, but the dimensions are 7.25 x 5.75 x 2.88 inches. So basically you need to dig at least 7.25 inches down, plus more for the tee that goes on the mainline and that sticks upward to attach to the sprinkler head so I would recommend about 10 inches. You can always fill in the dirt to make it flush against the head.
6. Will this work if I only need 16'? Can the adjustment be reduced that much?
Yes. Use the screw on the top of the unit to make the spray finer.
7. I went to adjust the distance of the spray and now it only sprays about 4 feet. What do i do now? Set screw is in. Never replaced nozzle.
I believe all you would have to do is start backing out the set screw that comes down into the spray stream. The further in the screw the shorter the distance. If you back it out too far then the nozzle will pop out when you turn on the water. When I adjusted mine after changing out the nozzle, I turned on the water and I just left the tool in the slot for distance, and then little by little turned it in until I had the distance that I wanted. Once I got the distance right I removed the tool
8. I need to replace my 1/2 inch npt sprinkler head with this item. what adaptor do i need to put voyager ii on my existing raiser?
This Orbit 55662 is on a 3/4 inch npt riser. Your 1/2 inch npt riser will need a 1/2 inch to 3/4 inch reducer. They have them with 1/2 inch npt female to 3/4 inch male.
9. What is the shortst distance spray the bonus nozzles will provide ?
According to the manufacturer, the Orbit II specs a 25-50 foot spray distance range; adjustable in a part-to full-circle spray pattern.
10. What is the difference between model 55661 & 55662?
We have different models for different regions and different colors, such as different color lids. So, they are basically the same.
#1 How Deep does the sprinkler have to go underground to be flush with the lawn ?
Hi, this is Janice from Orbit! That would depend on the ground you are putting it into, but the dimensions are 7.25 x 5.75 x 2.88 inches. So basically you need to dig at least 7.25 inches down, plus more for the tee that goes on the mainline and that sticks upward to attach to the sprinkler head so I would recommend about 10 inches. You can always fill in the dirt to make it flush against the head.
#2 Is it possible to shut off one sprinkler head individually? Keep all others in a section on, but shut off a single head?
We do not sell nozzle caps for gear drives like this. If you want a single head shut off entirely, you will need to cap/seal the pipe fitting instead.
This is Janice from Orbit! It may be possible but it's very uncommon and I don't recommend it. Spikes are for hose units the voyager 2 is an underground timer made for blulock-pvc-poly tubing so it's a different size 1, but even with an adapter, the pressures are different. If someone wanted a voyager 2 on a spike I would highly recommend an h20-6 or the brass impact - they would have much better usage and its made for a hose.


 Denotes square spacing.
 Denotes equilateral triangular spacing. Data represent test results in zero wind. Adjust for local conditions.