
Loading ...
Loading ...
Loading ...
23
OPERATING INSTRUCTION
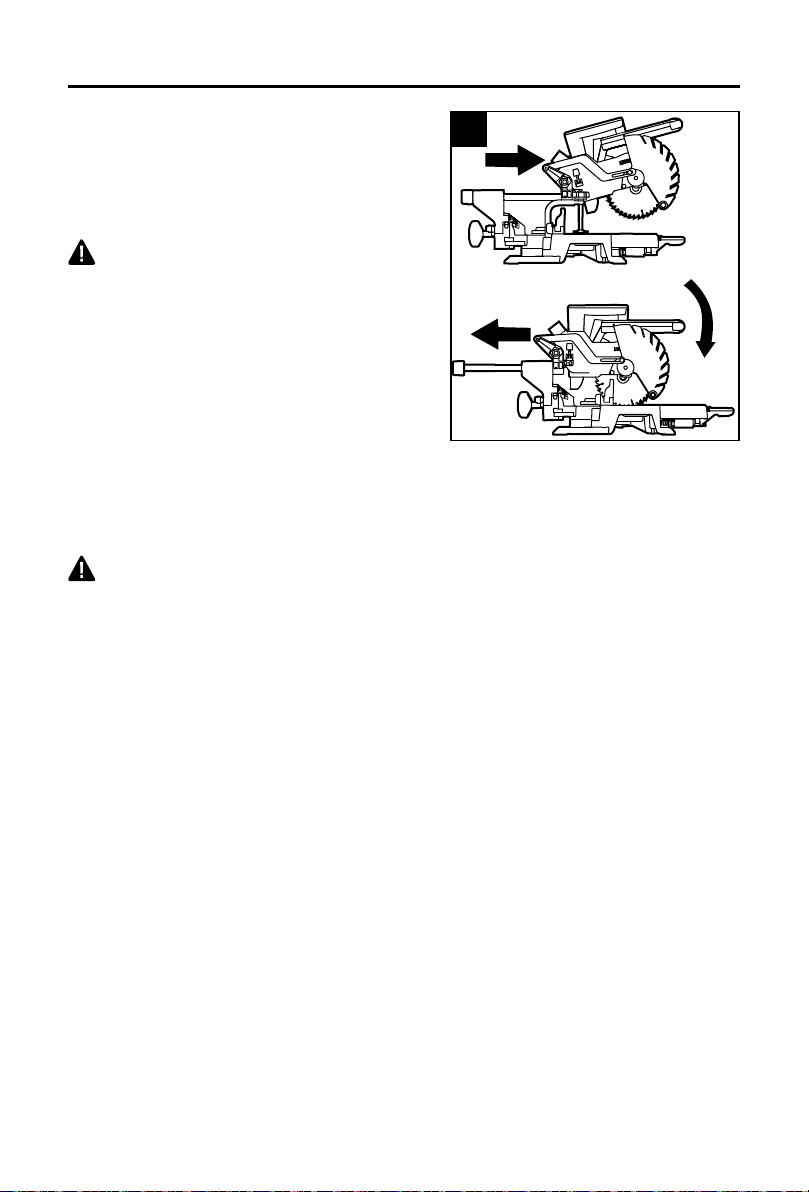
20. Slide Cuts
This type of cut is used mainly for wide pieces.
Loosen the sliding-lock knob (AB), then pull the saw
arm towards the operator. Lower the saw arm into
the work piece and then push it to the rear of the saw
to make the cut.
WARNING
• Never pull the saw toward you during a cut. The
blade can suddenly climb up on top of the work
piece and force itself toward you.
• Follow these instructions for making your slide cut:
a. Remove the battery pack from the saw.
b. Properly position the work piece. Make sure the
work piece is clamped rmly against the table
and thefence.
c. Loosen the sliding-lock knob (AB).
d. Attach the battery pak to the saw.
e. Grasp the main handle (R) and pull the saw arm away from the fence until the blade clears
the front of the work piece, or to its maximum extension.
f. Before turning the saw on, lower the saw arm to make sure the clamp clears the lower guard
and saw arm.
WARNING
• Use a clamping position that does not interfere with the cutting operation.
g. Turn on the on/off switch (B) Always allow the blade to reach full speed before cutting.
h. Lower the saw arm all the way down, and cut through the edge of the work piece.
i. Push (but do not force) the saw arm toward the fence all the way to the rear position to
complete the cut.
j. Release the On/Off switch. Wait until the blade comes to a complete stop before returning
the saw arm to the raised position, then removethe work piece.
21. Crosscutting
A crosscut is a cut made across the grain of the work piece. A straight crosscut is a cut made
with the miter table set at the 0° position. Miter crosscuts are made with the miter table set at
an angle other than 0°, either left or right.
a. Remove the battery pack from the saw.
b. Mark the cutting line on the work piece with a pencil.
c. Push in the arm-lock pin (AC) to lock the saw arm in the “DOWN” position.
d. Loosen the miter-control lever (P), and turn miter-control lever to the right side.
e. Move the saw to the desired angle, using either the miter-detent or the miter scale. Quickly
locate 0°, 15°, 22.5°, 31.6°, and 45° left or right by noting the stops or clicks at these angle
settings.
f. Retighten the miter-control lever (P)
NOTE: With the miter-control lever lifted (and held), the miter table moves freely to any desired
angle. Alternately, lift the miter-control lever and move the table until it is close to the desired
position, release the miter-control lever, and move the next detent. The miter table will stop at
each index point on the miter scale.
20
Loading ...
Loading ...
Loading ...