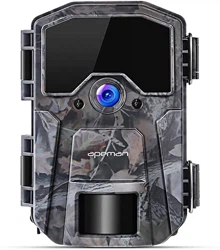
Apeman H40 Mini Trail Cameras
Product's Documents
Below are documents related to this product, you can read online or download:
- Owner's manual - (English) Read Online | Download pdf
THANK YOU for the purchase of your APEMAN H-Series Trail Camera. We appreciate your business and want to earn your trust. Please refer to the instructions in this manual to use the camera smoothly.
If your APEMAN Trail Camera does not seem to be functioning properly or if you are having photo/video quality issues. please feel free to e-mail us. we will try our best to meet your satisfaction.
We also welcome and value each feedback and suggestions on our camera. Your objective feedback and frank opinion are the big driving force for us to move forward. It is because of each lovely client and every useful advice that we could continue to improve our products quality and meet the needs in the ever-changing market.
We are well aware services indefinitely. we will soare no effort to improve product quality and service levels in the future to give our customers more intimate shopping experience
APEMAN Trail Camera Service E-mail: [email protected]
Hope everything goes well in your life.
Sincerely, APEMAN
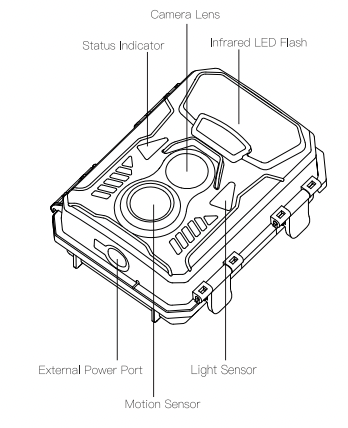
FRONT VIEW
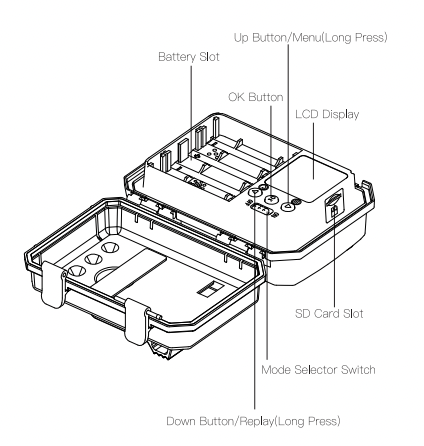
INSIDE VIEW
Battery Installation
Open the camera cover and install 4 AA Alkaline or Lithium batteries
Note: Anytime you load or unload batteries. rnake sure that the camera is OFF.
Important Battery Information.
— Only use Alkaline or Lithium batteries. We recommend the use of Energizer batteries.
— Do not mix old and new batteries. Always replace ALL the batteries at the sare time.
— When the camera is not in use. please remove the batteries.
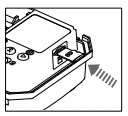
Insert the Micro SD Card
still under OFF mode. insert the Micro SD. card (using 6 or faster Micro SD Cards. up to 32GB) in the direction indicated on the card. until you hear an audible click.
Note: Camera will not operate without a Micro SD card installed.
Mounting with a Strap/Wall Mount
Place Camera on a tree or pole approximately
Hint:
1. If you are mounting camera to cover a trail. face the camera down the trail tilted at a slight downward angle.
2. Face the camera North or South to avoid over exposure from the sun.
3. Clear brush away from camera front to avoid false triggers from the wind.
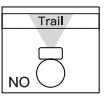
Power ON & Quick Select Taking Photo or Video
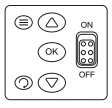
Slide the Mode Switch to the ON position, LCD screen light.
Default mode is Photo mode. press UP button to switch to Video mode, press DOWN button to back to Photo mode.
-  ” Represents “Photo” mode
-  ” Represents “Video” mode
Format Card & Setting Date and Time
Long press UP button to enter Setting Menu.
[Format]  [Set Clock]
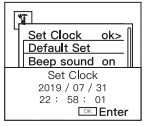
Run Quick Start
Close cover. status indicator flashes for 15 seconds. the camera will operate using Default Settings. You may also customize the settings in Settings Menu to meet your using requirements.
Viewing Files
View on the LCD screen
Open cover, press OK button to light up the screen. Then long press DOWN button to check your images and videos.

Removing the Micro-—SD Card
Remove the Micro-SD Card. nd load the SD card into the 4 in 1 d reader(Sold Separately) to view or rove stored images to another location.
Important: Make sure that the camera is in the OFF position before removing SD card.

Slide the Made Switch to the ON position. long pressing the UP button to enter the settings list. he name of the parameter will be shown on the built-in LCD. For all menu navigation. use UP/DOWN to navigate between options and OK to lock-in your selection
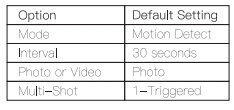
The Settings Menu — Parameters and Settings List
(Bold=default)/Descriptions
Capture photo or video or photo+video when motion or heat is detected.
Selects resolution for still photos.
Selects video resolution. Higher resolution produces better quality videos. but create larger files that take up more of the SD card capacity (fills up faster)
Selects how many photos are taken per trigger in Photo mode.
To extend camera using life. we recommend to set a shorter video length
Selects the length of time that the camera will “wait” until it responds to any additional triggers from the PIR after an animal is first detected and remains within the sensor’s range. During this user set “ignore triggers” interval. the camera will not capture photos/videos. This prevents the card from filling up with too many redundant images.
Turns Time Lapse recording rnode on/off. When activated. this function forces the camera to take photos or videos even when it is not triggered by a nearby live target. useful for constant monitoring of an area that might be far away from the camera.
This is also useful for observing cold blooded animals(e.g. snakes) or outdoor plants etc. As soon as the "On” setting has been confirmed by pressing the OK key. you could enter the interval time(15 seconds~30 minute) after which photos are to be taken
Note: In this mode. the PIR detection would stop working.
Select “On”. the date. time. the current temperature and moon phase will be imprinted on your still photos.
Set Time Switch to “On”. if camera should only be active within a certain time.
Once “On” has been confirmed with the OK key. the start and end time can be set.If the start time is. for instance set to 18:35 and the end time is 8:25. the camera will be operational from 6:35pm of the current day until 8:25 am of the following day. The camera will not be triggered and will not take any photos when the time in not included in this period.
Select a 4 digit security code for your camera.
PIR Sensitivity allows you to control as to how much movement and at what distance the camera will trigger. High sensitivity will allow for more distance. but will make the camera slightly more susceptible to false triggers and is ideal for open areas such as fields and food plots. Low sensitivity will shorten the distance but lower the chance of false triggers and is ideal for close range traps and deeply wooded areas.
Select the desired menu language.
Deletes (erases) all files stored on a card to prepare it for reuse. Always format a card that has been previously used in other devices or if it is a new card.
Caution: Make sure you have downloaded and backed up any files you want to preserve first!
IMPORTANT! Use to set date and time
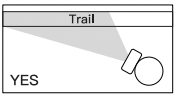
You can reset your camera to the factory default settings. Choose either YES - all setups restored to factory default or NO — keep custom settings.If the camera is behaving oddly and you think you may have changed the setting for something accidentally (but aren't sure which one). this will reset all parameters to default setting.
Select “ON” to open beep sound. “OFF” means close.
Select if record audio while recording a video.
Displays current firmware version for reference.
All APEMAN Trail Camera carries a 12—month warranty frorn purchase date.
Please register at www.apemans.com to activate your 1-year warranty.
Please also feel free to let us know what we could do to assist you if you have any problems about the game camera.
APEMAN CUSTOMER SERVICE E-MAIL ADDRESSES:
Quick—Contact: [email protected]
America: [email protected]
Europe: [email protected]
Japan: [email protected]
Reference file: Apeman H40 Mini Trail Cameras
Additionally, the document applies to other Apeman models: H45, H55, H60