PH960W
Trail Camera
Instruction Manual
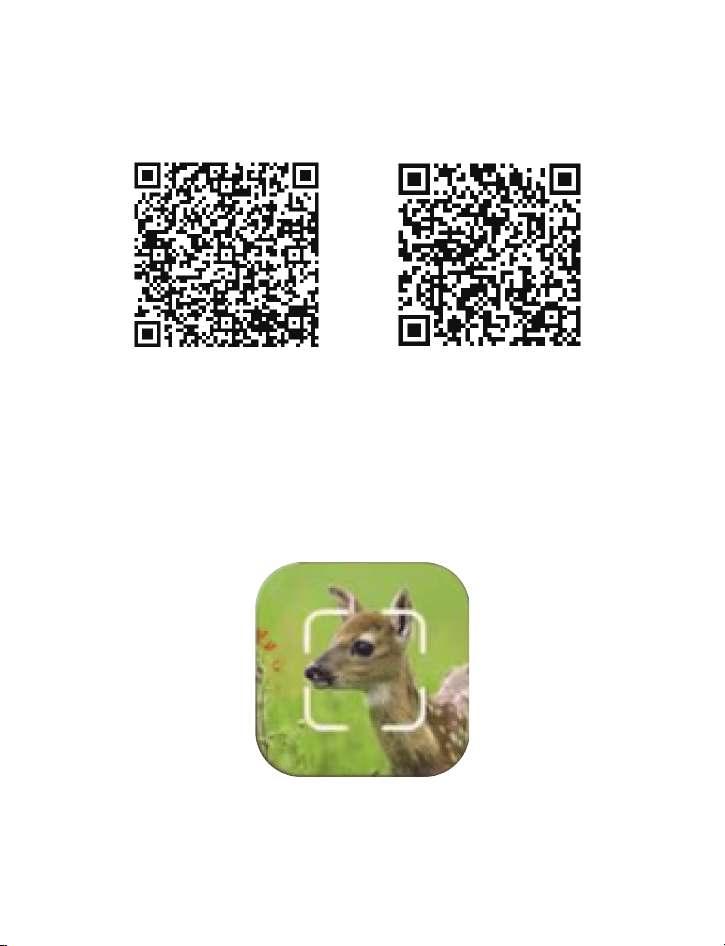
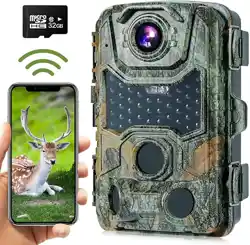
Download TrailCam Go Mobile APP
TrailCam Go
Android iPhone
Before using the Wi-Fi functionality,
please download the ‘TrailCam Go’ APP.

PACKAGE CONTENTS
1
1
1x WiFi trail camera
2
1x Type-C Cable
3
1x Stand Mount & Stand Support & 3x Bolts & Stoppers
4
1x Installation Belt
5
1x User Guide
010101
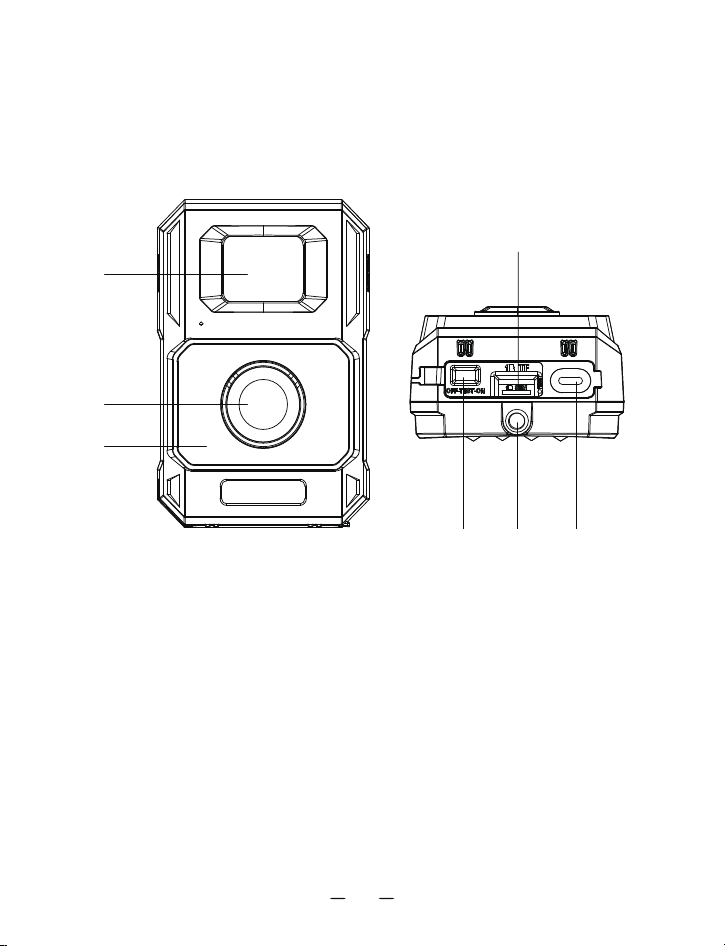
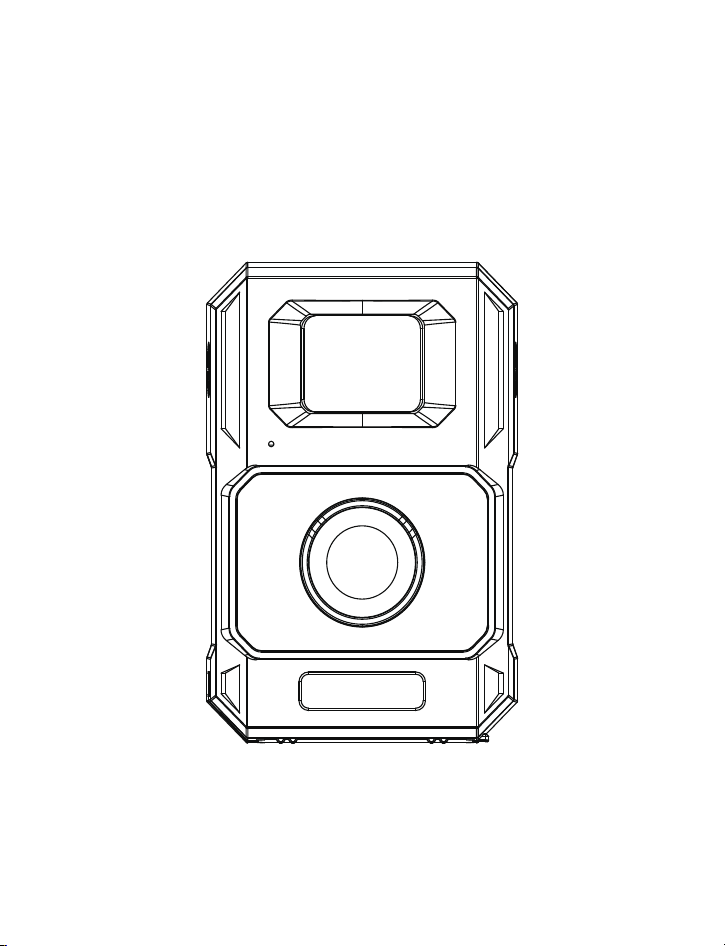
PRODUCT DIAGRAM
03. Lens
01
050706
04
02
03
04. Micro SD card slot
07. Fixaton port
02. Infrared LEDs
05. Type-C slot
01. PIR motion sensor
06. Mode switch
02

1. IMPORTANT NOTE
1.1About the Built-in Battery
Built-in 2000MA battery; Solar Input (TypeC); Charge TypeC(5V).
Standard Charging: 6.0 hours (0.2C)
Rapid charge:2.5-3.5 hours (0.5C)
Use a 5V 1A charging adapter to extend battery life.
1.3About APP Wi-Fi Connection
For better performance, we recommend that your phone is within 10 meters (30
feet) of your camera. Since there may be interference around, if the signal is not
good, please move closer to the camera gradually.
1.2. About SD Card
Require a standard-size micro SDXC/SDHC memory card (max capacity 256 GB,
Class 10).
Recommend using SanDisk 32GB micro SDXC/SDHC Class10 memory cards in the
camera to obtain the best cost performance.
Before use, please format your SD card in the camera in case your SD card may not
work with your camera.
Please gently remove the protective films on the front of the camera to get the best
performance, especially the protective films attached to the PIR motion sensor may
cause promotion detection performance, even no capture.
03

2. CAMERA OPERATION
Power/ Mode switch has 3 operational modes: "OFF", "ON", and "TEST".
1. Camera OFF
2. insert/pull out a Micro SD card
3. connect to an external device or a power
source
1. Work mode.
2. After the blue light flashes about 10 times, it
starts detecting motion.
3. Can connect to mobile phone to set camera
and view pictures.
1. Set up the camera
2. Only manual shooting
3. Connect the mobile phone to view pictures
4. The blue light is always on. After 30
seconds, the red light turns on after detecting
movement (the frequency of the red light is
related to the setting). It does not take
pictures and records. It is used to check
whether the IR-CUT of the camera is normal.
Power/ Mode Switch
“OFF” Mode
“ON” Mode
“TEST” Mode
Functions
Power/ Mode Switch
04

3. Wi-Fi CONNECTION
3.1. Download TrailCam Go Mobile APP
Before using the Wi-Fi functionality, please download the ‘TrailCam Go’ APP.
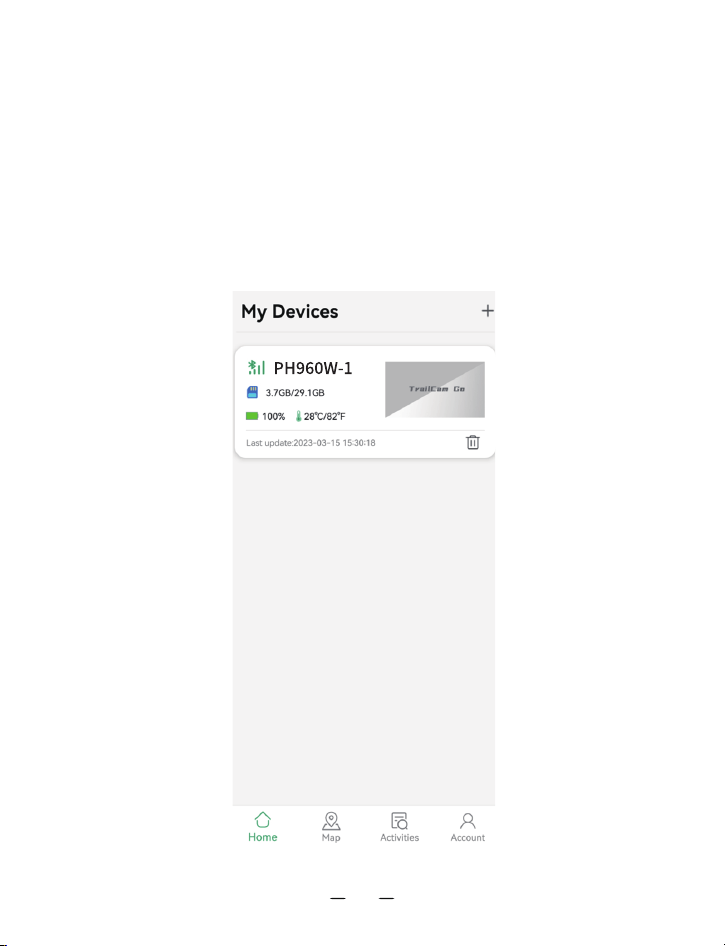
3.2. Add Your Camera
1. Enable Wi-Fi and Bluetooth on your mobile phone before opening the APP.
2. Make sure your camera is in ON/TEST mode, and that it is near you. To get a
stable connection, please get close to your camera no farther than 45ft away with no
obstacles between you and the camera, such as walls, glass doors, etc. (Within 1
meter, the camera will have the fastest connection speed and the connection success
rate will be as high as 99%)
3. Open the APP, and tap the “+”
4. Please tap the Wi-Fi camera
5. Follow the APP's prompts to connect the camera, which may take up to 30
seconds. (When the phone and camera are within 1 meter)
6. You can name your trail camera so that you can differentiate it if you buy several
cameras.
05
After adding the camera, you can mark where you put the trail camera in the
"MAP". (You need to authorize access to your address information) This can only be
used as a marker function, and does not have a GPS function, so be careful if
someone takes your camera away.
The mobile phone enters the MAP of the APP, which can navigate to the location
of the hunting camera for you.
06
4. About the Map

07
Motion Detection---Motion filter---ON/Off---ON---Detection zone---New area (The
range can be-changed at will)---Save area
Intelligent detection area: Only when there is a trigger in the shooting area you set,
will the camera work. (Can reduce false triggering)
Click the PH960W-1(what you named this camera), it will bring up the following
page:
Camera: Preview, manually taking pictures or videos:It requires you to connect the
camera again.(When you connect to this camera, it will not automatically shoot.
Connecting the camera will consume more power)
08

Gallery: Review or download the pictures or videos the camera has taken.
(Viewing SD card photos requires reconnecting the camera, viewing local photo
albums does not require reconnecting); when you need to save pictures to your
phone, you need to allow the APP to access your photo albums permissions.
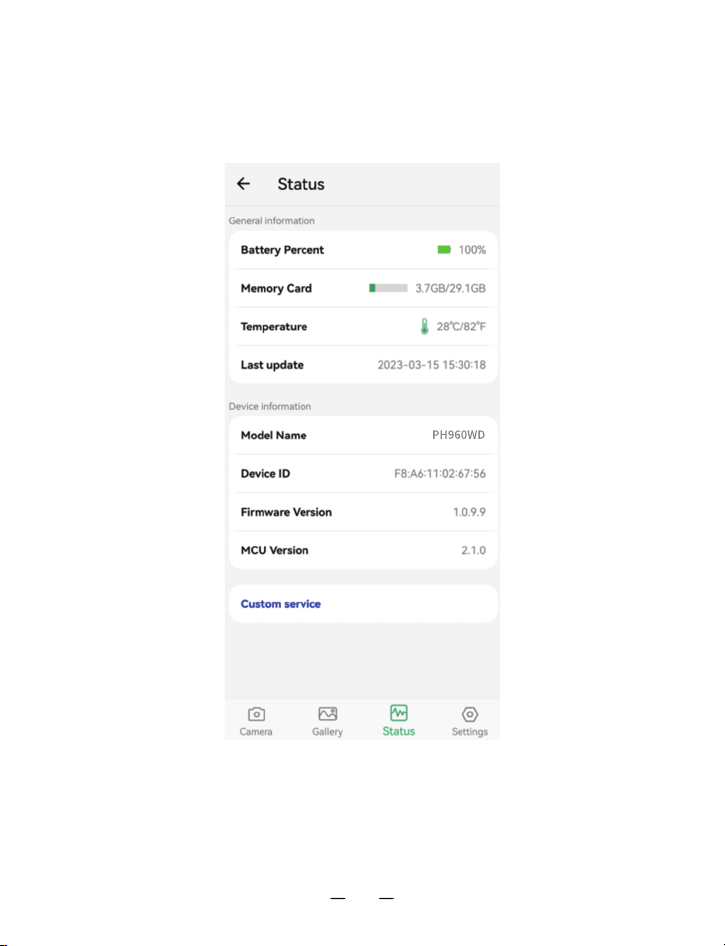
Status: To view the camera information, you will see the information when the
camera was last connected. When you need to see the latest information about
the camera, you need to reconnect the camera (After you charge the battery,
reconnect the camera, the battery will be updated)
Customer Service: you can send us customer service information directly after
the authorized email. We will reply to you within 24 hours. You can also
contact us here to activate your warranty (please tell us your order number).
Setting: After connecting the camera, you can set the shooting settings of the
camera on the mobile phone. Display or program camera settings, such as
mode, picture quality, etc. (requires reconnecting the camera)
When the APP is connected to the camera, the camera cannot
monitor motion for shooting and can only shoot manually. After
exiting the APP, wait for about 20 seconds and the camera will
resume automatically detecting motion shooting (ON Mode).
5. Important Notes on APP Wi-Fi Connection
1
No. Notes
09

Test Mode can detect whether the camera is working properly: the
blue light is always on, and after 20 seconds, the red light will flash
when detecting motion, indicating that the camera can detect motion
normally.
The connection between the mobile phone and the camera may fail
due to distance or obstructions. Please restart the APP, restart the
camera, and connect the mobile phone and the camera again when
they are close to each other.
The battery consumption of the camera depends on the settings of
the shooting camera and the usage time of the camera connected to
the phone. The camera consumes power faster when the phone is
connected to the camera.
2
3
4
When you share photos, the camera will be automatically discon-
nected. You will need to reconnect to continue viewing camera
photos after sharing.
5
When you access the map, the camera will be automatically
disconnected, and you need to reconnect when you re-enter the
camera.
6
No. Notes
10
1. Format Micro SD card at first
2.Mode: 20s video+ 2 photos
3. Photo resolution: 20MP
4. Video resolution: 1080p
5. Shot lag: 20s
6. Sensitivity motion sensors: Middle
7. Target recording time: off
8. Time lapse: off
The time will be synchronized after the camera is connected to the phone
6.Reference SET
7. INSTALLATION
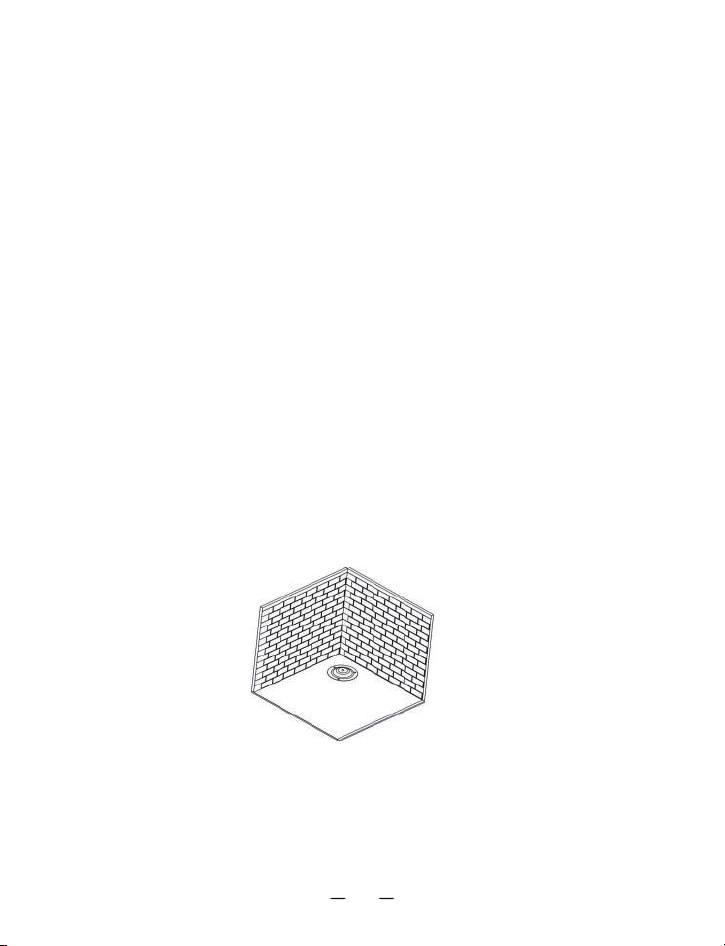
1. Mark the installation position with the help of the metal plate and make
holes in the wall.
If you want to put the camera on the wall.
11
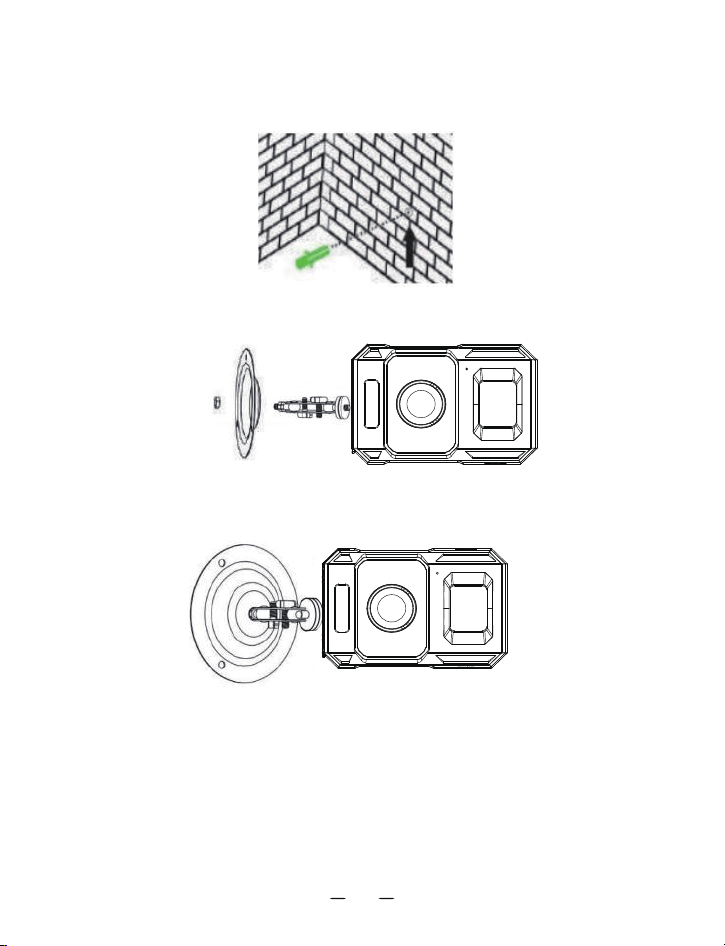
2. Put the white components in the holes.
3. Fix the Fixation Kit by following the picture.
4. Put the camera at the position you have chosen and fix the camera with screws.
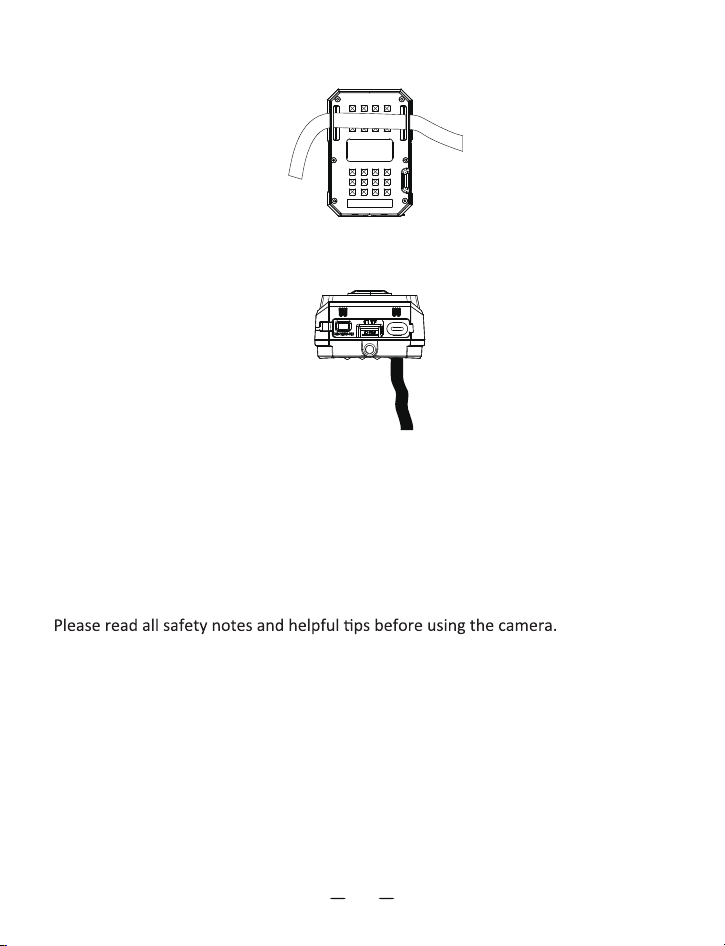
1. Pass the Installation Belt through the support on the back of the camera. If
the Belt is too long for the tree which you choose, there are 3 holes on each
side the support, you could pass the Installation Belt through several holes to
shorten the belt.
If you want to put the camera on a tree.
12
2. Put the camera on the bottom of the tree.
3. Go to the other side of the tree, pass the belt through the buckles by following
the picture.
4. Adjust the position of the camera then tightens the belt.
5. If you afraid that the camera would fall, you could also use the Fixation Kit and
the Installation Belt together to make sure that the camera is sturdily fixed on the
right position.
1. The device is only designed for wildlife observation, hunting, and security
monitoring. Do not use it for any other purpose.
2. Do not immerse the camera into water.
3. Do not disassemble the camera, please feel free to contact our customer service
for help.
4. Do not use the different type of power source, it may result in fire or electric
shock.
8. PRECAUTIONS FOR USE
Safety Notes
13

5. Always disconnect the power supply during a thunderstorm/ a lightning.
6. Never subject the camera display to heavy shocks, which may cause damage to
the lens, glass fragments, or injury.
9.FAQ
Helpful Tips
1. Place the device on an even surface or a stable stand. If you want to mount the
camera on a tree trunk, install it using the premium-quality mounting hardware/
strap designed for this camera.
2. Operate the camera in a well-ventilated area.
3. To prevent damage, never subject the camera to heavy shocks and do not shake
or drop it.
4. The device is not intended for use by children. Keep out of the reach of children.
1. Switch off the camera before inserting or removing the Micro SD Card. Do not
insert or remove the SD card when the power switch is in the “ON” position
2. Before inserting the memory card, make sure the write-protect switch on the
side of the Micro SD Card is "OFF"
3. Camera only operates after installing a Micro SD Card
If your camera does not seem to be functioning properly or if you are having
photo/video quality issues, please check if you are using the latest firmware or app
(the app is only applicable for the WiFi model), and check the Troubleshooting/FAQ
section.
Note:
14

Q: The camera won't power up
A: If the camera is in TEST mode and the blue light does not light up, please
charge the camera and restart the camera. In TEST mode, the blue light of the
camera is always on. Indicates that the camera can be turned on. The camera can
detect motion only in ON mode.
Q: Cannot connect to mobile phone
A: Check, please:
1. Are the Bluetooth and WiFi functions of your mobile phone turned on?
2. The connection distance should be as close as possible (10 meters) without any
obstruction.
3. Turn on the usage permissions of the APP in the settings
4. Please update the APP to the latest version
5. Try restarting your phone and camera
6. TEST/ON mode
If you still can't connect, please check the status (by the "customer service" menu
option), and send the order number and your phone model (iPhone 15) to our
support email for further assistance.
Q: The photos at night are completely black or
exposed.
A: Please keep the battery fully charged, Connect the camera to the mobile phone,
and take photos and videos manually. If there is a problem with the photo or
video, adjust the position and see if there is any obstruction in front of the lens, or
if there is a light shining directly on the camera, etc. After adjusting the position,
the camera shooting screen can be seen through the mobile phone. It is normal,
which means you can shoot normally.
15

10. TECHNICAL SPECIFICATIONS
100°
Yes
High/Medium/Low
65 Feet ( Below 77°F/25°C)
48MP
H.264/JPEG
1080P@30fps
Micro SD Card Up to 256GB
f=6,F/NO=1.6,FOV=100°;Auto IR Filter
0.2~0.6s
Triggering Time
PIR Sensor S
Range of IR Flash
External Memory
Lens
File Format
MAX Video Resolution
MAX Photo Resolution
5 Seconds to 60 Minutes, Programmable
1-3 , Programmable
Detection Angle
Temperature Compensation
Shot Lag
Sequence
16
Q: Why does my camera keep clicking and how to
fix it?
A: The camera makes a constant clicking sound, and this behavior is caused by a
component in the camera called the IR-CUT, which detects changes in light
intensity to switch between color and black and white modes. However, the camera
has a light intensity detection threshold, which may cause the camera to switch
modes repeatedly when it is in the critical area of light and dark. You can check
whether there is an object in front of the camera blocking the lens, or whether the
environment the camera is in causes the camera to switch shooting modes
repeatedly.

3-60 Seconds, Programmable
00:00 to 23:59 , Programmable
-20°C to 60°C (-4°F to 140°F)
IP66
Yes
TYPE C USB 2.0
Video Length
Stamps
Capture Mode
PC Interface
Power Supply
Waterproof Rating
Operating Temperature
Built-in Microphone & Speaker
Target Recording Time
On/Off ; Includes Serial No;
Temperature and Moon Phase
Color Images / Videos during Daytime;
B&W Images / Videos at Night
Built-in 2000MA battery; Also can use
Solar Input (TypeC); Charge TypeC(5V)
17

18
FCC Statement
This device complies with part 15 of the FCC Rules.
Operation is subject to the following two conditions:
(1)This device may not cause harmful interference, and
(2)this device must accept any interference received,
including interference that may cause undesired operation.
This equipment has been tested and found to comply with the
limits for a Class B digital device, pursuant to part 15 of
the FCC Rules.
These limits are designed to provide reasonable protection
against harmful interference in a residential installation.
This equipment generates, uses and can radiate radio
frequency energy and, if not installed and used in
accordance with the instructions,may cause harmful
interference to radio communications. However, there is no
guarantee that interference will not occur in a particular
installation.
If this equipment does cause harmful interference to radio
or television reception, which can be determined by turning
the equipment off and on, the user is encouraged to try to
correct the interference by one or more of the following
measures: Reorient or relocate the receiving antenna.
.Increase the separation between the equipment and receiver.
.Connect the equipment into an outlet on a circuit different
from that to which the receiver is connected.
.Consult the dealer or an experienced radio/TV technician
for help.
Caution: Any changes or modifications to this device not
explicitly approved by manufacturer could void your
authority to operate this equipment.
RF Exposure Information
The device was evaluated to meet general RF exposure
requirements. This equipment should be installed and used
with a minimum distance of 0 mm between the radiator and
your body.