V2026042301

1.IN THE BOX
1x Trail Camera, 1x Mounting Strap, 1x Base of Stand Set,
1x USB Cable, 1x Instruction Manual,
8x 1.5V AA Alkaline Batteries
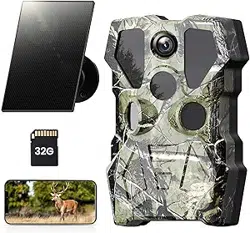
Note: This product does not come with a memory card.
2. IMPORTANT NOTE
2.1. Battery Requirements
This camera requires a total of eight (8) 1.5V AA Alkaline or
Lithium batteries for power. We highly recommend using
Energizer AA Alkaline batteries to maximize battery life.
2.2. Battery Caution
Please do not mix old and new batteries, and avoid mixing
different battery types. 1.2V Rechargeable AA batteries are
NOT recommended, as they may produce lower voltage, which
can lead to operational issues.
2.3. Battery Preservation
Remember to remove the batteries when the camera is NOT in
use to prevent unnecessary power drain.
2.4. Memory Card Specification
This camera requires a memory card with a maximum capacity
of 128GB, rated at Class 6 or above for optimal performance.
We recommend using SanDisk 64GB SDHC/Class 10 memory
cards for a cost-effective and reliable choice.
Before first use, please format your memory card in the camera
by using “Memory Card Format” in the menu settings.

2.5. Regarding App Wi-Fi Connection
For optimal performance when connecting your phone to the
camera via Wi-Fi, we suggest keeping your phone within a
range of 15 meters (approximately 45 feet) from the camera.
Interference from various sources can affect the signal quality.
If you encounter connectivity issues or a weak signal, please
try moving your phone closer to the camera step by step to
establish a stable connection.
Legal Attribution:
Apple and the Apple Logo are trademarks of Apple Inc., regis-
tered in the U.S. and other countries.
Google Play and the Google Play logo are trademarks of
Google LLC.
These trademarks are the property of their respective owners
and are not associated with our product or company.
2.6. Remove Protective Films
Before using the camera, please ensure that you have
removed any protective films on the front of the camera. This
step is crucial to achieve the best performance.
2.7. On-Screen Information
The number displayed in the top right corner of the screen
indicates either the length of video that can be recorded or the
number of photos that can be taken, depending on the
camera's current mode.
We hope this information enhances your experience with our
camera. If you have any further questions or require assistance,
please don't hesitate to reach out to our customer support team.

3. INTRODUCTION
3.1. About the Camera
The KJK228 heralds a new era in trail cameras. Overflowing
with advanced features, this camera is meticulously crafted to
enhance your outdoor monitoring experience.
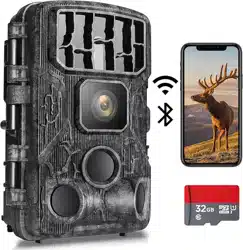
With a built-in Wi-Fi and Bluetooth module, the KJK228
ensures effortless connectivity and camera control through our
dedicated "TrailCam Go" App. The low-power Bluetooth
module expedites device discovery, while Wi-Fi enables live
previews, seamless image transmission, and hassle-free
settings adjustments.
Our camera proudly showcases cutting-edge imaging technol-
ogy, including smart night vision, blur reduction, and noise
reduction, all working harmoniously to deliver pristine high-res-
olution image quality.
Experience the future of trail cameras with the KJK228. Uncov-
er the beauty of the outdoors while staying effortlessly connect-
ed and in control.
3.2. Main Features
• Bluetooth for device discovery
• Wi-Fi for preview, playback, and settings
• Captures high-quality media: 84MP still photos, 4K 30fps
H.264 video clips with audio
• Exceptional night vision with a 90ft flash range;
• Wide 140° view angle
• User-friendly program with intuitive operation keys and a
built-in 2.0 inch color screen, simplifying programming and
media review
• Two modes available: Motion detection and Time lapse
• Swift performance with a 0.05s trigger time, 0.05s recovery
time, long 100ft trigger distance, and a 140° detection angle
• Each capture includes an info strip displaying Date, Time,
Temperature, and Moon phase
• Additional features: Work Time tracking, Loop Recording,
Time Lapse, Password Protection
• Designed for all climates with IP67 rating; operational in
temperatures ranging from -22°F to 158°F
• Supports SD/SDHC/SDXC memory cards, with a maximum
capacity of 128GB
3.3. Applications
The camera is versatile and can be utilized in various
ways:
• Hunting: Capture animals' tracks and behaviors in their
natural habitat.
• Wildlife Observation and Research: Record pictures and
videos of wild animals in their natural environment.
• Sports Camera: Perfect for activities like riding, driving,
camping, or exploring, allowing you to capture your adven-
tures.
• Motion-Triggered Security Camera: Ideal for home, farm,
office, and community surveillance, ensuring security and
peace of mind.
• Indoor and Outdoor Surveillance: Suitable for both indoor
and outdoor applications where evidence of intrusion or moni-
toring is needed.

3. INTRODUCTION
3.1. About the Camera
The KJK228 heralds a new era in trail cameras. Overflowing
with advanced features, this camera is meticulously crafted to
enhance your outdoor monitoring experience.
With a built-in Wi-Fi and Bluetooth module, the KJK228
ensures effortless connectivity and camera control through our
dedicated "TrailCam Go" App. The low-power Bluetooth
module expedites device discovery, while Wi-Fi enables live
previews, seamless image transmission, and hassle-free
settings adjustments.
Our camera proudly showcases cutting-edge imaging technol-
ogy, including smart night vision, blur reduction, and noise
reduction, all working harmoniously to deliver pristine high-res-
olution image quality.
Experience the future of trail cameras with the KJK228. Uncov-
er the beauty of the outdoors while staying effortlessly connect-
ed and in control.
3.2. Main Features
• Bluetooth for device discovery
• Wi-Fi for preview, playback, and settings
• Captures high-quality media: 84MP still photos, 4K 30fps
H.264 video clips with audio
• Exceptional night vision with a 90ft flash range;
• Wide 140° view angle
• User-friendly program with intuitive operation keys and a
built-in 2.0 inch color screen, simplifying programming and
media review
• Two modes available: Motion detection and Time lapse
• Swift performance with a 0.05s trigger time, 0.05s recovery
time, long 100ft trigger distance, and a 140° detection angle
• Each capture includes an info strip displaying Date, Time,
Temperature, and Moon phase
• Additional features: Work Time tracking, Loop Recording,
Time Lapse, Password Protection
• Designed for all climates with IP67 rating; operational in
temperatures ranging from -22°F to 158°F
• Supports SD/SDHC/SDXC memory cards, with a maximum
capacity of 128GB
3.3. Applications
The camera is versatile and can be utilized in various
ways:
• Hunting: Capture animals' tracks and behaviors in their
natural habitat.
• Wildlife Observation and Research: Record pictures and
videos of wild animals in their natural environment.
• Sports Camera: Perfect for activities like riding, driving,
camping, or exploring, allowing you to capture your adven-
tures.
• Motion-Triggered Security Camera: Ideal for home, farm,
office, and community surveillance, ensuring security and
peace of mind.
• Indoor and Outdoor Surveillance: Suitable for both indoor
and outdoor applications where evidence of intrusion or moni-
toring is needed.
4. PARTS AND CONTROLS
The camera is equipped with built-in multiple high efficiency
infrared LEDs, LED Indicators, Lens, 3pcs PIR Sensors, Lock
Holes in front view .
WiFi Indicator
LED Light
(WiFi connection
status is indicated
by a blinking
green light.)
Motion
Indicator LED
Light(The
LED Blinks
when heat is
detected in the
set mode)
Front View
The camera provides the following connections for external
devices: USB port and SD card slot etc.
Lens

maximize battery life during night use, we recommend using
1.5V AA alkaline batteries, particularly 8 Energizer brand
batteries, as they offer a battery life two to three times longer
than regular batteries.
5. INSTALLING THE BATTERIES AND SD CARD
Before you begin learning how to use your camera, you will first
need to install a set of batteries and insert an SD card.
Although that may only take you a minute, there are some
important notes about both batteries and SD cards you should
be aware of, so please take the time to read the following
directions and cautions:
5.1. Loading Batteries
After opening the battery compartment cover, you'll notice that
the camera features eight battery slots . To ensure the
camera operates correctly, it's essential to insert all eight
batteries with the correct polarity, ensuring the negative or "flat"
end aligns with the long spring in each battery slot.
Regarding rechargeable the battery, for optimal performance,
use 1.5V rechargeable lithium-ion batteries. They store more
power than regular alkalines and perform better, especially in
cold outdoor conditions. Avoid low-quality NiCd or Nickel Metal
Hydride rechargeables, as they store less power and under-
perform compared to standard alkalines.
During SET mode, when the battery power level becomes low,
you will see the message "Low Battery" displayed on the
screen. At this point, it's important to replace the batteries.
Please keep in mind that when the battery charge drops to 1/3,
the Night Vision function will automatically deactivate. You can
monitor the remaining power in the bottom right corner of the
screen. It's worth noting that the camera consumes more
power during nighttime operation due to its built-in IR LEDs. To

5. INSTALLING THE BATTERIES AND SD CARD
Before you begin learning how to use your camera, you will first
need to install a set of batteries and insert an SD card.
Although that may only take you a minute, there are some
important notes about both batteries and SD cards you should
be aware of, so please take the time to read the following
directions and cautions:
5.1. Loading Batteries
After opening the battery compartment cover, you'll notice that
the camera features eight battery slots (Figure 6). To ensure
the camera operates correctly, it's essential to insert all eight
batteries with the correct polarity, ensuring the negative or "flat"
end aligns with the long spring in each battery slot.
Regarding rechargeable the battery, for optimal performance,
use 1.5V rechargeable lithium-ion batteries. They store more
power than regular alkalines and perform better, especially in
cold outdoor conditions. Avoid low-quality NiCd or Nickel Metal
Hydride rechargeables, as they store less power and under-
perform compared to standard alkalines.
During SET mode, when the battery power level becomes low,
you will see the message "Low Battery" displayed on the
screen. At this point, it's important to replace the batteries.
Please keep in mind that when the battery charge drops to 1/3,
the Night Vision function will automatically deactivate. You can
monitor the remaining power in the bottom right corner of the
screen. It's worth noting that the camera consumes more
power during nighttime operation due to its built-in IR LEDs. To
maximize battery life during night use, we recommend using
1.5V AA alkaline batteries, particularly 8 Energizer brand
batteries, as they offer a battery life two to three times longer
than regular batteries.
device will not display an SD card icon on the screen in SET
mode. Formatting Memory card by using the camera's
"Format" parameter in the menu settings before using it for the
first time is recommended, especially when a card has been
used in other devices.
• To take out the SD card, just gently push in the card (do not
try to pull it out without pushing in first). The card is released
from the slot and ready to be removed when you hear the click.
Be sure the camera's power is switched OFF before inserting
or removing SD cards or batteries.
5.2. Inserting the SD Card
Insert the SD card (with the camera's power switch in the OFF
position) before beginning to operate the camera. Don't insert or
remove the SD card when the power switch is in the ON or SET
mode. SD cards up to a maximum128GB capacity is supported
The following describes how to insert and remove the SD
card:
• Insert the SD card into the card slot with its label side
upwards. A "click" sound indicates that the card is installed
successfully. If the wrong side of the card is facing up, you will
not be able to insert it without force, there is only one correct
way to insert cards. If the SD card is not installed correctly, the

Figure 6: Loading the Batteries
5.2. Inserting the SD Card
Insert the SD card (with the camera's power switch in the OFF
position) before beginning to operate the camera. Don't insert or
remove the SD card when the power switch is in the ON or SET
mode. SD cards up to a maximum128GB capacity is supported
(Figure 7).
The following describes how to insert and remove the SD
card:
• Insert the SD card into the card slot with its label side
upwards. A "click" sound indicates that the card is installed
successfully. If the wrong side of the card is facing up, you will
not be able to insert it without force, there is only one correct
way to insert cards. If the SD card is not installed correctly, the
device will not display an SD card icon on the screen in SET
mode. Formatting Memory card by using the camera's
"Format" parameter in the menu settings before using it for the
first time is recommended, especially when a card has been
used in other devices.
• To take out the SD card, just gently push in the card (do not
try to pull it out without pushing in first). The card is released
from the slot and ready to be removed when you hear the click.
Be sure the camera's power is switched OFF before inserting
or removing SD cards or batteries.

6. USING THE CAMERA
Once you've prepared your camera with the correct installation
of batteries and an SD card, you can simply take it outdoors
and secure it to a tree (or based on your specific application
scenario). Switch it ON and leave it to capture potential great
photos that match your expectations. However, we strongly
recommend that you initially invest some time indoors with this
manual (Alernatively, you can visit our website at
"www.kjkcam.com", where we regularly update instructional
videos and FAQs to assist you in using our products) along
with your camera. This will help you familiarize yourself with
the functions of those control keys.
At the very least, you may want to set the date and time so that
the camera can imprint them (or not, as it's your choice) on
your photos as they are taken. You can also learn how to
configure the camera to shoot video clips instead of still photos
if that's your preference. Additionally, reading some tips on how
to mount it securely on a tree can be beneficial.
7. THE OFF, ON, AND SET MODES
The camera has three basic operational modes:
• OFF mode: Power switch in the OFF position.
• SET mode: Power switch in the SET position (screen is on).
• ON mode: Power switch in the ON position.
App & WiFi Connection:
You can use the APP(TrailCam Go) to connect the camera
when the camera is operating in the ON or SET modes.

7.1. OFF Mode
The OFF mode is the "safe" mode when any actions must be
taken, e.g., replacing the SD card or batteries, or transporting
the device. And of course, when you are storing or not using
the camera, you will switch it to OFF. Please note that in the
OFF mode the camera consumes little power. It's a good idea
to take the batteries out of the battery compartment if the
camera will not be used for a long time.
7.2. SET Mode
In SET mode, you can easily review and adjust your camera's
settings using the built-in screen. To access these settings,
simply press the MODE key twice to bring up the menu. Within
this menu, you have the ability to modify various parameters
such as photo or video resolution, the time interval between
photos, enabling or disabling time imprinting, and more (for
further details, refer to Section 9 ADVANCED SETTINGS).
When you shift the power switch to the SET position, the
screen will activate, displaying essential information like the
available image capacity, battery level, camera or video mode,
and more.
Please take note: In SET mode, if there is no activity (key
pressing) within 2 minutes, the camera will automatically turn
off the screen to conserve power.
In SET mode, you can also connect the camera to a
computer's USB port to download your images.
7.3. ON Mode
Anytime after the batteries and SD card have been inserted,
you can switch on the camera. When the power switch is
moved to the topmost position, the camera will enter into the
ON mode. The camera will countdown 15second delay and
then be ready to capture images. Once in the ON mode, no
manual controls are needed or possible (the control keys have
no effect). The camera will take photos or videos automatically
(according to its current parameter settings).
You can either move the power switch directly from OFF to ON
mode, or stop at the SET position first to change one or more
settings, then move the switch to ON after you have finished
doing so.
Shortcut Keys/Functions
As mentioned earlier in the "Parts & Controls" section, the
keypad keys serve secondary "shortcut" functions when the
camera is in SET mode:
Press the OK key to quickly switch the camera to video mode.
Press the UP/Down key to swiftly set the camera to capture
still photos.
Press the OK key to manually trigger the shutter. This feature
is handy for testing the camera.
When set to the SET position (the middle position), press the
MODE key to review your photos and videos. Keep in mind that
the camera should not be in the OFF or ON position for this
function to work. Utilize the DOWN or UP key to navigate
through your media, and finally, press the MODE key to exit
playback mode.

8. Wi-Fi CONNECTION
8.1. Download TrailCam Go Mobile APP
Before using the Wi-Fi functionality, please download the
“TrailCam Go” App.
You can download the app from the app store by scanning the
following QR code.
NOTES:
The screenshots provided in this section are for reference
purposes only. The actual interface and layout may vary on
different versions of the App, whether on iOS or Android.
While using the TrailCam Go App (referred to as the App), it's
important to grant the App access to certain permissions on
your device. These permissions include Wi-Fi, Bluetooth,
storage, location, and camera access. Enabling these permis-
sions is essential to facilitate the functionality of taking pictures
and recording videos with the App.
For iOS users on iOS 14 and later, it's also necessary to enable
the Local Network permission to ensure seamless App opera-
tion. This will help maintain connectivity and ensure the App
functions as intended.

8.2. Enable Wi-Fi and Bluetooth
Enabling both Wi-Fi and Bluetooth on your mobile phone
before launching the App is a mandatory step. This action is
crucial for optimizing the connection speed between the App
and the camera.
Enable Wi-Fi and Bluetooth
8.3. Add Your Camera
Make sure your camera is in ON Mode, and that it is near you.
To get a stable connection, please get close to your camera no
farther than 45ft away with no obstacles between you and the
camera, such as walls, glass doors etc.
To add your camera, simply tap the "+" icon in the center of the
screen .

8.4. Choose Device Type
Please tap Wi-Fi Camera
8.5. Search Your Camera and Link
By default, in the list the camera will be indicated as ID
"KJK_XXXX". The App automatically searches for all Wi-Fi trail
cameras nearby, please make sure your camera is within the
Wi-Fi range. This process may take up to 15 seconds. If there is
no device shown in the list, To return to the previous menu, click
the "X" key. To refresh the list, click "Next" again .
Tap the one you want to add . The App starts connecting
to your camera. It might take up to 15 seconds to build the
Bluetooth and Wi-Fi connection between the App and camera.
There are 4 steps (Illustration omitted):
Tap to add device
Select Wi-Fi
Camera Type

Step1 - Connecting through Bluetooth...
Step2 - Searching Wi-Fi ...
Step3 - Activating the camera...
Step4 - Connecting through Wi-Fi...
"TrailCam Go" Wants to Join
WLAN Network
KJK_DDAD”
A system pop-up message will show .
Please tap "Join" to allow Wi-Fi connection. The string
"KJK_XXXX" is the name of Wi-Fi hotspot on the camera to
allow Wi-Fi connection. Among cameras, the prefix TrailCam is
fixed, XXXX is the internal camera identifier which may vary
from different cameras.
NOTE: On Android devices, there might be different system
pop-up messages that ask for allowing App connection to
camera since different mobile phone manufacturers may
modify and customize this system message.
After connected, a pop-up message would show as below:
?
Found camera
KJK_6E04
Connect Camera
Allow Wi-F- Connection
on iOS Device

Features
Status
Setting
Preview, Manual taking pictures or videos.
Details
Camera status, including battery level,
SD Card capacity and used size,
internal temperature of the camera,
number of pictures and videos stored on
the SD Card, camera model, firmware
version number, etc.
Display or program camera settings,
such as mode, picture quality etc.
Review or download the pictures or
videos the camera has taken.
Gallery
Camera
Refer to
Figure 2
Figure 3
Figure 4
Figure 1
8.6. App Navigation
Figure 1: Camera Figure 2: Status
KJK228

Figure 3: Settings Figure Figure 4: Gallery

8.7. Account Registration
To enhance the security of machine-captured and recorded
content,we recommend registering your account after binding
the app to your device.
Account Registration

9. ADVANCED SETTINGS
The trail camera comes with preset manufacturer settings. You
can change the settings to meet your requirements. Please
make sure that the camera is in the SET mode. Once the
camera screen is on, press MODE key to enter/exit the menu.
Press the UP/DOWN key to change the setting, and press the
OK key to confirm the change. Always remember to press the
OK to save the change. Otherwise you will lose your new
setting.
Parameter
Mode
Photo or
Video
Photo
Resolution
Motion
Detection
Timelapse
Normal
Timelapse
Video
Photo
Video
Photo+Video
Smart Best
Photo
84MP
64MP
48MP
40MP
...
4MP
Settings
(Bold=default)
Description
Select desired resolution for still
photos from 4 to 84 megapixels.
Higher resolution produces better
quality photos, but creates larger
files that take more of the SD card
capacity. Larger files require longer
time to write to the SD card, which
will slightly slow the shutter speed.
Select whether still photo , video,
photo&video clips are taken.
Select different mode to monitor

Smart Best
Photo
4K Lite
...
720P
5seconds,
Optional from
5s to 3m
On
Off
1P, 2P, 3P,
4P, 5P
Photo
Series
Video
Resolution
Video
Length
Audio
Recording
Shot
Lag/PIR
Sensitivity
10 seconds,
optional from
5s to 60m
Selecting On will record video with sound.
Select the shortest length of time that the
camera will wait until it responds to any
subsequent triggers from the PIR sensor
after a game is first detected.
During the selected interval, the camera
will not take pictures/videos.
This prevents the micro SD card from
filling up with too many redundant images.
Note: This option is invalid if Mode is set
as "Time Lapse"
Note: Night videos are limited to a
maximum of 30 seconds to conserve the
batteries. If set video length higher than
30 seconds, e.g. 60 seconds, the max
recording length at night keeps 30
seconds.
Select video resolution (pixels per
frame). Higher resolution produces
better quality videos, but creates larger
files that take more of the SD card
capacity.
Select the number of photos taken in
sequence per trigger in Camera mode.

On
Off
On
Off
optional
from 1s to
24h
High
Middle
Low
PIR
Sensitivity
Work Time
Timelaspe
When the "Time Lapse" feature is enabled,
the camera will automatically take photos/vid-
eos according to the set interval (1 Min ~ 24
Hours can be set) regardless of whether the
motion sensor has detected any game.
For example, after setting the interval time to
1H, and the camera will take a photo or
record a video every hour (confirm whether to
take a photo or record video based on your
work mode), the camera will take 24 photos
within 24H.
This is helpful when observing cold-blooded
Select On if you only want the camera to work
within a specified time period every day. For
instance, if the starting time is set at 18:35
and the ending time at 08:25, the camera will
function from 18:35 the current day to 08:25
the next day. Outside the time period the
camera will not be triggered or take
photos/videos.
The"High" level will make the camera more
sensitive to infrared (heat) and more easily
triggered by motion, the "Low" level makes it
less sensitive to heat and motion. The"Mid-
dle" is for average or moderate conditions.
Commonly, the"High" level is suitable when
the ambient temperature is warm and little
interference (interference such as windy),
and the "Low" level is helpful in cold weather.
Note: This option is invalid if Mode is set as
"Time Lapse"
animals like snakes, or the process of flower-
ing etc.
Note: Too small interval set in the Time Lapse
Settings will enable to take more pictures, but
can consume more battery power then
reduce battery life accordingly.
Note: this mode will disable motion detection.

When the "Time Lapse" feature is enabled,
the camera will automatically take photos/vid-
eos according to the set interval (1 Min ~ 24
Hours can be set) regardless of whether the
motion sensor has detected any game.
For example, after setting the interval time to
1H, and the camera will take a photo or
record a video every hour (confirm whether to
take a photo or record video based on your
work mode), the camera will take 24 photos
within 24H.
This is helpful when observing cold-blooded
M/D/Y
hh:mm
Date/Time
M-Month
D-Day
Y-Year
hh-Hour
mm-Minute
Press the Mode key to access the menu
options. Use the navigation keys to select the
"Time & Date” option and press the OK key to
enter the settings. Adjust the time and date
according to the local time. To modify a
specific value, use the UP/DOWN keys to
navigate to the desired field and press the OK
key to select it. Use the UP/DOWN keys to
modify the value of the selected field. For
example, for the hour or month, you can
increase or decrease the value. After making
the necessary modifications, press the OK
key to confirm and save the changes. To set
the time format, follow these additional steps:
In the "Time & Date" settings, find the option
for time format (12 or 24-hour format). Use
the OK key to select the desired time format.
If the 12-hour format is selected, the captured
animals like snakes, or the process of flower-
ing etc.
Note: Too small interval set in the Time Lapse
Settings will enable to take more pictures, but
can consume more battery power then
reduce battery life accordingly.
Note: this mode will disable motion detection.
images and videos will display AM and PM
water marks. For example, in the 24-hour
format, the time and date would be displayed
as"March 8,2023,15:46:29" while in the12-hour
format, it would be displayed as "March
8,2023,3:46:29 PM".

Motion
Test
D/MY
M/D/Y
Y/M/D
12h
24h
Date
Format
Time
Format
Password
Protection
On
Off
Beep
Sound
On
Off
Memory
Card
Format
Yes
No
This feature helps you aim the camera at your
target area. Please refer to the details in
Section 10.2.
Set a 4-digit password to protect your camera
from unauthorized users.If the code is lost, turn
the power switch to "OFF" at first. Then press
"OK" key and "UP" key at the same time (Don't
let go of your fingers) and turn the power
switch to "SET" Password will be cleared
automatically when the camera starts.
All files will be deleted after formatting the SD
card. Highly recommend you format the SD
card if it has been used previously in other
devices. Caution: make sure wanted files on
the SD card have been backed up first!
Choose to turn on or off.
M-Month
D-Day
Y-Year
hh-Hour
mm-Minute
Press the Mode key to access the menu
options. Use the navigation keys to select the
"Time & Date” option and press the OK key to
enter the settings. Adjust the time and date
according to the local time. To modify a
specific value, use the UP/DOWN keys to
navigate to the desired field and press the OK
key to select it. Use the UP/DOWN keys to
modify the value of the selected field. For
example, for the hour or month, you can
increase or decrease the value. After making
the necessary modifications, press the OK
key to confirm and save the changes. To set
the time format, follow these additional steps:
In the "Time & Date" settings, find the option
for time format (12 or 24-hour format). Use
the OK key to select the desired time format.
If the 12-hour format is selected, the captured
images and videos will display AM and PM
water marks. For example, in the 24-hour
format, the time and date would be displayed
as"March 8,2023,15:46:29" while in the12-hour
format, it would be displayed as "March
8,2023,3:46:29 PM".
Select date format which will be shown on the
screen and each capture.
Select time format which will be shown on the
screen and each capture.12h-AM/PM.

10. MOUNTING AND POSITIONING THE CAMERA
10.1. MOUNTING
After you've set up the camera's parameters to your personal
preferences at home, you're ready to take it outside and slide
the power switch to "ON". When setting up the camera for
scouting game or other outdoor applications, you must be sure
to mount it in place correctly and securely. We recommend
mounting the camera on a sturdy tree with a diameter of about
6 in (15cm). To get the optimal picture quality, the tree should
be about 16- 17 ft. (5 meters) away from the place to be moni-
tored, with the camera placed at a height of 2.5-3.5 ft. (0.75-
1m). Also, keep in mind that you will get the best results at night
when the subject is within the ideal flash range, no farther than
65ft (20m) and no closer than 10ft (3m) from the camera.
Note:Aiming a camera North will prevent capturing overex-
posed photos pointed directly at the sun.
Camera
Name
On
Off
Factory
Reset
Yes
No
Version Info Defined
Select On to assign a 4-character long in
the form of Capital A-Z, 0-9 to record the
location in the photos (e.g. A123 for Yellow
Stone Park). This helps multi-camera users
identify the location when reviewing the
photos.
Display the version of the camera
Selecting Yes will return all your previous
settings back to the manufacturer default.
There are two ways to mount the camera: using the provided
adjustable web belt, or the tripod socket.
Using the adjustable strap: Illustrates using the strap on the
camera. Push one end of the strap through the two brackets on
the back of the camera. Thread the end of the strap through
the buckle. Fasten the strap securely around the tree trunk by
pulling the end of the strap firmly so there is no slack left
(Figure 18).
Using the tripod socket : The camera is equipped with a socket
at the bottom end to enable to mount on a tripod or other
mounting accessories with a standard UNC 1/4-20 thread
screw.

10. MOUNTING AND POSITIONING THE CAMERA
10.1. MOUNTING
After you've set up the camera's parameters to your personal
preferences at home, you're ready to take it outside and slide
the power switch to "ON". When setting up the camera for
scouting game or other outdoor applications, you must be sure
to mount it in place correctly and securely. We recommend
mounting the camera on a sturdy tree with a diameter of about
6 in (15cm). To get the optimal picture quality, the tree should
be about 16- 17 ft. (5 meters) away from the place to be moni-
tored, with the camera placed at a height of 2.5-3.5 ft. (0.75-
1m). Also, keep in mind that you will get the best results at night
when the subject is within the ideal flash range, no farther than
65ft (20m) and no closer than 10ft (3m) from the camera.
Note:Aiming a camera North will prevent capturing overex-
posed photos pointed directly at the sun.
There are two ways to mount the camera: using the provided
adjustable web belt, or the tripod socket.
Using the adjustable strap: Illustrates using the strap on the
camera. Push one end of the strap through the two brackets on
the back of the camera. Thread the end of the strap through
the buckle. Fasten the strap securely around the tree trunk by
pulling the end of the strap firmly so there is no slack left
Using the tripod socket : The camera is equipped with a socket
at the bottom end to enable to mount on a tripod or other
mounting accessories with a standard UNC 1/4-20 thread
screw.

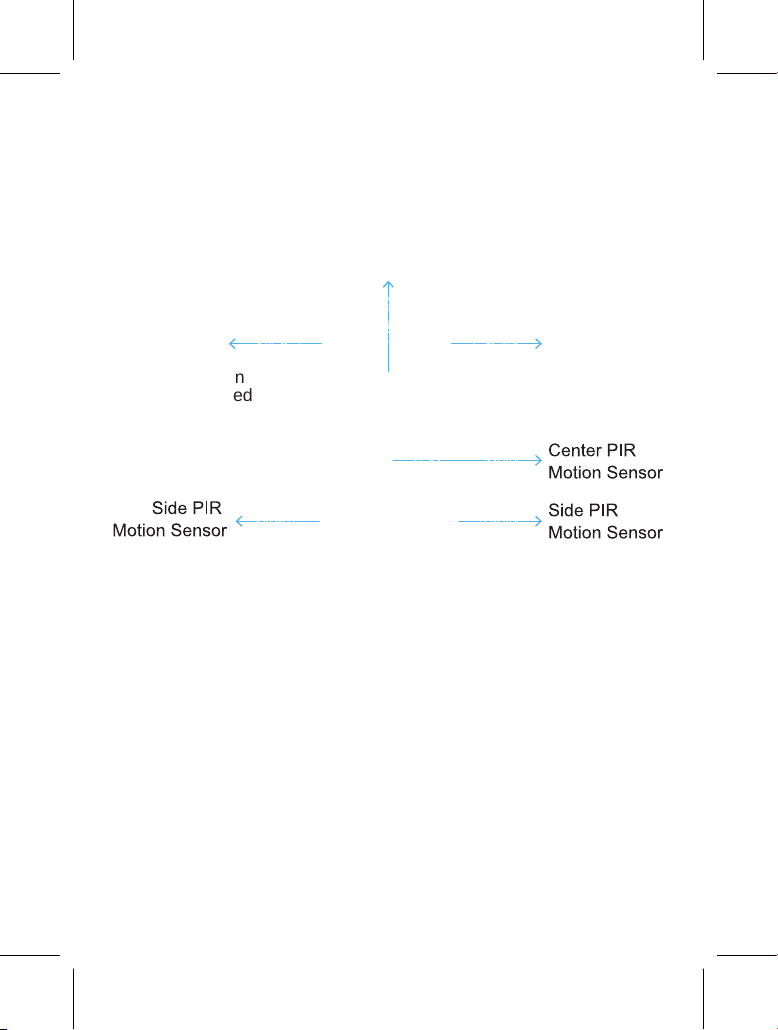
10.2. SENSING ANGLE AND DISTANCE TEST
To test whether the camera can effectively monitor the area
you choose, this test is recommended checking the sensing
angle and monitoring distance of the camera. To perform the
test:
Switch the camera to the SET mode.
The camera will countdown a max 10-second delay and be
ready to capture motions. (Note: The delay time may be less
than 10 seconds, depending on the actual time of the motion
sensor to be activated. The delay time is 10 seconds minus the
power-on time.) Close the camera door.
Make movements in front of the camera at several positions
within the area where you expect the game or subjects to be.
Try different distances and angles from the camera.
If the motion indicator LED light (Blue for Center PIR or Green
for Side PIR) blinks, it signifies that the position is detectable.
If it does not blink, that position is outside of the sensing area.
In these sensing test, the camera would take pictures once
motion captured. When you open the camera, the screen
shows the number of times triggered, you can review the
pictures on the screen.
The results of your testing will help you find the best placement
when mounting and aiming the camera. The height away from
the ground for placing the device should vary with the animal
size appropriately. In general, 3 to 6 feet is preferred.
You can avoid potential false triggers due to temperature and
motion disturbances in front of the camera by not aiming it at a
heat source or nearby tree branches or brush (especially on
windy days).
Do NOT install the camera behind the glass window as that is
not possible to sense any motion. Avoid the camera toward to
glass the object.
10.3. SWITCHING ON THE CAMERA
If you set the camera working mode as "Time Lapse" in the
menu, once you switch to the ON mode, the camera will be
ready to go into "Time Lapse" mode, then take images periodi-
cally according to your preset "Time lapse Interval" parameter
Before leaving the camera unattended, please check for the
following:
Are the batteries inserted with correct polarity and is their
power level sufficient?
Does the SD card have sufficient available space?
Is the power switch in the ON position?
11. REVIEW PHOTOS OR VIDEOS
After you have setup, mounted and activated your CAMERA,
you will be eager to return later and review the images it has
captured for you. The camera stores photos and videos in the
folder \DCIM in the SD card.
There are several different ways this can be done.
To view photos or videos directly on the camera screen, simply
tap the MODE button.
Or in the SET mode only, you can use the provided USB cable
to download the files to a computer.
Or you can put the SD card to a SD card "reader" (user
supplied), plug in a computer, and browse the files on the
computer without downloading.
12. TECHNICAL SPECIFICATIONS
Element
Max. Pixel Size
Lens
IR Flash
LCD Screen
Keypad
Description
84MP
FOV=90°
100ft
2.0 " Color Screen
4 Keys, 1 Power Switch
High/Middle/Low
SD, SDHC or SDXC Memory Card,
Max Capacity 128GB
4M/8M/16M/24M/32M/40M/48M/64MP/
84MP/ Smart Best Photo
Video Size
PIR Sensitive
Memory
Picture Size
720P/1080P/2.7K/4K Smart
Best Photo

PIR Sensing
Distance
100ft(-22° F to +158°F.)
PIR Sensing
Angle
Work Time
Shot Lag/
Dection Delay
5sec-60min, Programmable.
5sec ~ 10min., Programmable
(Note: Max 30 seconds at nighttime to
conserve batteries lifetime)
Photo Series
Video Length
1~5
Approx. 0.05~0.5 second
(0.05s while side motion sensors enabled)
Total 140°
4-Character (A-Z, 0-9)
On /Off, Specific working period of time
Camera Name
1 Sec. ~ 24 HoursTime Lapse
8x1.5V AA Alkaline BatteriesPower Supply
Auto Stand-by (Surveillance mode) in 2
minutes while no operation in SET mode
Auto Stand-by
Type C-USB, SD card holder, External
Power (DC 6V/ 1.5A, Plug 3.5x1.35mm)
Interface
Work Time
4-Digit Code
Password
Protection

13. FAQS
13.1. IMPORTANT NOTE
• Before inserting or removing the memory card, make sure the
camera is turned off.
• When checking the camera in SET mode, the ambient light
source may be unstable due to handheld movement. This can
trigger the motion sensor, resulting in a clicking sound and a
flashing screen. This is normal.
• It is recommended to use high-performance alkaline batteries
to extend the camera's usage time.
• Avoid using 1.2V rechargeable batteries as the trail camera
-22° F to +158°F.
Strap, Tripod Base ( 1/4”-20)
Operation
Temperature
5% ~ 95%
Operation
Humidity
FCC & CE & RoHS & WEEECertificate
5.43 x 15.08 x 4 inches/138 x 383 x 62mm
Product
Dimensions
After-sales
Mounting
IP67
Waterproof
PART3: About Batteries, Power Supply
Q: Battery life is shorter than expected
The following reasons may cause battery lifetime not as
expected:
Battery quality and cold temperature will affect the battery
lifetime.
Too many unwanted false triggers causing the battery to drain
quickly. Branches or weeds that can be blown by the wind, and
trigger the capture.
Excessive settings cause the camera to capture too many
redundant and repetitive pictures, leading to fast battery
consumption.
Please try the following trouble shootings:
Please use brand new batteries to power the camera, and use
1.5V lithium batteries when the weather is cold to get better
battery lifetime.
Set the camera working mode reasonably according to the
usage scenario. Check the camera settings such as Photo
Series, Sensitivity Motion, Shot Lag, etc.To reduce unneces-
sary triggers. For commonusage, we recommend
"Photo series" is 1, "Sensitivity motion sensors" is Middel, "shot
lag" is 10s.
Avoid false triggers: avoid objects such as branches or weeds
that can be blown by the wind when placing the camera.
If the frequency of using the camera is very high, we recom-
mend using an external power supply to power the camera.
Q: Can it use rechargeable NiMH batteries or Lithium
batteries?
Yes. Lithium batteries are better used in cold weather. We
recommend using new eight 1.5-volt rec hargeable lithium-ion
batteries to get maximum batteries lifetime. They're generally
marketed and sold in sets of four AA batteries plus a conve-
nient 4-cell charger, all for usually about $25.00 - $30.00. NiMH
rechargeable batteries cannot also be used.
Note: While all AA batteries will take decent daytime images
and daytime videos, the nighttime camera performance will
suffer, or not work at all when using AA batteries that have a
voltage less than 1.5 volts.
Don’t use the batteries’ voltage greater than 1.5V which would
damage the camera. Don’t mix old and new batteries. Don’t
mix battery types.
Q: Does the camera have a port for an external power?
Yes. The port is on the bottom of the camera. The camera can
work with 6V/1-15A external power adapter/source (user
supplied). The cable end of DC must be the circles of 3.5mm
outside, 1.35mm inside (that is 3.5×1.35mm) and the central
contact point is positive polarity.
It is easy to find the cable or adapter on Amazon (searching the
items by "DC 6V 1A 3.5×1.35mm"), or electronic marketplace.
Q: Can an external power source and internal 8 batteries
work together?
Yes. It can. The camera can accept external power (user
supplied) and work with internal batteries at the same time.
The camera will automatically use the higher voltage of the two
as the input power source.
When the external power supply is removed, the camera will
automatically switch to use the internal battery. Please do not
use an external power supply exceeding 6V.
PART4: About Motion Detection Issues
Q: Camera stops taking images or won’t take images
1. Please gently remove the protective films of the camera to
get the best performance, especially the protective films
attached to the PIR sensors will seriously reduce the motion
detection ability and even cause no capture.
2. Make sure that the camera
power switch is in the “ON”
position and not in the “OFF”.
3. Make sure the camera had been powered up for more than
60 seconds to ensure the PIR sensors have been fully activat-
ed.
4. Check the "shot lag" in menu settings, which is the delay
between current capture and next capture, set "shot lag" to a
lower value if you want more captures.
5. Please make sure that the SD card doesn’t reach its full
capacity. The default option is "Loop Recording" disabled; the
camera will stop taking images when the SD card reaches
capacity.
6. Make sure that you are using a good quality SD card in your
camera. We recommend SD/SDHC/SHXC Class10 brand
memory card, such as SanDisk, Kingston, Toshiba, Samsung,
etc.
7. IMPORTANT: If you have used an SD card in another device
before inserting it in your camera, you might want to try format-
ting the card using the "Memory Card Format" menu option in
SET mode (make sure you have backed up any important files
first, as formatting will erase all previous files). In some cases,
other devices may change the formatting of the SD card so that
it will not work properly with the camera. Or if the SD card has
been used for a long time, the SD card might be in unstable
status and not able to accept data writing into, in this case, the
camera behaves as not triggering and not taking pictures. So
please re-format SD card and try again.
8. IMPORTANT: Check the batteries to make sure their power
level is sufficient. If you are using rechargeable batteries, it
would not take nighttime pictures or videos due to the low
battery voltage (generally nominal 1.2V and drops down quick-
ly). Please use 1.5V batteries instead.
9. Run motion detection test by “Motion Test” menu option to
check whether the motion sensor does work.
Q: Camera does work, but can’t capture motions
The problem is generally caused by incorrect file system
format on your SD card. Please format your SD card according
the following steps:
Press MODE key, go to "Memory Card Format", select "OK".
Q: Camera takes continuous images of no subject
A camera has what is known as a “false trigger” if the PIR
sensor thinks that there is motion and heat in front of the
camera lens when there is no subject in the image. These
“False Triggers” are the result of placing the camera in an
environment where there is motion associated with tree
branches creating motion in front of the camera or an area
where there is high heat in the foreground and any motion from
wind could set off the camera. Setting a camera up over water
is also a potential cause for this issue. To remedy this situation:
1. Try moving the camera to an area that does not have any of
these issues or try changing the
sensor level on the menu settings.
2. If the camera continues to take images when there is no
subject in them, try placing the camera in an inside environ-
ment and aiming at a location where there is no motion.
3. If the camera continues to show issues, then there is proba-
bly an electronic component issue. If this is the case, please
contact our customer service to send the camera back for
repair or a new replacement.
Q: Photos do not capture subject of interest
1. Check the “PIR sensitivity” menu option. Set the “PIR sensi-
tivity” to “High” to obtain the highest performance. At normal
temperature of 77°F, “High” sensitivity for 75~100ft detecting
distance, “Medium” for 50ft, “Low” for 30ft.
2. Try to set your camera up in an area where there is not a
heat source in the camera’s view of sight.
3. In some cases, setting the camera near water will make the
camera take images with no subject in them. Try aiming the
camera over ground.
4. Try to avoid setting the camera up on small trees that are
prone to being moved by strong winds.
5. Remove any limbs which are right in front of the camera
lens.
6. Don’t install the camera behind the window glass.
requires 1.5V for proper functioning. Low battery voltage can
lead to improper operation. After the battery is depleted, the
camera will only have a few hours of operation remaining (the
camera will display a low battery warning).
• When using the trail camera for the first time or if the camera
cannot recognize the memory card, please format the memory
card before use. Before installing the battery, confirm the
correct battery polarity. Incorrect polarity may cause the
camera to short-circuit and potentially damage it. Please note
that the camera is not protected against short circuits.
• When using the product for the fifirst time, remove the protec-
tive film from the lens and sensor to ensure the motion sensor
is clean and undamaged. Any scratches or damage can affect
the camera's triggering performance.
• For on-site installation, ensure that the camera's socket and
the DC plug at the bottom are properly sealed to prevent
damage from rain.
• The USB cable provided is for transferring files from the
camera to the computer only. Do not use it to charge the
camera or recharge- able batteries as this can severely
damage the camera.
• Keep the camera lens and infrared window clean. If they
become dirty, clean them with a soft glasses cloth. Do not use
sharp objects that may scratch the LCD, camera lens, infrared
sensor, or LED glass.
• When the battery level is low, promptly replace all batteries to
avoid damage to the camera due to electrolyte leakage.

13. FAQS
13.1. IMPORTANT NOTE
• Before inserting or removing the memory card, make sure the
camera is turned off.
• When checking the camera in SET mode, the ambient light
source may be unstable due to handheld movement. This can
trigger the motion sensor, resulting in a clicking sound and a
flashing screen. This is normal.
• It is recommended to use high-performance alkaline batteries
to extend the camera's usage time.
• Avoid using 1.2V rechargeable batteries as the trail camera
PART3: About Batteries, Power Supply
Q: Battery life is shorter than expected
The following reasons may cause battery lifetime not as
expected:
Battery quality and cold temperature will affect the battery
lifetime.
Too many unwanted false triggers causing the battery to drain
quickly. Branches or weeds that can be blown by the wind, and
trigger the capture.
Excessive settings cause the camera to capture too many
redundant and repetitive pictures, leading to fast battery
consumption.
Please try the following trouble shootings:
Please use brand new batteries to power the camera, and use
1.5V lithium batteries when the weather is cold to get better
battery lifetime.
Set the camera working mode reasonably according to the
usage scenario. Check the camera settings such as Photo
Series, Sensitivity Motion, Shot Lag, etc.To reduce unneces-
sary triggers. For commonusage, we recommend
"Photo series" is 1, "Sensitivity motion sensors" is Middel, "shot
lag" is 10s.
Avoid false triggers: avoid objects such as branches or weeds
that can be blown by the wind when placing the camera.
If the frequency of using the camera is very high, we recom-
mend using an external power supply to power the camera.
Q: Can it use rechargeable NiMH batteries or Lithium
batteries?
Yes. Lithium batteries are better used in cold weather. We
recommend using new eight 1.5-volt rec hargeable lithium-ion
batteries to get maximum batteries lifetime. They're generally
marketed and sold in sets of four AA batteries plus a conve-
nient 4-cell charger, all for usually about $25.00 - $30.00. NiMH
rechargeable batteries cannot also be used.
Note: While all AA batteries will take decent daytime images
and daytime videos, the nighttime camera performance will
suffer, or not work at all when using AA batteries that have a
voltage less than 1.5 volts.
Don’t use the batteries’ voltage greater than 1.5V which would
damage the camera. Don’t mix old and new batteries. Don’t
mix battery types.
Q: Does the camera have a port for an external power?
Yes. The port is on the bottom of the camera. The camera can
work with 6V/1-15A external power adapter/source (user
supplied). The cable end of DC must be the circles of 3.5mm
outside, 1.35mm inside (that is 3.5×1.35mm) and the central
contact point is positive polarity.
It is easy to find the cable or adapter on Amazon (searching the
items by "DC 6V 1A 3.5×1.35mm"), or electronic marketplace.
Q: Can an external power source and internal 8 batteries
work together?
Yes. It can. The camera can accept external power (user
supplied) and work with internal batteries at the same time.
The camera will automatically use the higher voltage of the two
as the input power source.
When the external power supply is removed, the camera will
automatically switch to use the internal battery. Please do not
use an external power supply exceeding 6V.
PART4: About Motion Detection Issues
Q: Camera stops taking images or won’t take images
1. Please gently remove the protective films of the camera to
get the best performance, especially the protective films
attached to the PIR sensors will seriously reduce the motion
detection ability and even cause no capture.
2. Make sure that the camera
power switch is in the “ON”
position and not in the “OFF”.
3. Make sure the camera had been powered up for more than
60 seconds to ensure the PIR sensors have been fully activat-
ed.
4. Check the "shot lag" in menu settings, which is the delay
between current capture and next capture, set "shot lag" to a
lower value if you want more captures.
5. Please make sure that the SD card doesn’t reach its full
capacity. The default option is "Loop Recording" disabled; the
camera will stop taking images when the SD card reaches
capacity.
6. Make sure that you are using a good quality SD card in your
camera. We recommend SD/SDHC/SHXC Class10 brand
memory card, such as SanDisk, Kingston, Toshiba, Samsung,
etc.
7. IMPORTANT: If you have used an SD card in another device
before inserting it in your camera, you might want to try format-
ting the card using the "Memory Card Format" menu option in
SET mode (make sure you have backed up any important files
first, as formatting will erase all previous files). In some cases,
other devices may change the formatting of the SD card so that
it will not work properly with the camera. Or if the SD card has
been used for a long time, the SD card might be in unstable
status and not able to accept data writing into, in this case, the
camera behaves as not triggering and not taking pictures. So
please re-format SD card and try again.
8. IMPORTANT: Check the batteries to make sure their power
level is sufficient. If you are using rechargeable batteries, it
would not take nighttime pictures or videos due to the low
battery voltage (generally nominal 1.2V and drops down quick-
ly). Please use 1.5V batteries instead.
9. Run motion detection test by “Motion Test” menu option to
check whether the motion sensor does work.
Q: Camera does work, but can’t capture motions
The problem is generally caused by incorrect file system
format on your SD card. Please format your SD card according
the following steps:
Press MODE key, go to "Memory Card Format", select "OK".
Q: Camera takes continuous images of no subject
A camera has what is known as a “false trigger” if the PIR
sensor thinks that there is motion and heat in front of the
camera lens when there is no subject in the image. These
“False Triggers” are the result of placing the camera in an
environment where there is motion associated with tree
branches creating motion in front of the camera or an area
where there is high heat in the foreground and any motion from
wind could set off the camera. Setting a camera up over water
is also a potential cause for this issue. To remedy this situation:
1. Try moving the camera to an area that does not have any of
these issues or try changing the
sensor level on the menu settings.
2. If the camera continues to take images when there is no
subject in them, try placing the camera in an inside environ-
ment and aiming at a location where there is no motion.
3. If the camera continues to show issues, then there is proba-
bly an electronic component issue. If this is the case, please
contact our customer service to send the camera back for
repair or a new replacement.
Q: Photos do not capture subject of interest
1. Check the “PIR sensitivity” menu option. Set the “PIR sensi-
tivity” to “High” to obtain the highest performance. At normal
temperature of 77°F, “High” sensitivity for 75~100ft detecting
distance, “Medium” for 50ft, “Low” for 30ft.
2. Try to set your camera up in an area where there is not a
heat source in the camera’s view of sight.
3. In some cases, setting the camera near water will make the
camera take images with no subject in them. Try aiming the
camera over ground.
4. Try to avoid setting the camera up on small trees that are
prone to being moved by strong winds.
5. Remove any limbs which are right in front of the camera
lens.
6. Don’t install the camera behind the window glass.
requires 1.5V for proper functioning. Low battery voltage can
lead to improper operation. After the battery is depleted, the
camera will only have a few hours of operation remaining (the
camera will display a low battery warning).
• When using the trail camera for the first time or if the camera
cannot recognize the memory card, please format the memory
card before use. Before installing the battery, confirm the
correct battery polarity. Incorrect polarity may cause the
camera to short-circuit and potentially damage it. Please note
that the camera is not protected against short circuits.
• When using the product for the fifirst time, remove the protec-
tive film from the lens and sensor to ensure the motion sensor
is clean and undamaged. Any scratches or damage can affect
the camera's triggering performance.
• For on-site installation, ensure that the camera's socket and
the DC plug at the bottom are properly sealed to prevent
damage from rain.
• The USB cable provided is for transferring files from the
camera to the computer only. Do not use it to charge the
camera or recharge- able batteries as this can severely
damage the camera.
• Keep the camera lens and infrared window clean. If they
become dirty, clean them with a soft glasses cloth. Do not use
sharp objects that may scratch the LCD, camera lens, infrared
sensor, or LED glass.
• When the battery level is low, promptly replace all batteries to
avoid damage to the camera due to electrolyte leakage.

FAQ Catalog
PART1: WiFi Connection and App ....................................
Q: App will not connect to camera via Wi-Fi/Blue-
tooth.......................................................................................
Q: Do I have to be close to use the app? Or can I be in a
different state and see while I am not at home?....................
Q: Can’t connect to home Wi-Fi router..................................
Q: My Wi-Fi trail camera is not found by the TrailCam GO
App...................................................................................
Q: Wi-Fi connected, but can’t see any camera information
and can’t preview ..................................................................
PART2: About Recording Issues .......................................
Q: Can't recording video........................................................
Q: It looks overexposed or the background of the night
picture is too dark .................................................................
PART3: About Batteries, Power Supply ............................
Q: Battery life is shorter than expected .................................
Q: Can it use rechargeable NiMH batteries or Lithium
batteries? ..............................................................................
Q: Does the camera have a port for an external power?
...............................................................................................
Q: Can an external power source and internal 8 batteries
work together? ......................................................................
PART4: About Motion Detection Issues ...........................
Q: Camera stops taking images or won’t take images..........
Q: Camera does work, but can’t capture motions ................
Q: Camera takes continuous images of no subject ..............
Q: Photos do not capture subject of interest.........................
PART5: About Video Sound ...............................................
Q: The video is very clear, but the sound is not good ...........
PART6: About SD Card ......................................................
Q: There are problems with SD card access, such as not
being recognized, the inability to delete photos, read/open
photos or videos, etc. ...........................................................
PART7: About Camera Screen ..........................................
Q: When I turn on the camera, the screen just continually
flashes white .........................................................................
PART8: About Turn On .......................................................
Q: Camera won’t power up ...................................................
PART9: Other Issues ..........................................................
Q: What if I forget my camera password?.............................
Q: Why is there air in the trail camera? Is it a leak?..............
Q: Can this Wi-Fi trail camera connect to more than one
phone?...................................................................................
PART3: About Batteries, Power Supply
Q: Battery life is shorter than expected
The following reasons may cause battery lifetime not as
expected:
Battery quality and cold temperature will affect the battery
lifetime.
Too many unwanted false triggers causing the battery to drain
quickly. Branches or weeds that can be blown by the wind, and
trigger the capture.
Excessive settings cause the camera to capture too many
redundant and repetitive pictures, leading to fast battery
consumption.
Please try the following trouble shootings:
Please use brand new batteries to power the camera, and use
1.5V lithium batteries when the weather is cold to get better
battery lifetime.
Set the camera working mode reasonably according to the
usage scenario. Check the camera settings such as Photo
Series, Sensitivity Motion, Shot Lag, etc.To reduce unneces-
sary triggers. For commonusage, we recommend
"Photo series" is 1, "Sensitivity motion sensors" is Middel, "shot
lag" is 10s.
Avoid false triggers: avoid objects such as branches or weeds
that can be blown by the wind when placing the camera.
If the frequency of using the camera is very high, we recom-
mend using an external power supply to power the camera.
Q: Can it use rechargeable NiMH batteries or Lithium
batteries?
Yes. Lithium batteries are better used in cold weather. We
recommend using new eight 1.5-volt rec hargeable lithium-ion
batteries to get maximum batteries lifetime. They're generally
marketed and sold in sets of four AA batteries plus a conve-
nient 4-cell charger, all for usually about $25.00 - $30.00. NiMH
rechargeable batteries cannot also be used.
Note: While all AA batteries will take decent daytime images
and daytime videos, the nighttime camera performance will
suffer, or not work at all when using AA batteries that have a
voltage less than 1.5 volts.
Don’t use the batteries’ voltage greater than 1.5V which would
damage the camera. Don’t mix old and new batteries. Don’t
mix battery types.
Q: Does the camera have a port for an external power?
Yes. The port is on the bottom of the camera. The camera can
work with 6V/1-15A external power adapter/source (user
supplied). The cable end of DC must be the circles of 3.5mm
outside, 1.35mm inside (that is 3.5×1.35mm) and the central
contact point is positive polarity.
It is easy to find the cable or adapter on Amazon (searching the
items by "DC 6V 1A 3.5×1.35mm"), or electronic marketplace.
Q: Can an external power source and internal 8 batteries
work together?
Yes. It can. The camera can accept external power (user
supplied) and work with internal batteries at the same time.
The camera will automatically use the higher voltage of the two
as the input power source.
When the external power supply is removed, the camera will
automatically switch to use the internal battery. Please do not
use an external power supply exceeding 6V.
PART4: About Motion Detection Issues
Q: Camera stops taking images or won’t take images
1. Please gently remove the protective films of the camera to
get the best performance, especially the protective films
attached to the PIR sensors will seriously reduce the motion
detection ability and even cause no capture.
2. Make sure that the camera
power switch is in the “ON”
position and not in the “OFF”.
3. Make sure the camera had been powered up for more than
60 seconds to ensure the PIR sensors have been fully activat-
ed.
4. Check the "shot lag" in menu settings, which is the delay
between current capture and next capture, set "shot lag" to a
lower value if you want more captures.
5. Please make sure that the SD card doesn’t reach its full
capacity. The default option is "Loop Recording" disabled; the
camera will stop taking images when the SD card reaches
capacity.
6. Make sure that you are using a good quality SD card in your
camera. We recommend SD/SDHC/SHXC Class10 brand
memory card, such as SanDisk, Kingston, Toshiba, Samsung,
etc.
7. IMPORTANT: If you have used an SD card in another device
before inserting it in your camera, you might want to try format-
ting the card using the "Memory Card Format" menu option in
SET mode (make sure you have backed up any important files
first, as formatting will erase all previous files). In some cases,
other devices may change the formatting of the SD card so that
it will not work properly with the camera. Or if the SD card has
been used for a long time, the SD card might be in unstable
status and not able to accept data writing into, in this case, the
camera behaves as not triggering and not taking pictures. So
please re-format SD card and try again.
8. IMPORTANT: Check the batteries to make sure their power
level is sufficient. If you are using rechargeable batteries, it
would not take nighttime pictures or videos due to the low
battery voltage (generally nominal 1.2V and drops down quick-
ly). Please use 1.5V batteries instead.
9. Run motion detection test by “Motion Test” menu option to
check whether the motion sensor does work.
Q: Camera does work, but can’t capture motions
The problem is generally caused by incorrect file system
format on your SD card. Please format your SD card according
the following steps:
Press MODE key, go to "Memory Card Format", select "OK".
Q: Camera takes continuous images of no subject
A camera has what is known as a “false trigger” if the PIR
sensor thinks that there is motion and heat in front of the
camera lens when there is no subject in the image. These
“False Triggers” are the result of placing the camera in an
environment where there is motion associated with tree
branches creating motion in front of the camera or an area
where there is high heat in the foreground and any motion from
wind could set off the camera. Setting a camera up over water
is also a potential cause for this issue. To remedy this situation:
1. Try moving the camera to an area that does not have any of
these issues or try changing the
sensor level on the menu settings.
2. If the camera continues to take images when there is no
subject in them, try placing the camera in an inside environ-
ment and aiming at a location where there is no motion.
3. If the camera continues to show issues, then there is proba-
bly an electronic component issue. If this is the case, please
contact our customer service to send the camera back for
repair or a new replacement.
Q: Photos do not capture subject of interest
1. Check the “PIR sensitivity” menu option. Set the “PIR sensi-
tivity” to “High” to obtain the highest performance. At normal
temperature of 77°F, “High” sensitivity for 75~100ft detecting
distance, “Medium” for 50ft, “Low” for 30ft.
2. Try to set your camera up in an area where there is not a
heat source in the camera’s view of sight.
3. In some cases, setting the camera near water will make the
camera take images with no subject in them. Try aiming the
camera over ground.
4. Try to avoid setting the camera up on small trees that are
prone to being moved by strong winds.
5. Remove any limbs which are right in front of the camera
lens.
6. Don’t install the camera behind the window glass.
35
35
36
36
36
36
36
36
38
39
39
39
40
40

FAQ Catalog
PART1: WiFi Connection and App ....................................
Q: App will not connect to camera via Wi-Fi/Blue-
tooth.......................................................................................
Q: Do I have to be close to use the app? Or can I be in a
different state and see while I am not at home?....................
Q: Can’t connect to home Wi-Fi router..................................
Q: My Wi-Fi trail camera is not found by the TrailCam GO
App...................................................................................
Q: Wi-Fi connected, but can’t see any camera information
and can’t preview ..................................................................
PART2: About Recording Issues .......................................
Q: Can't recording video........................................................
Q: It looks overexposed or the background of the night
picture is too dark .................................................................
PART3: About Batteries, Power Supply ............................
Q: Battery life is shorter than expected .................................
Q: Can it use rechargeable NiMH batteries or Lithium
batteries? ..............................................................................
Q: Does the camera have a port for an external power?
...............................................................................................
Q: Can an external power source and internal 8 batteries
work together? ......................................................................
PART4: About Motion Detection Issues ...........................
Q: Camera stops taking images or won’t take images..........
Q: Camera does work, but can’t capture motions ................
Q: Camera takes continuous images of no subject ..............
Q: Photos do not capture subject of interest.........................
PART5: About Video Sound ...............................................
Q: The video is very clear, but the sound is not good ...........
PART6: About SD Card ......................................................
Q: There are problems with SD card access, such as not
being recognized, the inability to delete photos, read/open
photos or videos, etc. ...........................................................
PART7: About Camera Screen ..........................................
Q: When I turn on the camera, the screen just continually
flashes white .........................................................................
PART8: About Turn On .......................................................
Q: Camera won’t power up ...................................................
PART9: Other Issues ..........................................................
Q: What if I forget my camera password?.............................
Q: Why is there air in the trail camera? Is it a leak?..............
Q: Can this Wi-Fi trail camera connect to more than one
phone?...................................................................................
PART3: About Batteries, Power Supply
Q: Battery life is shorter than expected
The following reasons may cause battery lifetime not as
expected:
Battery quality and cold temperature will affect the battery
lifetime.
Too many unwanted false triggers causing the battery to drain
quickly. Branches or weeds that can be blown by the wind, and
trigger the capture.
Excessive settings cause the camera to capture too many
redundant and repetitive pictures, leading to fast battery
consumption.
Please try the following trouble shootings:
Please use brand new batteries to power the camera, and use
1.5V lithium batteries when the weather is cold to get better
battery lifetime.
Set the camera working mode reasonably according to the
usage scenario. Check the camera settings such as Photo
Series, Sensitivity Motion, Shot Lag, etc.To reduce unneces-
sary triggers. For commonusage, we recommend
"Photo series" is 1, "Sensitivity motion sensors" is Middel, "shot
lag" is 10s.
Avoid false triggers: avoid objects such as branches or weeds
that can be blown by the wind when placing the camera.
If the frequency of using the camera is very high, we recom-
mend using an external power supply to power the camera.
Q: Can it use rechargeable NiMH batteries or Lithium
batteries?
Yes. Lithium batteries are better used in cold weather. We
recommend using new eight 1.5-volt rec hargeable lithium-ion
batteries to get maximum batteries lifetime. They're generally
marketed and sold in sets of four AA batteries plus a conve-
nient 4-cell charger, all for usually about $25.00 - $30.00. NiMH
rechargeable batteries cannot also be used.
Note: While all AA batteries will take decent daytime images
and daytime videos, the nighttime camera performance will
suffer, or not work at all when using AA batteries that have a
voltage less than 1.5 volts.
Don’t use the batteries’ voltage greater than 1.5V which would
damage the camera. Don’t mix old and new batteries. Don’t
mix battery types.
Q: Does the camera have a port for an external power?
Yes. The port is on the bottom of the camera. The camera can
work with 6V/1-15A external power adapter/source (user
supplied). The cable end of DC must be the circles of 3.5mm
outside, 1.35mm inside (that is 3.5×1.35mm) and the central
contact point is positive polarity.
It is easy to find the cable or adapter on Amazon (searching the
items by "DC 6V 1A 3.5×1.35mm"), or electronic marketplace.
Q: Can an external power source and internal 8 batteries
work together?
Yes. It can. The camera can accept external power (user
supplied) and work with internal batteries at the same time.
The camera will automatically use the higher voltage of the two
as the input power source.
When the external power supply is removed, the camera will
automatically switch to use the internal battery. Please do not
use an external power supply exceeding 6V.
PART4: About Motion Detection Issues
Q: Camera stops taking images or won’t take images
1. Please gently remove the protective films of the camera to
get the best performance, especially the protective films
attached to the PIR sensors will seriously reduce the motion
detection ability and even cause no capture.
2. Make sure that the camera
power switch is in the “ON”
position and not in the “OFF”.
3. Make sure the camera had been powered up for more than
60 seconds to ensure the PIR sensors have been fully activat-
ed.
4. Check the "shot lag" in menu settings, which is the delay
between current capture and next capture, set "shot lag" to a
lower value if you want more captures.
5. Please make sure that the SD card doesn’t reach its full
capacity. The default option is "Loop Recording" disabled; the
camera will stop taking images when the SD card reaches
capacity.
6. Make sure that you are using a good quality SD card in your
camera. We recommend SD/SDHC/SHXC Class10 brand
memory card, such as SanDisk, Kingston, Toshiba, Samsung,
etc.
7. IMPORTANT: If you have used an SD card in another device
before inserting it in your camera, you might want to try format-
ting the card using the "Memory Card Format" menu option in
SET mode (make sure you have backed up any important files
first, as formatting will erase all previous files). In some cases,
other devices may change the formatting of the SD card so that
it will not work properly with the camera. Or if the SD card has
been used for a long time, the SD card might be in unstable
status and not able to accept data writing into, in this case, the
camera behaves as not triggering and not taking pictures. So
please re-format SD card and try again.
8. IMPORTANT: Check the batteries to make sure their power
level is sufficient. If you are using rechargeable batteries, it
would not take nighttime pictures or videos due to the low
battery voltage (generally nominal 1.2V and drops down quick-
ly). Please use 1.5V batteries instead.
9. Run motion detection test by “Motion Test” menu option to
check whether the motion sensor does work.
Q: Camera does work, but can’t capture motions
The problem is generally caused by incorrect file system
format on your SD card. Please format your SD card according
the following steps:
Press MODE key, go to "Memory Card Format", select "OK".
Q: Camera takes continuous images of no subject
A camera has what is known as a “false trigger” if the PIR
sensor thinks that there is motion and heat in front of the
camera lens when there is no subject in the image. These
“False Triggers” are the result of placing the camera in an
environment where there is motion associated with tree
branches creating motion in front of the camera or an area
where there is high heat in the foreground and any motion from
wind could set off the camera. Setting a camera up over water
is also a potential cause for this issue. To remedy this situation:
1. Try moving the camera to an area that does not have any of
these issues or try changing the
sensor level on the menu settings.
2. If the camera continues to take images when there is no
subject in them, try placing the camera in an inside environ-
ment and aiming at a location where there is no motion.
3. If the camera continues to show issues, then there is proba-
bly an electronic component issue. If this is the case, please
contact our customer service to send the camera back for
repair or a new replacement.
Q: Photos do not capture subject of interest
1. Check the “PIR sensitivity” menu option. Set the “PIR sensi-
tivity” to “High” to obtain the highest performance. At normal
temperature of 77°F, “High” sensitivity for 75~100ft detecting
distance, “Medium” for 50ft, “Low” for 30ft.
2. Try to set your camera up in an area where there is not a
heat source in the camera’s view of sight.
3. In some cases, setting the camera near water will make the
camera take images with no subject in them. Try aiming the
camera over ground.
4. Try to avoid setting the camera up on small trees that are
prone to being moved by strong winds.
5. Remove any limbs which are right in front of the camera
lens.
6. Don’t install the camera behind the window glass.
41
41
42
42
43
44
44
44
44
45
45
45
45
46
46
46
46

PART1: WiFi Connection and App
Q: App will not connect to camera via Wi-Fi/Bluetooth
The following reasons may cause WiFi to not connect
properly:
The camera and cell phone are too far apart: Please ensure
that the distance between the camera and cell phone does not
exceed 45ft (in an open environment without any obstructions).
If exceeding this distance, the cell phone will not be able to
recognize the signal of the camera.
VPN and antivirus software in cell phones: Some VPN and
antivirus software may restrict the WiFi connection between
the camera and app.
Cell phone cache: When there is too much cache in the cell
phone, it will cause WiFi connection to be slow, clean up the
cache regularly.
Please try the following trouble shootings:
After receiving the camera, please download the latest version
of the app on your phone and make sure that WiFi and
Bluetooth on your phone are turned on.
Open the app, during the connection process, please allow the
app to access the device’s WiFi, Bluetooth, storage, location,
and camera. For the first connection, we recommend that the
distance between the phone and the camera is within 45ft.
Check APN and antivirus software: Please make sure they are
turned off or allowed cell phone to use WiFi.
Q: Do I have to be close to use the app? Or can I be in a
different state and see
while I am not at home?
The Wi-Fi trail camera can only work with the app within Wi-Fi
and Bluetooth signal range.
You have to be within Bluetooth range to connect and then it
puts out its own Wi-Fi signal to your phone to view pictures.
Q: Can’t connect to home Wi-Fi router
The Wi-Fi trail camera can only be connected with your phone
by the dedicated app (“TrailCam GO”).
Q: My Wi-Fi trail camera is not found by the TrailCam GO App
Please make some quick check:
1. Get as close to the camera as possible (within 45ft due to the
limitation of Bluetooth technology).
2. The camera is turned on.
3. Wi-Fi option in the camera is enabled.
4. Make sure the camera battery level is good.
5. Both Bluetooth and Wi-Fi on your phone are enabled.
Q: Wi-Fi connected, but can’t see any camera information
and can’t preview
On iOS 14.4.1 or above, please use the Settings app, go to the
Privacy menu, then select Local Network. It will show a list of
all the apps that have requested permission giving the app
access to devices on the network.
PART2: About Recording Issues
Q: Can't recording video
The following reasons may cause camera not recording
properly:
Low battery: The camera needs to turn on the IR LEDs when
working at night, which consumes more power than working
during the day. If the voltage is low, it will record shorter videos
or not record videos.
The camera is not programmed to Video mode.
Wrong SD card file system: The incompatibility of SD card
formatting with the camera may cause the videos/pictures shot
by the camera to be unable to be stored in the SD card, thereby
making customers think that the camera has not taken correct-
ly.
Wrong settings of “Work Time”: If the Work Time is set, the
camera will only work during this time, and it will be in standby
at other times.
Please try the following trouble shootings:
After receiving the camera, please install a set of brand new
alkaline .
Ensure the camera is set to Video mode: The camera defaults
to Photo mode when it comes out of the factory. If you want to
record a video, you need to manually adjust the shooting mode
(MODE >Photo or Video > Video)
Format the SD card before first using the camera by the way:
press MODE, go to ‘Format memory card’ to ensure the SD
card working in right file system.
Check if the camera has been set “Work Time” as your expect-
ed.
Also you can run a motion test:
After configuring the device, switch it to "SET" mode.
Wait for approximately 15 seconds.
Move to the front of the camera.
If the motion indicator flashes "blue" or "green", it confirms the
proper functionality of the camera's infrared motion sensor ".
Q: It looks overexposed or the background of the night
picture is too dark
The dark background of night images is usually caused by
strong reflections from the obstacles close to the camera. To
get the best night image, please remove close-up obstacles
(such as walls or tree trunks) in front of the camera as possible,
or adjust the installation position of your camera to avoid these
obstacles (Refer to the figure below).
PART3: About Batteries, Power Supply
Q: Battery life is shorter than expected
The following reasons may cause battery lifetime not as
expected:
Battery quality and cold temperature will affect the battery
lifetime.
Too many unwanted false triggers causing the battery to drain
quickly. Branches or weeds that can be blown by the wind, and
trigger the capture.
Excessive settings cause the camera to capture too many
redundant and repetitive pictures, leading to fast battery
consumption.
Please try the following trouble shootings:
Please use brand new batteries to power the camera, and use
1.5V lithium batteries when the weather is cold to get better
battery lifetime.
Set the camera working mode reasonably according to the
usage scenario. Check the camera settings such as Photo
Series, Sensitivity Motion, Shot Lag, etc.To reduce unneces-
sary triggers. For commonusage, we recommend
"Photo series" is 1, "Sensitivity motion sensors" is Middel, "shot
lag" is 10s.
Avoid false triggers: avoid objects such as branches or weeds
that can be blown by the wind when placing the camera.
If the frequency of using the camera is very high, we recom-
mend using an external power supply to power the camera.
Q: Can it use rechargeable NiMH batteries or Lithium
batteries?
Yes. Lithium batteries are better used in cold weather. We
recommend using new eight 1.5-volt rec hargeable lithium-ion
batteries to get maximum batteries lifetime. They're generally
marketed and sold in sets of four AA batteries plus a conve-
nient 4-cell charger, all for usually about $25.00 - $30.00. NiMH
rechargeable batteries cannot also be used.
Note: While all AA batteries will take decent daytime images
and daytime videos, the nighttime camera performance will
suffer, or not work at all when using AA batteries that have a
voltage less than 1.5 volts.
Don’t use the batteries’ voltage greater than 1.5V which would
damage the camera. Don’t mix old and new batteries. Don’t
mix battery types.
Q: Does the camera have a port for an external power?
Yes. The port is on the bottom of the camera. The camera can
work with 6V/1-15A external power adapter/source (user
supplied). The cable end of DC must be the circles of 3.5mm
outside, 1.35mm inside (that is 3.5×1.35mm) and the central
contact point is positive polarity.
It is easy to find the cable or adapter on Amazon (searching the
items by "DC 6V 1A 3.5×1.35mm"), or electronic marketplace.
Q: Can an external power source and internal 8 batteries
work together?
Yes. It can. The camera can accept external power (user
supplied) and work with internal batteries at the same time.
The camera will automatically use the higher voltage of the two
as the input power source.
When the external power supply is removed, the camera will
automatically switch to use the internal battery. Please do not
use an external power supply exceeding 6V.
PART4: About Motion Detection Issues
Q: Camera stops taking images or won’t take images
1. Please gently remove the protective films of the camera to
get the best performance, especially the protective films
attached to the PIR sensors will seriously reduce the motion
detection ability and even cause no capture.
2. Make sure that the camera
power switch is in the “ON”
position and not in the “OFF”.
3. Make sure the camera had been powered up for more than
60 seconds to ensure the PIR sensors have been fully activat-
ed.
4. Check the "shot lag" in menu settings, which is the delay
between current capture and next capture, set "shot lag" to a
lower value if you want more captures.
5. Please make sure that the SD card doesn’t reach its full
capacity. The default option is "Loop Recording" disabled; the
camera will stop taking images when the SD card reaches
capacity.
6. Make sure that you are using a good quality SD card in your
camera. We recommend SD/SDHC/SHXC Class10 brand
memory card, such as SanDisk, Kingston, Toshiba, Samsung,
etc.
7. IMPORTANT: If you have used an SD card in another device
before inserting it in your camera, you might want to try format-
ting the card using the "Memory Card Format" menu option in
SET mode (make sure you have backed up any important files
first, as formatting will erase all previous files). In some cases,
other devices may change the formatting of the SD card so that
it will not work properly with the camera. Or if the SD card has
been used for a long time, the SD card might be in unstable
status and not able to accept data writing into, in this case, the
camera behaves as not triggering and not taking pictures. So
please re-format SD card and try again.
8. IMPORTANT: Check the batteries to make sure their power
level is sufficient. If you are using rechargeable batteries, it
would not take nighttime pictures or videos due to the low
battery voltage (generally nominal 1.2V and drops down quick-
ly). Please use 1.5V batteries instead.
9. Run motion detection test by “Motion Test” menu option to
check whether the motion sensor does work.
Q: Camera does work, but can’t capture motions
The problem is generally caused by incorrect file system
format on your SD card. Please format your SD card according
the following steps:
Press MODE key, go to "Memory Card Format", select "OK".
Q: Camera takes continuous images of no subject
A camera has what is known as a “false trigger” if the PIR
sensor thinks that there is motion and heat in front of the
camera lens when there is no subject in the image. These
“False Triggers” are the result of placing the camera in an
environment where there is motion associated with tree
branches creating motion in front of the camera or an area
where there is high heat in the foreground and any motion from
wind could set off the camera. Setting a camera up over water
is also a potential cause for this issue. To remedy this situation:
1. Try moving the camera to an area that does not have any of
these issues or try changing the
sensor level on the menu settings.
2. If the camera continues to take images when there is no
subject in them, try placing the camera in an inside environ-
ment and aiming at a location where there is no motion.
3. If the camera continues to show issues, then there is proba-
bly an electronic component issue. If this is the case, please
contact our customer service to send the camera back for
repair or a new replacement.
Q: Photos do not capture subject of interest
1. Check the “PIR sensitivity” menu option. Set the “PIR sensi-
tivity” to “High” to obtain the highest performance. At normal
temperature of 77°F, “High” sensitivity for 75~100ft detecting
distance, “Medium” for 50ft, “Low” for 30ft.
2. Try to set your camera up in an area where there is not a
heat source in the camera’s view of sight.
3. In some cases, setting the camera near water will make the
camera take images with no subject in them. Try aiming the
camera over ground.
4. Try to avoid setting the camera up on small trees that are
prone to being moved by strong winds.
5. Remove any limbs which are right in front of the camera
lens.
6. Don’t install the camera behind the window glass.

PART5: About Video Sound
Q: The video is very clear, but the sound is not good
The video has humming sound. The issue might be caused by
strong wind, electromagnetic interference from electronic
equipment, noise from cars, etc. Please try to install it at
relative silent location to check if it becomes better.
If there is still a problem, please send a video of the problem to
our customer support to request a solution.
PART6: About SD Card
Q: There are problems with SD card access, such as not
being recognized, the inability to delete photos,read/open
photos or videos, etc.
This trail camera supports full-size SD/SDHC/SDXC memory
card. In general, for better performance we recommend using
brand SD card, such as SanDisk, Kingston, Toshiba,Samsung,
etc. When you first use the SD card with your camera, please
format your SD card by using "Memory Card Format" menu
option. Our experience indicates sometimes SD card might be
in damaged or unstable condition, please replace SD card and
try again. Or using SD card reader or computer slot, try to
access it and check if the SD card does work.
If your SD card was ever formatted in NTFS format on your PC,
it is not possible to be recognized by this camera, please
PART3: About Batteries, Power Supply
Q: Battery life is shorter than expected
The following reasons may cause battery lifetime not as
expected:
Battery quality and cold temperature will affect the battery
lifetime.
Too many unwanted false triggers causing the battery to drain
quickly. Branches or weeds that can be blown by the wind, and
trigger the capture.
Excessive settings cause the camera to capture too many
redundant and repetitive pictures, leading to fast battery
consumption.
Please try the following trouble shootings:
Please use brand new batteries to power the camera, and use
1.5V lithium batteries when the weather is cold to get better
battery lifetime.
Set the camera working mode reasonably according to the
usage scenario. Check the camera settings such as Photo
Series, Sensitivity Motion, Shot Lag, etc.To reduce unneces-
sary triggers. For commonusage, we recommend
"Photo series" is 1, "Sensitivity motion sensors" is Middel, "shot
lag" is 10s.
Avoid false triggers: avoid objects such as branches or weeds
that can be blown by the wind when placing the camera.
If the frequency of using the camera is very high, we recom-
mend using an external power supply to power the camera.
Q: Can it use rechargeable NiMH batteries or Lithium
batteries?
Yes. Lithium batteries are better used in cold weather. We
recommend using new eight 1.5-volt rec hargeable lithium-ion
batteries to get maximum batteries lifetime. They're generally
marketed and sold in sets of four AA batteries plus a conve-
nient 4-cell charger, all for usually about $25.00 - $30.00. NiMH
rechargeable batteries cannot also be used.
Note: While all AA batteries will take decent daytime images
and daytime videos, the nighttime camera performance will
suffer, or not work at all when using AA batteries that have a
voltage less than 1.5 volts.
Don’t use the batteries’ voltage greater than 1.5V which would
damage the camera. Don’t mix old and new batteries. Don’t
mix battery types.
Q: Does the camera have a port for an external power?
Yes. The port is on the bottom of the camera. The camera can
work with 6V/1-15A external power adapter/source (user
supplied). The cable end of DC must be the circles of 3.5mm
outside, 1.35mm inside (that is 3.5×1.35mm) and the central
contact point is positive polarity.
It is easy to find the cable or adapter on Amazon (searching the
items by "DC 6V 1A 3.5×1.35mm"), or electronic marketplace.
Q: Can an external power source and internal 8 batteries
work together?
Yes. It can. The camera can accept external power (user
supplied) and work with internal batteries at the same time.
The camera will automatically use the higher voltage of the two
as the input power source.
When the external power supply is removed, the camera will
automatically switch to use the internal battery. Please do not
use an external power supply exceeding 6V.
PART4: About Motion Detection Issues
Q: Camera stops taking images or won’t take images
1. Please gently remove the protective films of the camera to
get the best performance, especially the protective films
attached to the PIR sensors will seriously reduce the motion
detection ability and even cause no capture.
2. Make sure that the camera
power switch is in the “ON”
position and not in the “OFF”.
3. Make sure the camera had been powered up for more than
60 seconds to ensure the PIR sensors have been fully activat-
ed.
4. Check the "shot lag" in menu settings, which is the delay
between current capture and next capture, set "shot lag" to a
lower value if you want more captures.
5. Please make sure that the SD card doesn’t reach its full
capacity. The default option is "Loop Recording" disabled; the
camera will stop taking images when the SD card reaches
capacity.
6. Make sure that you are using a good quality SD card in your
camera. We recommend SD/SDHC/SHXC Class10 brand
memory card, such as SanDisk, Kingston, Toshiba, Samsung,
etc.
7. IMPORTANT: If you have used an SD card in another device
before inserting it in your camera, you might want to try format-
ting the card using the "Memory Card Format" menu option in
SET mode (make sure you have backed up any important files
first, as formatting will erase all previous files). In some cases,
other devices may change the formatting of the SD card so that
it will not work properly with the camera. Or if the SD card has
been used for a long time, the SD card might be in unstable
status and not able to accept data writing into, in this case, the
camera behaves as not triggering and not taking pictures. So
please re-format SD card and try again.
8. IMPORTANT: Check the batteries to make sure their power
level is sufficient. If you are using rechargeable batteries, it
would not take nighttime pictures or videos due to the low
battery voltage (generally nominal 1.2V and drops down quick-
ly). Please use 1.5V batteries instead.
9. Run motion detection test by “Motion Test” menu option to
check whether the motion sensor does work.
Q: Camera does work, but can’t capture motions
The problem is generally caused by incorrect file system
format on your SD card. Please format your SD card according
the following steps:
Press MODE key, go to "Memory Card Format", select "OK".
Q: Camera takes continuous images of no subject
A camera has what is known as a “false trigger” if the PIR
sensor thinks that there is motion and heat in front of the
camera lens when there is no subject in the image. These
“False Triggers” are the result of placing the camera in an
environment where there is motion associated with tree
branches creating motion in front of the camera or an area
where there is high heat in the foreground and any motion from
wind could set off the camera. Setting a camera up over water
is also a potential cause for this issue. To remedy this situation:
1. Try moving the camera to an area that does not have any of
these issues or try changing the
sensor level on the menu settings.
2. If the camera continues to take images when there is no
subject in them, try placing the camera in an inside environ-
ment and aiming at a location where there is no motion.
3. If the camera continues to show issues, then there is proba-
bly an electronic component issue. If this is the case, please
contact our customer service to send the camera back for
repair or a new replacement.
Q: Photos do not capture subject of interest
1. Check the “PIR sensitivity” menu option. Set the “PIR sensi-
tivity” to “High” to obtain the highest performance. At normal
temperature of 77°F, “High” sensitivity for 75~100ft detecting
distance, “Medium” for 50ft, “Low” for 30ft.
2. Try to set your camera up in an area where there is not a
heat source in the camera’s view of sight.
3. In some cases, setting the camera near water will make the
camera take images with no subject in them. Try aiming the
camera over ground.
4. Try to avoid setting the camera up on small trees that are
prone to being moved by strong winds.
5. Remove any limbs which are right in front of the camera
lens.
6. Don’t install the camera behind the window glass.
reformat your SD card in your camera by "Memory Card
Format" menu option, restart the camera after the SD card
formatted.
PART7: About Camera Screen
Q: When I turn on the camera, the screen just continually
flashes white
It may be due to poor batteries contact. It is recommended to
remove the batteries, wipe both ends of the battery and the
positive electrode (“flat”) of the battery compartment and the
spring with a clean cloth before reinstalling.
PART8: About Turn On
Q: Camera won’t power up
1. Make sure that you have installed eight batteries in the
battery compartment, filling battery all spaces with no “gaps”.
Make sure that the batteries are installed correctly, observing
proper polarity. Always place the negative (flat) end of each
battery in contact with the spring side of its slot inside the
camera. Or install the batteries again to check if the camera
can power up.
2. We recommend using new eight high quality 1.5V Alkaline or
Lithium AA batteries. In some cases, the new batteries might
be defective, even would be no power, it would be quite good if
you have meter to measure the batteries voltage to double
check.
3. 1.2V Rechargeable AA batteries are NOT recommended as
the lower voltage they produce can cause operational issues.
The worst case is that some batteries might not be power the
camera up.
PART9: Other Issues
Q: What if I forget my camera password?
Turn off the camera, then press OK and UP keys hold while
adjusting power switch to SET mode to unlock it.
Q: Why is there air in the trail camera? Is it a leak?
The air inside the camera is currently at a normal humidity
level. Temperature fluctuations can sometimes cause conden-
sation, which will dissipate once the temperature stabilizes.
Alternatively, you can accelerate the removal of condensation
by using a desiccant.
Q: Can this Wi-Fi trail camera connect to more than one
phone?
Yes, this trail camera can connect to up to two smartphones
simultaneously.
If your unit is still having trouble, please feel free to contact
customer support with your order number. Please be assured
we will make the things right for you.

PART3: About Batteries, Power Supply
Q: Battery life is shorter than expected
The following reasons may cause battery lifetime not as
expected:
Battery quality and cold temperature will affect the battery
lifetime.
Too many unwanted false triggers causing the battery to drain
quickly. Branches or weeds that can be blown by the wind, and
trigger the capture.
Excessive settings cause the camera to capture too many
redundant and repetitive pictures, leading to fast battery
consumption.
Please try the following trouble shootings:
Please use brand new batteries to power the camera, and use
1.5V lithium batteries when the weather is cold to get better
battery lifetime.
Set the camera working mode reasonably according to the
usage scenario. Check the camera settings such as Photo
Series, Sensitivity Motion, Shot Lag, etc.To reduce unneces-
sary triggers. For commonusage, we recommend
"Photo series" is 1, "Sensitivity motion sensors" is Middel, "shot
lag" is 10s.
Avoid false triggers: avoid objects such as branches or weeds
that can be blown by the wind when placing the camera.
If the frequency of using the camera is very high, we recom-
mend using an external power supply to power the camera.
Q: Can it use rechargeable NiMH batteries or Lithium
batteries?
Yes. Lithium batteries are better used in cold weather. We
recommend using new eight 1.5-volt rec hargeable lithium-ion
batteries to get maximum batteries lifetime. They're generally
marketed and sold in sets of four AA batteries plus a conve-
nient 4-cell charger, all for usually about $25.00 - $30.00. NiMH
rechargeable batteries cannot also be used.
Note: While all AA batteries will take decent daytime images
and daytime videos, the nighttime camera performance will
suffer, or not work at all when using AA batteries that have a
voltage less than 1.5 volts.
Don’t use the batteries’ voltage greater than 1.5V which would
damage the camera. Don’t mix old and new batteries. Don’t
mix battery types.
Q: Does the camera have a port for an external power?
Yes. The port is on the bottom of the camera. The camera can
work with 6V/1-15A external power adapter/source (user
supplied). The cable end of DC must be the circles of 3.5mm
outside, 1.35mm inside (that is 3.5×1.35mm) and the central
contact point is positive polarity.
It is easy to find the cable or adapter on Amazon (searching the
items by "DC 6V 1A 3.5×1.35mm"), or electronic marketplace.
Q: Can an external power source and internal 8 batteries
work together?
Yes. It can. The camera can accept external power (user
supplied) and work with internal batteries at the same time.
The camera will automatically use the higher voltage of the two
as the input power source.
When the external power supply is removed, the camera will
automatically switch to use the internal battery. Please do not
use an external power supply exceeding 6V.
PART4: About Motion Detection Issues
Q: Camera stops taking images or won’t take images
1. Please gently remove the protective films of the camera to
get the best performance, especially the protective films
attached to the PIR sensors will seriously reduce the motion
detection ability and even cause no capture.
2. Make sure that the camera
power switch is in the “ON”
position and not in the “OFF”.
3. Make sure the camera had been powered up for more than
60 seconds to ensure the PIR sensors have been fully activat-
ed.
4. Check the "shot lag" in menu settings, which is the delay
between current capture and next capture, set "shot lag" to a
lower value if you want more captures.
5. Please make sure that the SD card doesn’t reach its full
capacity. The default option is "Loop Recording" disabled; the
camera will stop taking images when the SD card reaches
capacity.
6. Make sure that you are using a good quality SD card in your
camera. We recommend SD/SDHC/SHXC Class10 brand
memory card, such as SanDisk, Kingston, Toshiba, Samsung,
etc.
7. IMPORTANT: If you have used an SD card in another device
before inserting it in your camera, you might want to try format-
ting the card using the "Memory Card Format" menu option in
SET mode (make sure you have backed up any important files
first, as formatting will erase all previous files). In some cases,
other devices may change the formatting of the SD card so that
it will not work properly with the camera. Or if the SD card has
been used for a long time, the SD card might be in unstable
status and not able to accept data writing into, in this case, the
camera behaves as not triggering and not taking pictures. So
please re-format SD card and try again.
8. IMPORTANT: Check the batteries to make sure their power
level is sufficient. If you are using rechargeable batteries, it
would not take nighttime pictures or videos due to the low
battery voltage (generally nominal 1.2V and drops down quick-
ly). Please use 1.5V batteries instead.
9. Run motion detection test by “Motion Test” menu option to
check whether the motion sensor does work.
Q: Camera does work, but can’t capture motions
The problem is generally caused by incorrect file system
format on your SD card. Please format your SD card according
the following steps:
Press MODE key, go to "Memory Card Format", select "OK".
Q: Camera takes continuous images of no subject
A camera has what is known as a “false trigger” if the PIR
sensor thinks that there is motion and heat in front of the
camera lens when there is no subject in the image. These
“False Triggers” are the result of placing the camera in an
environment where there is motion associated with tree
branches creating motion in front of the camera or an area
where there is high heat in the foreground and any motion from
wind could set off the camera. Setting a camera up over water
is also a potential cause for this issue. To remedy this situation:
1. Try moving the camera to an area that does not have any of
these issues or try changing the
sensor level on the menu settings.
2. If the camera continues to take images when there is no
subject in them, try placing the camera in an inside environ-
ment and aiming at a location where there is no motion.
3. If the camera continues to show issues, then there is proba-
bly an electronic component issue. If this is the case, please
contact our customer service to send the camera back for
repair or a new replacement.
Q: Photos do not capture subject of interest
1. Check the “PIR sensitivity” menu option. Set the “PIR sensi-
tivity” to “High” to obtain the highest performance. At normal
temperature of 77°F, “High” sensitivity for 75~100ft detecting
distance, “Medium” for 50ft, “Low” for 30ft.
2. Try to set your camera up in an area where there is not a
heat source in the camera’s view of sight.
3. In some cases, setting the camera near water will make the
camera take images with no subject in them. Try aiming the
camera over ground.
4. Try to avoid setting the camera up on small trees that are
prone to being moved by strong winds.
5. Remove any limbs which are right in front of the camera
lens.
6. Don’t install the camera behind the window glass.
14. WARRANTY
TWO-YEAR LIMITED WARRANTY
Your KJK trail camera is backed by a two-year warranty
starting from the date of original purchase. We assure you that
your camera is designed to be free from defects in materials
and workmanship when used under standard conditions. It's
important to note that this warranty excludes damages result-
ing from misuse, abuse, improper handling or installation,
damage caused by wildlife, or any unauthorized repair
attempts.
During the warranty period, we reserve the right to either
repair or replace your camera with an identical or similar
model at no cost. Please be aware that this warranty is
applicable exclusively to the original retail purchaser through
our authorized dealer network. To avail of warranty benefits,
you'll need to provide proof of the original purchase date, such
as a purchase receipt or order number. Any replacement
product issued under this warranty will be covered for the
remaining duration of the original product's warranty period.
This warranty specifically addresses failures attributed to
material or workmanship defects during normal usage and
does not extend to regular wear and tear.
If you require assistance with a warranty claim, kindly get in
touch with your dealer or our authorized distributor.
15. FCC COMPLIANCE STATEMENT
This device complies with Part 15 of the FCC Rules.
Operation is subject to the following conditions:
(1)This device may not cause harmful interference
(2)This device must accept any interference received, includ-
ing interference that my cause undesired operation.
Please Note: This equipment has been tested and found to
comply with the limits for a Class B digital device, pursuant to
part 15 of the FCC Rules. These limits are designed to provide
reasonable protection against harmful interference in aresi-
dential installation. This equipment generates uses and can
radiate radio frequency energy and, if not installed and used in
accordance with the instructions,may cause harmful interfer-
ence to radio communications. However, there is no guaran-
tee that interference will not occur in a particular installation. If
this equipment does cause harmful interference to radio or
television reception, which can be determined by turning the
equipment off and on, the user is encouraged to try to correct
the interference by one or more of the following measures:
• Reorient or relocate the receiving antenna.
• Increase the separation between the equipment and the
receiver.
• Connect the equipment into an outlet on a circuit different
from that to which the receiver is connected.
Caution: To comply with the limits for an FCC Class B
computing device, always use the signal cord and power
cord supplied with this unit.
The Federal communications Commission warns that chang-
es or modifications to the unit not expressly approved by the
party responsible for compliance could void the user’s authori-
ty to operate the equipment.

PART3: About Batteries, Power Supply
Q: Battery life is shorter than expected
The following reasons may cause battery lifetime not as
expected:
Battery quality and cold temperature will affect the battery
lifetime.
Too many unwanted false triggers causing the battery to drain
quickly. Branches or weeds that can be blown by the wind, and
trigger the capture.
Excessive settings cause the camera to capture too many
redundant and repetitive pictures, leading to fast battery
consumption.
Please try the following trouble shootings:
Please use brand new batteries to power the camera, and use
1.5V lithium batteries when the weather is cold to get better
battery lifetime.
Set the camera working mode reasonably according to the
usage scenario. Check the camera settings such as Photo
Series, Sensitivity Motion, Shot Lag, etc.To reduce unneces-
sary triggers. For commonusage, we recommend
"Photo series" is 1, "Sensitivity motion sensors" is Middel, "shot
lag" is 10s.
Avoid false triggers: avoid objects such as branches or weeds
that can be blown by the wind when placing the camera.
If the frequency of using the camera is very high, we recom-
mend using an external power supply to power the camera.
Q: Can it use rechargeable NiMH batteries or Lithium
batteries?
Yes. Lithium batteries are better used in cold weather. We
recommend using new eight 1.5-volt rec hargeable lithium-ion
batteries to get maximum batteries lifetime. They're generally
marketed and sold in sets of four AA batteries plus a conve-
nient 4-cell charger, all for usually about $25.00 - $30.00. NiMH
rechargeable batteries cannot also be used.
Note: While all AA batteries will take decent daytime images
and daytime videos, the nighttime camera performance will
suffer, or not work at all when using AA batteries that have a
voltage less than 1.5 volts.
Don’t use the batteries’ voltage greater than 1.5V which would
damage the camera. Don’t mix old and new batteries. Don’t
mix battery types.
Q: Does the camera have a port for an external power?
Yes. The port is on the bottom of the camera. The camera can
work with 6V/1-15A external power adapter/source (user
supplied). The cable end of DC must be the circles of 3.5mm
outside, 1.35mm inside (that is 3.5×1.35mm) and the central
contact point is positive polarity.
It is easy to find the cable or adapter on Amazon (searching the
items by "DC 6V 1A 3.5×1.35mm"), or electronic marketplace.
Q: Can an external power source and internal 8 batteries
work together?
Yes. It can. The camera can accept external power (user
supplied) and work with internal batteries at the same time.
The camera will automatically use the higher voltage of the two
as the input power source.
When the external power supply is removed, the camera will
automatically switch to use the internal battery. Please do not
use an external power supply exceeding 6V.
PART4: About Motion Detection Issues
Q: Camera stops taking images or won’t take images
1. Please gently remove the protective films of the camera to
get the best performance, especially the protective films
attached to the PIR sensors will seriously reduce the motion
detection ability and even cause no capture.
2. Make sure that the camera
power switch is in the “ON”
position and not in the “OFF”.
3. Make sure the camera had been powered up for more than
60 seconds to ensure the PIR sensors have been fully activat-
ed.
4. Check the "shot lag" in menu settings, which is the delay
between current capture and next capture, set "shot lag" to a
lower value if you want more captures.
5. Please make sure that the SD card doesn’t reach its full
capacity. The default option is "Loop Recording" disabled; the
camera will stop taking images when the SD card reaches
capacity.
6. Make sure that you are using a good quality SD card in your
camera. We recommend SD/SDHC/SHXC Class10 brand
memory card, such as SanDisk, Kingston, Toshiba, Samsung,
etc.
7. IMPORTANT: If you have used an SD card in another device
before inserting it in your camera, you might want to try format-
ting the card using the "Memory Card Format" menu option in
SET mode (make sure you have backed up any important files
first, as formatting will erase all previous files). In some cases,
other devices may change the formatting of the SD card so that
it will not work properly with the camera. Or if the SD card has
been used for a long time, the SD card might be in unstable
status and not able to accept data writing into, in this case, the
camera behaves as not triggering and not taking pictures. So
please re-format SD card and try again.
8. IMPORTANT: Check the batteries to make sure their power
level is sufficient. If you are using rechargeable batteries, it
would not take nighttime pictures or videos due to the low
battery voltage (generally nominal 1.2V and drops down quick-
ly). Please use 1.5V batteries instead.
9. Run motion detection test by “Motion Test” menu option to
check whether the motion sensor does work.
Q: Camera does work, but can’t capture motions
The problem is generally caused by incorrect file system
format on your SD card. Please format your SD card according
the following steps:
Press MODE key, go to "Memory Card Format", select "OK".
Q: Camera takes continuous images of no subject
A camera has what is known as a “false trigger” if the PIR
sensor thinks that there is motion and heat in front of the
camera lens when there is no subject in the image. These
“False Triggers” are the result of placing the camera in an
environment where there is motion associated with tree
branches creating motion in front of the camera or an area
where there is high heat in the foreground and any motion from
wind could set off the camera. Setting a camera up over water
is also a potential cause for this issue. To remedy this situation:
1. Try moving the camera to an area that does not have any of
these issues or try changing the
sensor level on the menu settings.
2. If the camera continues to take images when there is no
subject in them, try placing the camera in an inside environ-
ment and aiming at a location where there is no motion.
3. If the camera continues to show issues, then there is proba-
bly an electronic component issue. If this is the case, please
contact our customer service to send the camera back for
repair or a new replacement.
Q: Photos do not capture subject of interest
1. Check the “PIR sensitivity” menu option. Set the “PIR sensi-
tivity” to “High” to obtain the highest performance. At normal
temperature of 77°F, “High” sensitivity for 75~100ft detecting
distance, “Medium” for 50ft, “Low” for 30ft.
2. Try to set your camera up in an area where there is not a
heat source in the camera’s view of sight.
3. In some cases, setting the camera near water will make the
camera take images with no subject in them. Try aiming the
camera over ground.
4. Try to avoid setting the camera up on small trees that are
prone to being moved by strong winds.
5. Remove any limbs which are right in front of the camera
lens.
6. Don’t install the camera behind the window glass.
14. WARRANTY
TWO-YEAR LIMITED WARRANTY
Your KJK trail camera is backed by a two-year warranty
starting from the date of original purchase. We assure you that
your camera is designed to be free from defects in materials
and workmanship when used under standard conditions. It's
important to note that this warranty excludes damages result-
ing from misuse, abuse, improper handling or installation,
damage caused by wildlife, or any unauthorized repair
attempts.
During the warranty period, we reserve the right to either
repair or replace your camera with an identical or similar
model at no cost. Please be aware that this warranty is
applicable exclusively to the original retail purchaser through
our authorized dealer network. To avail of warranty benefits,
you'll need to provide proof of the original purchase date, such
as a purchase receipt or order number. Any replacement
product issued under this warranty will be covered for the
remaining duration of the original product's warranty period.
This warranty specifically addresses failures attributed to
material or workmanship defects during normal usage and
does not extend to regular wear and tear.
If you require assistance with a warranty claim, kindly get in
touch with your dealer or our authorized distributor.
15. FCC COMPLIANCE STATEMENT
This device complies with Part 15 of the FCC Rules.
Operation is subject to the following conditions:
(1)This device may not cause harmful interference
(2)This device must accept any interference received, includ-
ing interference that my cause undesired operation.
Please Note: This equipment has been tested and found to
comply with the limits for a Class B digital device, pursuant to
part 15 of the FCC Rules. These limits are designed to provide
reasonable protection against harmful interference in aresi-
dential installation. This equipment generates uses and can
radiate radio frequency energy and, if not installed and used in
accordance with the instructions,may cause harmful interfer-
ence to radio communications. However, there is no guaran-
tee that interference will not occur in a particular installation. If
this equipment does cause harmful interference to radio or
television reception, which can be determined by turning the
equipment off and on, the user is encouraged to try to correct
the interference by one or more of the following measures:
• Reorient or relocate the receiving antenna.
• Increase the separation between the equipment and the
receiver.
• Connect the equipment into an outlet on a circuit different
from that to which the receiver is connected.
• The device has been evaluated to meet general RF exposur
e requirement.
• The device can be used in portable exposure condition with
out restriction.
• This radio should NOT be installed and operating simultane
ously with other radio
Caution: To comply with the limits for an FCC Class B
computing device, always use the signal cord and power
cord supplied with this unit.
The Federal communications Commission warns that chang-
es or modifications to the unit not expressly approved by the
party responsible for compliance could void the user’s authori-
ty to operate the equipment.