Loading ...
Loading ...
Loading ...
17
OPERATION
To Engage Auger
1. To engage the auger and start throwing snow, squeeze the auger control
against the left handle. Release to stop the auger.
Replacing Shear Pins
WARNING
NEVER replace the auger shear pins with anything other than OEM Part
No. 738-04124A (gold colored replacement shear pins). Any damage to the
auger gearbox or other components as a result of failing to do so will NOT
be covered by your snow blower’s warranty.
WARNING
Always turn off the snow blower’s engine and remove the key prior to
replacing shear pins.
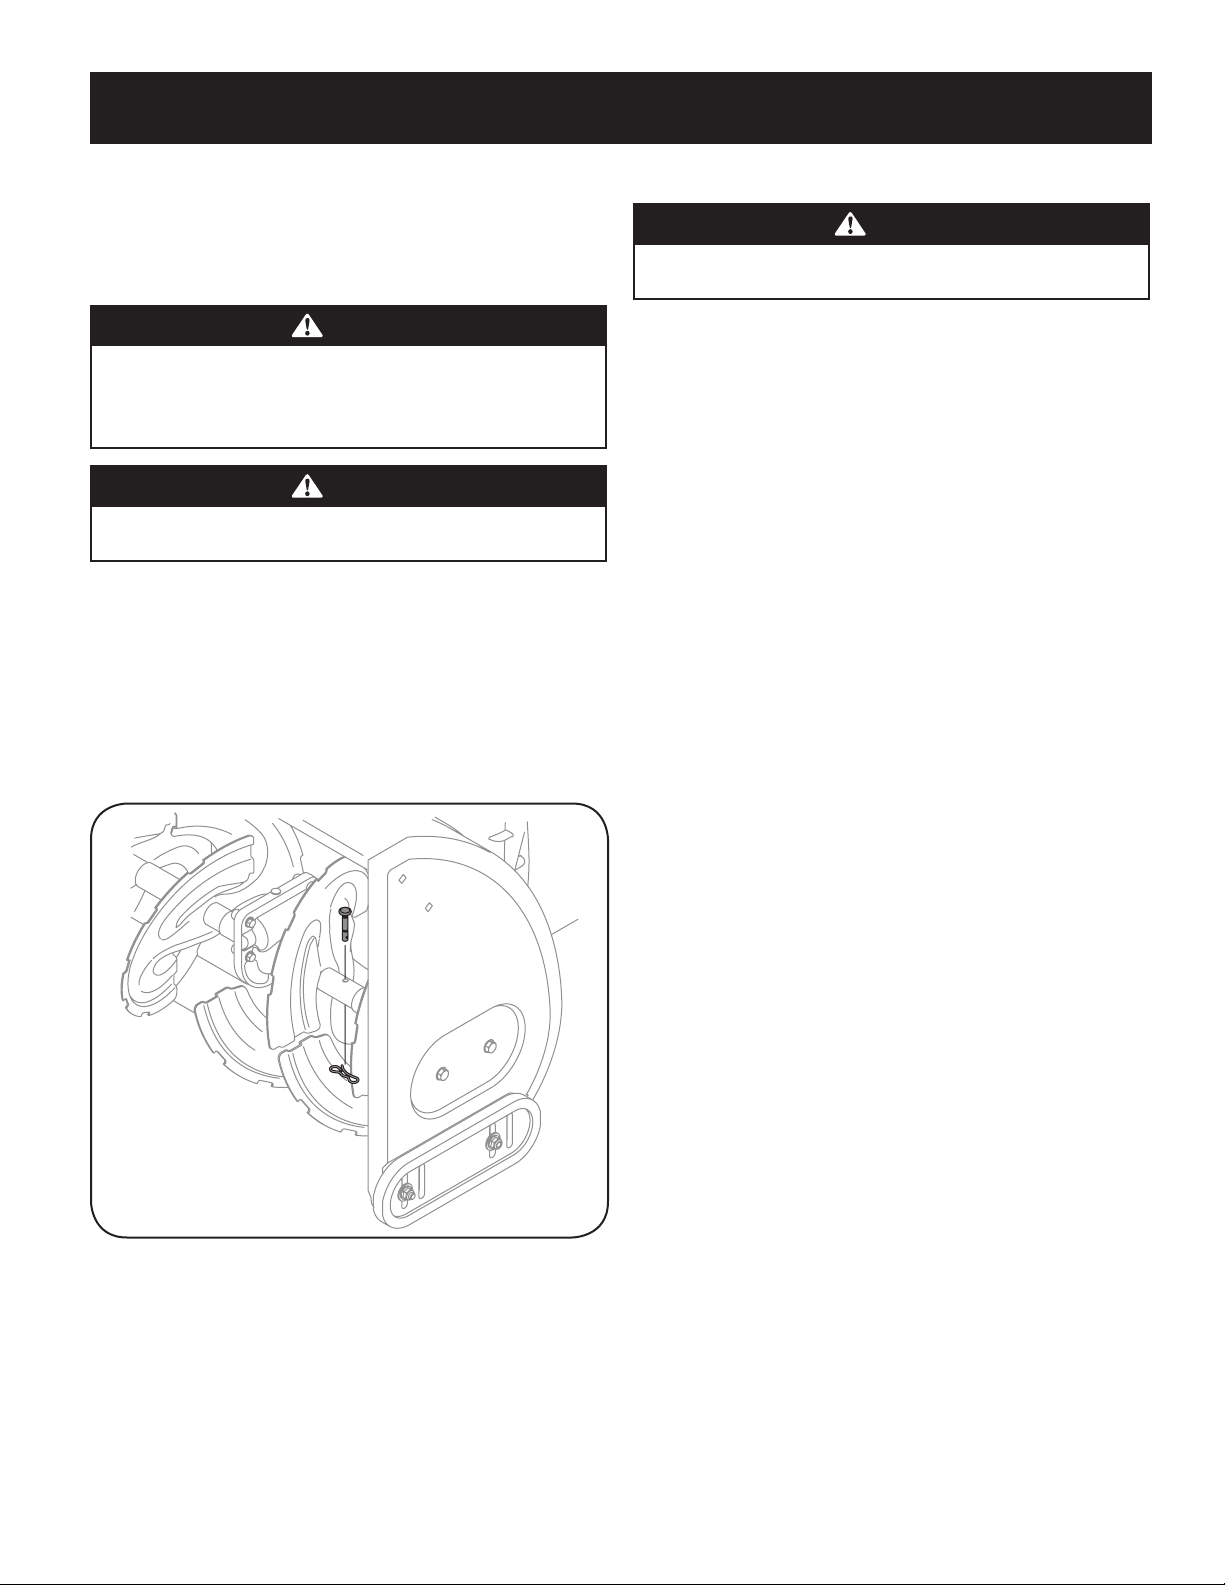
Each auger blade is secured to the spiral shaft with a shear pin and bow-tie clip. If
an auger blade strikes a foreign object or ice jam, the pin will shear off to prevent
damage to the blade. If an auger blade does not turn, check to see if its pin has
sheared off.
IMPORTANT: ALWAYS use the correct OEM replacement shear pin.
2-Stage Snow Blowers
• The auger is secured to the spiral shaft using gold colored shear pins (OEM
Part No. 738-04124A). See Figure 17.
Figure 17
Using Snow Blower to Clear Snow
WARNING
Check the area to be cleared for foreign objects. Remove foreign objects,
if any.
1. Start the engine following starting instructions.
2. Allow the engine to warm up for a few minutes as the engine will not
develop full power until it reaches operating temperature.
3. Rotate the chute assembly to the desired direction, away from bystanders
and/or buildings.
4. Making certain no bystanders or obstacles are in front of the unit, squeeze
the auger control completely against the upper handle to fully engage the
auger.
5. While the auger control is engaged, squeeze the drive control completely
against the upper handle to engage the wheels. Do not “feather” the drive
control.
6. As the snow blower starts to move, maintain a firm hold on the handle, and
guide the snow blower along the path to be cleared.
7. Release the auger and drive controls to stop the snow throwing action and
forward motion.
NOTE: Your unit is equipped with a clutch in the transmission. If the wheels
stop turning while trying to discharge large volumes of snow, immediately
disengage the drive control and allow the rotating auger to discharge snow
from the housing. Reduce the clearing width and continue operation.
8. On each succeeding pass, readjust the chute assembly to the desired position
and slightly overlap the previously cleared path.
Loading ...
Loading ...
Loading ...