Loading ...
Loading ...
Loading ...
32
Battery Backup
1 Install the Battery*
To reduce the risk of FIRE or INJURY to persons:
• Disconnect ALL electric and battery power BEFORE performing ANY service or
maintenance.
• Use ONLY LiftMaster part # 485LM for replacement battery.
• DO NOT dispose of battery in fire. Battery may explode. Check with local codes for
disposal instructions.
ALWAYS wear protective gloves and eye protection when changing the battery or working around
the battery compartment.
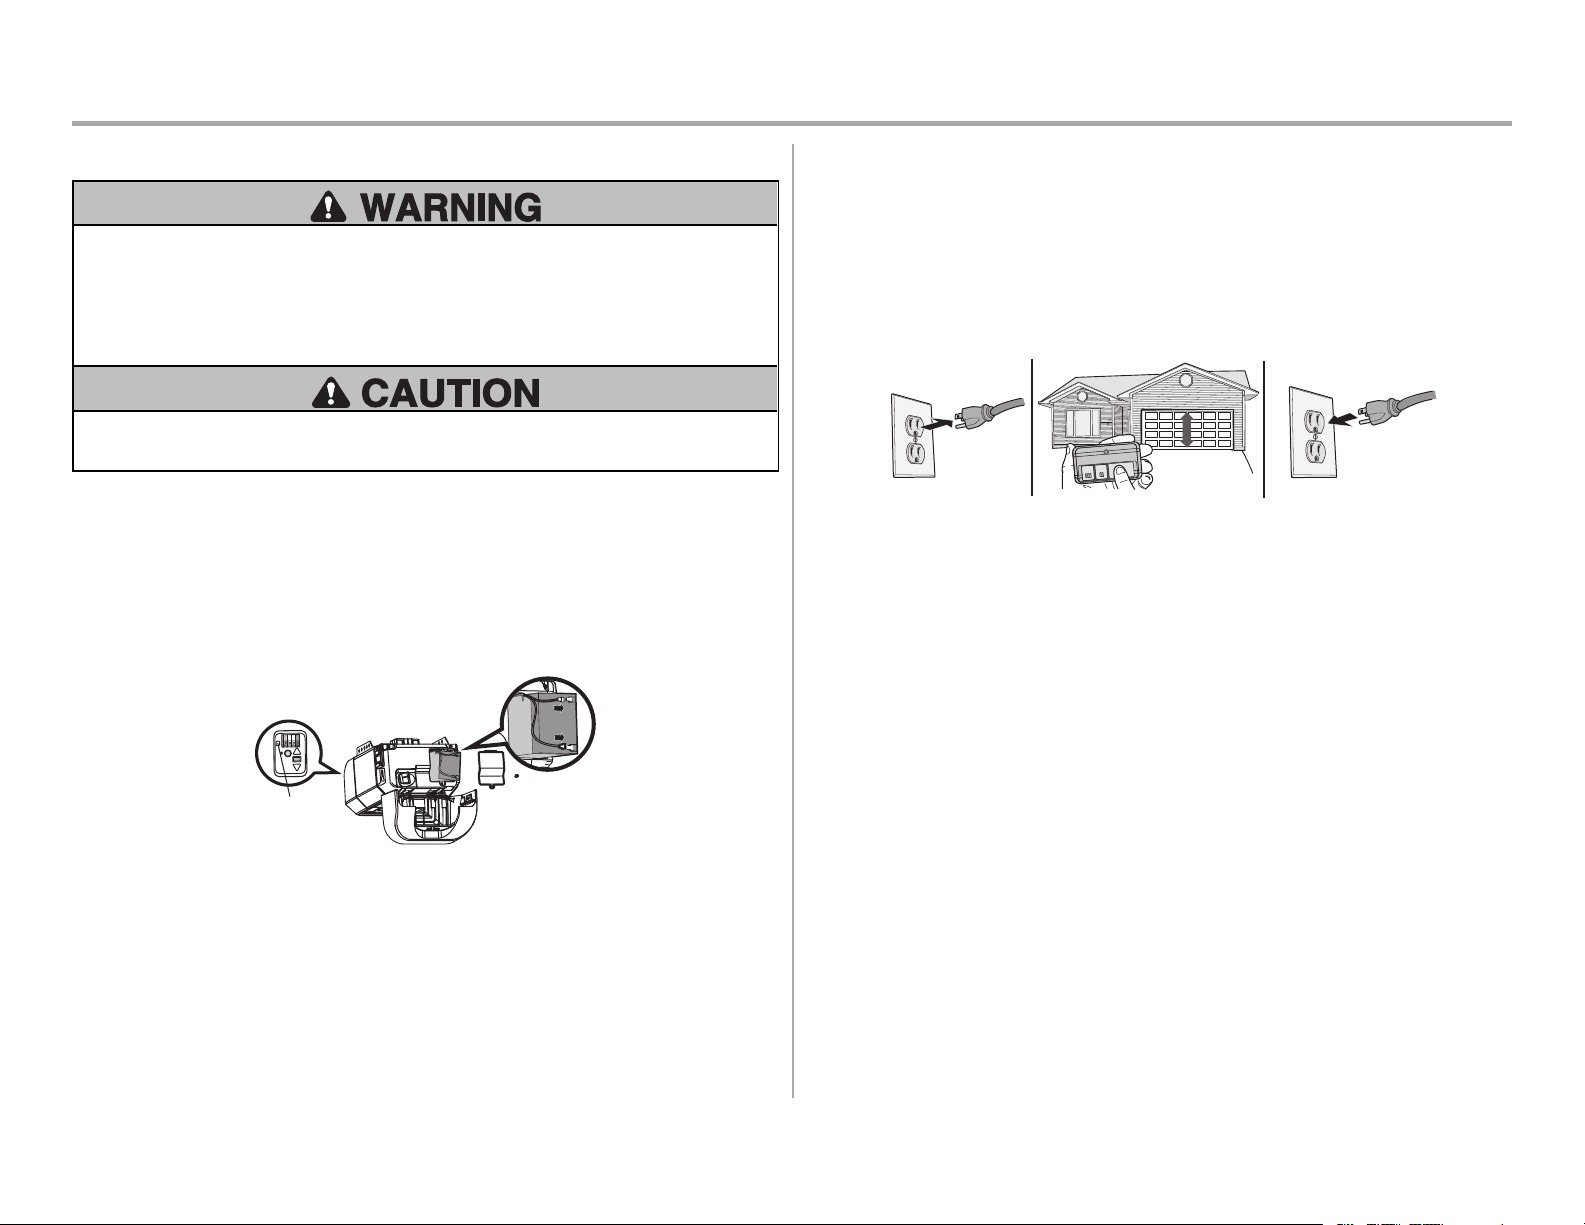
1. Unplug the garage door opener.
2. Open the light lens on the right side panel of the garage door opener. Use a Phillips head
screwdriver to remove the battery cover on the garage door opener.
3. Partially insert the battery into the battery compartment with the terminals facing out.
4. Connect red (+) and black (-) wires from the garage door opener to the corresponding
terminals on the battery.
5. Replace the battery cover.
6. Plug in the garage door opener.
7. Wait for the green Battery Status LED to start flashing before proceeding to test the battery.
Battery
Status LED
* If applicable
2 Test the Battery
1. Unplug the garage door opener. The battery status LED will either glow solid orange
indicating opener is operating on battery power or will flash indicating low battery power.
NOTE:Make sure the garage door opener is unplugged.
2.
Open and close the door using the remote control or door control. NOTE: The garage door
opener may run slower if the battery is not fully charged. The battery will take 24 hours to
fully charge.
3. Plug in the garage door opener. Verify the battery status LED is flashing green, indicating the
battery is charging.
1 2
3
Loading ...
Loading ...
Loading ...