Loading ...
Loading ...
Loading ...
11
Assembly
1 Attach the Rail to the Garage Door Opener
MODELS 8360WLB AND 8365W-267
* Can be installed with a T-Rail or a Square Rail. For Square Rail assembly steps, see instructions
provided with the rail kit model LMSSRKIT. Once completed, return to this manual for the installation
instructions.
To avoid possible SERIOUS INJURY to finger from moving garage door opener:
• ALWAYS keep hand clear of sprocket while operating opener.
• Securely attach sprocket cover BEFORE operating.
To avoid SERIOUS damage to garage door opener, use ONLY those bolts/fasteners mounted in the
top of the opener.
NOTE: ONLY use the bolts removed from the garage door opener. Place the garage door opener on
the packing material to prevent scratching.
1. Remove the two bolts from the top of the garage door opener.
2. Align the rail and the styrofoam over the sprocket. Cut the tape from the rail, chain, and
styrofoam.
3. Fasten the rail with the previously removed bolts.
4. Position the chain around the garage door opener sprocket.
5. Install the sprocket cover by squeezing the sides and inserting the tabs into the slots on the
garage door opener.
Washered Bolt 5/16"-18 x 1/2"
(Mounted in the garage door opener)
Washered Bolt 5/16"-18 x 1/2"
(Mounted in the garage door opener)
Model 83602
Model 8365WL-267
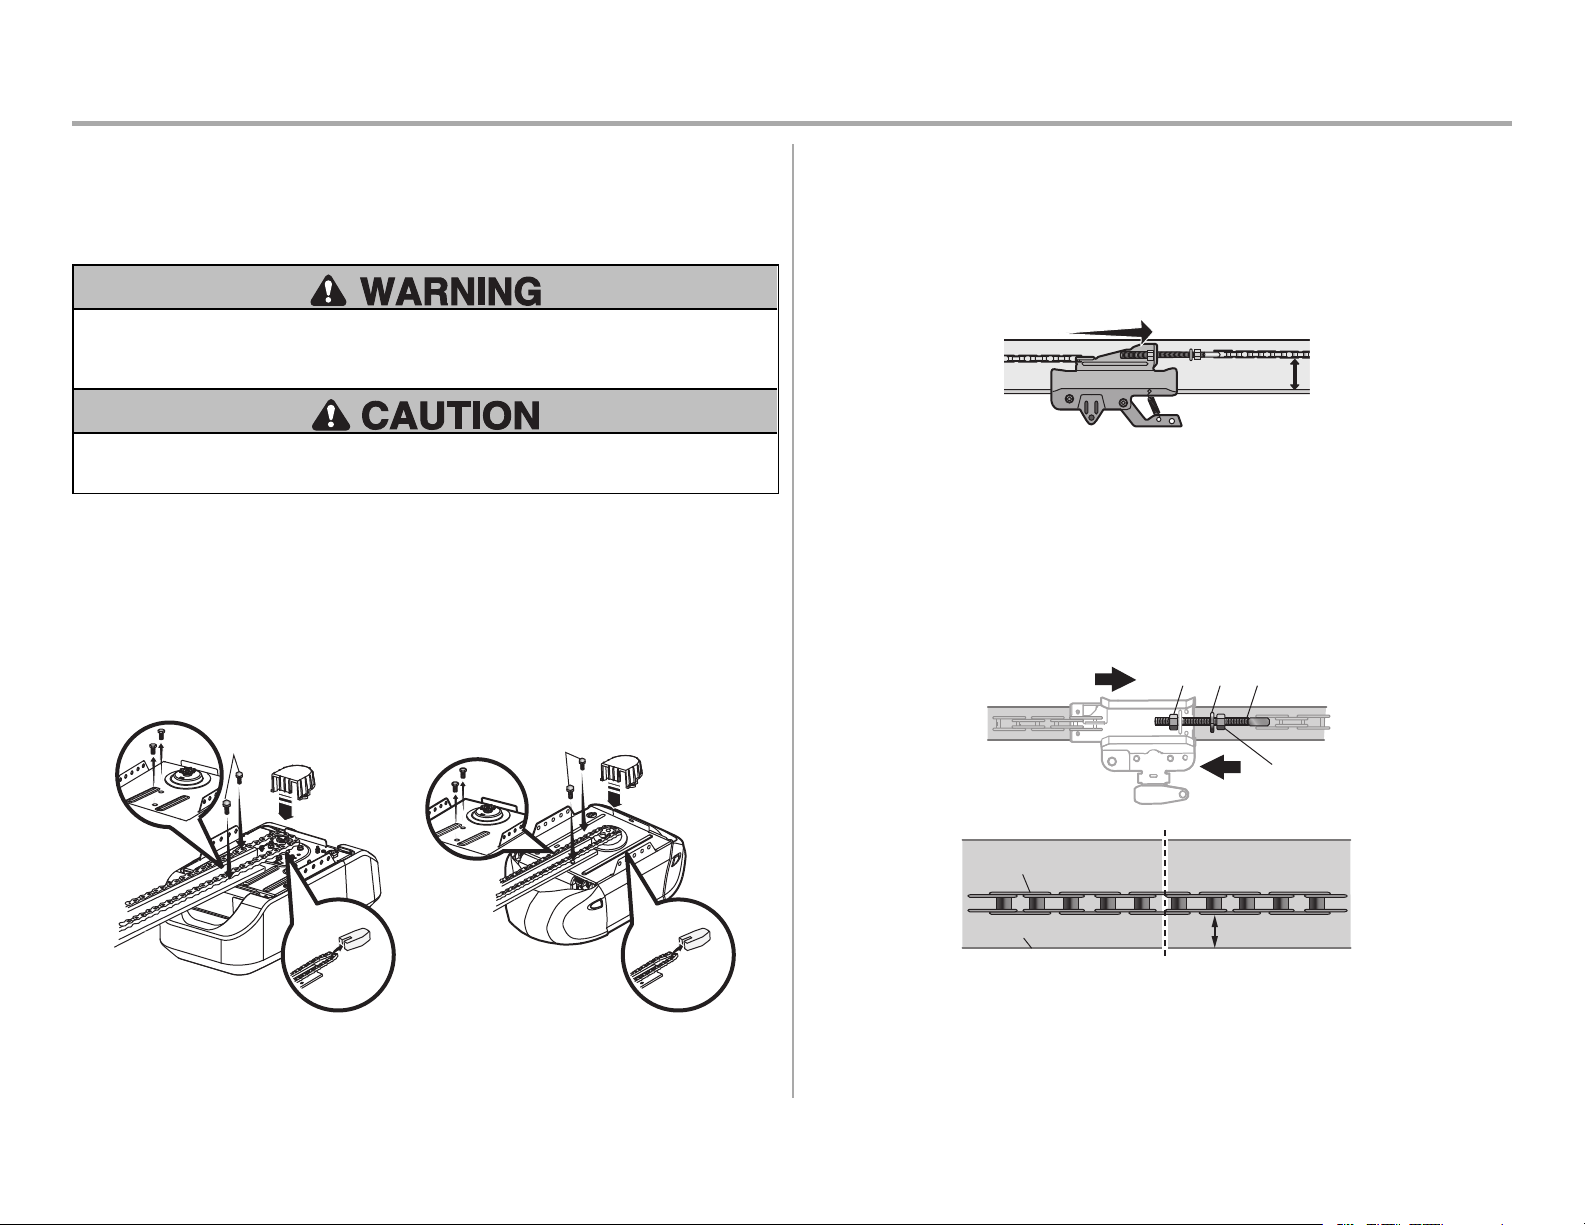
2 Tighten the Chain
FOR T-RAIL
1. Loosen the inner nut and lock washer on the trolley threaded shaft.
2. Tighten the outer nut until the chain is a 1/2" above the base of the rail at the midpoint
oftherail.
3. Re-tighten the inner nut.
Slack in the chain is normal when the door is closed. No readjustment is necessary.
1/2" (13 mm)
FOR SQUARE RAIL
1. Spin the inner nut and lock washer down the trolley threaded shaft, away from the trolley.
2. To tighten the chain, turn the outer nut in the direction shown.
3. When the chain is approximately 1/4" (6 mm) above the base of the rail at the midpoint,
retighten the inner nut to secure the adjustment.
Sprocket noise can result if the chain is too loose. When installation is complete, you may notice
some chain droop with the door closed. This is normal. If the chain returns to the position shown
when the door is open, do not re-adjust the chain.
NOTE: During future maintenance, ALWAYS pull the emergency release handle to disconnect the
trolley before adjusting the chain.
Outer
Nut
Lock
Washer
Trolley Threaded
Shaft
Inner Nut
To Tighten
Inner Nut
To Tighten Outer Nut
Base of Rail
Chain
1/4" (6 mm)
Mid length of Rail
Loading ...
Loading ...
Loading ...