Loading ...
Loading ...
Loading ...
Coolant Replacement
Refer to Safety Precautions on page 25.
Coolant should be replaced by your dealer, unless
you have the proper tools and service data and
are mechanically qualified. Refer to the Honda
Service Manual (page 164).
Coolant
WARNING
Removing the radiator cap while the
engine is hot can cause the coolant to
spray out, seriously scalding you.
Always let the engine and radiator cool
down before removing the radiator cap.
50 Servicing Your Honda
To properly dispose of drained coolant, refer to
You & the Environment, page 143.
Improper disposal of drained fluids is harmful to
the environment.
NOTICE
Coolant System Bleed Air
1. Remove the radiator cap (1).
(1) radiator cap
2. Fill the system with the recommended coolant
through the filler opening up to filler neck.
Use a fresh recommended coolant mixture
(page 48).
Capacity:
1.27 US qt (1.20R) after disassembly
1.19 US qt (1.13R) after draining
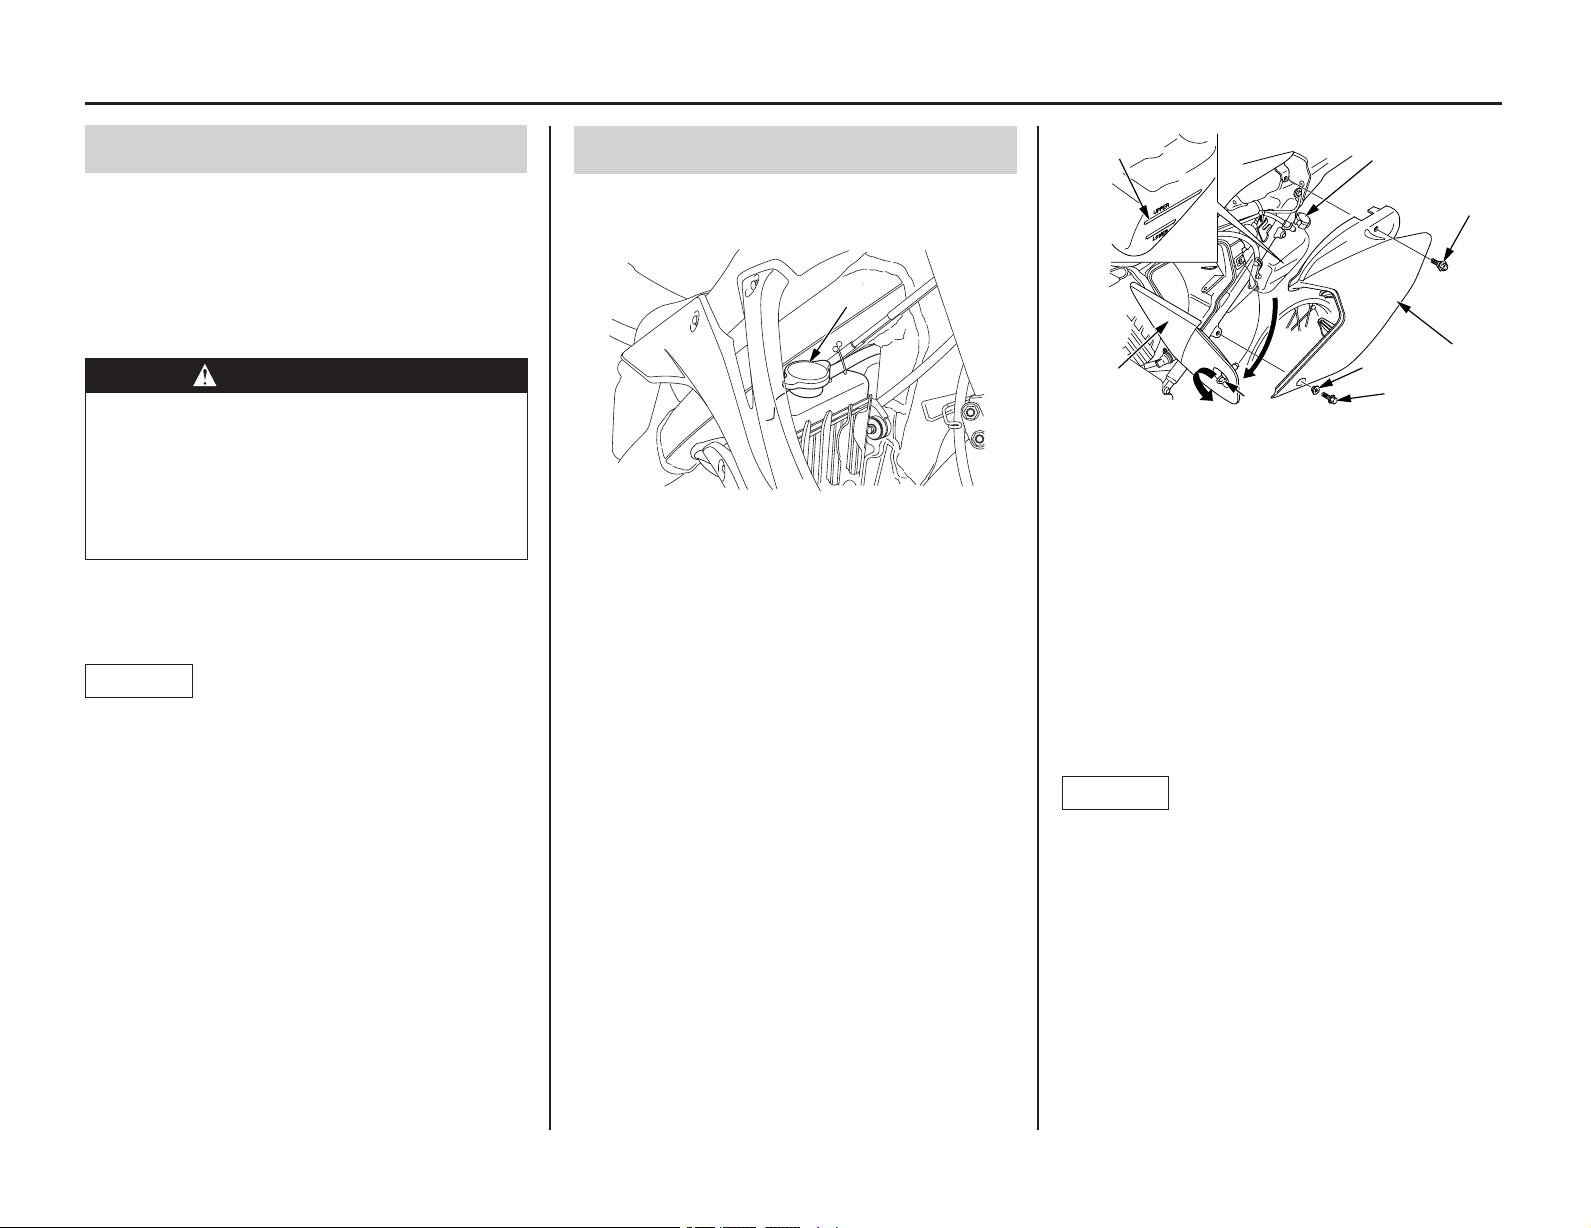
3. Turn the quick fastener (2) counterclockwise
and open the air cleaner housing cover (3).
4. Remove the left side cover bolt (4), collar (5),
seat mounting bolt (6) and left side cover (7).
5. Remove the reserve tank cap (8) and fill the
reserve tank to the UPPER level line (9).
(2) quick fastener (6) seat mounting bolt
(3) air cleaner housing cover (7) left side cover
(4) left side cover bolt (8) reserve tank cap
(5) collar (9) UPPER level line
6. Bleed air front the system as follows:
• Shift the transmission into neutral. Start the
engine and let it idle 2-3 minutes.
• Snap the throttle three-four times to bleed air
from the system.
• Stop the engine and, if necessary, add
coolant up to the proper level. Reinstall the
radiator cap.
• Check the level of coolant in the reserve
tank and fill to the UPPER level if it is low .
If the radiator cap is not installed properly, it
will cause excessive coolant loss and may result
in overheating and engine damage.
7. Install the radiator reserve tank cap and left
side cover, and close the air cleaner housing
cover.
8. Install the seat mounting bolt and tighten it to
the specified torque:
19 lbf·ft (26 N·m, 2.7 kgf·m)
NOTICE
(1)
(9)
(3)
(8)
(6)
(7)
(4)
(5)
(2)
Loading ...
Loading ...
Loading ...