Loading ...
Loading ...
Loading ...
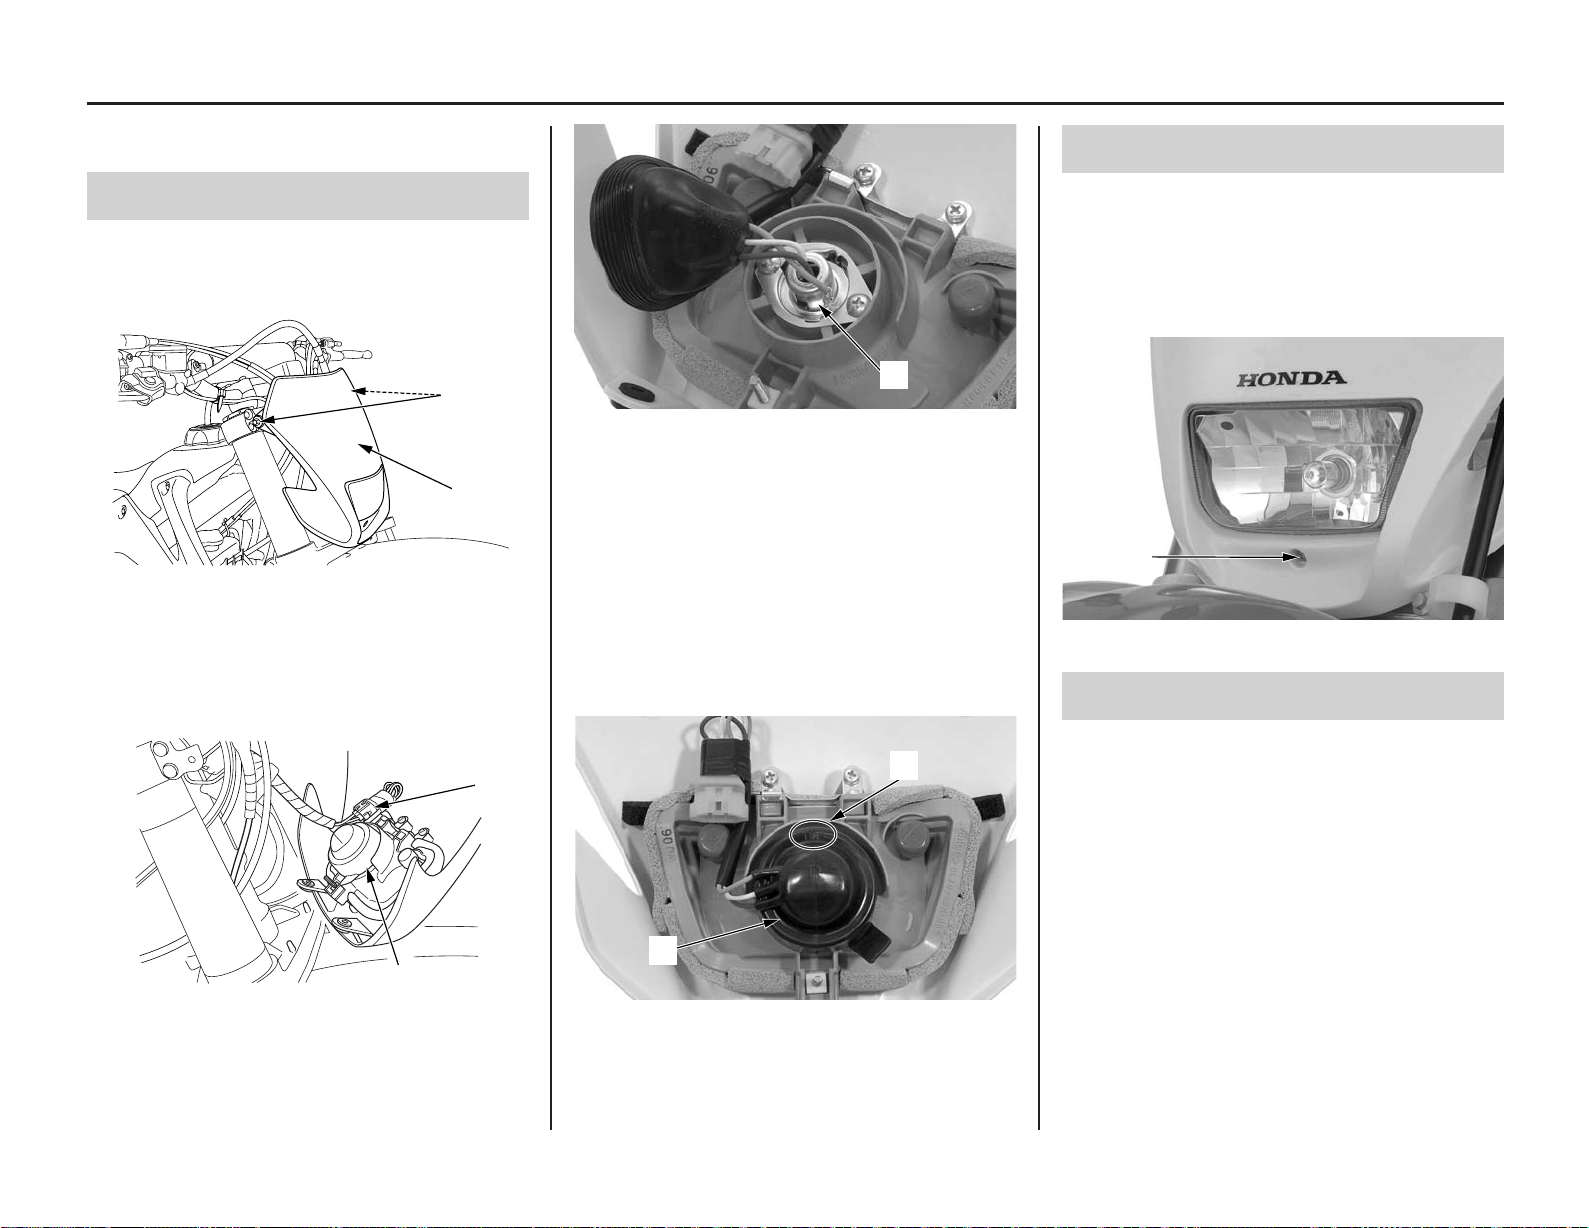
(4) dust cover (6) “TOP” mark
6. To install the headlight, reverse the removal
procedure.
Servicing Your Honda 101
Headlight & Taillight
Refer to Safety Precaution on page 25.
Headlight Bulb
1. Remove the front visor bolts (1) and pull out
the front visor (2).
(1) front visor bolts
(2) front visor
2. Disconnect the headlight connector (3).
Remove the dust cover (4).
(5) headlight bulb socket
4. To install a new headlight bulb, push and turn
the headlight bulb socket clockwise.
If you touch the bulb with your bare hands, clean
it with a cloth moistened with denatured alcohol
to prevent early bulb failure.
5. Install the dust cover (4) tightly against the
headlight unit with its “TOP” mark (6) facing
up.
(2)
(1)
(3)
(4)
(5)
(1)
(1) adjusting screw
Taillight
The taillight uses LED illumination.
If the taillight does not function properly, see
your dealer for service.
This model is equipped with an electric starter
and battery for easy engine starting.
There is a possibility of damage to the lighting
system if the battery is carelessly removed.
Never kick-start the engine without the battery
connected.
If it becomes necessary to kick-start the engine
with the battery removed, remove the relays to
the battery to prevent damage to the lighting.
Headlight Aim
The headlight aim can be raised or lowered.
Turn the adjusting screw (1) clockwise to move
the headlight up or turn the adjusting screw
counterclockwise to move the headlight down to
proper adjustment.
(4)
(6)
(3) headlight connector
(4) dust cover
3. To pull the headlight bulb out, push and turn
the headlight bulb socket (5) counterclockwise.
Loading ...
Loading ...
Loading ...