Loading ...
Loading ...
Loading ...
27
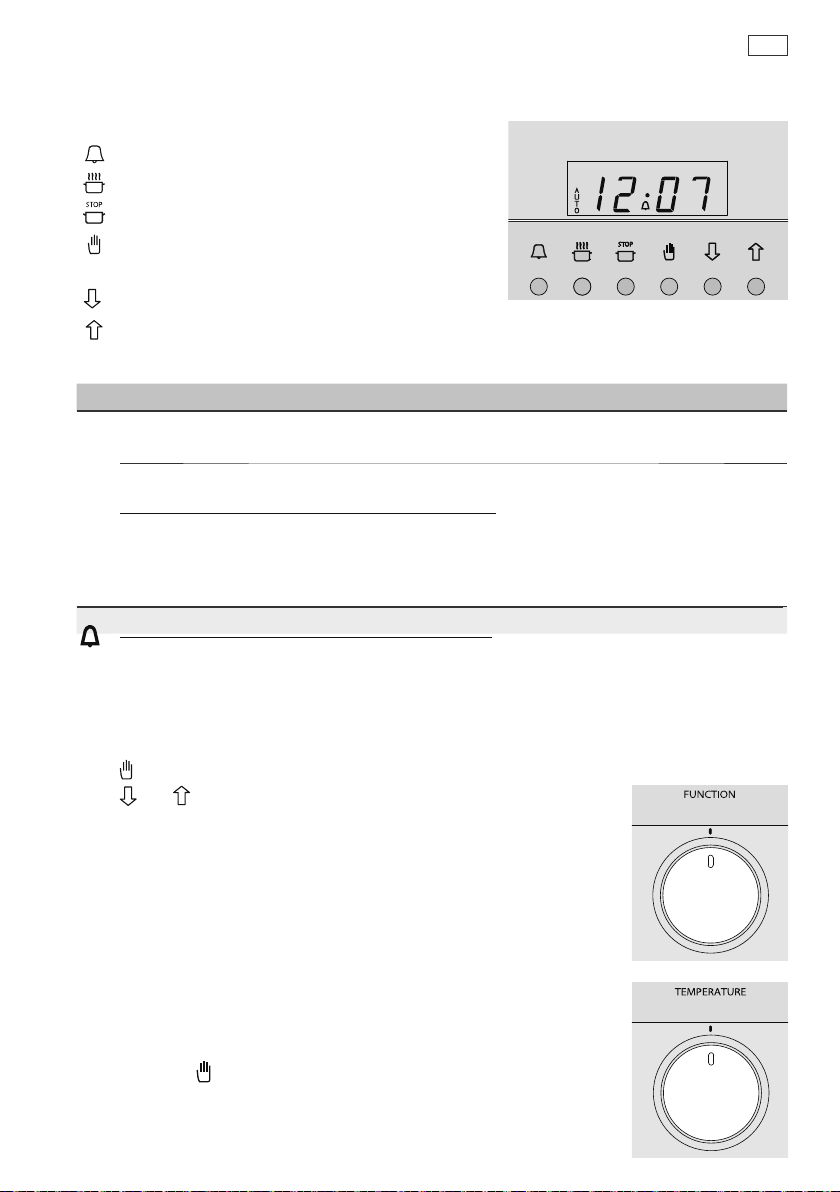
Fig. 20 Clock display and
control buttons
Buttons
sets the timer
sets the cooking time for automatic cooking
sets the stop time for automatic cooking
sets the clock, returns oven to manual mode,
cancels automatic cooking
decreases time and beep volume
increases time
Illuminated symbols
To set the clock
When the power to the oven is turned on or restored after a power failure, 0
.
00 and AUTO will
flash in the display.
1
Press
.
2
Press and until you have the correct time of day.
Oven controls
1
Select the function using the function knob. The oven lights will come on.
2
Select the temperature using the temperature control knob. The oven
temperature indicator light, above the temperature knob on the control
panel, will glow until the oven has reached the set temperature, and
then it will go out.
3
When you have finished cooking, turn the function and temperature
control knobs to the off O position.
Note: press the
button if
AUTO is flashing or steadily illuminated.
If the display shows It means that... For more information
A
U
T
O
flashing with
0
.
00
The clock needs to be set. See instructions below.
steadily lit
The oven is set for automatic
cooking.
See section ‘Automatic cooking’
flashing and
beeping
Automatic cooking has finished
or has been set incorrectly (the
stop time is before the time of
day).
steadily lit The timer is set.
See section ‘Using the electronic timer’
flashing and beeping The set time is up.
Oven controls and setting the clock
Fig. 21 Function knob
Fig. 22 Temperature knob
Loading ...
Loading ...
Loading ...