Loading ...
Loading ...
Loading ...
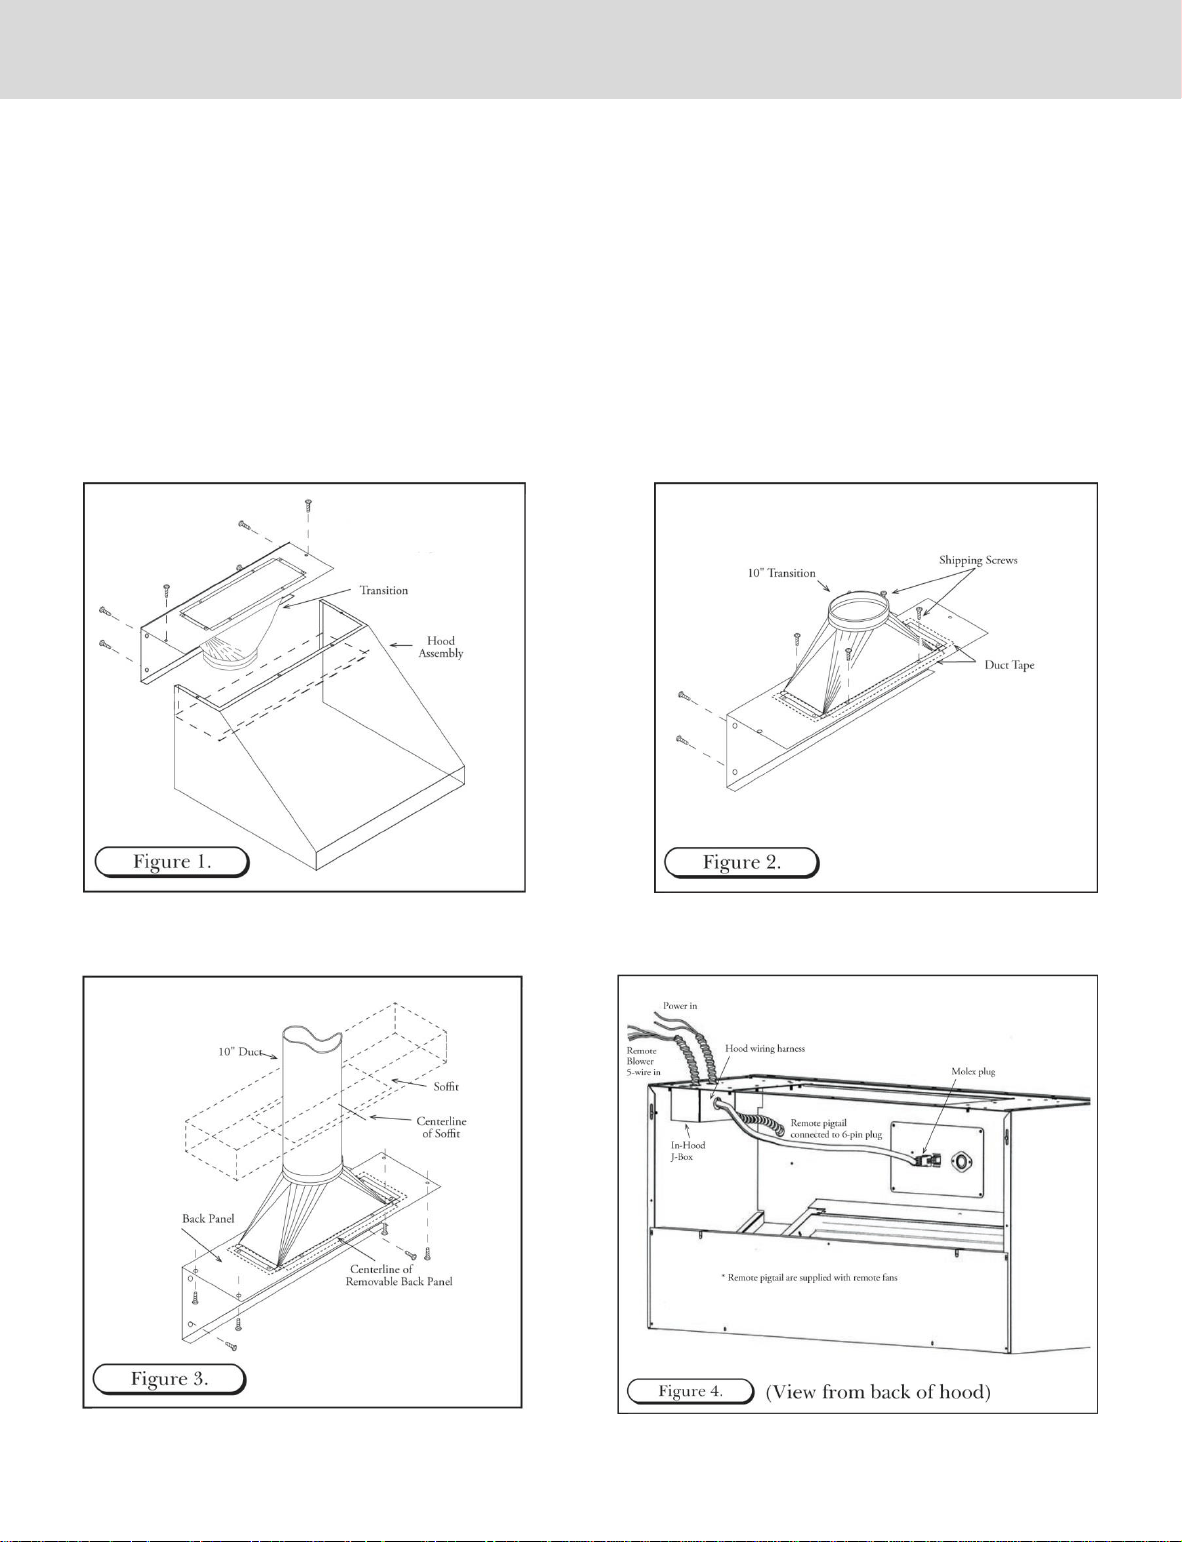
1. The hood is shipped with the back panel and the transition. (Note: The transition is shipped upside down
within the hood and can be flipped for rear discharge if desired. It must be removed then reinstalled – See
Figures 1 though 3)
2. Detach the transition from the back panel removing four (4) screws. These shipping screws are needed for
re-attaching the transition to the back panel.
3. Secure the transition to the top of the back panel, using the four (4) screws provided. Use duct tape to seal
the joints of the transition and the top of the back panel. (See Figure 2)
4. Secure the back side of the hood to wall stud following building code in your area. (See Figure 3)
WALL HOOD INSTALLATION
5
Loading ...
Loading ...
Loading ...