Loading ...
Loading ...
Loading ...
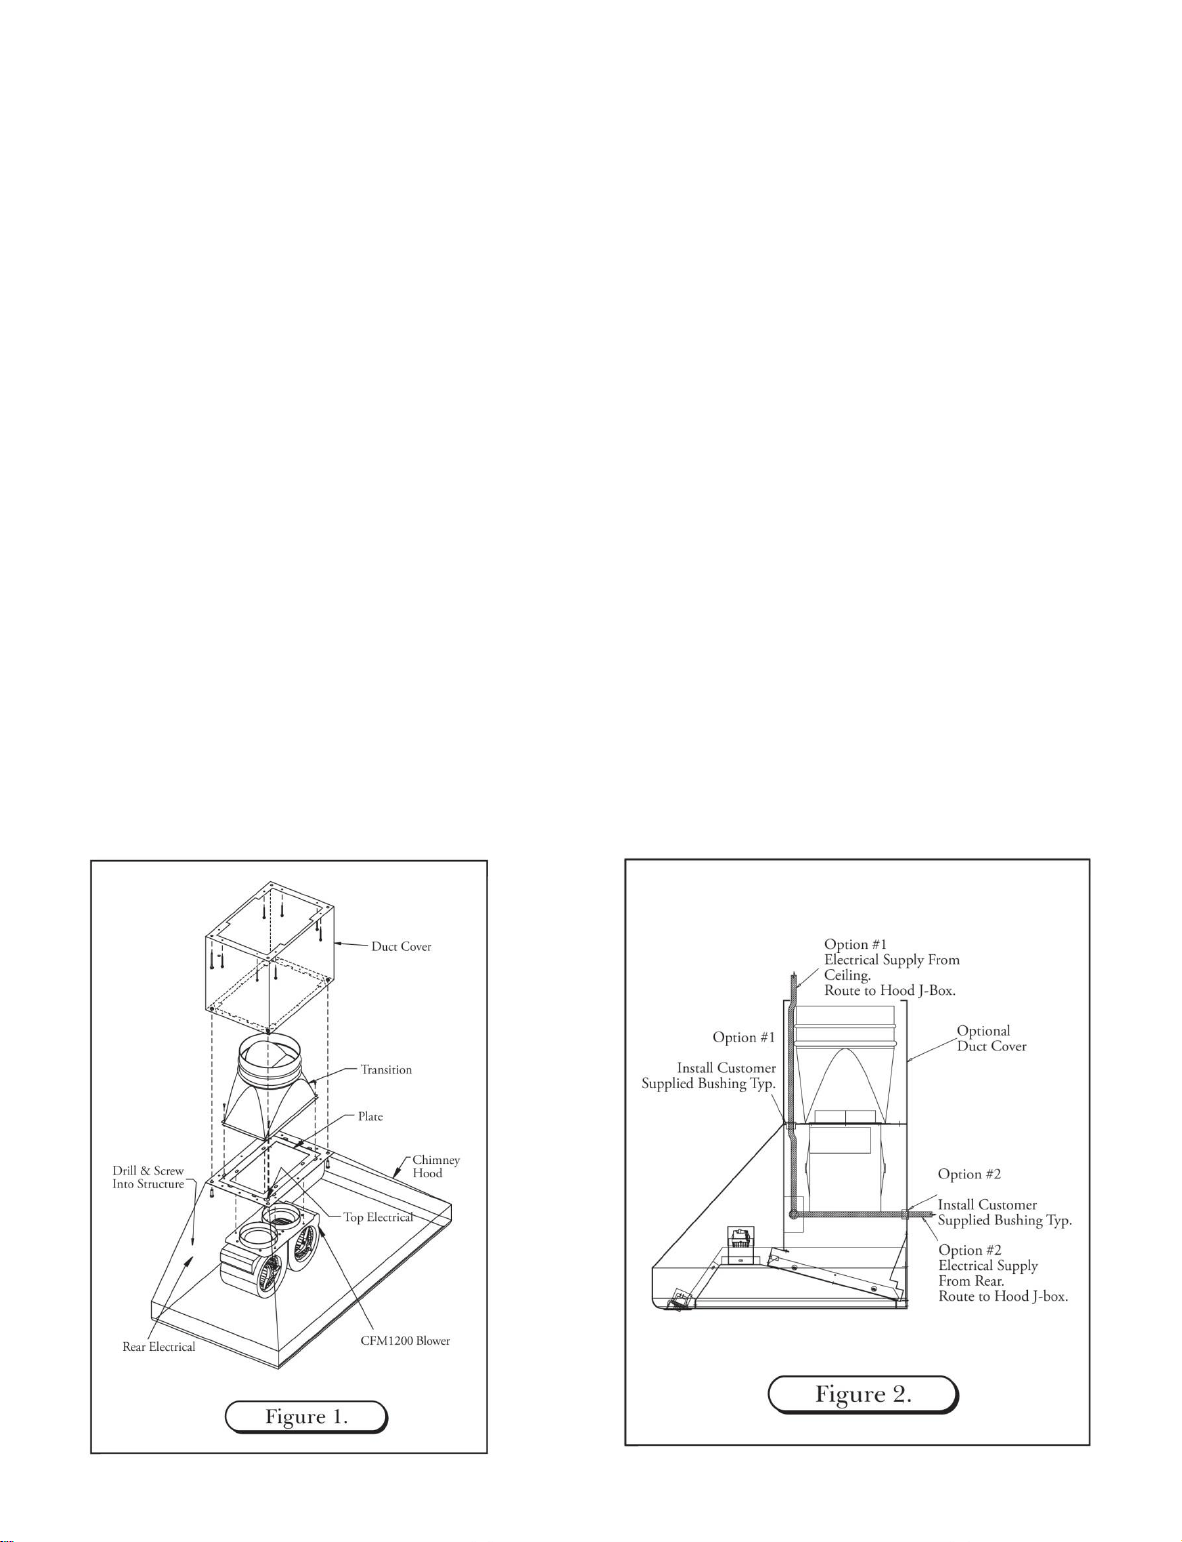
INSTALLING CHIMNEY STYLE HOODS
1. Position the Chimney Hood on its back and
locate the transition inside the Chimney Hood;
remove the (4) #8 x ½” self tapping screws at the
top of the hood which hold the transition to the
hood (save these screws for later use), separate
the transition from the hood base and duct cover.
2. Install the transition to the duct work ensuring the
bottom of the transition is centered and flush with
the bottom of the duct cover. Check the position
of the transition by sliding the duct cover over the
mounted transition. Verify that the transition is
flush, and centered to the bottom of the duct
cover. When transition installation is complete,
be sure to check that the damper is not hindered
from opening if using mechanical fasteners. (See
Figure 5)
3. Run electrical supply from rear or top location of
hood to hood J-Box(See Figure 2)
4. Install the duct cover to the top of the hood using
the 12 – 24 self tapping 7/8” length screws. Also
bolt the hood to the duct cover using the supplied
stainless steel 3/8” bolts.
5. Before hanging the hood, drill holes in the back
of the hood, if necessary, to line up with the
structural studs in the wall. Also, be prepared
when hanging the hood to feed the electrical
either through the top down, or use the hole
provided in the back. You may drill a hole in the
back, if necessary, to accommodate the electrical.
(See Figure 2)
6. Slide the hood up the wall with the transition
sliding inside the duct cover, then secure the hood
to the back wall (drilling through the back of the
hood to locate studs). Use the #10 x 2” long self-
tapping screws to secure the hood to the wall
structure. (See Figure 6)
7. Once the hood is secure, attach the transition to
the rectangular plate at the junction of the hood
and duct cover with the screws that were
removed from the transition. (See Figure 6)
28
Loading ...
Loading ...
Loading ...