Loading ...
Loading ...
Loading ...
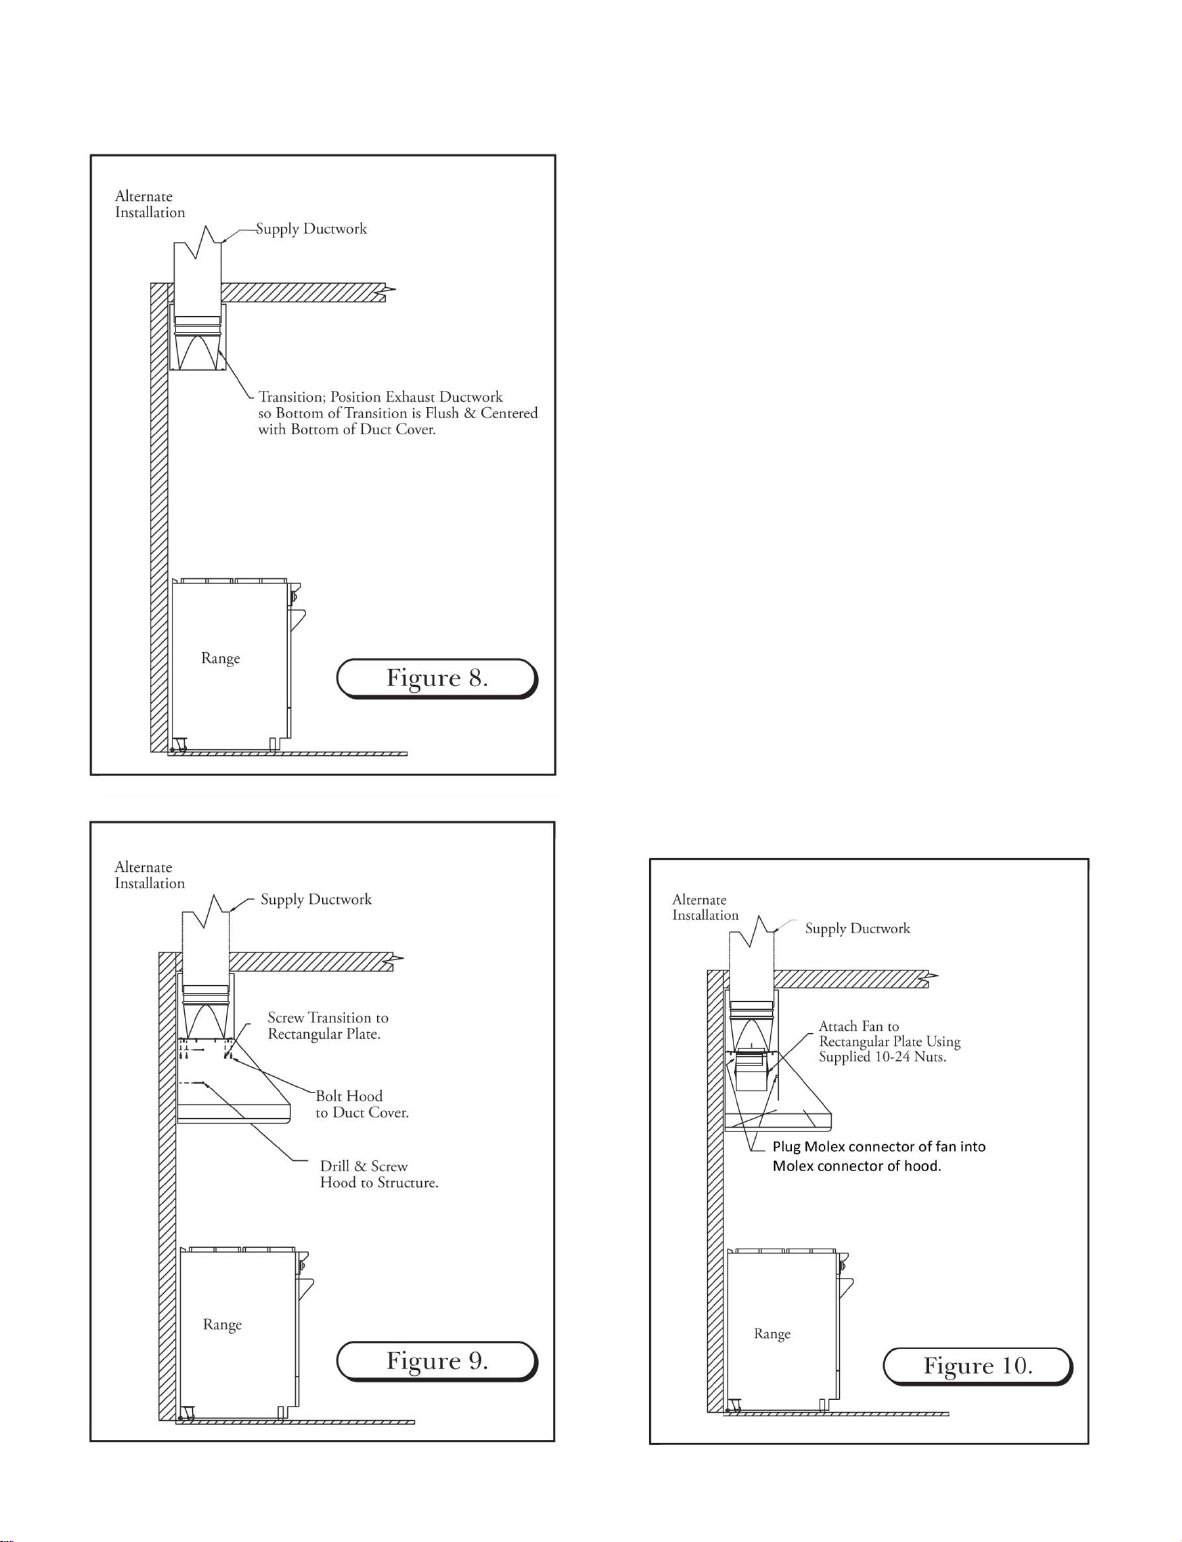
ALTERNATE INSTALLATION FOR A CHIMNEY STYLE HOOD
In certain situations the installer may opt for a different
installation sequence. The alternate sequence is listed
below.
1. Drill holes in back of duct cover to align with
structural members; fasten duct cover to wall using
#10 x 2” self tapping screws; attach duct cover
through ceiling opening in top of structure; if
available. (See Figure 7)
2. Install transition to ductwork, ensuring transition
bottom is centered and flush with bottom of duct
cover (in most you cases you will not be able to
mechanically fasten transition to ductwork. If
mechanical fasteners are used, apply duct tape to
hold transition in place until hood is mounted. This
may be followed by a small amount of silicone at the
connection of the transition of ductwork. (See
Figure 8)
3. Attach the hood to the duct cover. Fasten the hood
to back wall (drilling through the back of the hood
and duct cover to locate studs. (See Figure 9)
4. Continue installation with sequence #7 of standard
installation instructions.
30
Loading ...
Loading ...
Loading ...