Loading ...
Loading ...
Loading ...
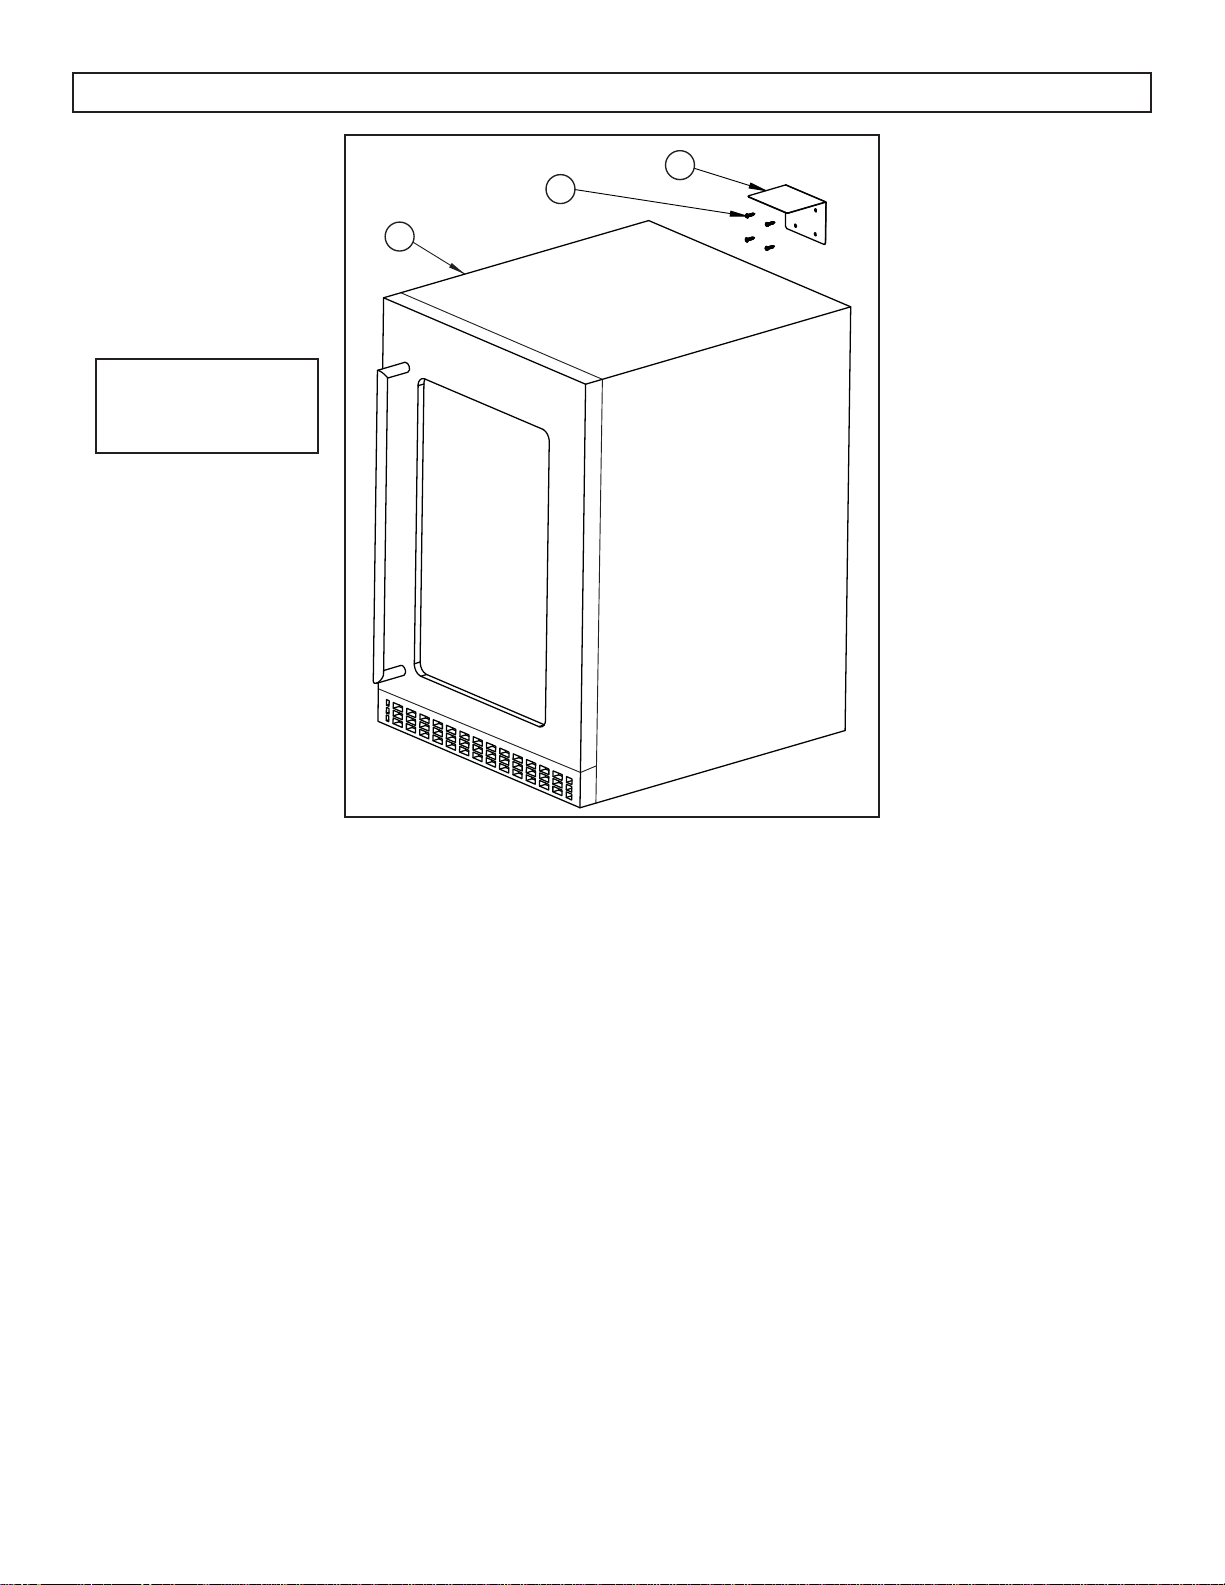
Anti-Tip Bracket Installation
This appliance is intended for built in application.
If the appliance will be used in a freestanding
application, the anti-tip bracket must be installed to
avoid personal injury, damage to the appliance or
loss of contents. If the appliance is not anchored,
fully loaded wine racks that extend 100% will cause
the unit to tip forward and create a dangerous
condition.
Place the appliance against the wall in its fi nal
install location. Place the anti-tip bracket on the
back of the appliance with one side of the bracket
against the wall. Mark the location of the anti-tip
bracket with a pencil and remove the appliance.
Attach the bracket to the wall with the provided
screws and wall anchors. Place the appliance
under the installed anti-tip bracket. The fi t should
be tight to the appliance. Check the soundness of
the installation by applying pressure to the cabinet,
ensuring that the appliance does not tip.
Leveling Instructions
Ensure that the appliance is placed in its fi nal
location. Turn the two leveling legs on bottom of the
cabinet to the right to lower the appliance and to
the left to raise the appliance.
It is recommended on fi rst installation to turn both
leveling legs to the right as far as they will go, until
the top of the feet are touching the bottom of the
cabinet. Then, gradually turn both feet to the left
until the appliance is level and at the appropriate
height.
Once complete, open the door of the appliance and
make sure that the shelves are able to move freely.
INSTALLATION
www.silhouetteappliances.com 6
1
2
3
1. Anti-Tip Bracket
2. Screws
3. Cabinet
Loading ...
Loading ...
Loading ...