User Manual Audio
BASICS
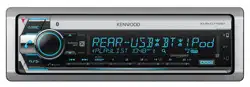
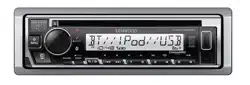
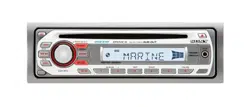
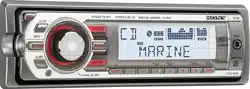
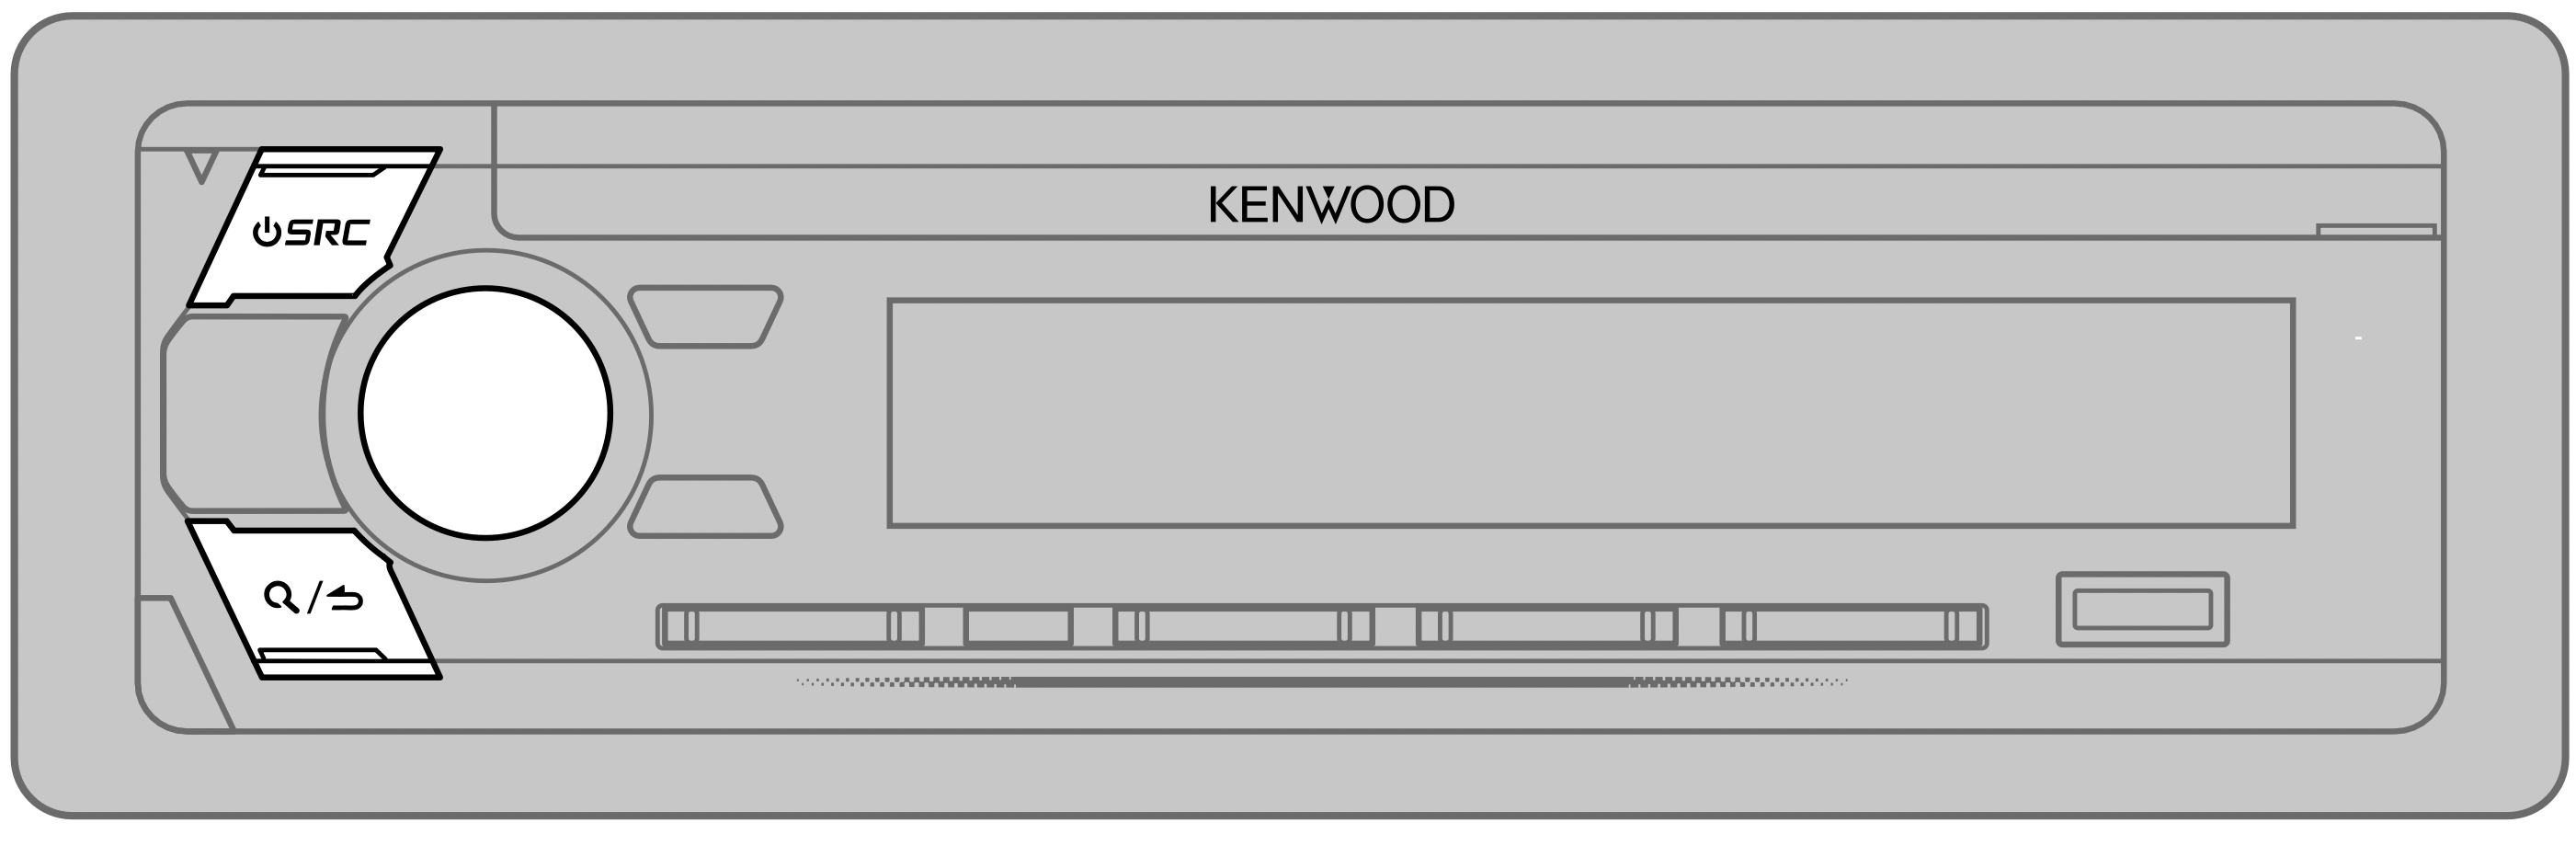
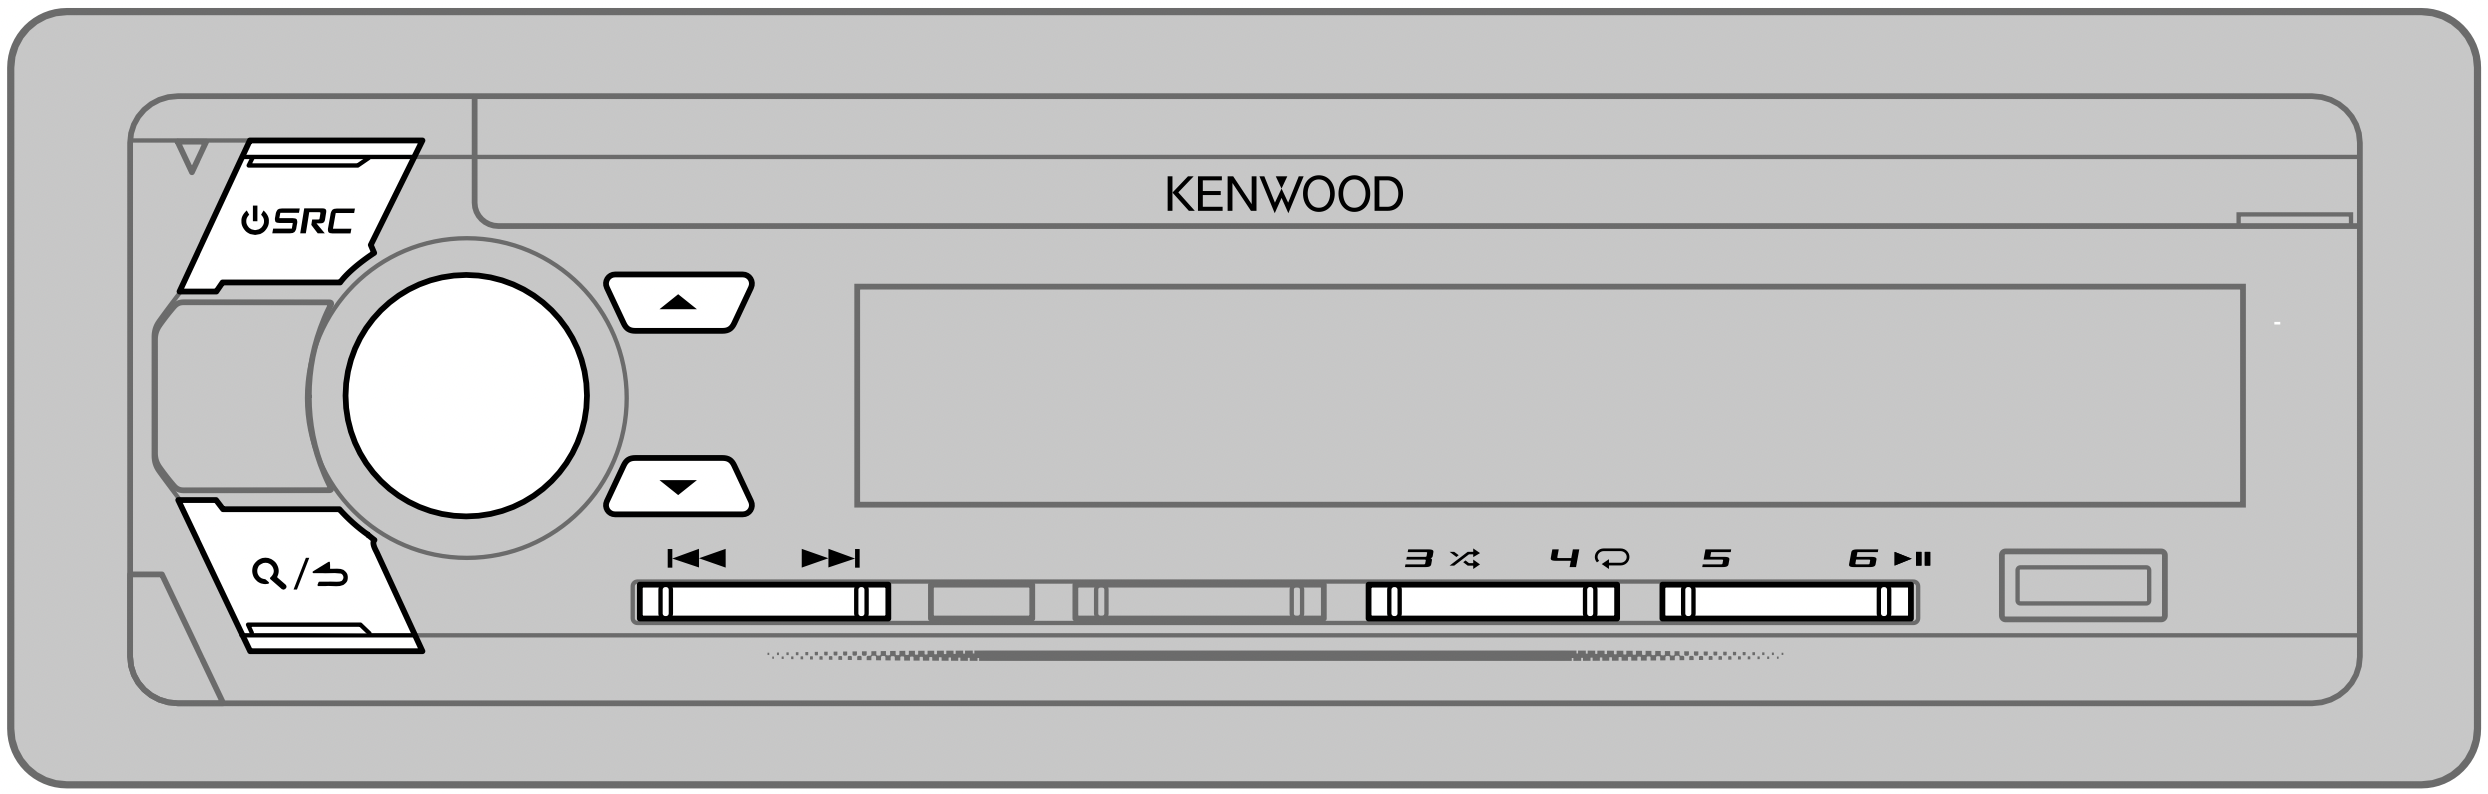
Faceplate
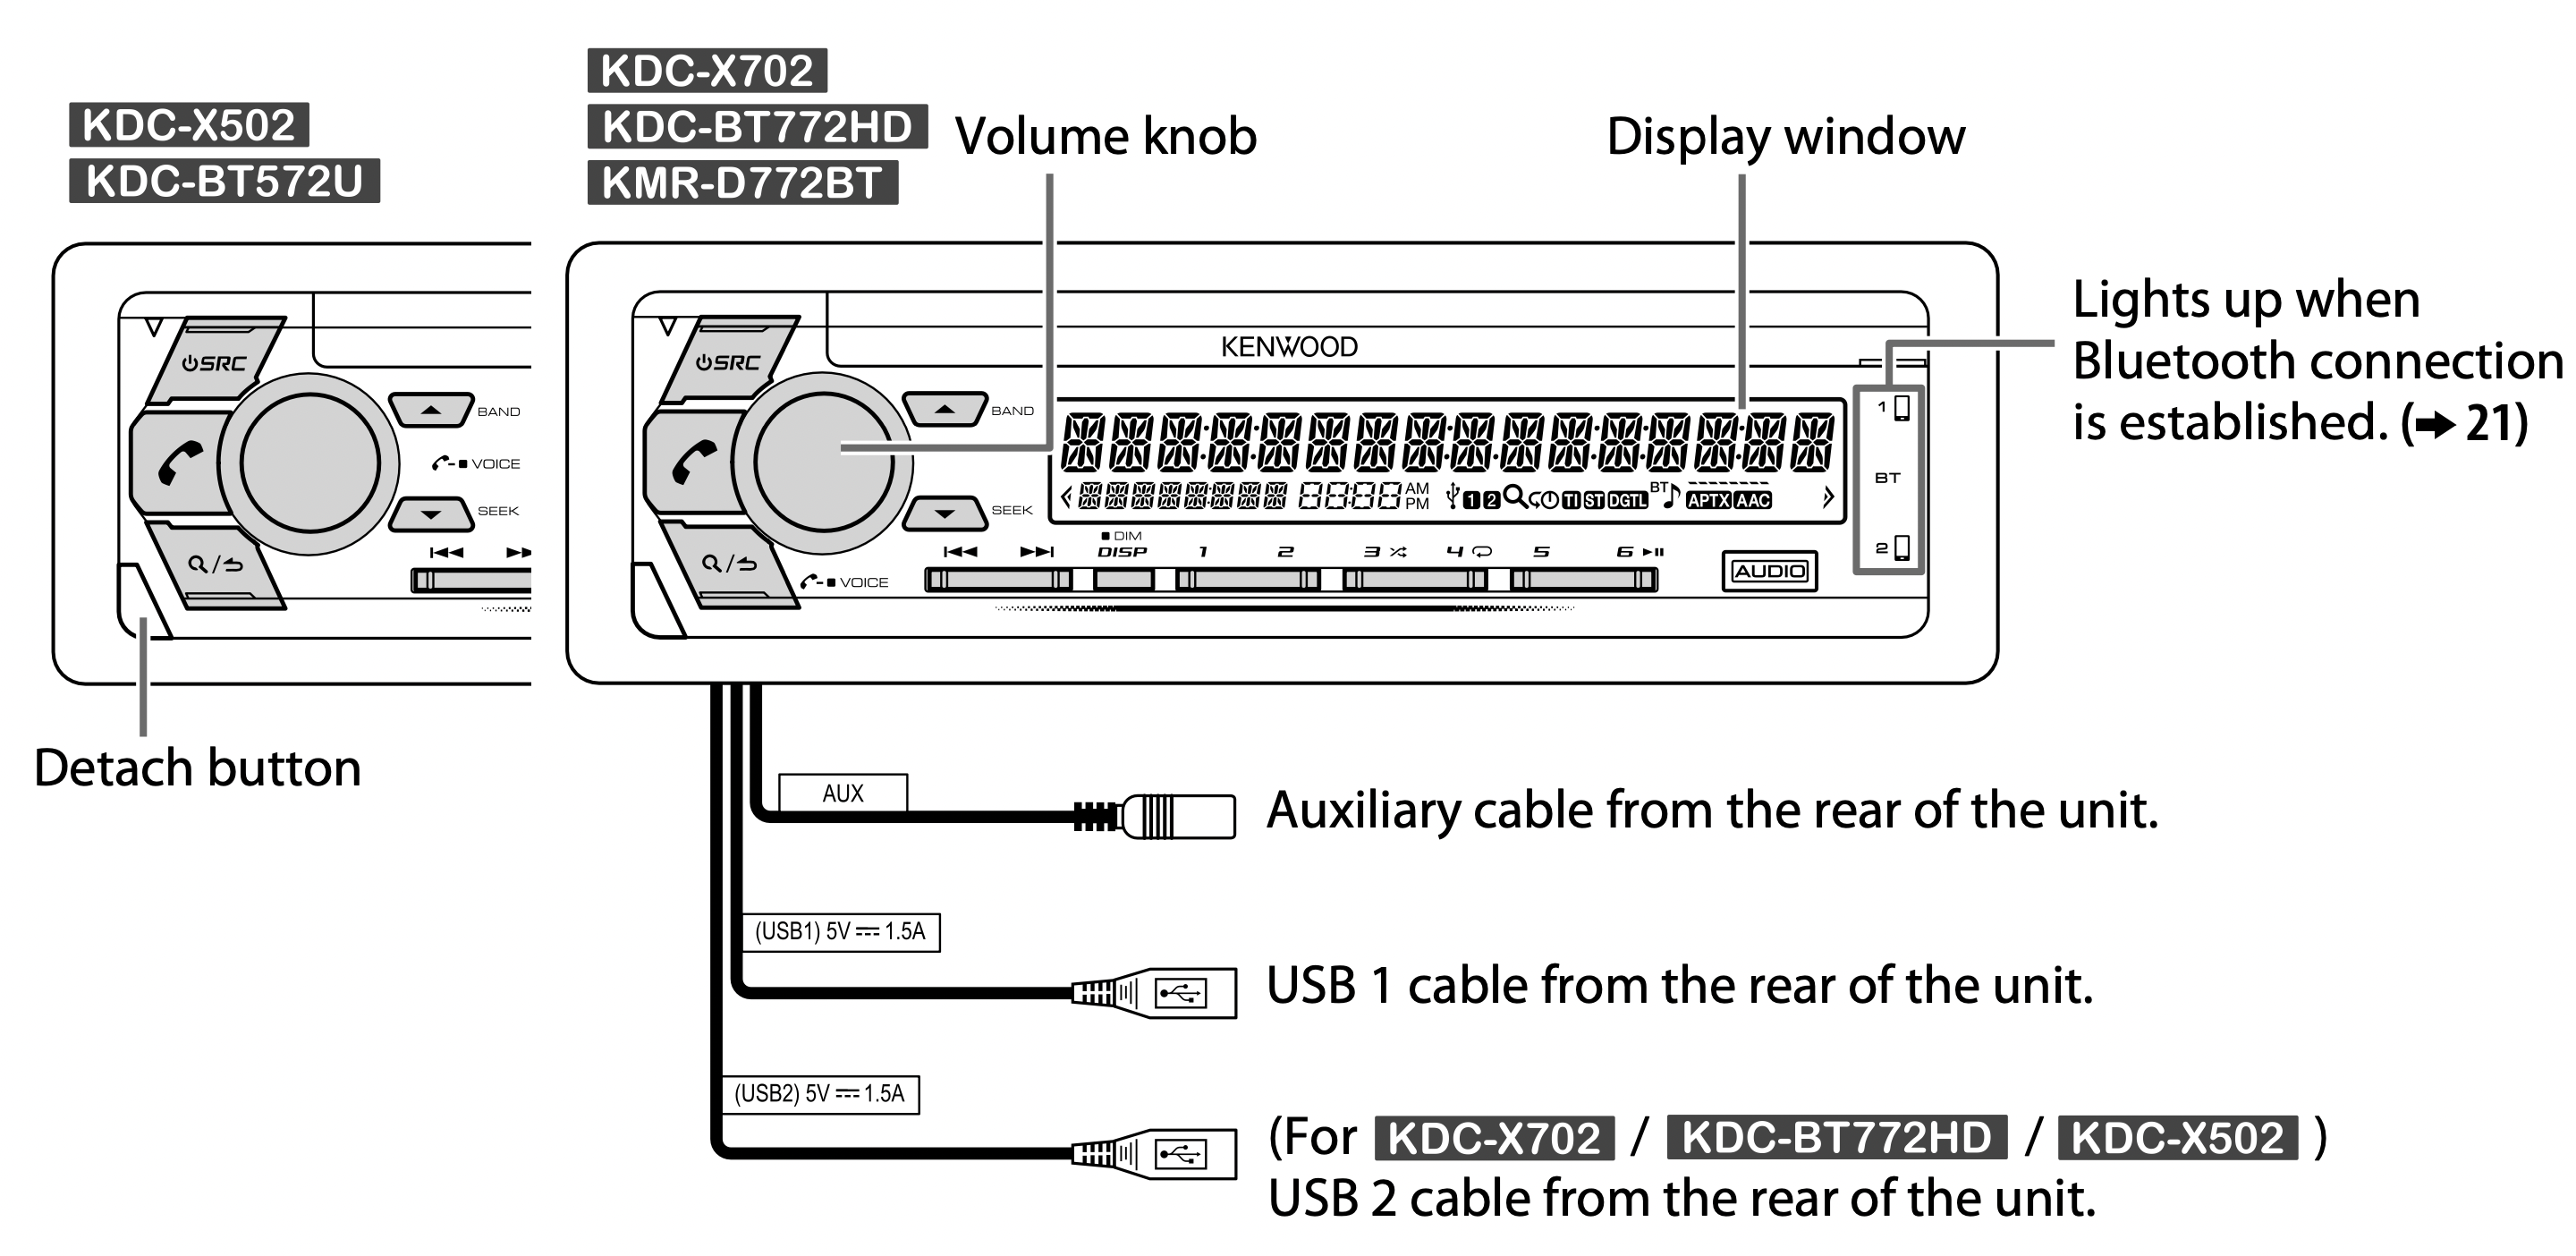
Attach

Detach

How to reset
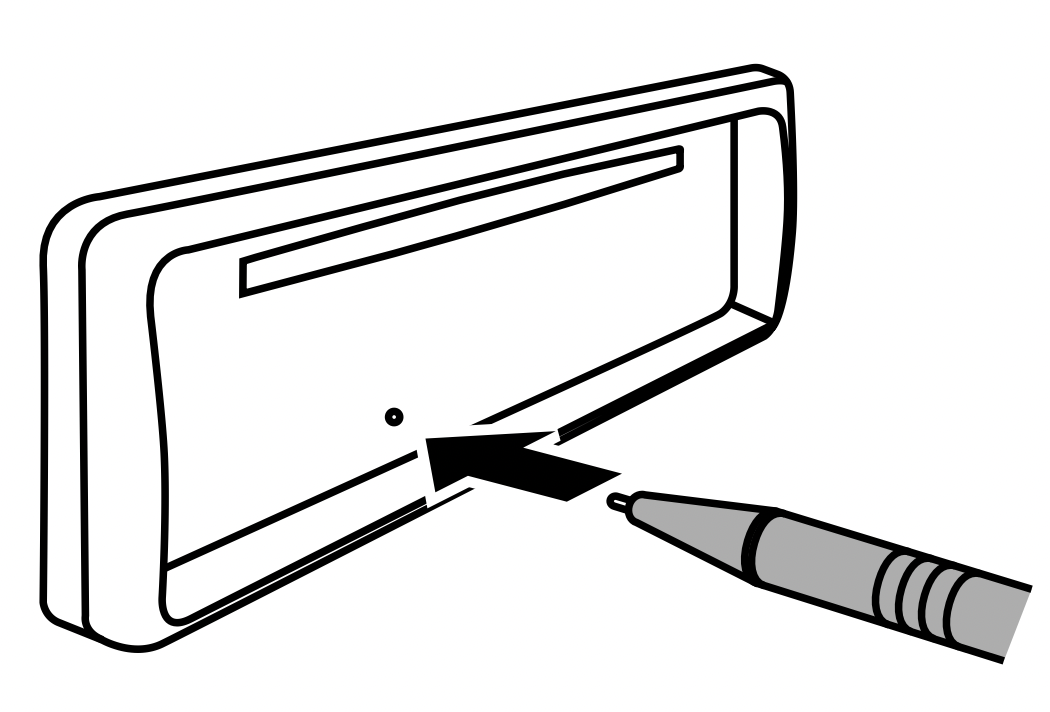
Reset the unit within 5 seconds after detaching the faceplate.
Note: The highlighted area on the faceplate flashes when the unit enters searching status.

* For KMR-D772BT: The power will automatically turn off after 20 minutes when in standby mode (Auto Power Off).
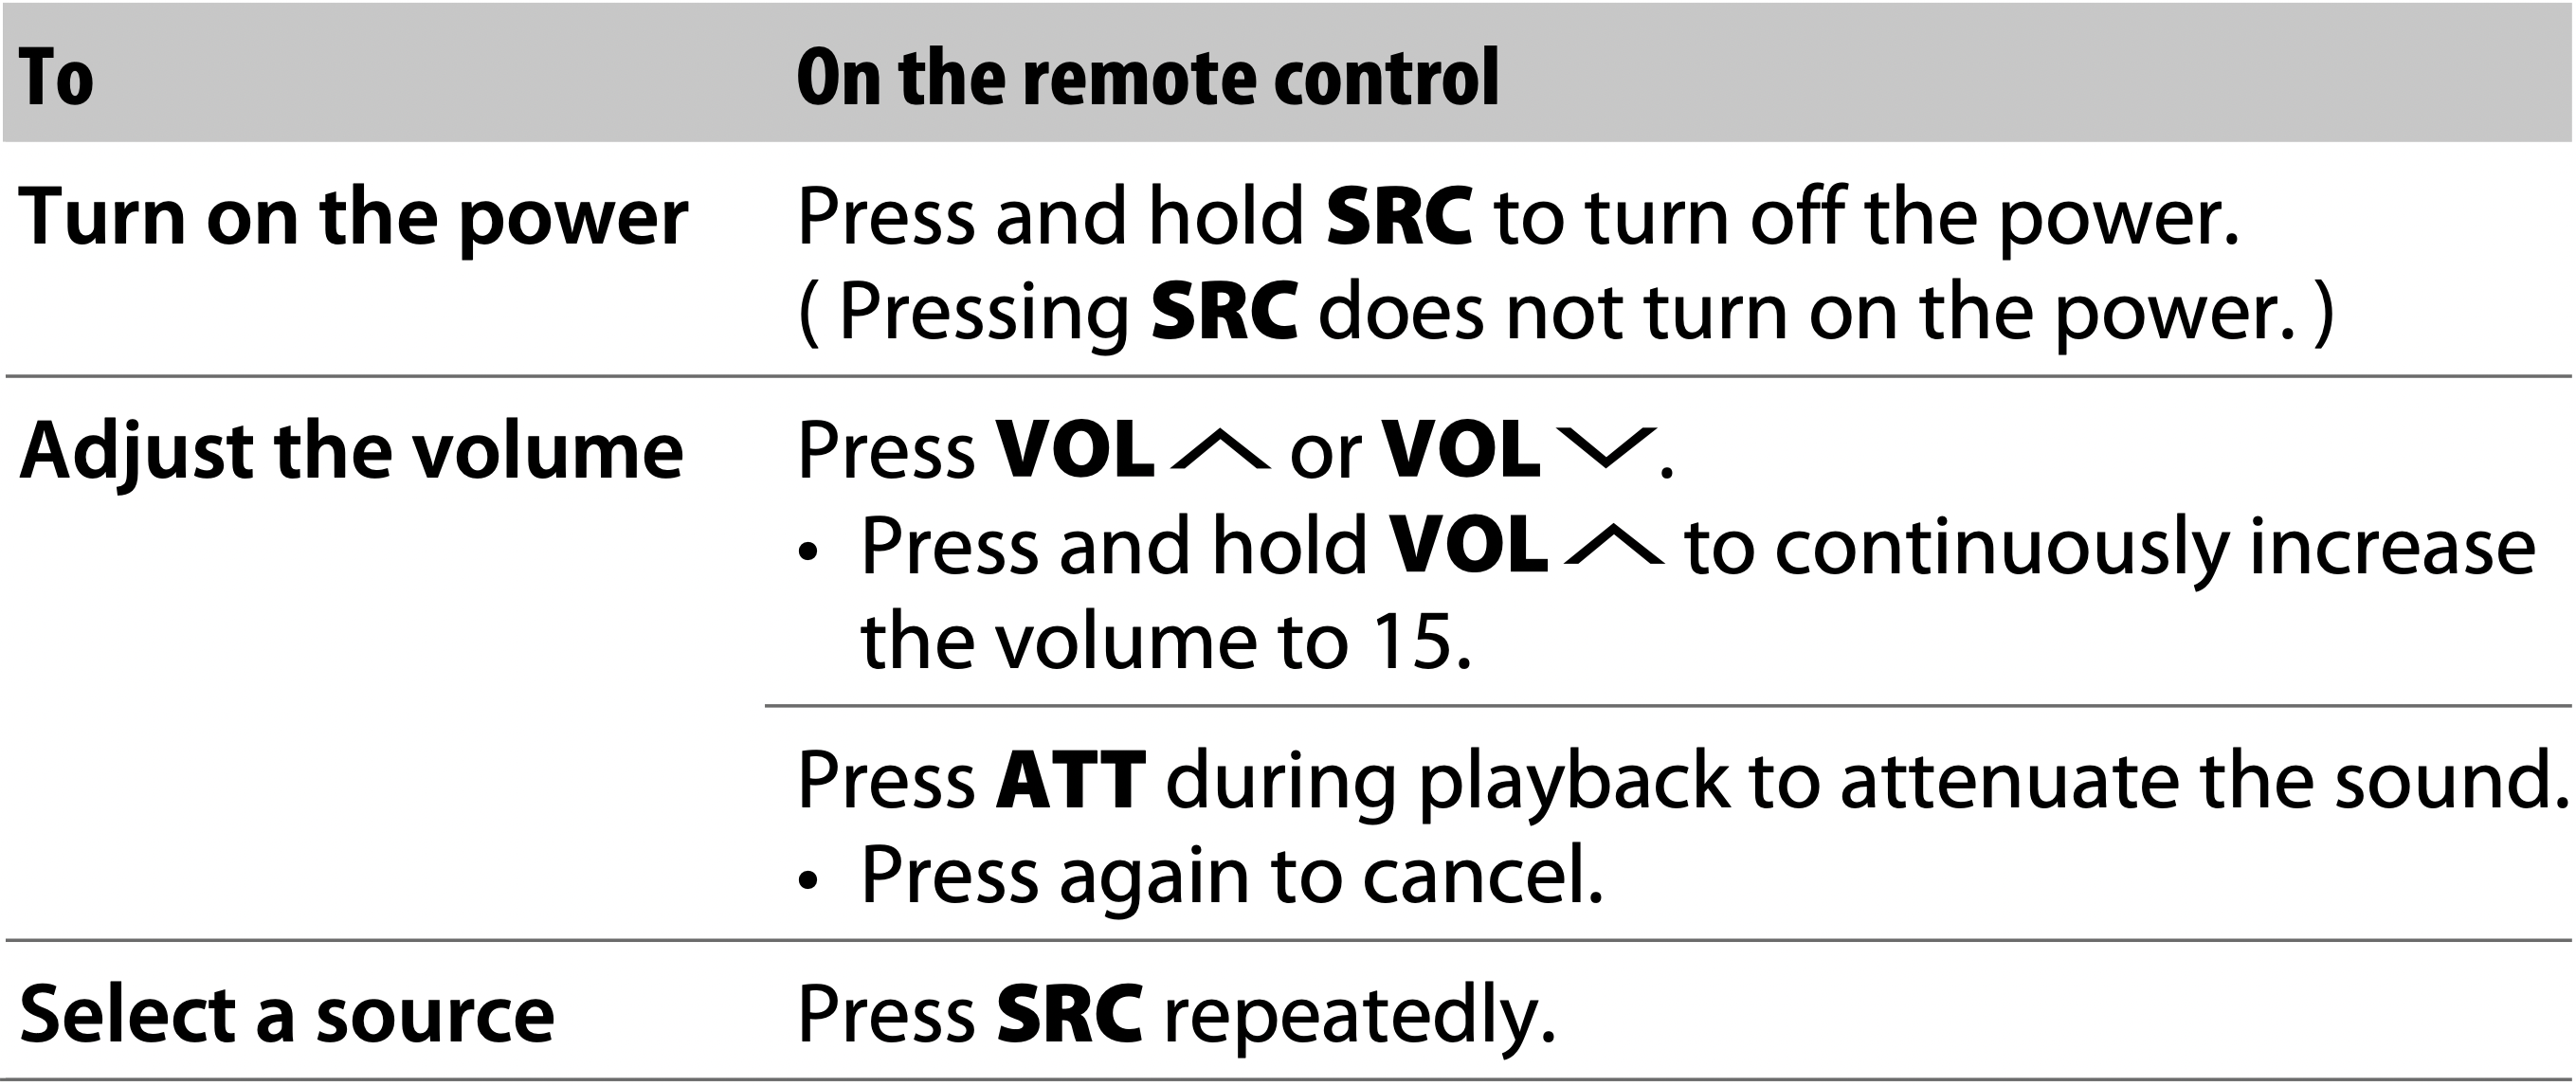
Remote control (RC-406)
This unit can be remotely controlled with an optionally purchased remote control.
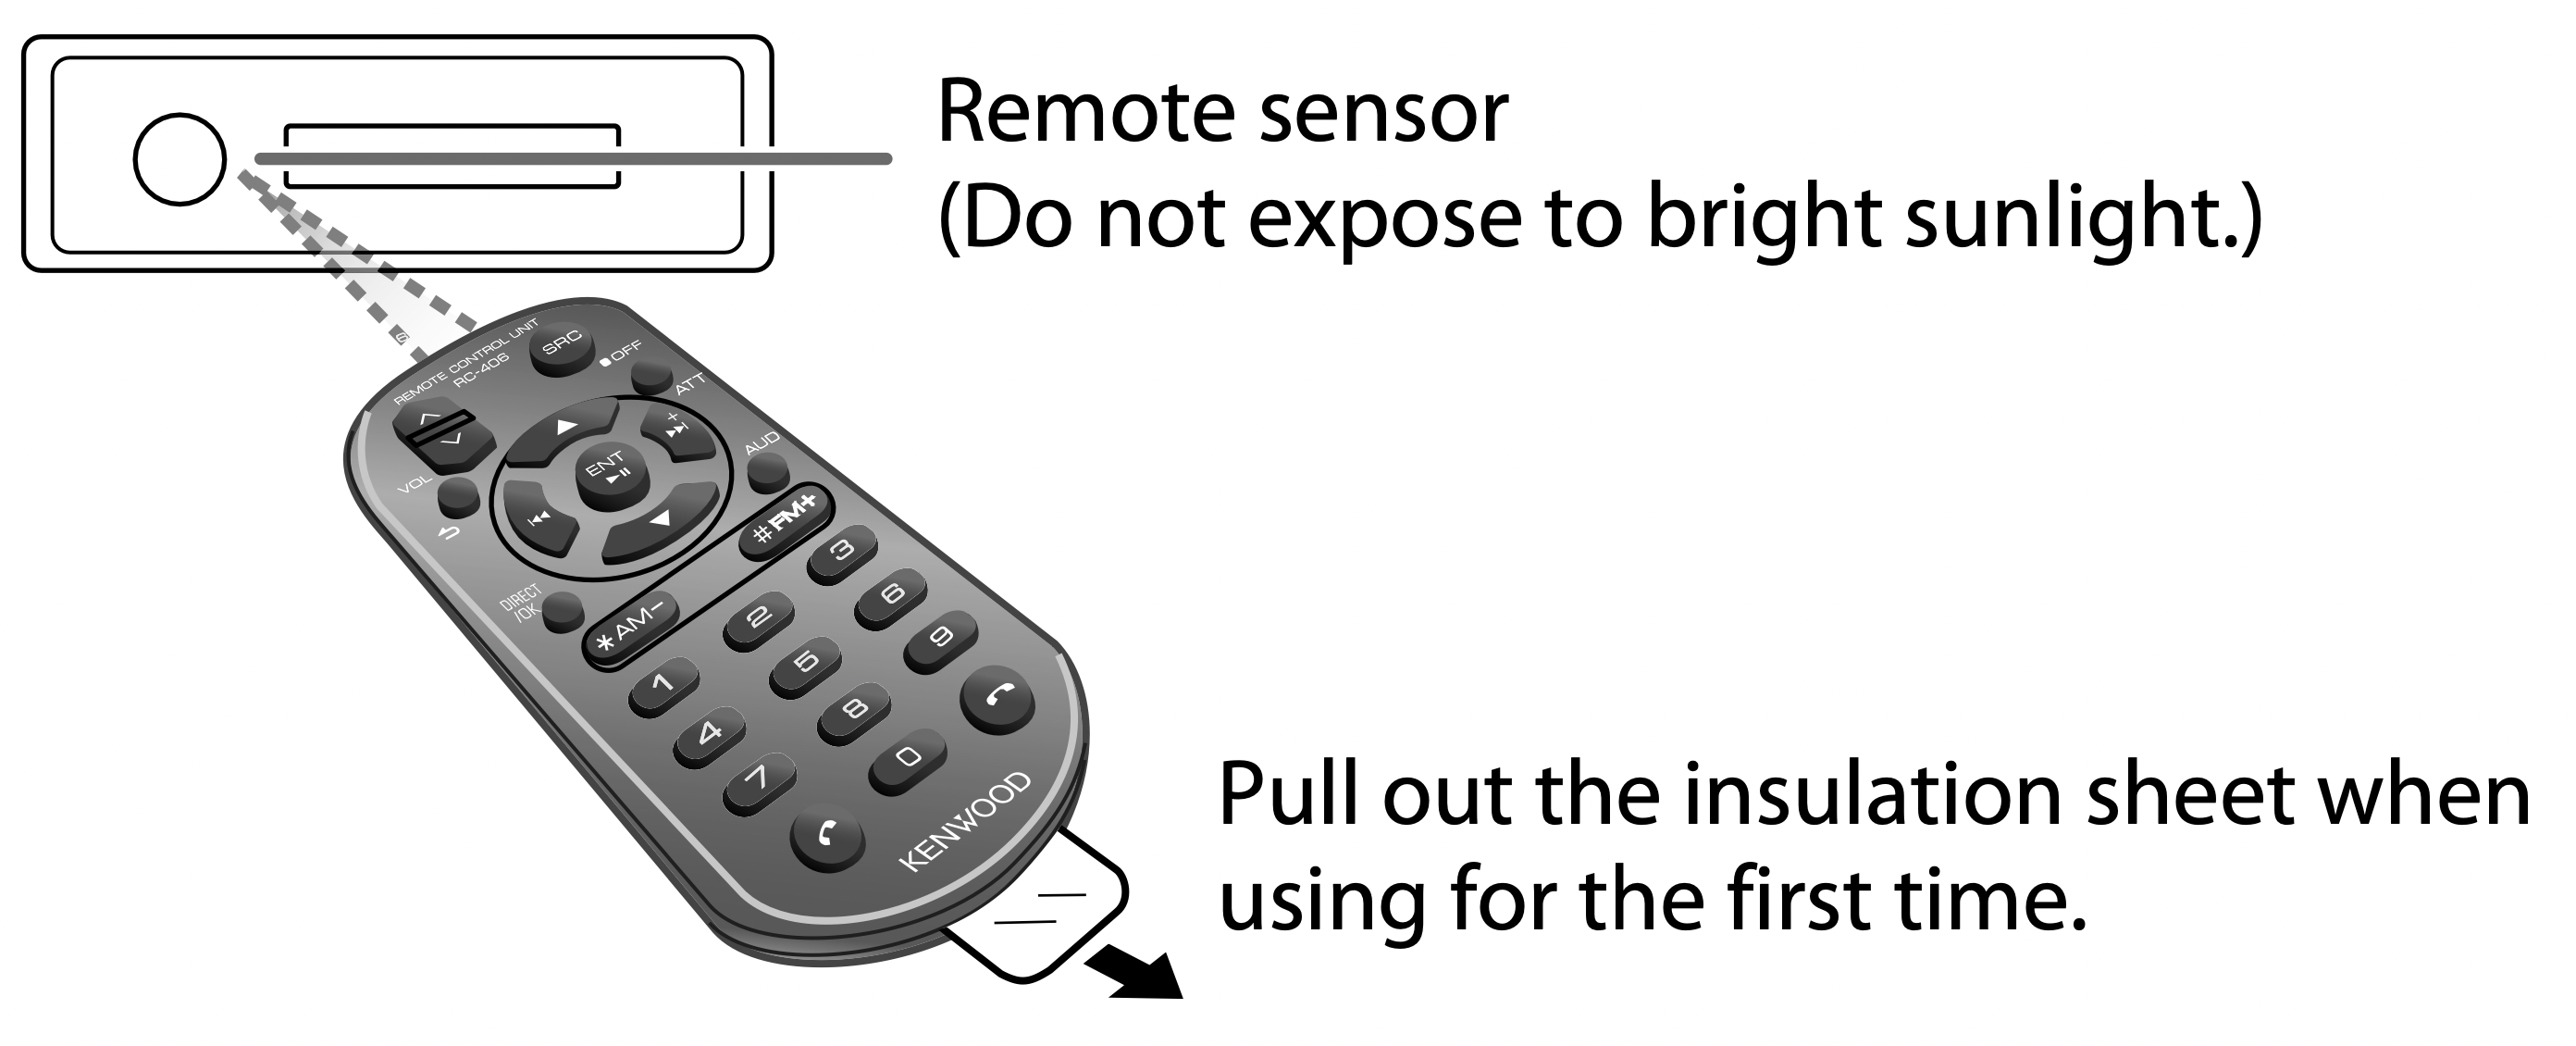
KMR-D772BT: Remote control functions are not available.
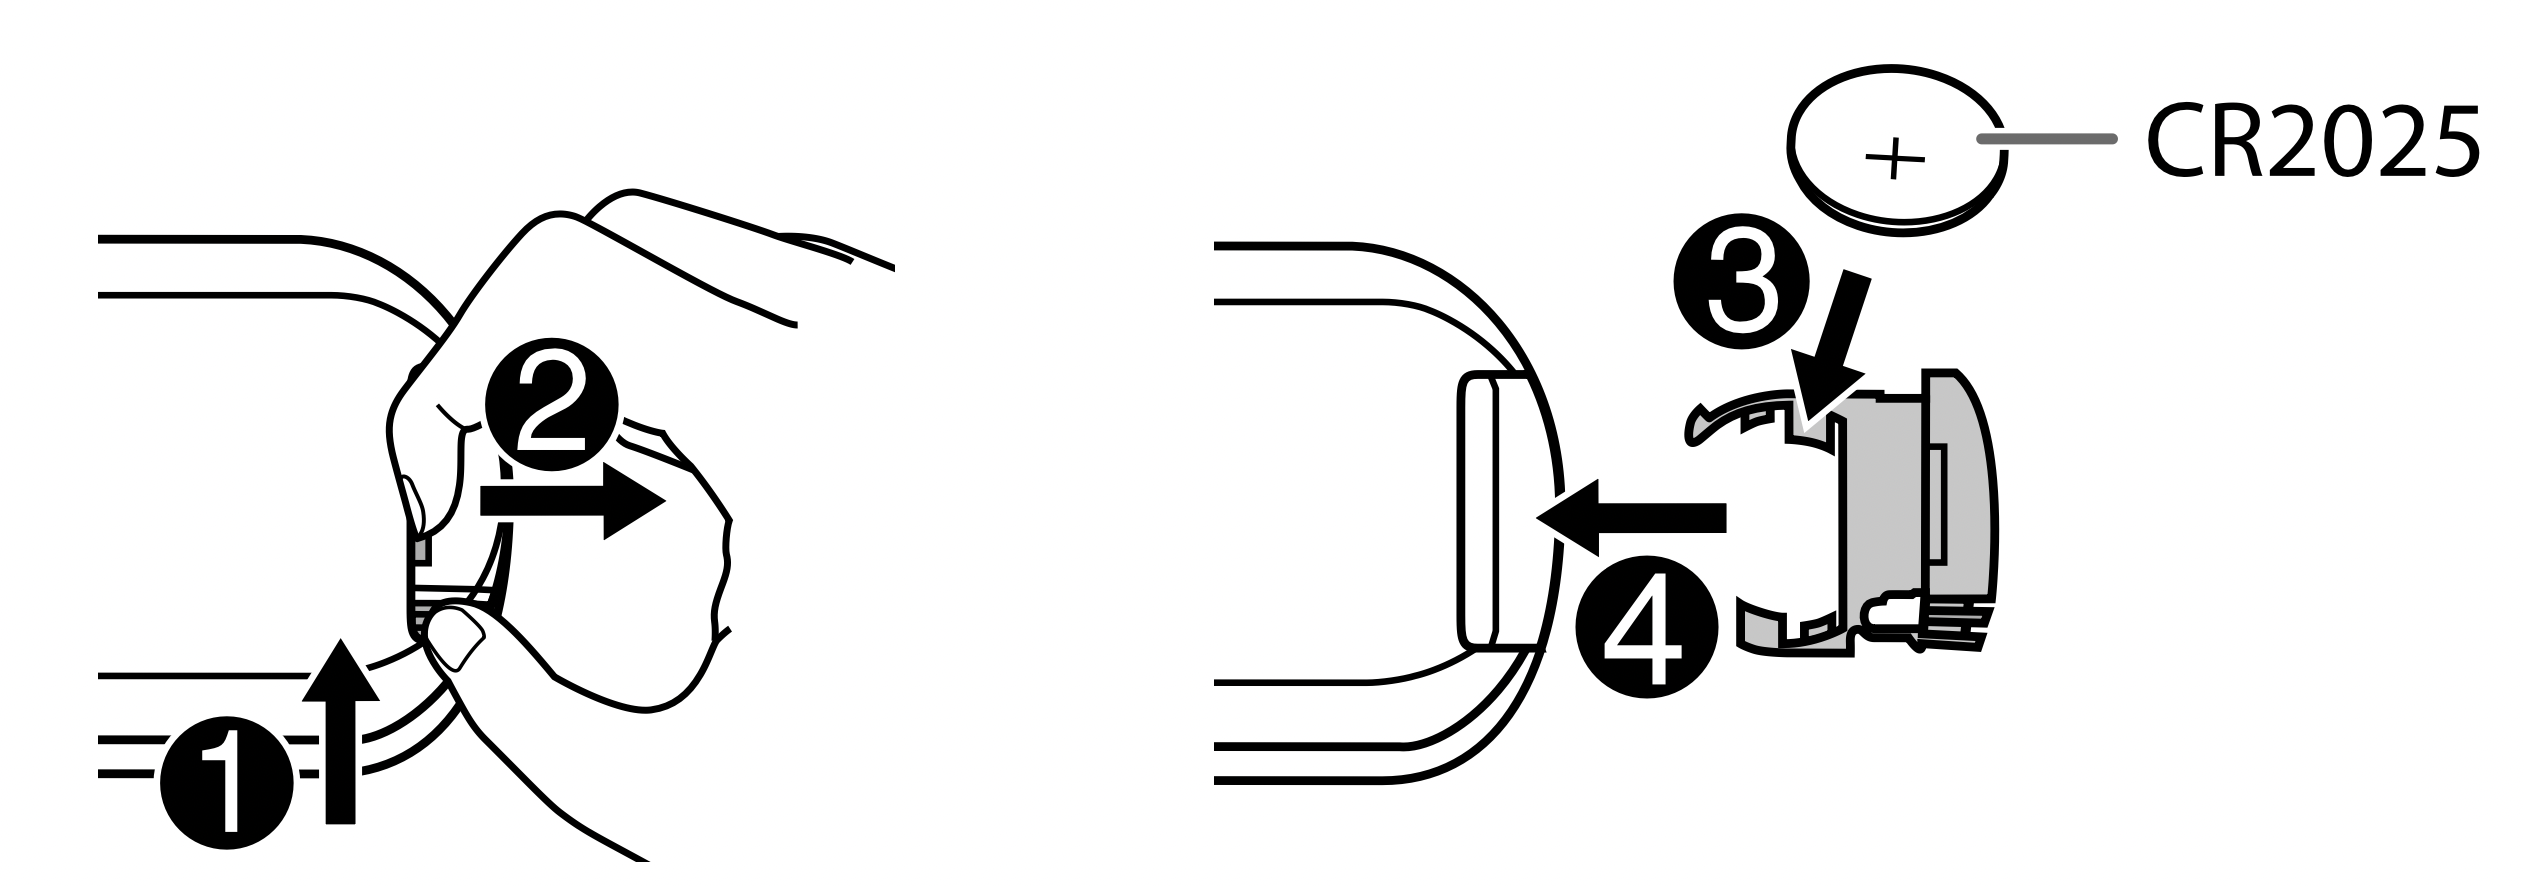
How to replace the battery
GETTING STARTED
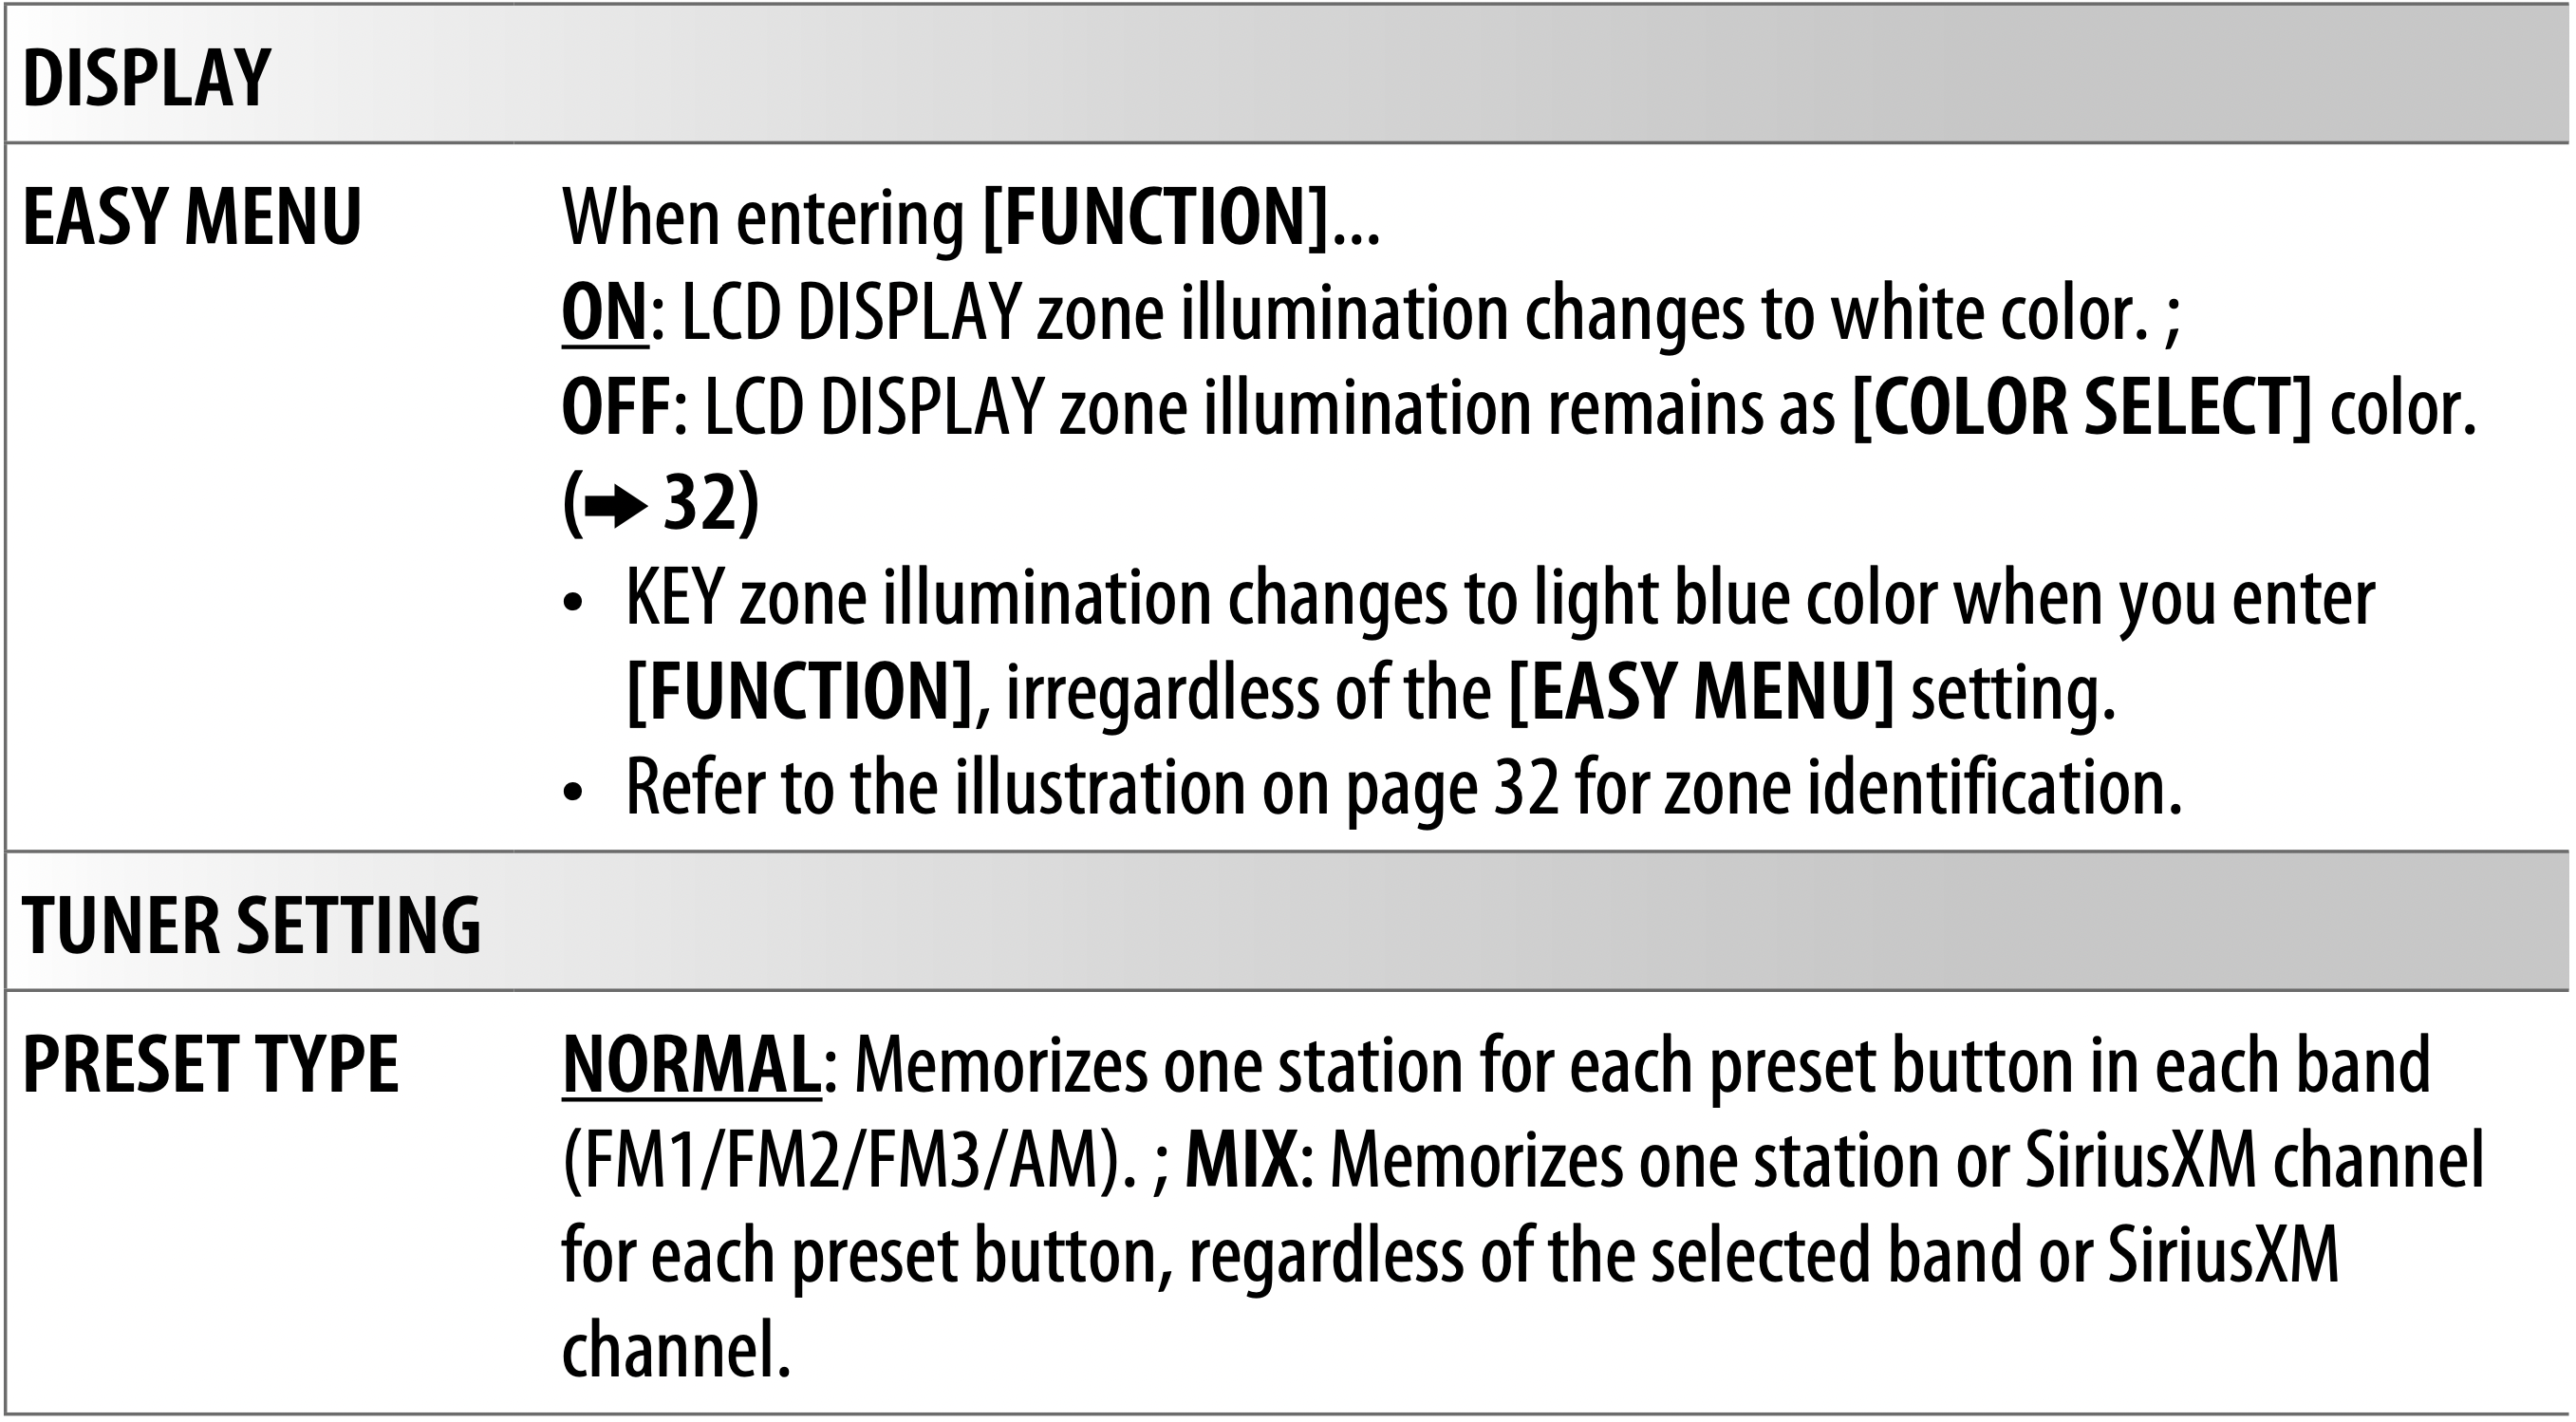
Select the display language and cancel the demonstration
When you turn on the power for the first time (or [FACTORY RESET] is set to [YES], 5), the display shows: “SEL LANGUAGE” > “PRESS” > “VOLUME KNOB”.
- Turn the volume knob to select [ENG] (English) or [SPA] (Spanish), then press the knob.
[ENG] is selected for the initial setup.
Then, (except for KMR-D772BT ) the display shows: “CANCEL DEMO” > “PRESS” > “VOLUME KNOB”.
- Press the volume knob.
[YES] is selected for the initial setup.
- Press the volume knob again.
“DEMO OFF” appears.
Set the clock and date
- Press the volume knob to enter [FUNCTION].
- Turn the volume knob to select [CLOCK], then press the knob.
To adjust the clock
- Turn the volume knob to select [CLOCK ADJUST], then press the knob.
- Turn the volume knob to make the settings, then press the knob.
Hour > Minute
- Turn the volume knob to select [CLOCK FORMAT], then press the knob.
- Turn the volume knob to select [12H] or [24H], then press the knob.
To set the date
- Turn the volume knob to select [DATE FORMAT], then press the knob.
- Turn the volume knob to select [DD/MM/YY] or [MM/DD/YY], then press the knob.
- Turn the volume knob to select [DATE SET], then press the knob. 10 Turn the volume knob to make the settings, then press the knob.
Day > Month > Year or Month > Day Year
- Press and hold
 to exit.
To return to the previous setting item, press  .
.
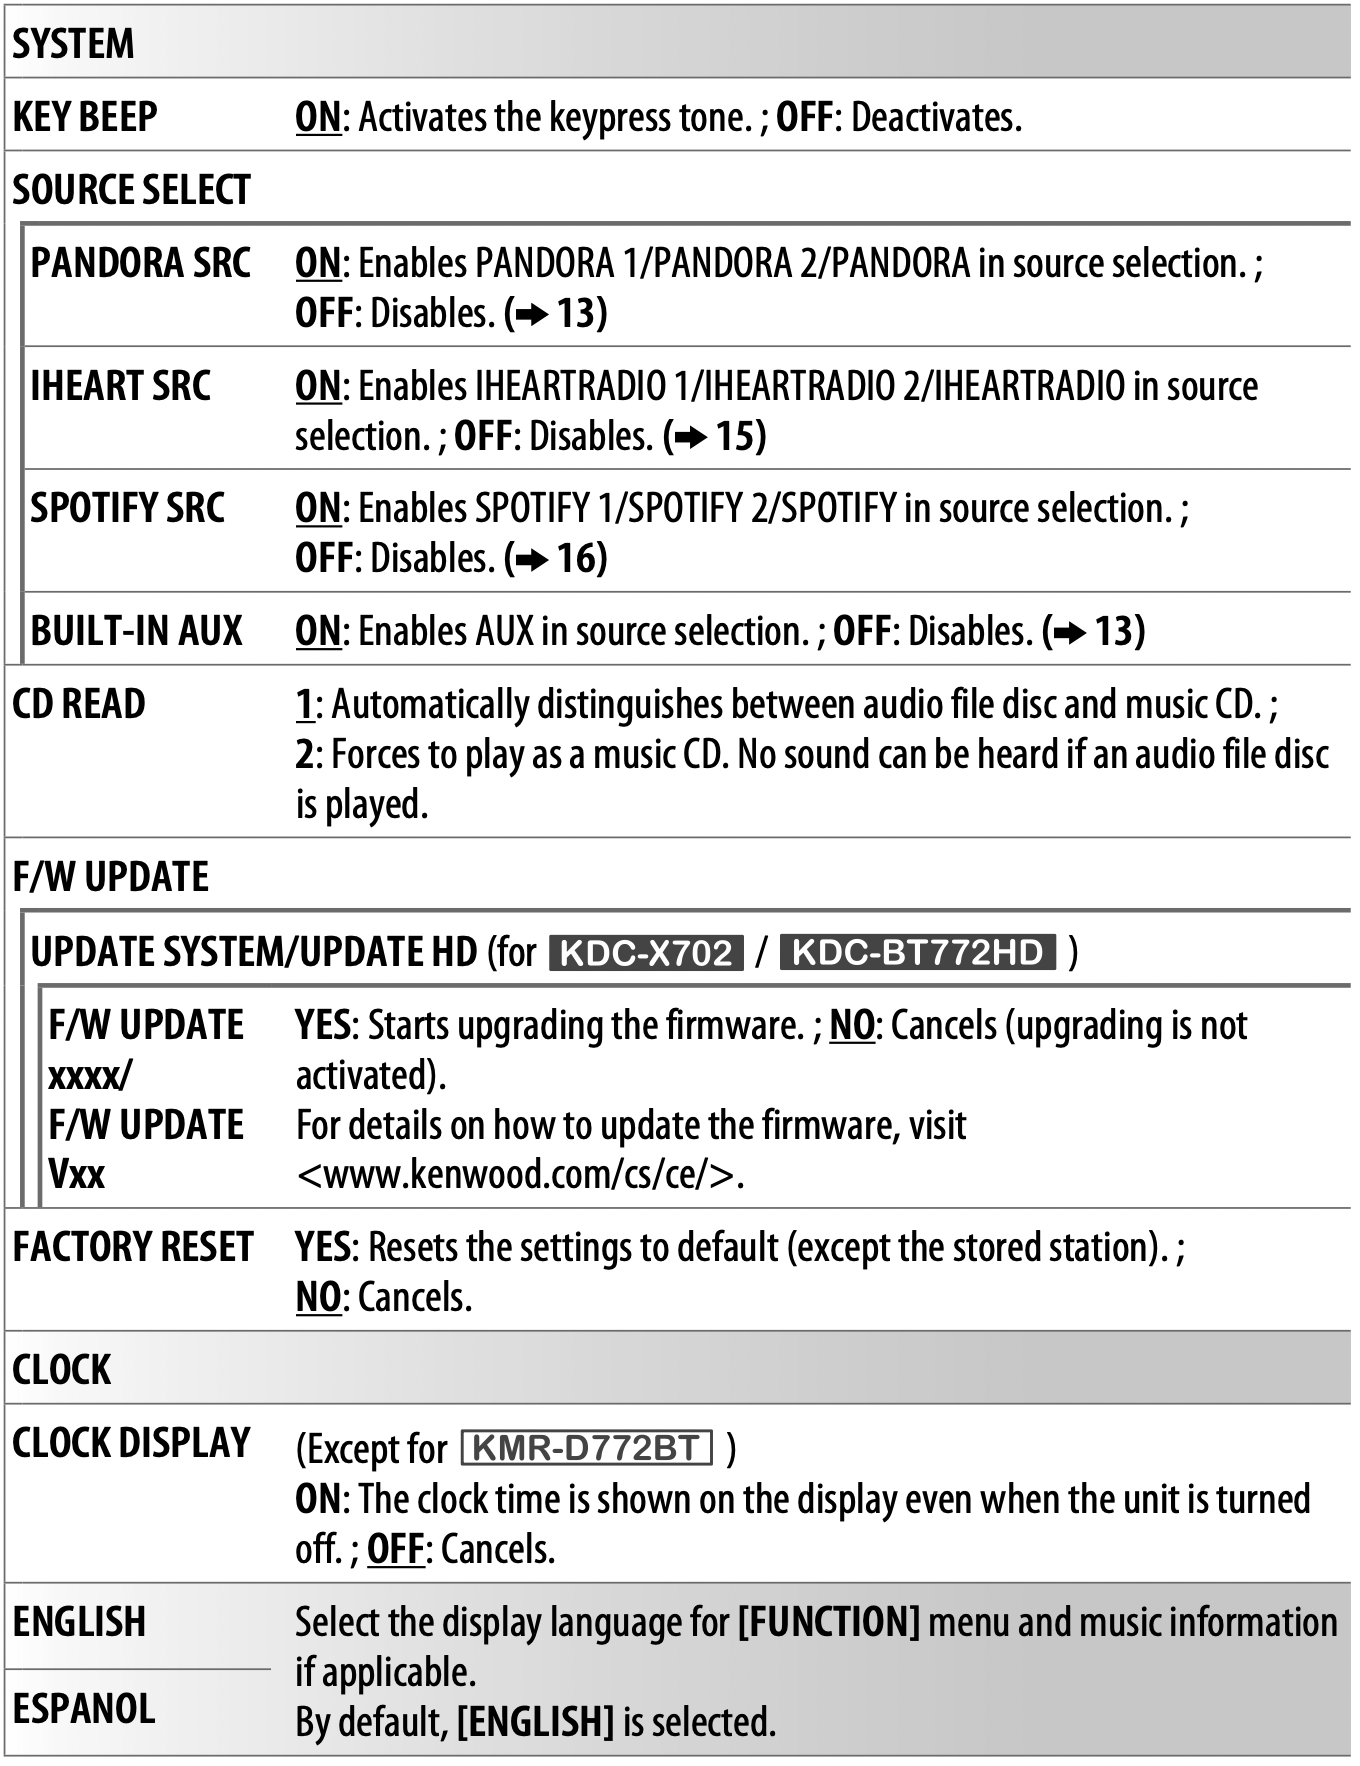
Set the initial settings
- Press
 SRC repeatedly to enter STANDBY.
- Press the volume knob to enter [FUNCTION].
- Turn the volume knob to select an item (see the following table), then press the knob.
- Repeat step 3 until the desired item is selected or activated.
- Press and hold
 to exit.
To return to the previous setting item, press  .
.
Register the marine remote ID (for KMR-D772BT)
Applicable only when you connect Kenwood Marine Remote Control unit (KCA-RC55MR, optional accessory) to this unit.
- For connection, 42, Connecting external components.
- Refer also to the supplied instruction manual of the Kenwood Marine Remote Control unit for more information.
Preparation:
Press SRC repeatedly to enter STANDBY, then press the volume knob to enter [FUNCTION].
- Turn the volume knob to select an item, then press the knob.
[SYSTEM] > [REMOTE SETTING] > [REMOTE ID SET]
Remote control ID list is displayed.
[YES] indicates that this ID is already registered.
[NO] indicates that this ID is available.
- Turn the volume knob to select an available ID [REMOTE ID1]/[REMOTE ID2]/[REMOTE ID3], then press the knob. “REGISTERING” appears on the display window.
To register, on the Kenwood Marine Remote Control unit:
Press ENTER to register as [REMOTE ID1].
Press SRC to register as [REMOTE ID2].
Press DISP to register as [REMOTE ID3].
Once the ID is registered, “COMPLETED” appears.
To delete the registered ID
- Turn the volume knob to select an item, then press the knob.
[SYSTEM] > [REMOTE SETTING] > [REMOTE ID DELETE]
- Turn the volume knob to select the ID to delete [ID1 DELETE]/[ID2 DELETE]/[ID3 DELETE], then press the knob.
- Turn the volume knob to select [YES] to delete the selected ID, and select [NO] to cancel.
- To exit, press and hold .
- To return to the previous setting item, press .
HD Radio™ tuner
(for KDC-X702/ KDC-BT772HD)

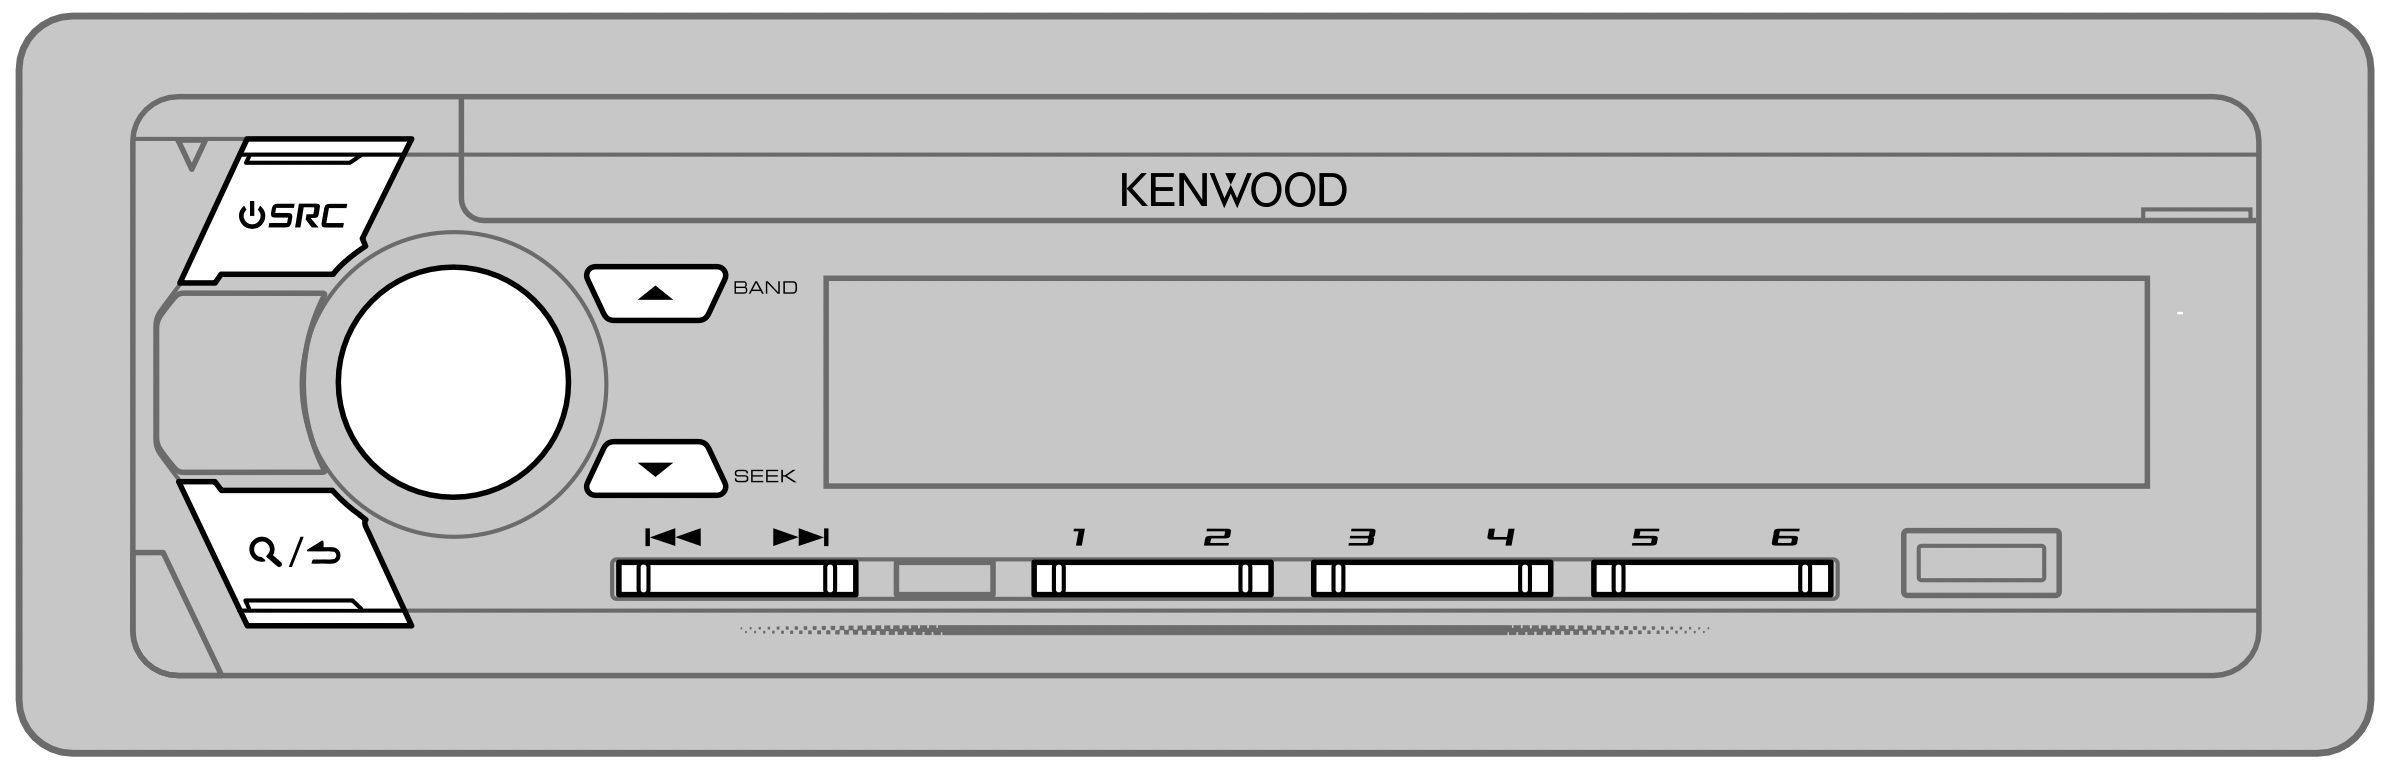
Search for a station
- Press SRC repeatedly to select HD RADIO.
- Press
 BAND repeatedly (or press #FM + / *AM - on the remote control) to select FM1/FM2/FM3/AM.
- Press
 /
/  (or press
  /
/  (+) on the remote control) to search for a station or channel.
- To change the searching method for / : Press
 SEEK repeatedly.
AUTO1 : Automatically search for a station or channel.
AUTO2 : Search for a preset station or channel.
MANUAL : Manually search for a station or channel.
- To store a station or channel: Press and hold one of the number buttons (1 to 6).
- To select a stored station or channel: Press one of the number buttons (1 to 6) (or press one of the number buttons (1 to 6) on the remote control).
Direct Access Tuning (using the remote control)
- Press DIRECT to enter Direct Access Tuning.
- Press the number buttons to enter a frequency.
- Press ENT
 to search for a station or channel.
- To cancel, press
 or DIRECT.
- If no operation is done for 10 seconds after step 2, Direct Access Tuning is automatically canceled.
Select an HD Radio multicast channel
Many HD Radio stations offer more than one channel programming. This service is called multicasting. While receiving HD Radio multicast channels....
Press / to select your desired channel (HD1 to HD8). “LINKING” appears while linking to a multicast channel.
Receive an Emergency Alert message
You can receive an emergency alert message while listening to another source or while in STANDBY, via HD Radio Broadcast.
Activate emergency alert message reception
- Press the volume knob to enter [FUNCTION].
- Turn the volume knob to select [TUNER SETTING], then press the knob.
- Turn the volume knob to select [EMERGENCY ALERT], then press the knob.
- Turn the volume knob to select [ON], then press the knob.
- Press and hold to exit.
- To deactivate emergency alert message reception, select [OFF] in step 4.
- To return to the previous setting item, press .
Receive an emergency alert message
When an emergency alert message is received, it appears and remains on the display until the user performs the “Ignore” function.
- Press SRC (or press SRC on the remote control) to ignore the alert message.
The same emergency alert message will not interrupt again for 12 hours.
Display received emergency alert messages
The received emergency alert messages are stored in the Alert Message List, and you can check them later. While listening to the HD RADIO source...
- Press to display the Alert Message List.
- Turn the volume knob to select a message.
- Press the volume knob to display the information related to the message.
- Press again to exit.
- “NO LIST” appears when the list is empty.
- This feature can store up to four messages in the list.
- To clear the message list, set [FACTORY RESET] to [YES].
Other settings
- Press the volume knob to enter [FUNCTION].
- Turn the volume knob to select an item, then press the knob.
- Repeat step 2 until the desired item is selected or activated.
- Press and hold to exit.
To return to the previous setting item, press .

RADIO
(for KMR-D772BT / KDC-X502 / KDC-BT572U)
Search for a station
- Press SRC repeatedly to select RADIO.
- Press BAND repeatedly (or press #FM + / *AM - on the remote control) to select FM1/FM2/FM3/AM.
- Press / (or press / (+) on the remote control) to search for a station.
- To change the searching method for / : Press repeatedly.
AUTO1 : Automatically search for a station.
AUTO2 : Search for a preset station. MANUAL : Manually search for a station.
- To store a station: Press and hold one of the number buttons (1 to 6).
- To select a stored station: Press one of the number buttons (1 to 6) (or press one of the number buttons (1 to 6) on the remote control).
Direct Access Tuning (using the remote control)
- Press DIRECT to enter Direct Access Tuning.
- Press the number buttons to enter a frequency.
- Press ENT to search for a station.
- To cancel, press or DIRECT.
- If no operation is done for 10 seconds after step 2, Direct Access Tuning is automatically canceled.
Other settings
- Press the volume knob to enter [FUNCTION].
- Turn the volume knob to select an item (see the following table), then press the knob.
- Repeat step 2 until the desired item is selected or activated.
- Press and hold to exit.
To return to the previous setting item, press .
Available Program Type for [PTY SEARCH]
SPEECH : NEWS, INFORM (information), SPORTS, TALK, LANGUAGE, REL TALK (religious talk), PERSNLTY (personality), PUBLIC, COLLEGE, HABL ESP (spanish talk), WEATHER.
MUSIC : ROCK, CLS ROCK (classic rock), ADLT HIT (adult hits), SOFT RCK (softrock), TOP 40, COUNTRY, OLDIES, SOFT, NOSTALGA (nostalgia), JAZZ, CLASSICL (classical), R & B (rhythm and blues), SOFT R&B (soft rhythm and blues), REL MUSC (religious music), MUSC ESP (spanish music), HIP HOP The unit will search for the Program Type categorized under [SPEECH] or [MUSIC] if selected.
- [MONO SET]/[TI]/[PTY SEARCH] is selectable only when the band is FM1/ FM2/FM3.
- If the volume is adjusted during reception of traffic information, the adjusted volume is memorized automatically. It will be applied the next time traffic information is turned on.
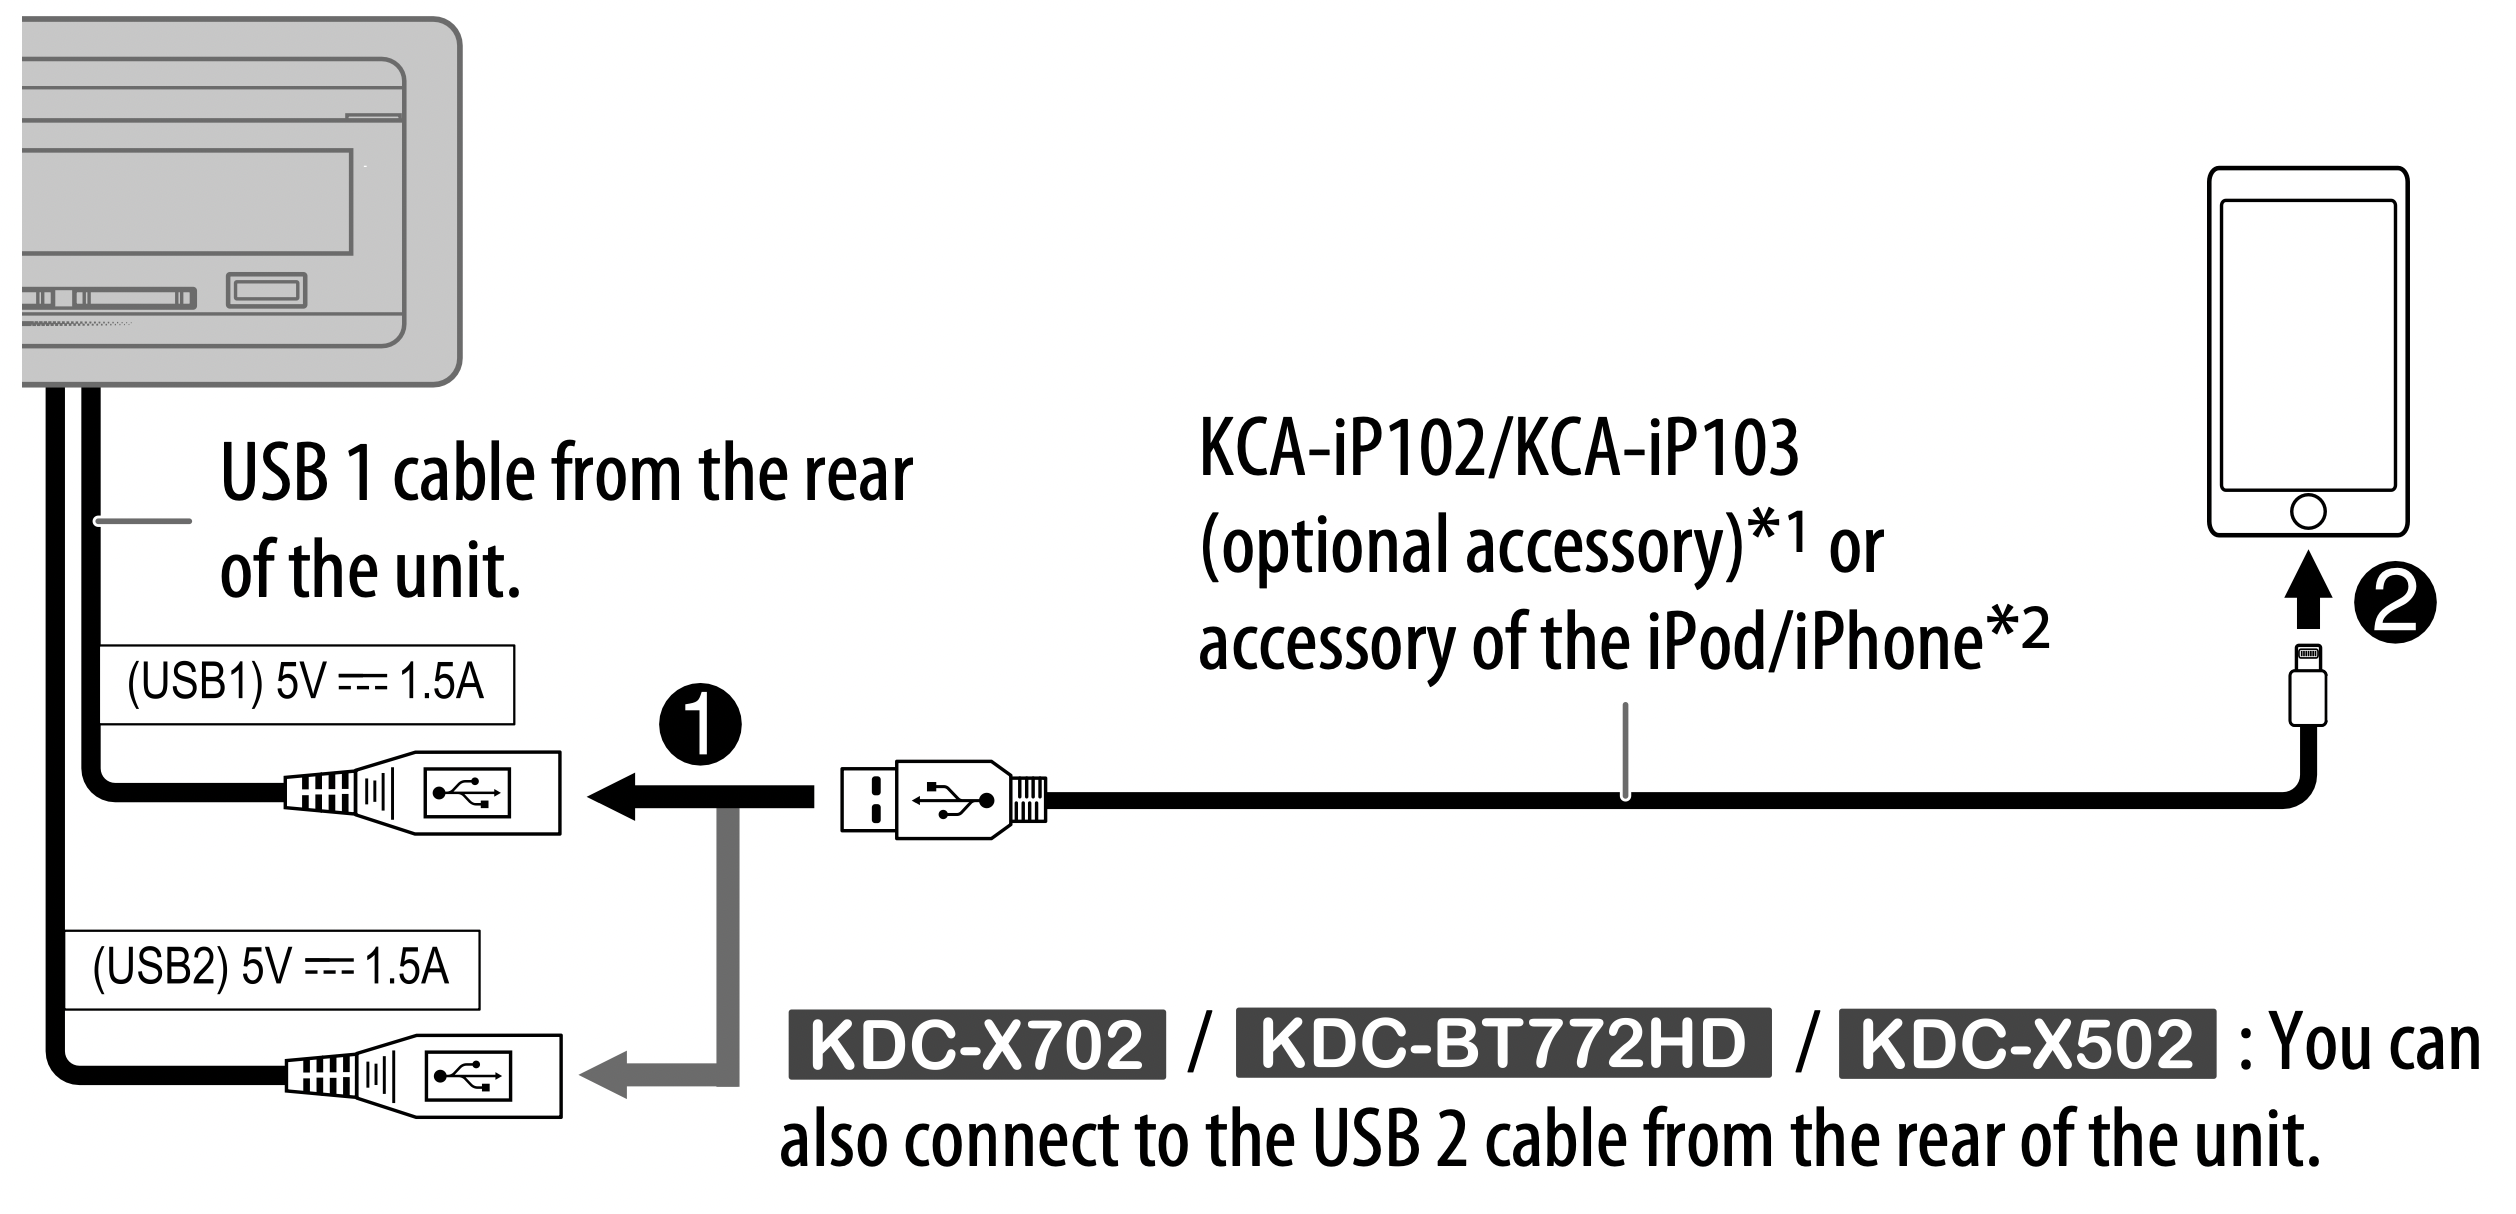
CD/USB/iPod/ANDROID
Start playback
The source changes automatically and playback starts.

Selectable source:
- KDC-X702 / KDC-BT772HD / KDC-X502: CD/USB 1/USB 2/iPod 1/iPod 2/ANDROID 1/ANDROID 2
- KMR-D772BT / KDC-BT572U: CD/USB/iPod USB/ANDROID

*1 KCA-iP102 : 30-pin type, KCA-iP103 : Lightning type
*2 Do not leave the cable inside the car when not using.
*3 When connecting an Android device, “Press [VIEW] to install KENWOOD MUSIC PLAY APP” is shown. Follow the instructions to install the application. You can also install the latest version of KENWOOD MUSIC PLAY application on your Android device before connecting.
*4 For ANDROID: Applicable only when [BROWSE MODE] is selected.
*5 For CD: Only for MP3/WMA/AAC files. This does not work for iPod/ANDROID.
*6 For iPod/ANDROID: Applicable only when [MODE OFF]/[BROWSE MODE] is selected.
*7 For CD: Only for MP3/WMA/AAC files.
Select control mode
While in iPod 1/iPod 2/iPod USB source, press 5 repeatedly.
MODE ON : Control iPod using the iPod itself. However, you can still play/ pause, file skip, fast-forward or reverse from this unit.
MODE OFF : Control iPod from this unit.
While in ANDROID 1/ANDROID 2/ANDROID source, press 5 repeatedly.
BROWSE MODE : Control Android device from this unit via KENWOOD MUSIC PLAY application installed in the Android device.
HAND MODE : Control Android device using the Android device itself via other media player applications installed in the Android device. However, you can still play/pause and file skip from this unit.
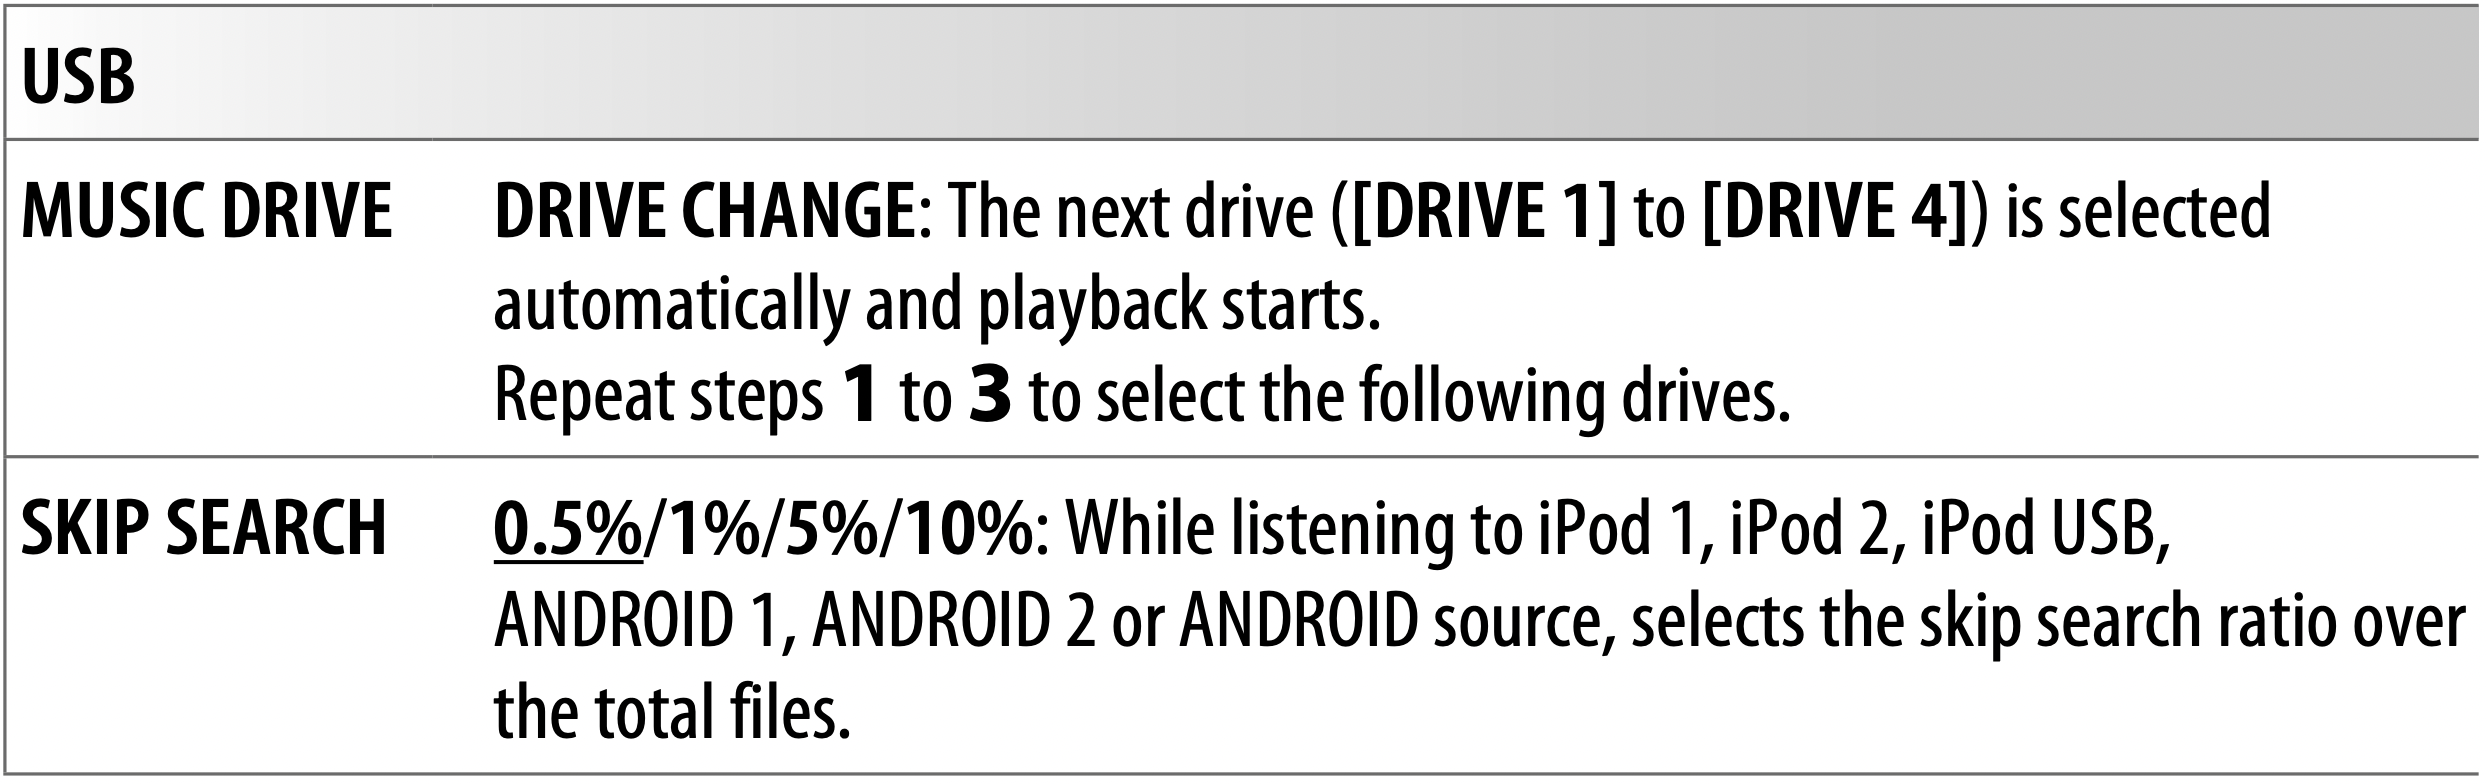
Select music drive
While in USB 1/USB 2/USB source, press 5 repeatedly. Stored songs in the following drive will be played back.
- Selected internal or external memory of a smartphone (Mass Storage Class).
- Selected drive of a multiple drives device.
Listen to TuneIn Radio/TuneIn Radio Pro/Aupeo
While listening to TuneIn Radio, TuneIn Radio Pro or Aupeo, connect the iPod/iPhone to the USB input terminal of the unit.
- The unit will output the sound from these applications.
Select a file from a folder/list
For iPod/ANDROID, applicable only when [MODE OFF]/[BROWSE MODE] is selected.
- Press .
- Turn the volume knob to select a folder/list, then press the knob.
- Turn the volume knob to select a file, then press the knob.
Quick Search (applicable only for CD, USB 1, USB 2, USB, ANDROID 1, ANDROID 2 and ANDROID source)
If you have many files, you can search through them quickly.
Turn the volume knob quickly to browse through the list quickly.
Skip Search (applicable only for iPod 1, iPod 2, iPod USB, ANDROID 1, ANDROID 2 and ANDROID source)
Press / to search at a preset skip search ratio. ( 12, [SKIP SEARCH])
- Pressing and holding / searches at a 10% ratio.
Alphabet search (applicable only for iPod 1, iPod 2, iPod USB, ANDROID 1, ANDROID 2 and ANDROID source)
You can search for a file according to the first character.
For iPod 1/iPod 2/iPod USB source
- Turn the volume knob quickly to enter character search.
- Turn the volume knob to select the character.
Select “ * ” to search for a character other than A to Z, 0 to 9.
- Press / to move to the entry position.
You can enter up to 3 characters.
- Press the volume knob to start searching.
For ANDROID 1/ANDROID 2/ANDROID source
- Press / to enter character search.
- Turn the volume knob to select the character.
^A^: Upper case letters (A to Z)
_A_: Lower case letters (a to z)
-0-: Numbers (0 to 9)
*** : Character other than A to Z, 0 to 9
- Press the volume knob to start searching.
- To return to the root folder/first file/top menu, press 5. (Not applicable for BT AUDIO source.)
- To return to the previous setting item, press .
- To cancel, press and hold .
Direct Music Search (using the remote control)
- Press DIRECT.
- Press the number buttons to enter a track/file number.
- Press ENT to search for music.
- To cancel, press or DIRECT.
- Not available if Random Play is selected.
- Not applicable for iPod 1, iPod 2, iPod USB, ANDROID 1, ANDROID 2 and ANDROID source.
Other settings
- Press the volume knob to enter [FUNCTION].
- Turn the volume knob to select an item (see the following table), then press the knob.
- Repeat step 2 until the desired item is selected or activated.
- Press and hold to exit.
To return to the previous setting item, press .
AUX
Preparation:
Select [ON] for [BUILT-IN AUX] for [SOURCE SELECT].
Start listening
- Connect a portable audio player (commercially available).
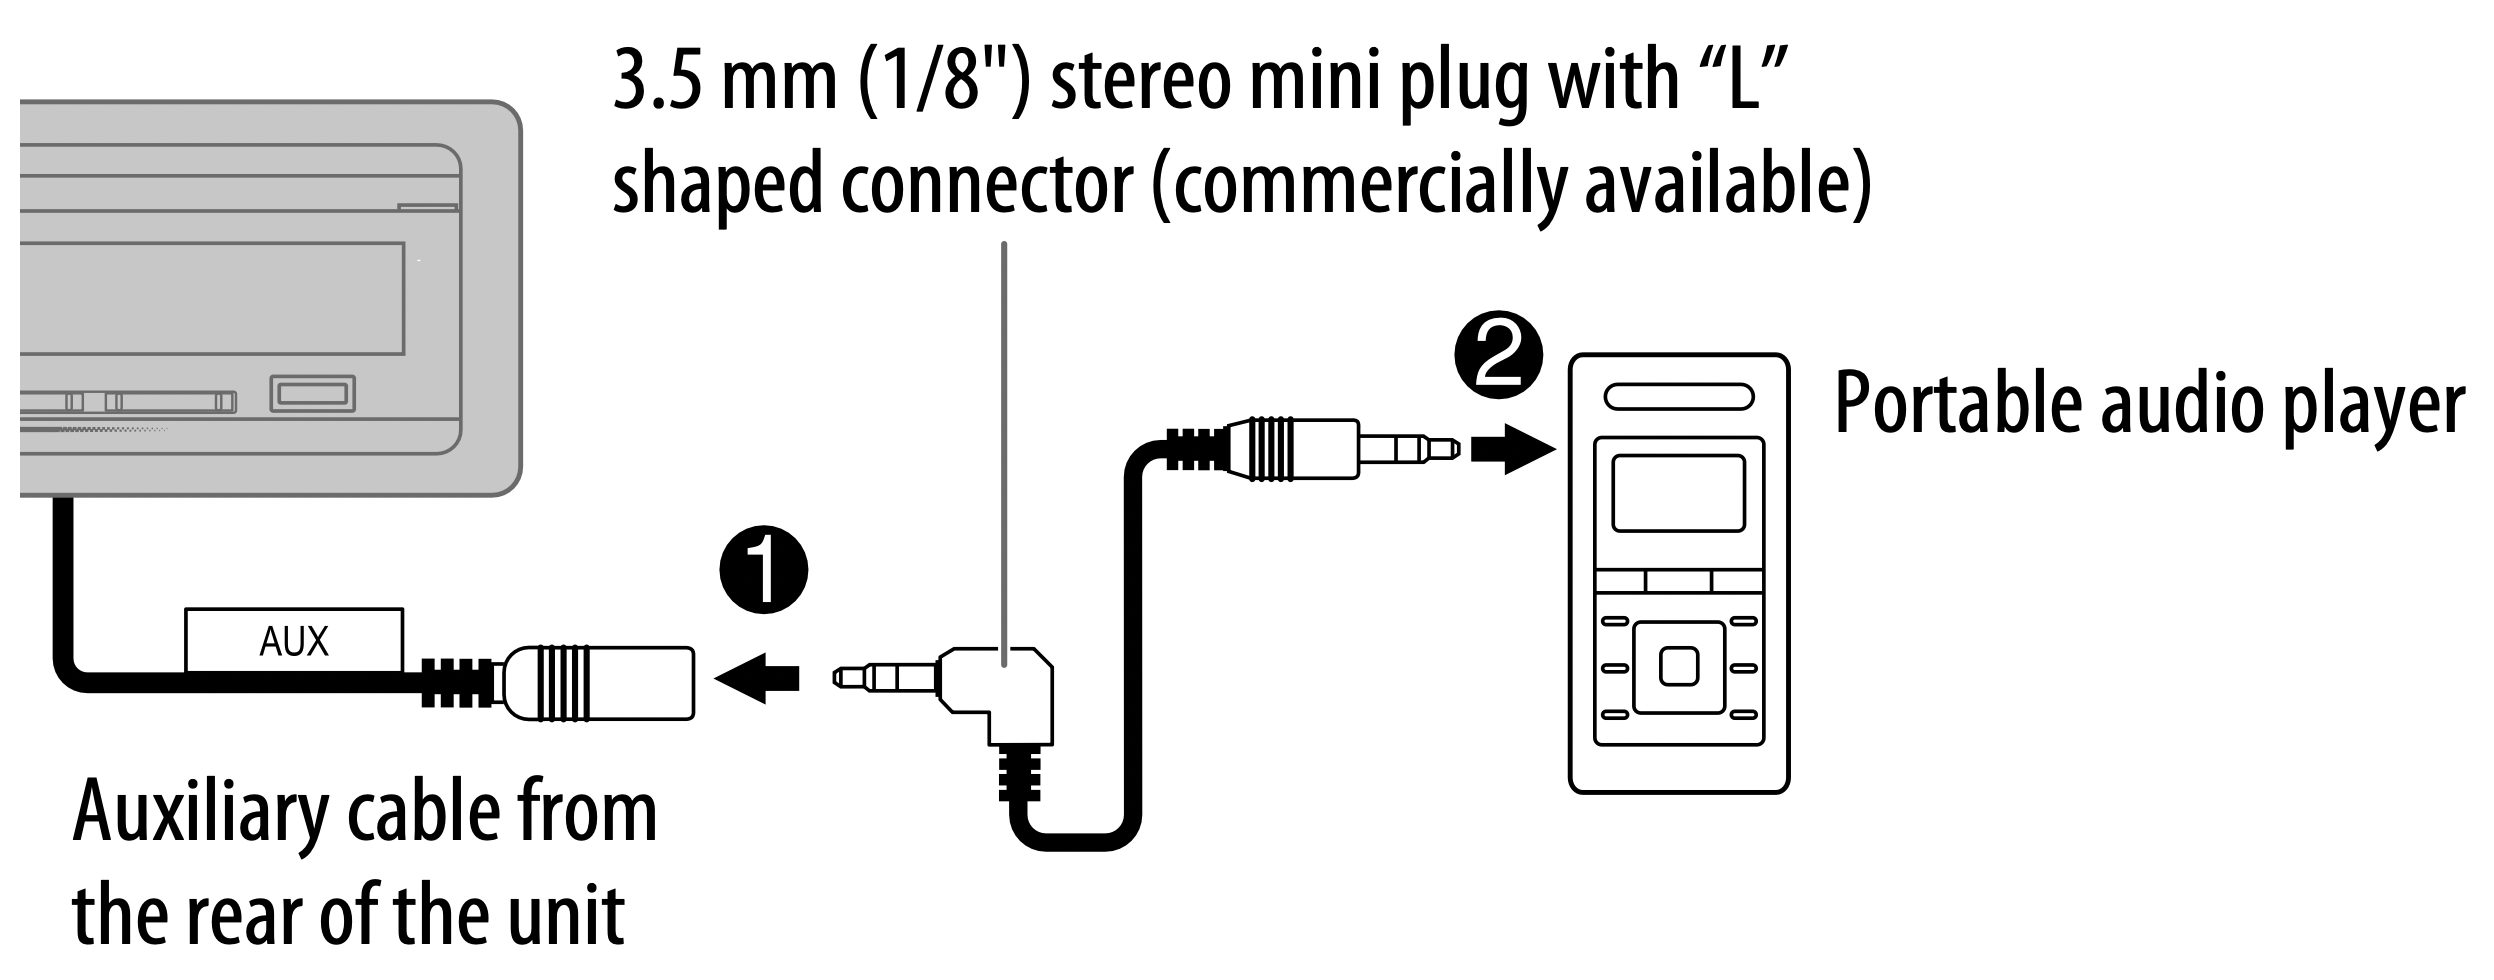
- Press SRC repeatedly to select AUX.
- Turn on the portable audio player and start playback.
Set the AUX name
While listening to a portable audio player connected to the unit...
- Press the volume knob to enter [FUNCTION].
- Turn the volume knob to select [SYSTEM], then press the knob.
- Turn the volume knob to select [AUX NAME SET], then press the knob.
- Turn the volume knob to select an item, then press the knob.
AUX (default)/DVD/PORTABLE/GAME/VIDEO/TV
- Press and hold to exit.
To return to the previous setting item, press .
Pandora®
Preparation:
Install the latest version of the Pandora application on your device (iPhone/iPod touch), then create an account and log in to Pandora.
- Select [ON] for [PANDORA SRC] in [SOURCE SELECT].
Start listening
- Open the Pandora application on your device.
- Connect your device to the USB input terminal.
- Press SRC repeatedly to select PANDORA 1/PANDORA 2/ PANDORA.
Broadcast starts automatically.
*1 KCA-iP102 : 30-pin type, KCA-iP103 : Lightning type
*2 Do not leave the cable inside the car when not using.

* If thumbs down is selected, the current track is skipped.
Create and save a new station
- Press .
- Turn the volume knob to select [NEW STATION], then press the knob.
- Turn the volume knob to select [FROM ARTIST] or [FROM TRACK], then press the knob.
A new station is created based on the artist or current song.
- Press and hold one of the number buttons (1 to 5) to store.
To select a stored station: Press one of the number buttons (1 to 5).
Search for a registered station
- Press .
- Turn the volume knob to select an item, then press the knob.
[SORT BY DATE]: According to the registered date
[SORT BY A-Z]: By alphabetical order
- Turn the volume knob (or press / on the remote control) to select the desired station.
- Press the volume knob (or press ENT on the remote control) to confirm.
To cancel, press and hold .
Bookmark current song information
Press and hold the volume knob.
“BOOKMARKED” appears and the information is stored to your device.
- The bookmark is available on your Pandora account but not on this unit.
Delete a station
While listening to PANDORA...
- Press .
- Turn the volume knob to select [STATION DELETE], then press the knob.
- Turn the volume knob to select [SORT BY DATE] or [SORT BY A-Z], then press the knob.
- Turn the volume knob to select the desired station to delete, then press the knob.
- Turn the volume knob to select [YES], then press the knob.
- Press and hold to exit.
To return to the previous setting item, press .
TROUBLESHOOTING
| Symptom |
Remedy
|
|
General
|
| Sound cannot be heard. |
- Adjust the volume to the optimum level.
- Check the cords and connections.
|
| “MISWIRING CHECK WIRING THEN POWER ON” appears. |
Turn the power off, then check to be sure the terminals of the speaker wires are insulated properly.
Turn the power on again.
|
| “PROTECTING SEND TO SERVICE” appears. |
Send the unit to the nearest service center.
|
- Sound cannot be heard.
- The unit does not turn on.
- Information shown on the display is incorrect.
|
Clean the connectors.
|
|
The unit does not work at all.
|
Reset the unit. |
|
(For KMR-D772BT) “SET ERROR”/ “DELETE ERROR”
|
Setting/deleting the remote control ID is unsuccessful. Turn the power off, then turn on the power and perform the operation again.
|
|
HD Radio tuner/ Radio
|
- Radio reception is poor.
- Static noise while listening to the radio.
|
Connect the antenna firmly. |
|
CD/USB/iPod
|
| Disc cannot be ejected. |
Press and hold  to forcibly eject the disc. Be careful not to drop the disc when it is ejected. If this does not solve the problem, reset the unit. to forcibly eject the disc. Be careful not to drop the disc when it is ejected. If this does not solve the problem, reset the unit.
|
| Noise is generated. |
Skip to another track or change the disc.
|
|
Tracks do not play back as you intended them to play.
|
Playback order is determined when files are recorded. |
|
“READING” keeps flashing.
|
Do not use too many hierarchical levels or folders. |
|
Elapsed playing time is not correct.
|
This is caused by how the tracks are recorded. |
|
“LOADING” appears when you enter search mode by pressing .
|
This unit is still preparing the iPod/iPhone music list. It may take some time to load, try again later. |
| Correct characters are not displayed (e.g. album name). |
- This unit can only display uppercase letters, numbers, and a limited number of symbols.
- Depending on the display language you have selected, some characters may not be displayed correctly.
|
|
“NA FILE”
|
Make sure the media contains supported audio files. |
| “NO DISC” |
Insert a playable disc into the loading slot.
|
|
“TOC ERROR”
|
Make sure the disc is clean and inserted properly. |
| “PLEASE EJECT” |
Reset the unit. If this does not solve the problem, consult your nearest service centre.
|
|
“NO DEVICE”
|
Connect a USB device, and change the source to USB again. |
| “COPY PROTECTED” |
A copy-protected file is played.
|
|
“UNSUPPORTED DEVICE”
|
- Check whether the connected device is compatible with this unit and ensure the file systems are in supported formats.
- Reattach the device.
|
|
“UNRESPONSIVE DEVICE”
|
Make sure the device is not malfunction and reattach the device. |
| “USB HUB IS NOT SUPPORTED” |
This unit cannot support a USB device connected via a USB hub.
|
- The source does not change to “USB” when you connect a USB device while listening to another source.
- “USB ERROR” appears.
|
The USB port is drawing more power than the design limit. Turn the power off and unplug the USB device. Then, turn on the power and reattach the USB device. If this does not solve the problem, turn the power off and on (or reset the unit) before replacing with another USB device. |
|
“NO MUSIC”
|
Connect a USB device that contains playable audio files. |
|
“iPod ERROR”
|
- Reconnect the iPod.
- Reset the iPod.
|
|
ANDROID
|
- Sound cannot be heard during playback.
- Sound output only from the Android device.
|
- Reconnect the Android device.
- If in [HAND MODE], launch any media player application on the Android device and start playback.
- If in [HAND MODE], relaunch the current media player application or use another media player application.
- Restart the Android device.
- If this does not solve the problem, the connected Android device is unable to route the audio signal to unit.
|
| Cannot playback at [BROWSE MODE]. |
- Make sure KENWOOD MUSIC PLAY APP is installed on the Android device.
- Reconnect the Android device and select the appropriate control mode.
- If this does not solve the problem, the connected Android device does not support [BROWSE MODE].
|
|
“NO DEVICE” or “READING” keeps flashing.
|
- Switch off the developer options on the Android device.
- Reconnect the Android device.
- If this does not solve the problem, the connected Android device does not support [BROWSE MODE].
|
|
Playback is intermittent or sound skips.
|
Turn off the power saving mode on the Android device. |
|
“ANDROID ERROR”/ “NA DEVICE”
|
- Reconnect the Android device.
- Restart the Android device.
|
|
Pandora
|
| “ADD ERROR” |
New station creation is unsuccessful.
|
| “CHECK DEVICE” |
Check the Pandora application on your device.
|
| “NO SKIPS” |
The skip limit has been reached.
|
| “NO STATIONS” |
No stations are found.
|
| “STATION LIMIT” |
The number of registered stations has reached its limit. Retry after deleting unnecessary stations from your device.
|
| “CONNECT ERROR” |
Communication is unstable.
|
| “RATING ERROR” |
Registration of thumbs up/thumbs down has failed due to insufficient network connectivity.
|
| “THUMBS N/A” |
Registration of thumbs up/thumbs down is not allowed.
|
| “LICENSE ERROR” |
You try to access from a country which Pandora is not deliverable.
|
|
iHeartRadio
|
|
iHeartRadio station cannot be selected.
|
If “Explicit Content” in [Account Settings] is checked in the web version of iHeartRADIO, custom stations become unavailable.
|
|
“NOT CONNECTED”
|
Link to the application is impossible. |
|
Spotify
|
|
“DISCONNECTED”
|
USB is disconnected from the head unit. Please make sure the device is connected properly through USB. |
| “CONNECTING” |
- Connected via USB input terminal: The device is connecting to the head unit. Please wait.
- Connected via Bluetooth: The Bluetooth is disconnected.
Please check Bluetooth connection and make sure both the device and the unit are paired and connected.
|
| “CHECK APP” |
The Spotify application is not connected properly, or user is not login. End the Spotify application and restart, then login to your Spotify account.
|
|
SiriusXM® Radio
|
| “CHAN LOCKED ENTER CODE:” |
The selected channel is locked. Enter the correct pass code to unlock.
|
| “CH UNSUBSCRIBED” |
The selected channel is unsubscribed. Call 1-866-635-2349 in the U.S.A. or 1-877-438-9677 in Canada to subscribe.
|
| “CHAN UNAVAILABLE” |
The selected channel is unavailable.
|
| “CHECK ANTENNA” |
Check that the antenna and its connection are in good condition.
|
| “CHECK TUNER” |
Make sure the SiriusXM Vehicle Tuner is connected to the unit.
|
| “NO SIGNAL” |
Make sure the antenna is mounted outside the vehicle.
|
|
“SUBSCRIPTION UPDATED – PRESS ENTER TO CONTINUE.”
|
Your subscription is updated. Press the volume knob to continue.
|
| “CODE ERROR” |
Make sure you have entered the correct pass code.
|
| “NO CONTENT” |
There is insufficient content to start TuneScan.
|
| “SCAN CANCEL” |
TuneScan has been aborted.
|
|
Bluetooth®
|
|
No Bluetooth device is detected.
|
- Search from the Bluetooth device again.
- Reset the unit.
|
| Bluetooth pairing cannot be made. |
- Make sure you have entered the same PIN code to both the unit and Bluetooth device.
- Delete pairing information from both the unit and the Bluetooth device, then perform pairing again.
|
| Echo or noise is heard during a phone conversation. |
- Adjust the microphone unit’s position.
- Check the [ECHO CANCEL] setting.
|
| Phone sound quality is poor. |
- Reduce the distance between the unit and the Bluetooth device.
- Move the car to a place where you can get a better signal reception.
|
| Voice calling method is not successful. |
- Use voice calling method in a more quiet environment.
- Reduce the distance from the microphone when you speak the name.
- Make sure the same voice as the registered voice tag is used.
|
| Sound is being interrupted or skipped during playback of a Bluetooth audio player. |
- Reduce the distance between the unit and the Bluetooth audio player.
- Turn off, then turn on the unit and try to connect again.
- Other Bluetooth devices might be trying to connect to the unit.
|
| The connected Bluetooth audio player cannot be controlled. |
- Check whether the connected Bluetooth audio player supports Audio/Video Remote Control Profile (AVRCP). (Refer to the instructions of your audio player.)
- Disconnect and connect the Bluetooth player again.
|
|
“DEVICE FULL”
|
The number of registered devices has reached its limit. Retry after deleting an unnecessary device. |
| “N/A VOICE TAG” |
Make sure the same voice as the registered voice tag is used.
|
| “NOT SUPPORT” |
The connected phone does not support Voice Recognition feature or phonebook transfer.
|
| “NO ENTRY”/“NO PAIR” |
There is no registered device connected/found via Bluetooth.
|
| “ERROR” |
Try the operation again. If “ERROR” appears again, check if the device supports the function you have tried.
|
| “NO INFO”/“NO DATA” |
Bluetooth device cannot get the contact information.
|
| “HF ERROR XX”/ “BT ERROR” |
Reset the unit and try the operation again. If this does not solve the problem, consult your nearest service center.
|
| “SWITCHING NG” |
The connected phones might not support phone switching feature.
|